


AssetBundle打包
设置AssetBundle名字
手动设置
打包之前按照上图所示的方法,设置一下AssetBundle的名字。
自动设置
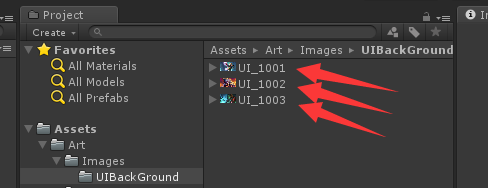
将需要进行AssetBundle打包的图片按照“UI_”的前缀命名,然后根据图片的父目录来设置AssetBundle的名字。如下所示
然后新建一个ImageImporter.cs文件放入Editor目录下
     using


     UnityEngine

     ;


     using


     UnityEditor

     ;


     /// <summary>


     /// 根据名字前缀自动化设置图片的格式以及TAG等设置


     /// </summary>


     public


     class


     ImageImporter


     :


     AssetPostprocessor


     {


     /// <summary>


     /// 图片导入之前调用,可设置图片的格式、spritePackingTag、assetBundleName等信息


     /// </summary>


     void


     OnPreprocessTexture

     (

     )


     {


     TextureImporter

      importer

     =


     (

     TextureImporter

     )

     assetImporter

     ;


     string

      path

     =

      importer

     .

     assetPath

     ;


     string

     [

     ]

      pathArray

     =

      importer

     .

     assetPath

     .

     Split

     (

     '/'

     )

     ;


     if


     (

     pathArray

     .

     Length

     <=


     2

     )


     {


            Debug

     .

     LogError

     (

     "获取路径名失败"

     )

     ;


     return

     ;


     }


     string

      imageName

     =

      pathArray

     [

     pathArray

     .

     Length

     -


     1

     ]

     ;


     string

      packTag

     =

      pathArray

     [

     pathArray

     .

     Length

     -


     2

     ]

     ;


     if


     (

     imageName

     .

     StartsWith

     (

     "UI_"

     )

     )


     {


            importer

     .

     textureType

     =

      TextureImporterType

     .

     Sprite

     ;


            importer

     .

     mipmapEnabled

     =


     false

     ;


     //设置spritePackingTag


            importer

     .

     spritePackingTag

     =

      packTag

     ;


     //设置assetBundleName


            importer

     .

     assetBundleName

     =

      packTag

     ;


     }


     }


     }
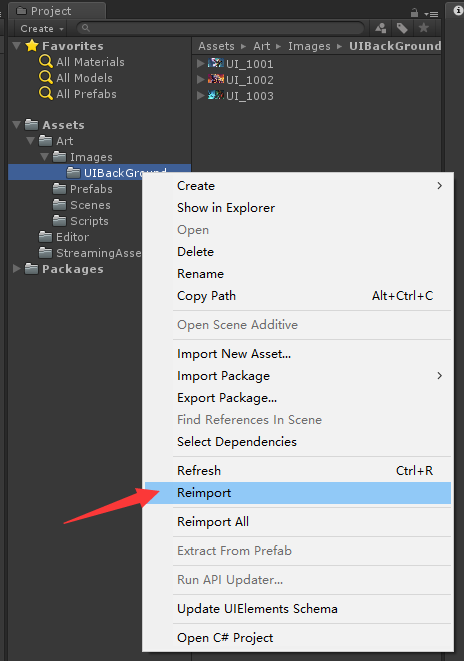
接着执行Reimport操作即可自动设置好图片的AssetBundle的名字。
AssetBundle打包
新建一个QAssetBundleEditor.cs脚本放入Editor文件夹下面,代码如下
     using


     System

     .

     IO

     ;


     using


     UnityEditor

     ;


     /// <summary>


     /// AssetBundle打包脚本Editor


     /// </summary>


     public


     class


     QAssetBundleEditor


     {


     static


     string

      OUT_PATH_WIN64

     =


     "AssetBundles/Win64/AssetBundles"

     ;


     static


     string

      OUT_PATH_IOS

     =


     "AssetBundles/IOS/AssetBundles"

     ;


     static


     string

      OUT_PATH_Android

     =


     "AssetBundles/Android/AssetBundles"

     ;


     /// <summary>


     /// BuildWin64


     /// </summary>


     [

     MenuItem

     (

     "AssetBundle/BuildWin64"

     )

     ]


     public


     static


     void


     BuildAssetBundle_Win64

     (

     )


     {


     BuildAssetBundles

     (

     OUT_PATH_WIN64

     ,

      BuildTarget

     .

     StandaloneWindows64

     )

     ;


     }


     /// <summary>


     /// BuildWin64


     /// </summary>


     [

     MenuItem

     (

     "AssetBundle/BuildIOS"

     )

     ]


     public


     static


     void


     BuildAssetBundle_IOS

     (

     )


     {


     BuildAssetBundles

     (

     OUT_PATH_IOS

     ,

      BuildTarget

     .

     iOS

     )

     ;


     }


     /// <summary>


     /// BuildWin64


     /// </summary>


     [

     MenuItem

     (

     "AssetBundle/BuildAndroid"

     )

     ]


     public


     static


     void


     BuildAssetBundle_Android

     (

     )


     {


     BuildAssetBundles

     (

     OUT_PATH_Android

     ,

      BuildTarget

     .

     Android

     )

     ;


     }


     public


     static


     void


     BuildAssetBundles

     (

     string

      outPath

     ,


     BuildTarget

      buildTarget

     )


     {


     if


     (

     Directory

     .

     Exists

     (

     outPath

     )

     )


     {


            Directory

     .

     Delete

     (

     outPath

     ,


     true

     )

     ;


     }


        Directory

     .

     CreateDirectory

     (

     outPath

     )

     ;


        BuildPipeline

     .

     BuildAssetBundles

     (

     outPath

     ,

      BuildAssetBundleOptions

     .

     UncompressedAssetBundle

     ,

      buildTarget

     )

     ;


        AssetDatabase

     .

     Refresh

     (

     )

     ;


     }


     }
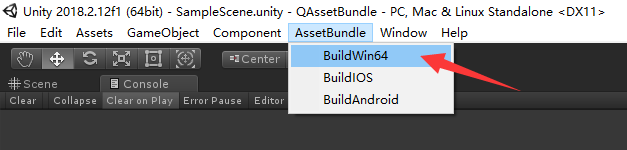
然后通过Unity的菜单栏进行AssetBundle打包操作,选择“AssetBundle/BuildWin64”打出一个Windows平台使用的AssetBundle。
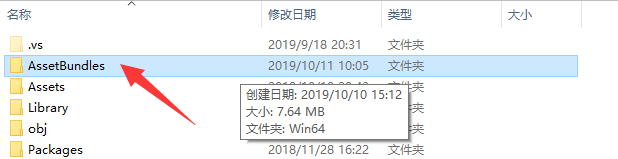
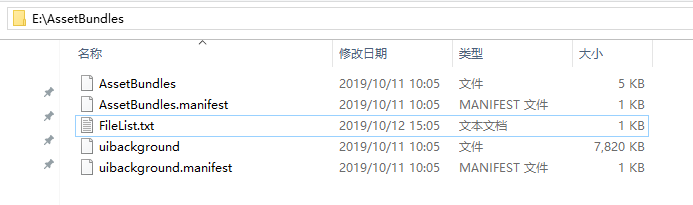
在Asset同级目录生成了AssetBundles目录
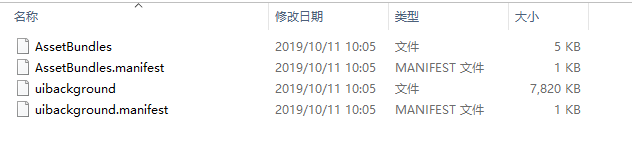
文件如下所示,有一个以文件夹名字“AssetBundles”命名的AssetBundle,可以理解为主AssetBundle,下面的uibackground就是将几张图片打出来的AssetBundle包。
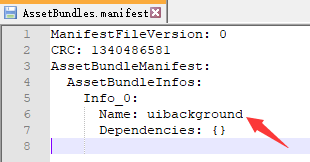
AssetBundles.manifest文件的“AssetBundleInfos”保存了当前打出的所有AssetBundle的文件名称。
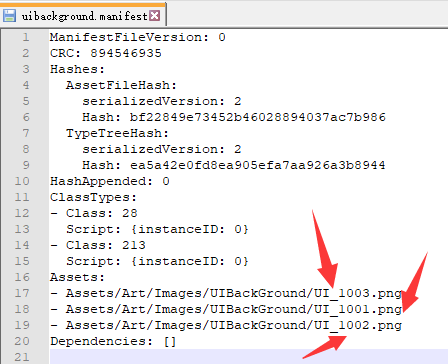
uibackground.manifest文件的“Assets”保存了当前打出的AssetBundle里面包含的所有图片名称。
AssetBundle加载
我们将打出来的所有AssetBundle放入Unity的StreamingAssets目录

接下来就可以通过代码加载AssetBundle了。
新建一个QAssetBundleManager.cs文件,代码如下
     using


     UnityEngine

     ;


     using


     System

     .

     Collections

     .

     Generic

     ;


     public


     class


     QAssetBundleManager


     {


     static


     AssetBundle

      assetbundle

     =


     null

     ;


     static


     Dictionary

     <

     string

     ,

      AssetBundle

     >

      DicAssetBundle

     =


     new


     Dictionary

     <

     string

     ,

      AssetBundle

     >

     (

     )

     ;


     public


     static


     T


     LoadResource

     <

     T

     >

     (

     string

      assetBundleName

     ,


     string

      assetBundleGroupName

     )


     where


     T


     :


     Object


     {


     if


     (

     string

     .

     IsNullOrEmpty

     (

     assetBundleGroupName

     )

     )


     {


     return


     default

     (

     T

     )

     ;


     }


     if


     (

     !

     DicAssetBundle

     .

     TryGetValue

     (

     assetBundleGroupName

     ,


     out

      assetbundle

     )

     )


     {


            assetbundle

     =

      AssetBundle

     .

     LoadFromFile

     (

     GetStreamingAssetsPath

     (

     )


     +

      assetBundleGroupName

     )

     ;

     //+ ".assetbundle"


            DicAssetBundle

     .

     Add

     (

     assetBundleGroupName

     ,

      assetbundle

     )

     ;


     }


     object

      obj

     =

      assetbundle

     .

     LoadAsset

     (

     assetBundleName

     ,


     typeof

     (

     T

     )

     )

     ;


     var

      one

     =

      obj

     as


     T

     ;


     return

      one

     ;


     }


     public


     static


     void


     UnLoadResource

     (

     string

      assetBundleGroupName

     )


     {


     if


     (

     DicAssetBundle

     .

     TryGetValue

     (

     assetBundleGroupName

     ,


     out

      assetbundle

     )

     )


     {


            assetbundle

     .

     Unload

     (

     false

     )

     ;


     if


     (

     assetbundle

     !=


     null

     )


     {


                assetbundle

     =


     null

     ;


     }


            DicAssetBundle

     .

     Remove

     (

     assetBundleGroupName

     )

     ;


            Resources

     .

     UnloadUnusedAssets

     (

     )

     ;


     }


     }


     public


     static


     string


     GetStreamingAssetsPath

     (

     )


     {


     string

      StreamingAssetsPath

     =


     #

     if

      UNITY_EDITOR


        Application

     .

     streamingAssetsPath

     +


     "/"

     ;


     #

     elif

      UNITY_ANDROID


     "jar:file://"


     +

      Application

     .

     dataPath

     +


     "!/assets/"

     ;


     #

     elif

      UNITY_IPHONE


        Application

     .

     dataPath

     +


     "/Raw/"

     ;


     #

     else


     string

     .

     Empty

     ;


     #

     endif


     return

      StreamingAssetsPath

     ;


     }


     }
核心代码就是下面这两行代码
     assetbundle

     =

      AssetBundle

     .

     LoadFromFile

     (

     GetStreamingAssetsPath

     (

     )


     +

      assetBundleGroupName

     )

     ;


     object

      obj

     =

      assetbundle

     .

     LoadAsset

     (

     assetBundleName

     ,


     typeof

     (

     T

     )

     )

     ;
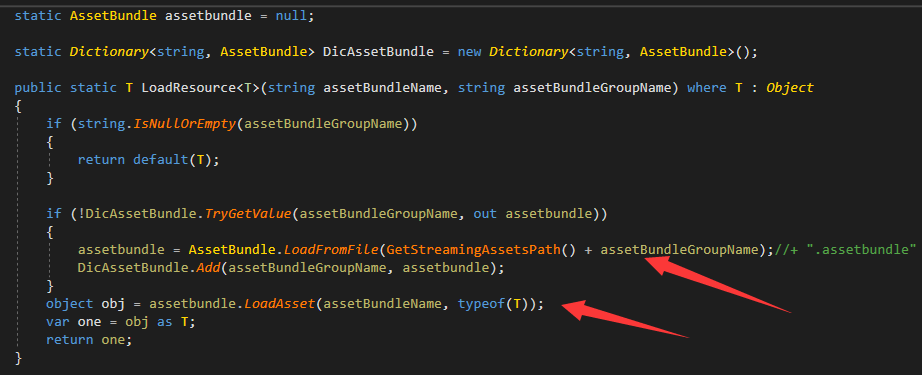
通过AssetBundle.LoadFromFile加载出AssetBundle,然后根据图片的名字从AssetBundle里面取出即可,接口为
     assetbundle

     .

     LoadAsset
下面通过一个例子来查看如何使用
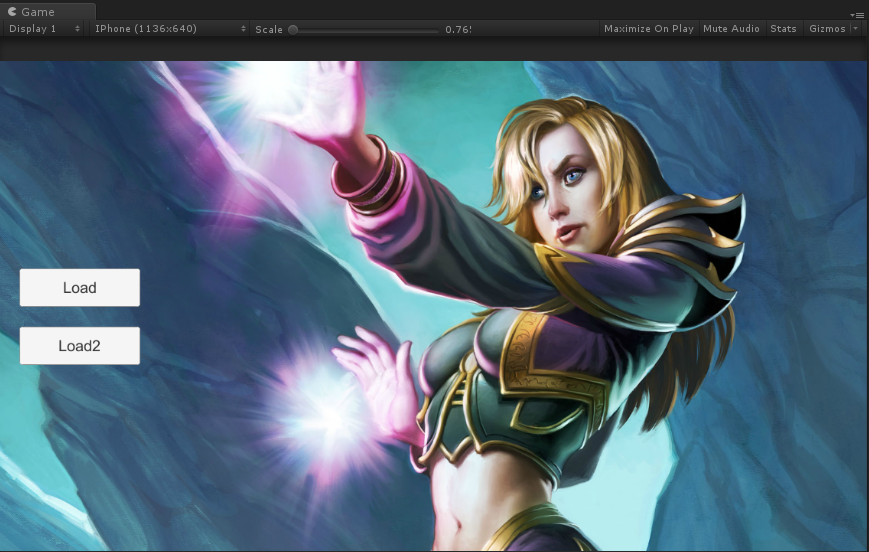
我们创建两个按钮,分别用来加载两张图片,按钮的回调函数就是加载出某个AssetBundle(uibackground)下面的某个图片(UI_1002)
     QAssetBundleManager

     .

     LoadResource

     <

     Sprite

     >

     (

     "UI_1002"

     ,


     "uibackground"

     )

     ;
具体代码如下:
     using


     UnityEngine

     .

     UI

     ;


     using


     UnityEngine

     ;


     using


     UnityEngine

     .

     Networking

     ;


     using


     System

     .

     Collections

     ;


     public


     class


     QAssetBundleSample


     :


     MonoBehaviour


     {


     public


     Button

      Button_Load

     ;


     public


     Button

      Button_Load2

     ;


     public


     Image

      Image_BackGround

     ;


     private


     void


     Awake

     (

     )


     {


        Button_Load

     .

     onClick

     .

     AddListener

     (

     OnClickLoad

     )

     ;


        Button_Load2

     .

     onClick

     .

     AddListener

     (

     OnClickLoad2

     )

     ;


     }


     void


     OnClickLoad

     (

     )


     {


        Image_BackGround

     .

     overrideSprite

     =

      QAssetBundleManager

     .

     LoadResource

     <

     Sprite

     >

     (

     "UI_1002"

     ,


     "uibackground"

     )

     ;


     }


     void


     OnClickLoad2

     (

     )


     {


        Image_BackGround

     .

     overrideSprite

     =

      QAssetBundleManager

     .

     LoadResource

     <

     Sprite

     >

     (

     "UI_1003"

     ,


     "uibackground"

     )

     ;


     }


     }
运行Unity,结果如下
AssetBundle卸载
     assetbundle

     .

     Unload

     (

     false

     )

     ;


assetbundle

     .

     Unload

     (

     true

     )

     ;
Unload(false) 只卸载内存镜像;
Unload(true) 卸载内存镜像以及Asset的内存实例;
一般AssetBundle的卸载是放在切场景的时候,或者低内存的时候,手动调用该接口,执行完Unload之后assetbundle就会被Unity置为null。QAssetBundleManager.cs增加如下函数即可。
     public


     static


     void


     UnLoadResource

     (

     string

      assetBundleGroupName

     )


     {


     if


     (

     DicAssetBundle

     .

     TryGetValue

     (

     assetBundleGroupName

     ,


     out

      assetbundle

     )

     )


     {


            assetbundle

     .

     Unload

     (

     false

     )

     ;


            DicAssetBundle

     .

     Remove

     (

     assetBundleGroupName

     )

     ;


            Resources

     .

     UnloadUnusedAssets

     (

     )

     ;


     }


     }
AssetBundle下载
方式:在登录游戏的时候检查更新,下载对应的AssetBundle到本地。然后运行的时候直接从本地加载AssetBundle,游戏运行中不从网络上下载AssetBundle。
搭建本地服务器
为了测试下载,这里通过nodejs搭建一个本地服务器,将打出来的AssetBundle放入本地服务器中,通过C#去下载即可方便测试。
安装
Node.js
。 在安装完成后再安装
http-server
,命令行输入:
     npm install http

     -

     server

     -

     g
等待下载完成,我们到AssetBundle生成的目录下,开启命令行,输入
     http

     -

     server
即可在当前目录开启服务。
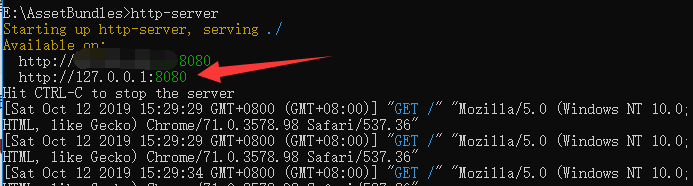
我们在浏览器中输入http://127.0.0.1:8080/即可访问本地的服务器
下面我们开始通过C#代码来下载对应的AssetBundle文件。
UnityWebRequest
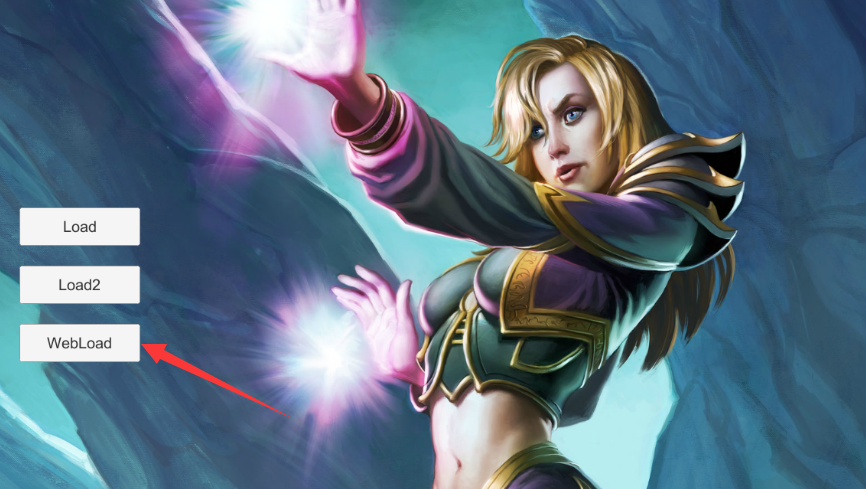
我们在界面中增加一个“WebLoad”按钮,当点击按钮的时候从服务器中下载对应的AssetBundle文件,保存到本地之后按照之前的流程加载即可。这里我们使用Unity自带的UnityWebRequest函数来进行下载操作。
先下载主AssetBundle也就是“AssetBundles”文件,该文件中保存了本地所有的AssetBundle的名字以及AssetBundle的依赖关系。然后下载所有的AssetBundle文件同时保存到本地。
     AssetBundle

      mainAssetBundle

     =

      AssetBundle

     .

     LoadFromFile

     (

     localPath

     )

     ;


     if


     (

     mainAssetBundle

     ==


     null

     )


     yield


     break

     ;


     //获取AssetBundleManifest文件


     AssetBundleManifest

      manifest

     =

      mainAssetBundle

     .

     LoadAsset

     <

     AssetBundleManifest

     >

     (

     "AssetBundleManifest"

     )

     ;


     //获取AssetBundleManifest中的所有AssetBundle的名称信息


     string

     [

     ]

      assets

     =

      manifest

     .

     GetAllAssetBundles

     (

     )

     ;


     for


     (

     int

      i

     =


     0

     ;

      i

     <

      assets

     .

     Length

     ;

      i

     ++

     )


     {


                Debug

     .

     Log

     (

     AssetBundlePath

     +

      assets

     [

     i

     ]

     )

     ;


     //开启协程下载所有的


     StartCoroutine

     (

     DownloadAssetBundleAndSave

     (

     AssetBundlePath

     ,

      assets

     [

     i

     ]

     ,


     (

     )


     =>


     {


     //下载完成,按照之前的方法,从本地加载AssetBundle并设置。


                    Image_BackGround

     .

     overrideSprite

     =

      QAssetBundleManager

     .

     LoadResource

     <

     Sprite

     >

     (

     "UI_1003"

     ,


     "uibackground"

     )

     ;


     }

     )

     )

     ;


     }
完整代码如下
     void


     OnClickWebLoad

     (

     )


     {


     StartCoroutine

     (

     DownloadAssetBundles

     (

     )

     )

     ;


     }


     /// <summary>


     /// 下载根目录AssetBundle文件


     /// </summary>


     /// <returns></returns>


     IEnumerator


     DownloadAssetBundles

     (

     )


     {


     using


     (

     UnityWebRequest

      www

     =

      UnityWebRequest

     .

     Get

     (

     AssetBundlePath

     +

      MainAssetBundleName

     )

     )


     {


     yield


     return

      www

     .

     SendWebRequest

     (

     )

     ;


     if


     (

     www

     .

     isNetworkError

     )


     {


     yield


     break

     ;


     }


     byte

     [

     ]

      datas

     =

      www

     .

     downloadHandler

     .

     data

     ;


     SaveAssetBundle

     (

     MainAssetBundleName

     ,

      datas

     )

     ;


     string

      localPath

     =

      QAssetBundleManager

     .

     GetApplicationdataPath

     (

     )


     +

      MainAssetBundleName

     ;


     AssetBundle

      mainAssetBundle

     =

      AssetBundle

     .

     LoadFromFile

     (

     localPath

     )

     ;


     if


     (

     mainAssetBundle

     ==


     null

     )


     yield


     break

     ;


     //获取AssetBundleManifest文件


     AssetBundleManifest

      manifest

     =

      mainAssetBundle

     .

     LoadAsset

     <

     AssetBundleManifest

     >

     (

     "AssetBundleManifest"

     )

     ;


     //获取AssetBundleManifest中的所有AssetBundle的名称信息


     string

     [

     ]

      assets

     =

      manifest

     .

     GetAllAssetBundles

     (

     )

     ;


     for


     (

     int

      i

     =


     0

     ;

      i

     <

      assets

     .

     Length

     ;

      i

     ++

     )


     {


                Debug

     .

     Log

     (

     AssetBundlePath

     +

      assets

     [

     i

     ]

     )

     ;


     //开启协程下载所有的


     StartCoroutine

     (

     DownloadAssetBundleAndSave

     (

     AssetBundlePath

     ,

      assets

     [

     i

     ]

     ,


     (

     )


     =>


     {


     //下载完成,按照之前的方法,从本地加载AssetBundle并设置。


                    Image_BackGround

     .

     overrideSprite

     =

      QAssetBundleManager

     .

     LoadResource

     <

     Sprite

     >

     (

     "UI_1003"

     ,


     "uibackground"

     )

     ;


     }

     )

     )

     ;


     }


     }


     }


     IEnumerator


     DownloadAssetBundleAndSave

     (

     string

      url

     ,


     string

      name

     ,


     Action

      saveLocalComplate

     =


     null

     )


     {


     WWW

      www

     =


     new


     WWW

     (

     url

     +

      name

     )

     ;


     yield


     return

      www

     ;


     if


     (

     www

     .

     isDone

     )


     {


     SaveAssetBundle

     (

     name

     ,

      www

     .

     bytes

     ,

      saveLocalComplate

     )

     ;


     }


     }


     void


     SaveAssetBundle

     (

     string

      fileName

     ,


     byte

     [

     ]

      bytes

     ,


     Action

      saveLocalComplate

     =


     null

     )


     {


     string

      path

     =

      QAssetBundleManager

     .

     GetApplicationdataPath

     (

     )


     +

      fileName

     ;


     FileInfo

      fileInfo

     =


     new


     FileInfo

     (

     path

     )

     ;


     FileStream

      fs

     =

      fileInfo

     .

     Create

     (

     )

     ;


        fs

     .

     Write

     (

     bytes

     ,


     0

     ,

      bytes

     .

     Length

     )

     ;


        fs

     .

     Flush

     (

     )

     ;


        fs

     .

     Close

     (

     )

     ;


        fs

     .

     Dispose

     (

     )

     ;


     if


     (

     saveLocalComplate

     !=


     null

     )


     {


     saveLocalComplate

     (

     )

     ;


     }


     }
运行游戏,结果如下所示。
AssetBundle文件比对
既然能够通过服务器下载AssetBundle了,那么我们需要根据AssetBundle的文件不同来选择是否需要重新下载,这里我们通过文件的MD5来进行文件比对,如果MD5相同就不需要重新下载。这里简单写下思路。首先我们将打好的AssetBundle文件的MD5全部读取出来,然后将AssetBundle名字和对应的MD5写入“FileList.txt”文件中,然后将该文件上传至服务器,根据服务器的文件来和本地的“FileList.txt”进行比对,有MD5不一致的就需要下载,下载完了再覆盖掉本地的“FileList.txt”。当然也可以增加一个“Version.txt”文件,里面用来记录版本号,通过版本号来判断是否进行文件更新。
如何创建这个"FileList.txt"呢?增加两个编辑器函数即可
     /// <summary>


     /// Create FileList


     /// </summary>


     static


     void


     CreateFileList

     (

     string

      outPath

     )


     {


     string

      filePath

     =

      outPath

     +

      FILE_LIST_NAME

     ;


     if


     (

     File

     .

     Exists

     (

     filePath

     )

     )


     {


            File

     .

     Delete

     (

     filePath

     )

     ;


     }


     StreamWriter

      streamWriter

     =


     new


     StreamWriter

     (

     filePath

     )

     ;


     string

     [

     ]

      files

     =

      Directory

     .

     GetFiles

     (

     outPath

     )

     ;


     for


     (

     int

      i

     =


     0

     ;

      i

     <

      files

     .

     Length

     ;

      i

     ++

     )


     {


     string

      tmpfilePath

     =

      files

     [

     i

     ]

     ;


     if


     (

     tmpfilePath

     .

     Equals

     (

     filePath

     )


     ||

      tmpfilePath

     .

     EndsWith

     (

     ".manifest"

     )

     )


     continue

     ;


            Debug

     .

     Log

     (

     tmpfilePath

     )

     ;


            tmpfilePath

     .

     Replace

     (

     "\\"

     ,


     "/"

     )

     ;


            streamWriter

     .

     WriteLine

     (

     tmpfilePath

     .

     Substring

     (

     outPath

     .

     Length

     )


     +


     "|"


     +


     GetFileMD5

     (

     tmpfilePath

     )

     )

     ;


     }


        streamWriter

     .

     Close

     (

     )

     ;


        streamWriter

     .

     Dispose

     (

     )

     ;


        AssetDatabase

     .

     Refresh

     (

     )

     ;


     }


     /// <summary>


     /// 获取文件的MD5


     /// </summary>


     static


     System

     .

     Security

     .

     Cryptography

     .

     MD5

      MD5

     =


     new


     System

     .

     Security

     .

     Cryptography

     .

     MD5CryptoServiceProvider

     (

     )

     ;


     static


     System

     .

     Text

     .

     StringBuilder

      stringBuilder

     =


     new


     System

     .

     Text

     .

     StringBuilder

     (

     )

     ;


     static


     string


     GetFileMD5

     (

     string

      filePath

     )


     {


     FileStream

      fileStream

     =


     new


     FileStream

     (

     filePath

     ,

      FileMode

     .

     Open

     )

     ;


     byte

     [

     ]

      bytes

     =

      MD5

     .

     ComputeHash

     (

     fileStream

     )

     ;


        fileStream

     .

     Close

     (

     )

     ;


     for


     (

     int

      i

     =


     0

     ;

      i

     <

      bytes

     .

     Length

     ;

      i

     ++

     )


     {


            stringBuilder

     .

     Append

     (

     bytes

     [

     i

     ]

     .

     ToString

     (

     "x2"

     )

     )

     ;


     }


     return

      stringBuilder

     .

     ToString

     (

     )

     ;


     }
名字和MD5之间通过“|”分隔即可。

欢迎Star。如果本文对你有所帮助,欢迎赞赏~~~
《游戏AI程序设计实战》作者 微信公众号:Unity游戏开发笔记 Github:https://github.com/onelei

优快云:https://blog.youkuaiyun.com/onelei1994
QQ交流群:754814245 欢迎支持我的新书《游戏AI程序设计实战》 https://item.jd.com/12520141.html


 7989
7989

 被折叠的 条评论
为什么被折叠?
被折叠的 条评论
为什么被折叠?
 到【灌水乐园】发言


