


 本文详细介绍在UE4中管理Actor组件的三种方法:编辑器直接添加、构造函数中创建和游戏运行时动态添加。文章深入探讨了C++中如何使ActorComponent在编辑器中可用,构造函数中组件的正确初始化,以及运行时如何动态加载和添加蓝图组件。
Actor添加ActorComponent
总结Actor添加组件(ActorComponent)的常用三种方式:
[1] 在蓝图编辑器中直接添加
[2] 在Actor构造函数中创建添加
[3] 在游戏运行时(GameRunTime)进行添加
[1][2]方式相当于在编辑器层面预先添加组件,[3]是游戏运行时的层面上添加组件
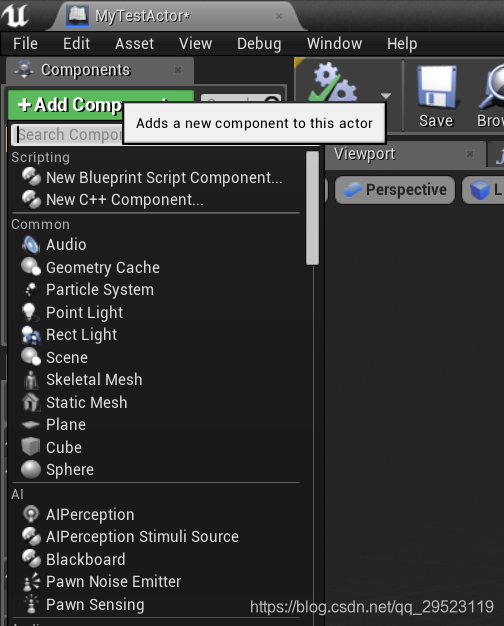
编辑器直接添加
不过C++创建的ActorComponent变成可编辑器可直接添加的组件得在 UCLASS 宏这样设置
"UCLASS(meta=(BlueprintSpawnableComponent) )"
UCLASS(meta=(BlueprintSpawnableComponent) )
class MYPROJECT3_API UTestActorComponent : public UActorComponent
{
}
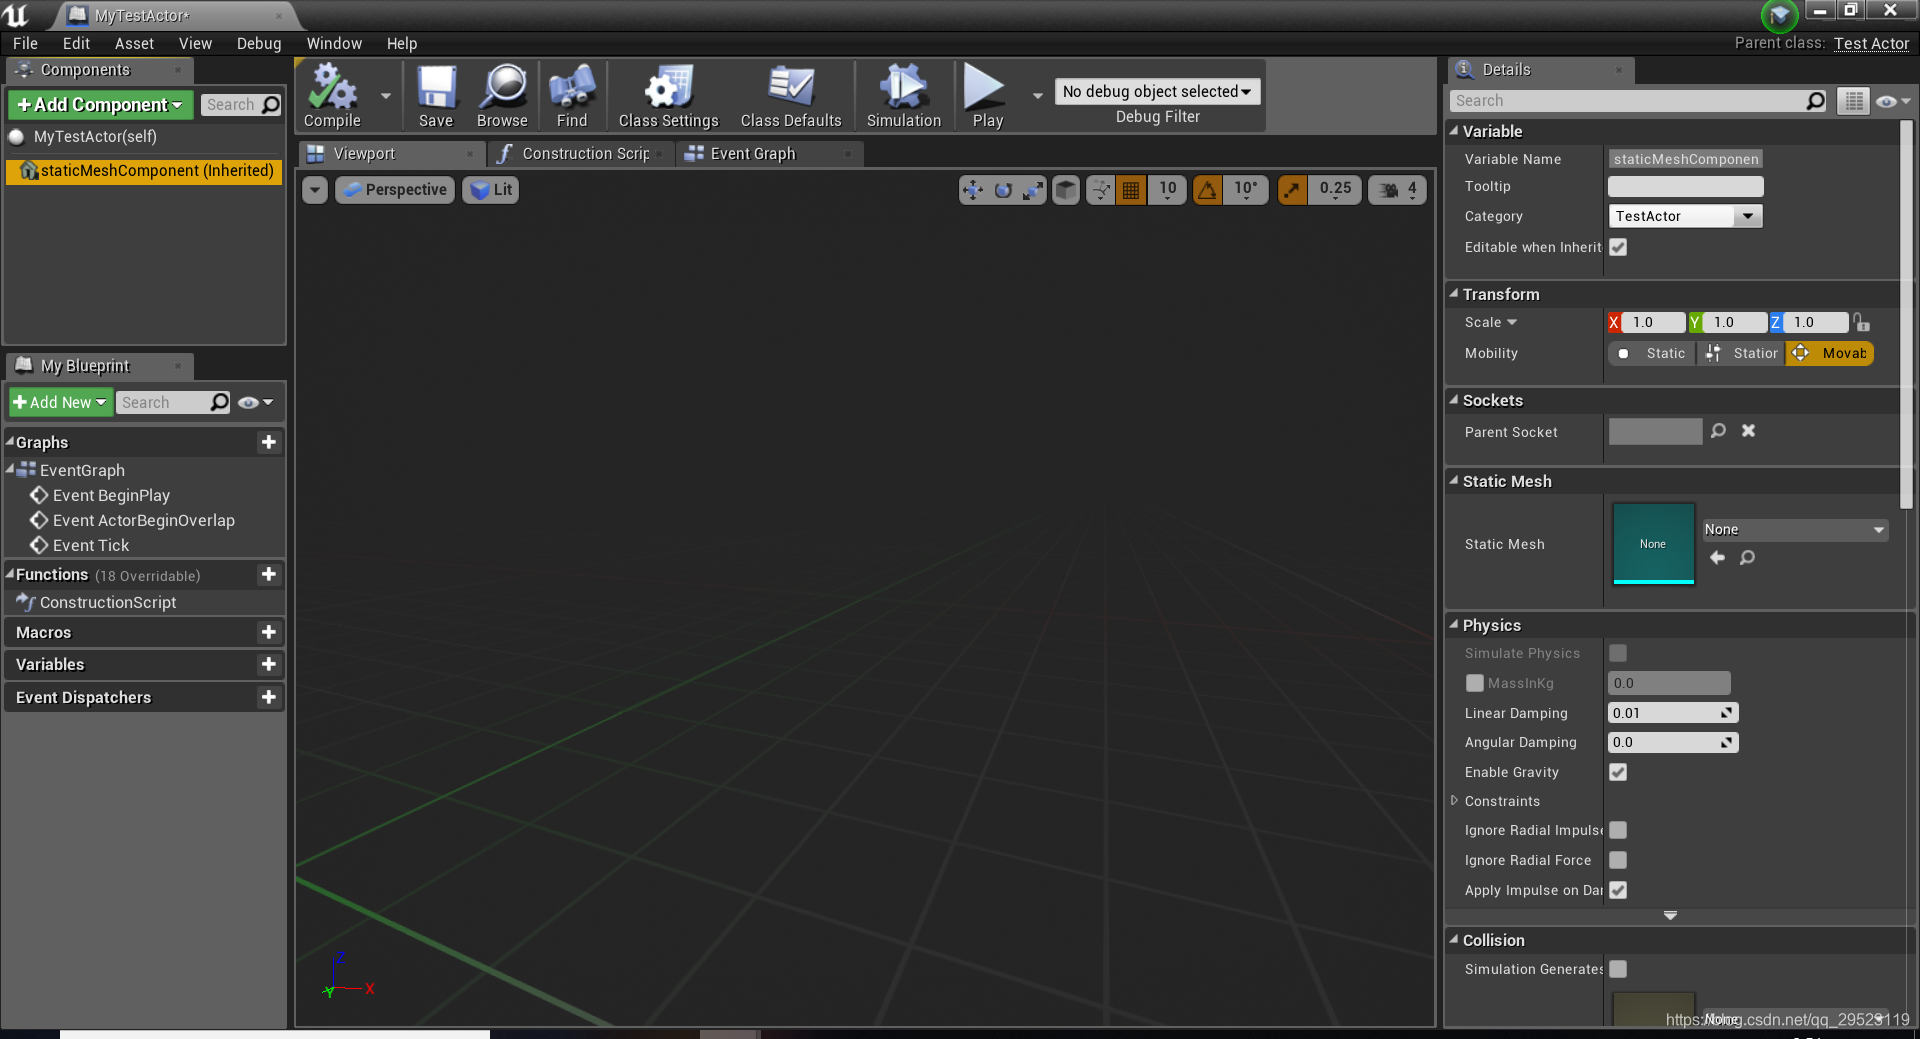
在Actor构造函数中创建添加
UCLASS()
class MYPROJECT3_API ATestActor : public AActor
{
	GENERATED_BODY()

public:
	// Sets default values for this actor's properties
	ATestActor();

protected:
	// Called when the game starts or when spawned
	virtual void BeginPlay() override;

public:
	// Called every frame
	virtual void Tick(float DeltaTime) override;

	UPROPERTY(VisibleAnywhere)
		class UStaticMeshComponent* staticMeshComponent;
};
ATestActor::ATestActor()
{
 	// Set this actor to call Tick() every frame.  You can turn this off to improve performance if you don't need it.
	PrimaryActorTick.bCanEverTick = true;
	staticMeshComponent = CreateDefaultSubobject<UStaticMeshComponent>(TEXT("StaitcMeshComponent"));
	RootComponent = staticMeshComponent;
}
上面比较注意的是,UPROPERTY里得用“VisibleAnywhere”,不要用EditAnywhere或者EditDefaultsOnly等等其他的。
如果创建的这个组件是USceneComponent并且又不作为RootComponent,得调用AttachToComponent绑定到某个sceneComponent之下,不过在构造函数中SetupAttachment 就能起到类似作用,可以看看SetupAttachment 函数的 源码注释
if (ensureMsgf(!bRegistered, TEXT("SetupAttachment should only be used to initialize AttachParent and AttachSocketName for a future AttachToComponent. Once a component is registered you must use AttachToComponent.")))
	{
		if (ensureMsgf(InParent != this, TEXT("Cannot attach a component to itself.")))
在游戏运行时(GameRunTime)进行添加
const FName actorComponentName = FName("TestActorComponent");
UTestActorComponent* actorComponent = NewObject<UTestActorComponent>(character, actorComponentName);
actorComponent->RegisterComponent();
这个 NewObject函数的第一参数为目标“Actor”,至于网上不少资料说还要用AddOwnedComponent,其实是不必要的。
character->AddOwnedComponent(actorComponent);
如果创建的这个组件是USceneComponent并且又不作为RootComponent,得调用AttachToComponent绑定到某个sceneComponent之下,
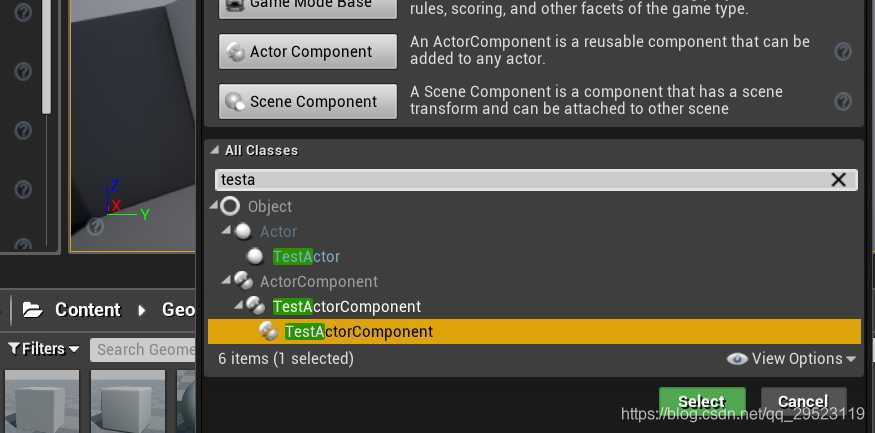
这里顺便说一下,很多时候项目开发中,由于我们某些组件是游戏运行时添加的,并且经常性添加的那个组件有大量的参数,我们不可能在添加的时候再设置参数,往往"动态添加组件的开发模式"是遵循下面几步:
(1)组件变成蓝图类,并设置好参数
(2)用LoadClass加载组件蓝图类为UClass*
(3)在NewObject传入UClass*
下面演示个例子:
[1]UCLASS(Blueprintable)代表了一个UObject可以变为蓝图类
UCLASS(Blueprintable, ClassGroup=(Custom), meta=(BlueprintSpawnableComponent) )
class MYPROJECT3_API UTestActorComponent : public UActorComponent
{
	GENERATED_BODY()

public:
	// Sets default values for this component's properties
	UTestActorComponent();

protected:
	// Called when the game starts
	virtual void BeginPlay() override;

public:
	// Called every frame
	virtual void TickComponent(float DeltaTime, ELevelTick TickType, FActorComponentTickFunction* ThisTickFunction) override;


	UPROPERTY(EditAnywhere)
		float a;

	UPROPERTY(EditAnywhere)
		float b;

	UPROPERTY(EditAnywhere)
		float c;

};
[2]蓝图化
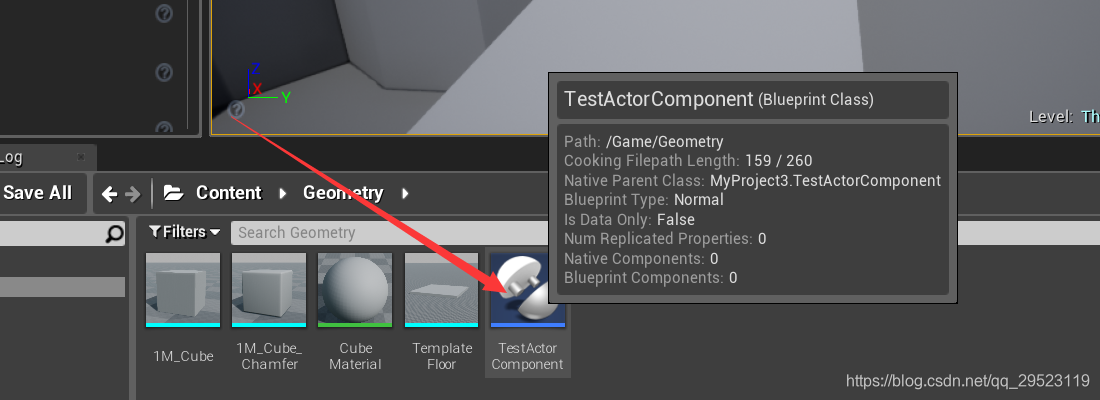

[3]代码动态添加蓝图化的组件
void ATestActor::BeginPlay()
{
	Super::BeginPlay();

	APlayerController* 	playerController = GetWorld()->GetFirstPlayerController();
	if (nullptr == playerController)
		return;
	AActor* character = playerController->GetPawn();
	if (nullptr == character)
		return;
	const FString testComponentBPFilePath = "/Game/Geometry/TestActorComponent.TestActorComponent_C";
	UClass* testComponentClass = LoadClass<UTestActorComponent>(character, *testComponentBPFilePath);
	if (nullptr == testComponentClass)
		return;
	const FName actorComponentName = FName("TestActorComponent");
	UTestActorComponent* actorComponent = NewObject<UTestActorComponent>(character, testComponentClass);
	if (nullptr == actorComponent)
		return;
	actorComponent->RegisterComponent();
}
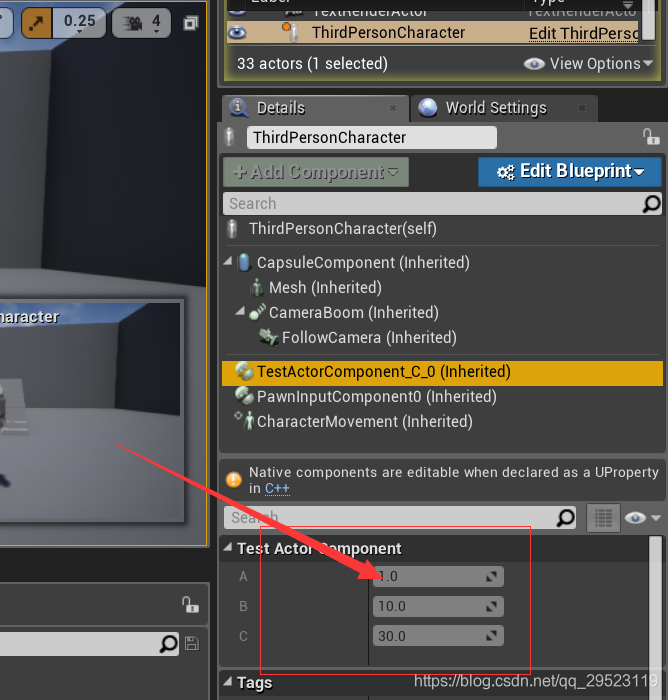
运行截图:
Actor移除ActorComponent
主要是先调用UnregisterComponent, 然后再DestroyComponent
if (MyActorComponent)
{
	MyActorComponent->UnregisterComponent();
	MyActorComponent->DestroyComponent();
}


 8065
8065

 被折叠的 条评论
为什么被折叠?
被折叠的 条评论
为什么被折叠?
 到【灌水乐园】发言


