


 本文基于Unity URP,对深度相关知识进行整理。介绍了Eye Depth,即物体相对摄像机平面的距离,还提及ComputeScreenPos的作用;阐述深度图,包括其存储及采样方法;最后讲述根据深度重建世界坐标的多种方法,如逆推、射线法等。
本文只是对深度的一些整理和个人理解,如果有不对的地方,请一定要告诉我。演示基于Unity URP, shader用shader graph 或者HLSL,build-in自行根据对照表更改
1. Eye Depth(观察空间)
Eye Depth是物体相对于摄像机所在平面的距离,因为是相对,所以Z是相反的,Eye Depth的0就是摄像机,1就是一个单位,10就是10个单位,所以有的人会把他称为“World” space Depth,这个depth在所有平台上都是一样的,而且不区分正交透视,因为他在投影之前。在shader graph 中如何得到片段的Eye Depth呢
正交或者投影
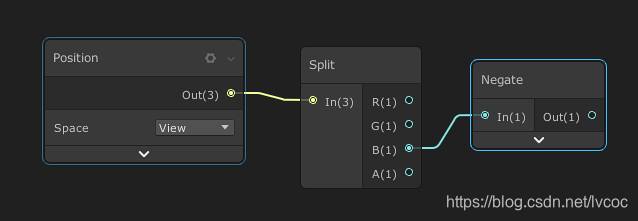
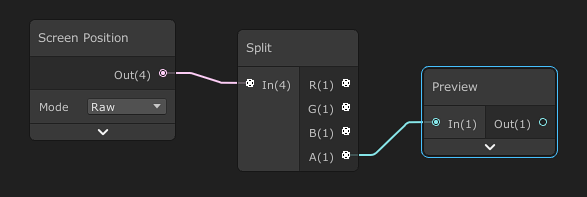
只适用于透视
HLSL
第一种
// 顶点
float3 positionWS = TransformObjectToWorld(IN.positionOS.xyz);
float3 positionVS = TransformWorldToView(positionWS);
OUT.positionVS = positionVS;
// 片段
float fragmentEyeDepth = -IN.positionVS.z;
第二种
//裁剪空间坐标
float4 positionCS 	= TransformWorldToHClip(input.positionOS.xyz);
OUT.positionCS 		= positionCS;
//求屏幕坐标
//一种方法是
float4 positionScr	= positionCS * 0.5f;
positionScr.xy 		= float2(positionScr.x, positionScr.y * _ProjectionParams.x) + positionScr.w;
positionScr.zw 		= positionCS.zw;
OUT.scrPos= positionScr;
//或者直接用URP封装的
OUT.scrPos= ComputeScreenPos(positionCS);//[-w,w]->[0,w]
//片段
float fragmentEyeDepth = IN.scrPos.w;
这边扯开了,先讲下ComputeScreenPos,他的作用是把裁剪空间齐次坐标转换到屏幕空间的齐次坐标 ,或者换句话说就是把xy取值范围从[-w,w] 转到 [0,w],然后再做透视除法(齐次除法),取值范围变成[0,1],就可以用来提取屏幕纹理了
注意 透视除法应该放在片段着色器里执行,不然会造成UV扭曲,因为片段着色器之前的光栅化会对几何数据做差值,而做差值前做除法会导致结果不准确
这个方法得到了屏幕齐次坐标,那么再经过透视除法,可以的到NDC,再走一步可以直接得到Z Buffer Depth,也就是深度纹理中的像素值
float3 ndcPos 		= IN.scrPos.xyz / IN.scrPos.w;//[0-1] D3D
float2 screenUV 	= ndcPos.xy;
float zdepth 		= ndcPos.z;
对于D3D,NDC z取值范围已经是[0,1],所以可以直接相等,而openGL z在[-1,1],需要
z* 0.5 + 0.5所以我常用的是第二种方法,因为可以顺便得到更多的信息
PS:
NDC=
 最低0.47元/天 解锁文章


 5659
5659

 被折叠的 条评论
为什么被折叠?
被折叠的 条评论
为什么被折叠?
 到【灌水乐园】发言


