


因为之前没有想着记录,所以从现在开始记录一下和一些自己的改动。
Clone Creating Ability(克隆)
1,创建一个名为clone的预制体
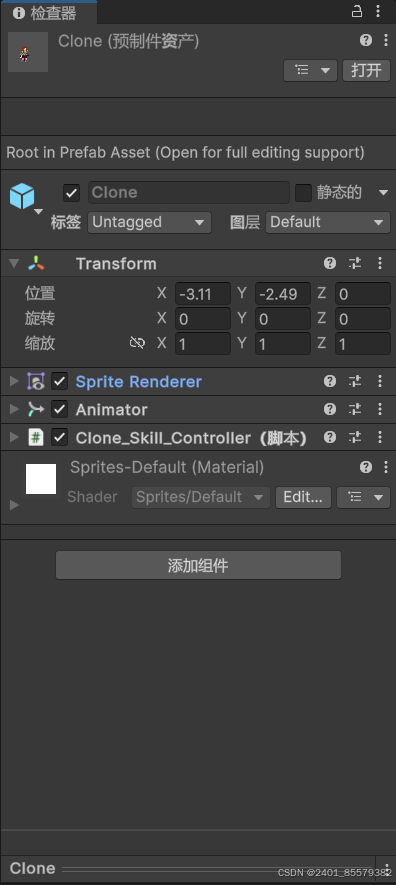
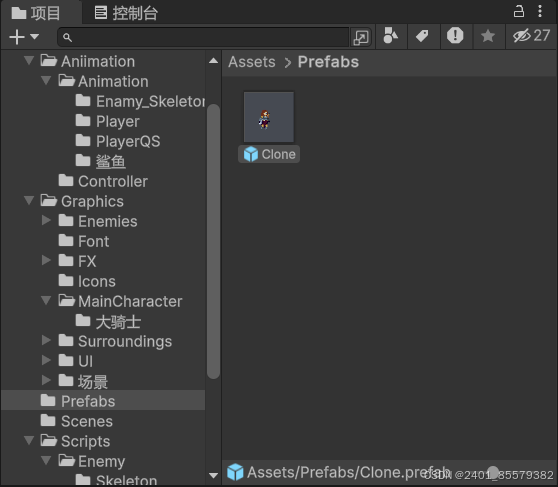
创建一个名为clone_AC的Animator Controller用来存放动画,可将player的Idle动画设置为初始动画。
记得需要将精灵排序图层改为Player(-1)
2,创建Clone_Skill_Controller(这是绑定在clone预制件上的)
using System;
using System.Collections;
using System.Collections.Generic;
using UnityEngine;

public class Clone_Skill_Controller : MonoBehaviour
{
    //获取精灵
    private SpriteRenderer sr;
    //失去颜色速度
    [SerializeField] private float clorLoosingSpeed;

    private float cloneTimer;
    private void Awake()
    {
        sr = GetComponent<SpriteRenderer>();
    }
    private void Update()
    {
        cloneTimer -= Time.deltaTime;
        if(cloneTimer<0)
        {
            sr.color = new Color(1, 1, 1, sr.color.a - (Time.deltaTime * clorLoosingSpeed));
        }
    }
    //设置克隆体的位置
    public void SetupClone(Transform _newTransform,float _cloneDuration)
    {
        transform.position = _newTransform.position;
        cloneTimer = _cloneDuration;
    }


}
3,创建Clone_Skill (实现克隆体的生成)
using System.Collections;
using System.Collections.Generic;
using UnityEngine;
//分身技能
public class Clone_Skill : Skill
{
    // 用于存储分身的预制体
    [SerializeField] private GameObject clonePrefab;
    // 克隆消失时间
    [SerializeField] private float cloneDuration;


    // 创建分身的方法
    // 参数 _clonePosition 表示分身的位置
    public void CreteClone(Transform _clonePosition)
    {
             实例化分身预制体,生成一个新的分身对象
            GameObject newClone = Instantiate(clonePrefab);
        // 获取新分身对象的 Clone_Skill_Controller 组件,并调用 SetupClone 方法进行分身的设置
        //传入分身位置和克隆消失时间作为参数
        newClone.GetComponent<Clone_Skill_Controller>().SetupClone(_clonePosition, cloneDuration);
    }
}
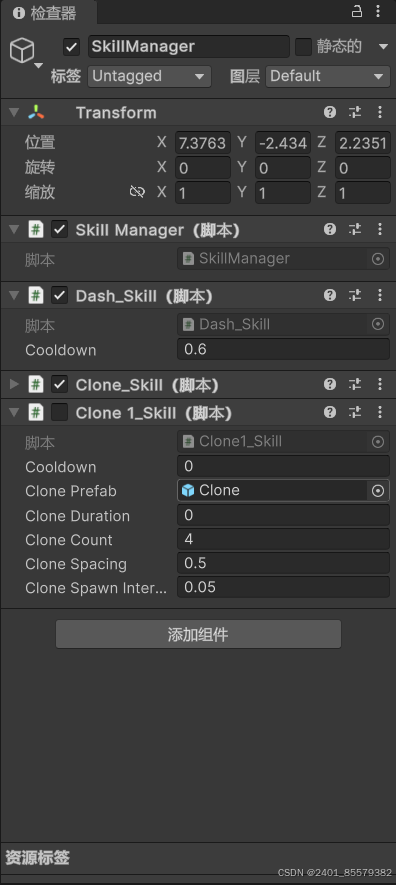
4,记得在SkillManager中导入public Clone_Skill clone { get; private set; }和 clone =GetComponent<Clone_Skill>();
using System.Collections;
using System.Collections.Generic;
using UnityEngine;

public class SkillManager : MonoBehaviour
{
    public static SkillManager instance;
    public Dash_Skill dash { get; private set; }
    public Clone_Skill clone { get; private set; }
    public Clone1_Skill clone1 { get; private set; }
    public void Awake()
    {
        if (instance != null)
            Destroy(instance.gameObject);
        else
            instance = this;
    }
    public void Start()
    {
        dash = GetComponent < Dash_Skill> ();
        clone =GetComponent<Clone_Skill>();
        clone1 = GetComponent<Clone1_Skill>();
    }
}
注意其中的clone1是我自己就老师的视频新增的效果
5,记得在playe中导入
public SkillManager skill { get; private set; }
    //声明技能组件
    public SkillManager skill { get; private set; }

    protected override void Start()
     {
     base.Start();
     skill = SkillManager.instance;
    //进入待机动画
     stateMachine.Initialize(idleState);
     }
6,最后记得在PlayerDashState中实现方法
using System.Collections;
using System.Collections.Generic;
using UnityEngine;
//冲刺状态
public class PlayerDashState : PlayerState
{
    public PlayerDashState(Player _player, PlayerStateMachine _stateMachine, string _animBooIName) : base(_player, _stateMachine, _animBooIName)
    {
    }

    public override void Enter()
    {
        base.Enter();
        //使用克隆技能1
        //player.skill.clone1.CreteClone(player.transform,player.dashDir);
        //使用克隆技能
        player.skill.clone.CreteClone(player.transform);
        //重置冲刺持续时间
        stateTimer = player.dashDuration;

    }

    public override void Exit()
    {
        base.Exit();
        player.SetVelocity(0, rb.velocity.y);
    }

    public override void Update()
    {
        base.Update();
        if(!player.IsGroundDetected() && player.IsWallDatected())
        {
            stateMachine.ChangeState(player.wallSlide);
        }
        player.SetVelocity(player.dashDir * player.dashSpeed, rb.velocity.y);
        if (stateTimer<0)
        {
            stateMachine.ChangeState(player.idleState);
        }
    }
}
7,最后是我的clone1我给他是新增了一个单独的Clone_Dash动画就一帧且给他实现了可以多个分身切跟随他身后生成
using System;
using System.Collections;
using System.Collections.Generic;
using UnityEngine;


//分身技能
public class Clone1_Skill : Skill
{
    // 用于存储分身的预制体
    [SerializeField] private GameObject clonePrefab;
    // 克隆消失时间
    [SerializeField] private float cloneDuration;
    // 分身的数量
    [SerializeField] private int cloneCount;
    // 分身之间的间距
    [SerializeField] private float cloneSpacing;
    // 分身产生的间隔时间
    [SerializeField] private float cloneSpawnInterval;
    // 存储冲刺方向
    private float dashDir;

    // 创建分身的方法
    // 参数 transform 表示玩家的 Transform 组件
    public void CreteClone(Transform playerTransform, float dashDir)
    {
        // 存储 dashDir
        this.dashDir = dashDir;
        Vector2 _dashDirection;
        if (dashDir == 1)
        {
            _dashDirection = playerTransform.right;
        }
        else if (dashDir == -1)
        {
            _dashDirection = -playerTransform.right;
        }
        else
        {
            // 处理异常情况,例如 dashDir 不为 1 或 -1 时,可以默认向右冲刺
            _dashDirection = playerTransform.right;

        }

        StartCoroutine(CreateClonesWithInterval(playerTransform, _dashDirection));
    }

    private IEnumerator CreateClonesWithInterval(Transform playerTransform, Vector2 _dashDirection)
    {
        for (int i = 0; i < cloneCount; i++)
        {
            Vector2 clonePosition = Vector2.zero;
            if (this.dashDir == 1)
            {
                // 计算当前分身的位置,根据玩家位置、冲刺方向和分身间距
                clonePosition = (Vector2)playerTransform.position + (i * cloneSpacing * _dashDirection);
            }
            else if (this.dashDir == -1)
            {
                // 计算当前分身的位置,根据玩家位置、冲刺方向和分身间距
                clonePosition = (Vector2)playerTransform.position - (i * cloneSpacing * _dashDirection);
            }

            // 实例化分身预制体,生成一个新的分身对象
            GameObject newClone = Instantiate(clonePrefab, clonePosition, Quaternion.identity);

            // 获取新分身对象的 Clone_Skill_Controller 组件,并调用 SetupClone 方法进行分身的设置
            // 传入分身位置和克隆消失时间作为参数
            // 将 Vector2 类型的 clonePosition 转换为 Transform 类型
            Transform cloneTransform = new GameObject().transform;
            cloneTransform.position = clonePosition;
            newClone.GetComponent<Clone_Skill_Controller>().SetupClone(cloneTransform, cloneDuration);

            // 根据冲刺方向翻转分身
            if (this.dashDir == -1)
            {
                newClone.transform.localScale = new Vector3(-newClone.transform.localScale.x, newClone.transform.localScale.y, newClone.transform.localScale.z);
            }

            // 等待一段时间再创建下一个分身
            yield return new WaitForSeconds(cloneSpawnInterval);
        }

    }
}


 1020
1020

 被折叠的 条评论
为什么被折叠?
被折叠的 条评论
为什么被折叠?
 到【灌水乐园】发言


