segment anything环境配置与使用测试

硬件:RTX3070 i9-11900H 内存16G

目录

一、环境配置

二、使用测试--predictor_example.ipynb

1.jupyter notebook准备操作

2.Object masks from prompts with SAM与Environment Set-up

3.Set-up

4.Example image

5.Selecting objects with SAM

6.Specifying a specific object with additional points

7.Specifying a specific object with a box

 8.Combining points and boxes

 9.Batched prompt inputs

10.End-to-end batched inference

三、使用测试--automatic_mask_generator_example.ipynb

1.Environment Set-up

2.Set-up

3.Example image

4.Automatic mask generation

 5.Automatic mask generation options


一、环境配置

首先从官方github上下载并解压在一个目录下,官方github网址:

GitHub - facebookresearch/segment-anythinghttps://github.com/facebookresearch/segment-anything下面进行环境配置:

1.conda创建虚拟环境,注意python版本大于等于3.8(官方要求python>=3.8)。

conda create -n segment python=3.8 -y

2.激活刚刚创建的虚拟环境,安装pytorch,注意官方要求pytorch>=1.7torchvision>=0.8。

conda activate segment
pip install torch==1.10.1+cu113 torchvision==0.11.2+cu113 torchaudio==0.10.1+cu113 -f https://download.pytorch.org/whl/cu113/torch_stable.html

3.本文在pycharm IDE中进行调试,在解压目录下打开pycharm并配置上刚刚配置好的环境,进行后续的环境配置。

pycharm调用conda虚拟环境

进入 pycharm终端terminal进行后续安装

pip install -e .

官方没有给出安装库的详细版本,按照官方给的指令进行执行 

pip install opencv-python pycocotools matplotlib onnxruntime onnx

至此,环境配置完成,后续问题通过程序的报错去补全环境缺失的库或者调整库的版本。

二、使用测试--predictor_example.ipynb

1.jupyter notebook准备操作

官方给的是jupyter notebook的测试流程,首先启动终端进入虚拟环境

conda activate segment

进入官方编写的jupyter notebook的目录下,通过cd的方式,xxx根据实际目录调整

cd xxx:\xxx\segment-anything-main\segment-anything-main\notebooks

注:网上有很多方式去在jupyter notebook调用虚拟环境,我认为最好是在虚拟环境中安装库,如果安装错了可以直接删除虚拟环境,留有容错率且保持conda base环境的简洁,尽量不要在conda base环境中安装多余的库,conda base环境只作为创建虚拟环境的base环境。

在虚拟环境中安装ipykernel,如果不安装,jupyter notebook无法识别到刚刚创建的虚拟环境,即使终端已经启动了虚拟环境。

pip install ipykernel

 将刚刚创建的虚拟环境写入jupyter notebook

模板:

python -m ipykernel install --user --name 虚拟环境名 --display-name "显示名"

实际操作:

python -m ipykernel install --user --name segment --display-name "segment"

 启动jupyter notebook,启动后该终端不要关闭

jupyter notebook

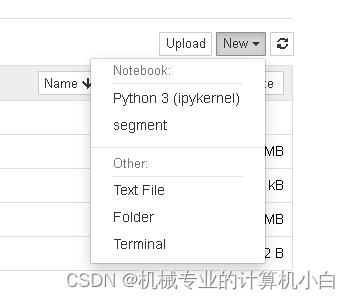
在此图可以发现segment虚拟环境,说明jupyter notebook识别环境配置成功,但是需要配置虚拟环境。

 图中右侧可以看到虚拟环境名。

官方jupyter notebook给的比较详细,首先是predictor_example

接下来按照标题去看官方给的例子

2.Object masks from prompts with SAM与Environment Set-up

关于谷歌colab上运行的操作,由于是本机运行不需要这些操作。

3.Set-up

调用库并定义掩膜、点、矩形框的绘图函数。

4.Example image

为实例图片,通过Opencv读取并展示出来

5.Selecting objects with SAM

为检测测试,分为多个步骤

(1)下载训练好的网络模型,放在项目的model文件夹下,并修改程序中的路径

GitHub - facebookresearch/segment-anything: The repository provides code for running inference with the SegmentAnything Model (SAM), links for downloading the trained model checkpoints, and example notebooks that show how to use the model.

### 配置 Segment Anything Model 2 (SAM2) 为了配置和运行 Segment Anything Model 2 (SAM2),需遵循特定的环境设置和技术细节。以下是详细的指导: #### 安装依赖库 首先,确保安装必要的 Python 库和支持工具。推荐使用虚拟环境管理器如 `conda` 或者 `venv` 来创建独立的工作空间。 ```bash # 创建并激活新的 conda 虚拟环境 conda create --name sam_env python=3.8 conda activate sam_env # 安装 PyTorch 和 torchvision, 版本应 CUDA 兼容 pip install torch==1.10.0+cu113 torchvision==0.11.1+cu113 torchaudio===0.10.0 -f https://download.pytorch.org/whl/cu113/torch_stable.html # 安装其他所需包 pip install opencv-python numpy matplotlib scikit-image tqdm einops omegaconf hydra-core ``` #### 下载预训练权重文件 访问官方 GitHub 页面下载最新的 SAM2 模型权重文件[^2]。通常这些资源会被托管在云端存储服务上,比如 AWS S3 或 Google Drive。 #### 加载模型架构定义 通过导入相应的模块加载 SAM2 的网络结构,并初始化参数。这里假设已经获取到了正确的 `.pth` 文件路径。 ```python from segment_anything import SamPredictor, sam_model_registry model_type = "vit_h" checkpoint_path = "./sam_vit_h_4b8939.pth" device = "cuda" if torch.cuda.is_available() else "cpu" sam = sam_model_registry[model_type](checkpoint=checkpoint_path).to(device=device) predictor = SamPredictor(sam) ``` #### 设置数据集接口 对于图像分割任务来说,准备合适的数据源至关重要。可以利用现有的公开数据集或是自定义采集的数据集来进行测试验证工作。 ```python import cv2 import numpy as np def load_image(image_file): image = cv2.imread(str(image_file)) rgb_image = cv2.cvtColor(image, cv2.COLOR_BGR2RGB) return rgb_image image_path = 'path_to_your_test_image.jpg' input_image = load_image(image_path) predictor.set_image(input_image) ``` #### 进行预测操作 最后一步就是调用 API 接口完成实际的目标区域标注过程。可以根据具体应用场景调整输入提示的方式,例如点击位置、矩形框选等方式。 ```python point_coords = np.array([[500, 375]]) point_labels = np.array([1]) masks, scores, logits = predictor.predict( point_coords=point_coords, point_labels=point_labels, multimask_output=True, ) for i, mask in enumerate(masks): plt.figure(figsize=(10,10)) plt.imshow(input_image) show_mask(mask, plt.gca()) show_points(point_coords, point_labels, plt.gca()) plt.title(f"Mask {i+1}, Score: {scores[i]:.3f}", fontsize=18) plt.axis('off') plt.show() ``` 以上即为完整的 SAM2 模型配置流程说明。
评论
添加红包

请填写红包祝福语或标题

红包个数最小为10个

红包金额最低5元

当前余额3.43前往充值 >
需支付:10.00
成就一亿技术人!
领取后你会自动成为博主和红包主的粉丝 规则
hope_wisdom
发出的红包
实付
使用余额支付
点击重新获取
扫码支付
钱包余额 0

抵扣说明:

1.余额是钱包充值的虚拟货币,按照1:1的比例进行支付金额的抵扣。
2.余额无法直接购买下载,可以购买VIP、付费专栏及课程。

余额充值