


原文链接:https://blog.youkuaiyun.com/weixin_44453694/article/details/127937666
这种移植编译的教程,网上非常多,很有用,在写触摸屏应用的时候,移植这个库,简化我们开发时,自己写各种复杂的函数。可以用到实际的项目中。
一、tslib库编译与移植
1.tslib库简介
tslib 是电阻式触摸屏用于校准的一个软件库,是一个开源的程序,能够为触摸屏驱动获得的采样提供诸如滤波、去抖、校准等功能,通常作为触摸屏驱动的适配层,为上层的应用提供了一个统一的接口。
2 相关工具安装
安装必要工具libtool、automake、autoconf
$ sudo apt-get install libtool
$ sudo apt-get install automake
$ sudo apt-get install autoconf
3 tslib安装步骤
系统环境
开发环境: Ubuntu18.04
目标开发板: Tiny4412
交叉编译器: arm-linux-gcc
Linux内核: Linux3.5
1.下载tslib库源码包,将源码解压到用户目录下。
tslib源码下载地址:https://github.com/libts/tslib/releases

2.configure配置,生成Makefile文件。
[wbyq@wbyq tslib-master]$ ./autogen.sh
[wbyq@wbyq tslib-master]$ ./configure --host=arm-linux ac_cv_func_malloc_0_nonnull=yes --cache-file=arm-linux.cache --prefix=$PWD/_install
- -host=arm-linux - - -指定编译器
- -prefix=$PWD/_install - - -指定安装目录
3.编译安装。
 make
 make install
编译安装好后会生成 _install 文件夹。
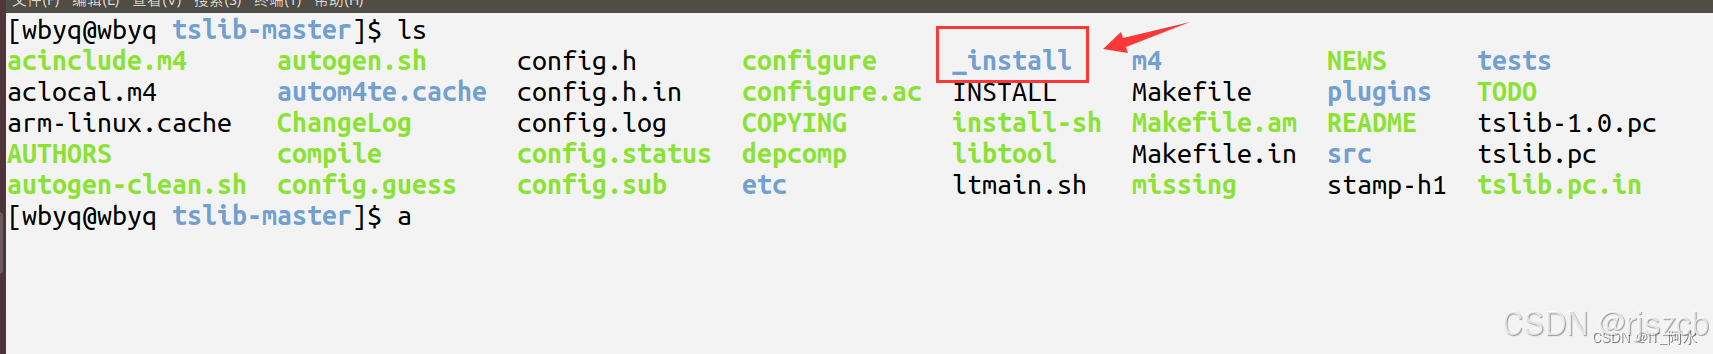
[wbyq@wbyq tslib-master]$ cd _install/
[wbyq@wbyq _install]$ tree
.
├── bin
│   ├── ts_calibrate
│   ├── ts_harvest
│   ├── ts_print
│   ├── ts_print_raw
│   └── ts_test
├── etc
│   └── ts.conf
├── include
│   └── tslib.h
└── lib
    ├── libts-1.0.so.0 -> libts-1.0.so.0.0.0
    ├── libts-1.0.so.0.0.0
    ├── libts.la
    ├── libts.so -> libts-1.0.so.0.0.0
    ├── pkgconfig
    │   ├── tslib-1.0.pc
    │   └── tslib.pc
    └── ts
        ├── arctic2.la
        ├── arctic2.so
        ├── collie.la
        ├── collie.so
        ├── corgi.la
        ├── corgi.so
        ├── dejitter.la
        ├── dejitter.so
        ├── dmc.la
        ├── dmc.so
        ├── galax.la
        ├── galax.so
        ├── h3600.la
        ├── h3600.so
        ├── input.la
        ├── input.so
        ├── linear_h2200.la
        ├── linear_h2200.so
        ├── linear.la
        ├── linear.so
        ├── mk712.la
        ├── mk712.so
        ├── pthres.la
        ├── pthres.so
        ├── tatung.la
        ├── tatung.so
        ├── touchkit.la
        ├── touchkit.so
        ├── ucb1x00.la
        ├── ucb1x00.so
        ├── variance.la
        └── variance.so

6 directories, 45 files
4.拷贝bin目录下的文件到开发板/bin目录下。
[wbyq@wbyq _install]$ cp bin/* /home/wbyq/soft_work/rootfs/bin/
5.拷贝lib目录下的.so文件到开发板的/lib目录下。
[wbyq@wbyq _install]$ cp lib/.so /home/wbyq/soft_work/rootfs/lib/ -rfdv
[wbyq@wbyq _install]$ cp lib/ts/ /home/wbyq/soft_work/rootfs/lib/ -rfdv
6.拷贝etc/ts.conf文件到开发板的/etc目录下。
[wbyq@wbyq _install]$ cp etc/ts.conf /home/wbyq/soft_work/rootfs/etc/
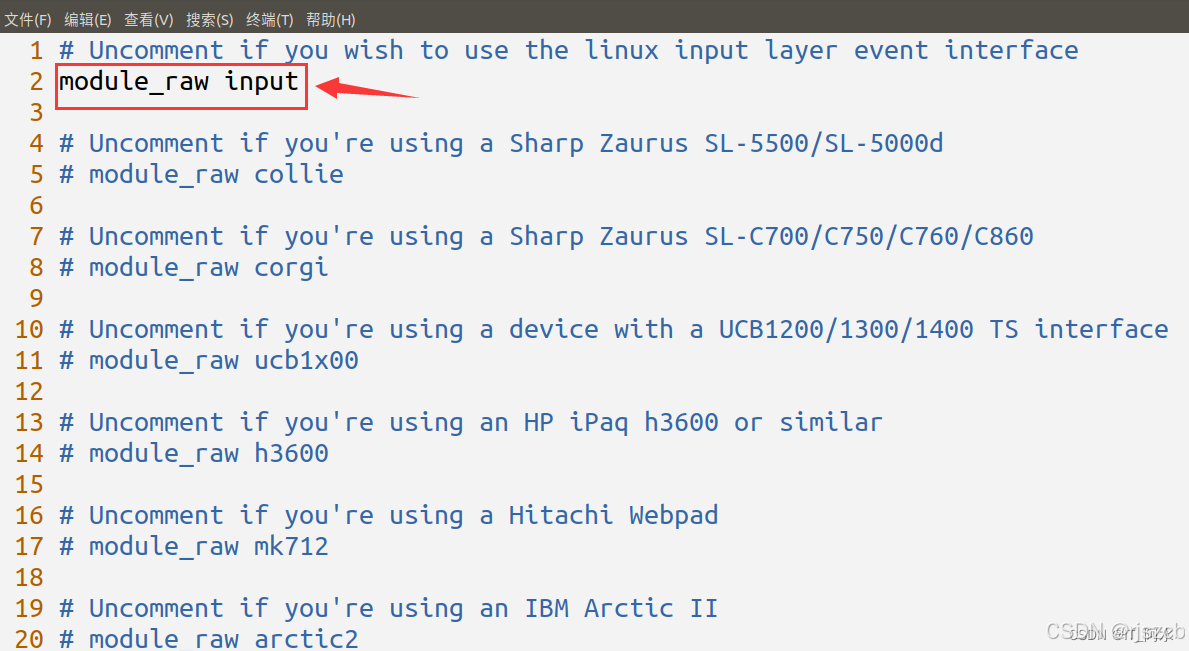
7.修改配置文件。
如果希望使用linux输入层事件接口,需要取消module_raw input 注释。
[wbyq@wbyq _install]$ vim /home/wbyq/soft_work/rootfs/etc/ts.conf
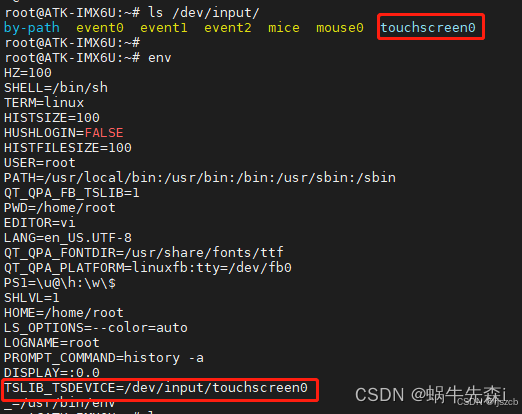
8.配置开发板的的启动文件 profile。event2,需要根据自己开发板,设置,是否是这个。
[wbyq@wbyq _install]$ vim /home/wbyq/soft_work/rootfs/etc/profile
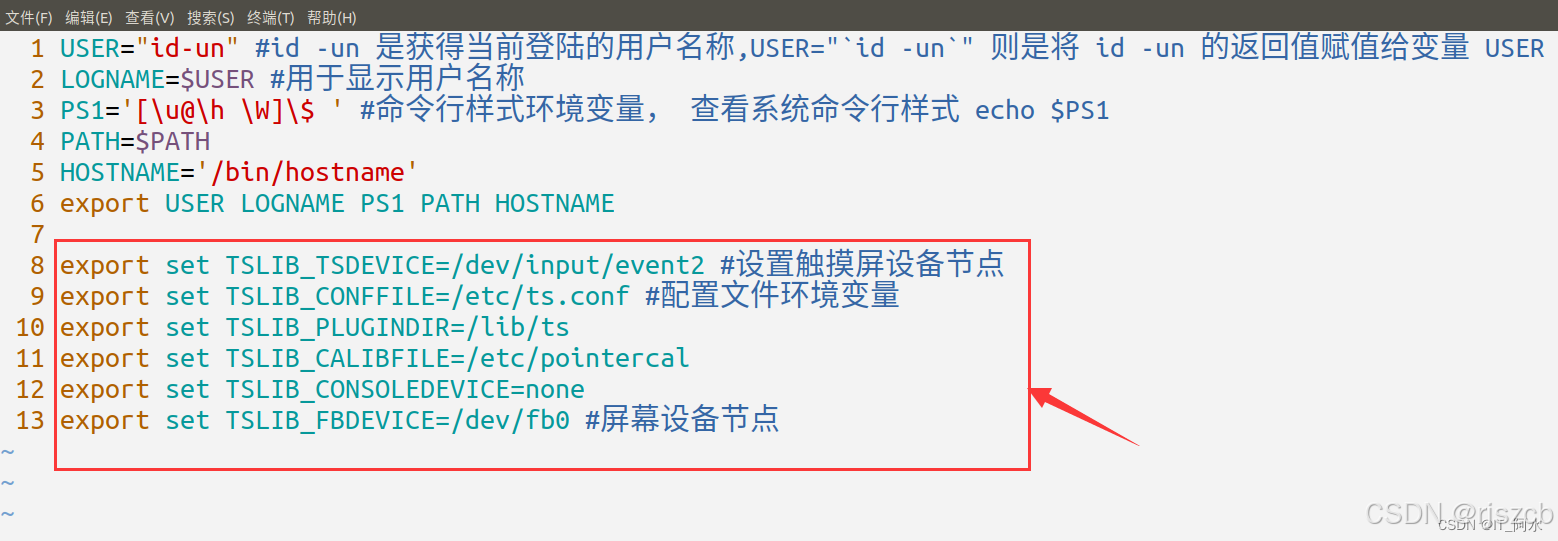
注意: 设置完环境变量之后,需要重启开发板生效,或者使用 source 命令立即生效。
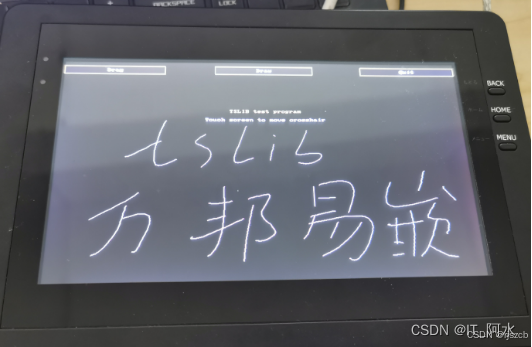
开发板运行效果
前提是要安装好开发板,安装触摸屏驱动,检查触摸屏设备节点是否为上面设置的event2,运行ts_test。
[root@wbyq code]# insmod ft5x06_dev.ko
[ 759.390000] IIC子系统:设备层注册成功
[root@wbyq code]# insmod ft5x06_drv.ko
[ 762.175000] IIC子系统:驱动层注册成功
[ 762.175000] 资源匹配成功
[ 762.175000] input: Unspecified device as /devices/virtual/input/input3
[root@wbyq code]# ts_test
874.277420: 388 354 1
874.322712: 384 352 1
874.337917: 369 348 1
874.353162: 355 346 1
874.368397: 332 343 1
874.383524: 304 339 1
874.398664: 277 337 1
874.413889: 258 336 1
874.429156: 243 335 1
874.444247: 234 334 1
874.474649: 230 333 1
874.489914: 236 330 1
874.504974: 248 328 1
tslib中提供的测试命令,是通过ts.config文件读取相应的触摸屏配置信息和LCD屏配置信息。提供非常多的测试命令,可以写字。
可以调用tslib提供的函数,来读取坐标,我们就不用字节写读取input,我们前面那样写的。
使用 tslib 提供的 API 接口来编写触摸屏应用程序,使用 tslib 库函数需要在我们的应用程序中包含 tslib 的头文件 tslib.h。
1、基于tslib写单点触摸屏应用程序
#include <stdio.h>
#include <sys/types.h>
#include <sys/stat.h>
#include <fcntl.h>
#include <unistd.h>
#include <string.h>
#include <stdlib.h>
#include "tslib.h"
int main(int argc,char *argv[])
{
struct tsdev *ts;
char *tsdevice=NULL;
/*打开触摸屏设备节点*/
if( (tsdevice = getenv("TSLIB_TSDEVICE")) != NULL ) {
ts = ts_open(tsdevice,0);
}
else {
ts = ts_open("/dev/input/event2",0);
}
if(ts==NULL)
{
perror("ts_open");
exit(1);
}
if (ts_config(ts)) {
perror("ts_config");
exit(1);
}
struct ts_sample samp;
int ret;
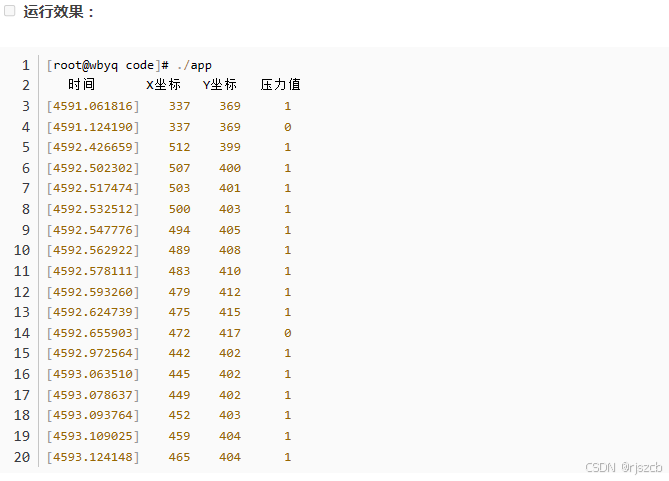
printf(" 时间 \t X坐标 \t Y坐标\t压力值 \n");
while (1)
{
ret = ts_read(ts, &samp, 1);
if (ret < 0)
{
perror("ts_read");
exit(1);
}
if (ret != 1)
continue;
printf("[%ld.%06ld] %6d %6d %6d\n", samp.tv.tv_sec, samp.tv.tv_usec,samp.x, samp.y, samp.pressure);
}
return 0;
}
可以看出上述步骤:
打开触摸屏设备:struct tsdev *ts_setup(const char *dev_name, int nonblock),参数 dev_name 指定触摸屏的设备节点,参数 nonblock 表示是否以非阻塞方式打开触摸屏设备。
配置触摸屏设备:int ts_config(struct tsdev *ts),解析 ts.conf 文件中的配置信息,加载相应的插件。
读取触摸屏数据:int ts_read(struct tsdev *ts, struct ts_sample *samp, int nr),ts_read 用于读取单点触摸数据
代码中ts_setup函数的dev_name参数为null,函数内部会读取TSLIB_TSDEVICE 环境变量,获取该环境变量的内容以得知触摸屏的设备节点。
ts_read()函数的 samp 参数是一个 struct ts_sample *类型的指针,指向一个 struct ts_sample 对象,struct ts_sample 数据结构描述了触摸点的信息。
程序编译时,要指定库的,如下。
cflags=-I/home/wbyq/soft_work/tslib-master/tslib-master/_install/include  		#指定头文件
cflags+=-L/home/wbyq/soft_work/tslib-master/tslib-master/_install/lib 		 	#指定库文件路径
cflags+=-lts  				#指定库

app:
	arm-linux-gcc app.c -o app $(cflags)
或者这样
${CC} -I /home/jack/linux/tslib/tools/tslib/include -L /home/jack/linux/tslib/tools/tslib/lib -lts -o ts_single_touch tslib_touch.c
-I 指定tslib库的头文件路径
-L 指定tslib库路径
-l 指定链接库,也就是 libts.so 库文件
2、基于tslib写多点触摸屏应用程序
使用 ts_read_mt()函数读取多点触摸数据
#include <stdio.h>
#include <stdlib.h>
#include <sys/ioctl.h>
#include <linux/input.h>
#include <tslib.h>
int main(int argc, char *argv[])
{
struct tsdev *ts = NULL;
struct ts_sample_mt *mt_ptr = NULL;
struct input_absinfo slot;
int max_slots;
unsigned int pressure[12] = {0}; //用于保存每一个触摸点上一次的按压力,初始为 0,表示松开
int i;
/* 打开并配置触摸屏设备 */
ts = ts_setup(NULL, 0);
if (NULL == ts) {
fprintf(stderr, "ts_setup error");
exit(EXIT_FAILURE);
}
/* 获取触摸屏支持的最大触摸点数 */
if (0 > ioctl(ts_fd(ts), EVIOCGABS(ABS_MT_SLOT), &slot)) {
perror("ioctl error");
ts_close(ts);
exit(EXIT_FAILURE);
}
max_slots = slot.maximum + 1 - slot.minimum;
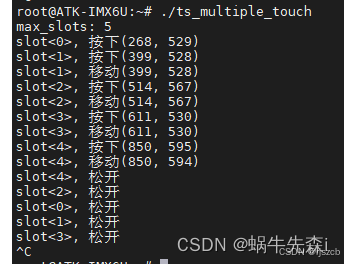
printf("max_slots: %d\n", max_slots);
/* 内存分配 */
mt_ptr = calloc(max_slots, sizeof(struct ts_sample_mt));
/* 读数据 */
for ( ; ; )
{
if (0 > ts_read_mt(ts, &mt_ptr, max_slots, 1))
{
perror("ts_read_mt error");
ts_close(ts);
free(mt_ptr);
exit(EXIT_FAILURE);
}
for (i = 0; i < max_slots; i++) {
if (mt_ptr[i].valid) {//有效表示有更新!
if (mt_ptr[i].pressure) { //如果按压力>0
if (pressure[mt_ptr[i].slot])//如果上一次的按压力>0
printf("slot<%d>, 移动(%d, %d)\n", mt_ptr[i].slot, mt_ptr[i].x, mt_ptr[i].y);
else
printf("slot<%d>, 按下(%d, %d)\n", mt_ptr[i].slot, mt_ptr[i].x, mt_ptr[i].y);
}
else
printf("slot<%d>, 松开\n", mt_ptr[i].slot);
pressure[mt_ptr[i].slot] = mt_ptr[i].pressure;
}
}
}
/* 关闭设备、释放内存、退出 */
ts_close(ts);
free(mt_ptr);
exit(EXIT_SUCCESS);
}


 3029
3029

 被折叠的 条评论
为什么被折叠?
被折叠的 条评论
为什么被折叠?
 到【灌水乐园】发言


