能够成功发送的程序

/*
  Rui Santos
  Complete project details at https://RandomNerdTutorials.com/esp32-cam-post-image-photo-server/

  Permission is hereby granted, free of charge, to any person obtaining a copy
  of this software and associated documentation files.

  The above copyright notice and this permission notice shall be included in all
  copies or substantial portions of the Software.
*/

#include <Arduino.h>
#include <WiFi.h>
#include "soc/soc.h"
#include "soc/rtc_cntl_reg.h"
#include "esp_camera.h"
#include <Base64.h>

const char* ssid = "-----";
const char* password = "------";

String serverName = "192.168.31.28";   // REPLACE WITH YOUR Raspberry Pi IP ADDRESS
//String serverName = "example.com";   // OR REPLACE WITH YOUR DOMAIN NAME

String serverPath = "/upload.php";     // The default serverPath should be upload.php

const int serverPort = 5001;

WiFiClient client;

// CAMERA_MODEL_AI_THINKER
#define PWDN_GPIO_NUM     32
#define RESET_GPIO_NUM    -1
#define XCLK_GPIO_NUM      0
#define SIOD_GPIO_NUM     26
#define SIOC_GPIO_NUM     27

#define Y9_GPIO_NUM       35
#define Y8_GPIO_NUM       34
#define Y7_GPIO_NUM       39
#define Y6_GPIO_NUM       36
#define Y5_GPIO_NUM       21
#define Y4_GPIO_NUM       19
#define Y3_GPIO_NUM       18
#define Y2_GPIO_NUM        5
#define VSYNC_GPIO_NUM    25
#define HREF_GPIO_NUM     23
#define PCLK_GPIO_NUM     22

const int timerInterval = 30000;    // time between each HTTP POST image
unsigned long previousMillis = 0;   // last time image was sent

void setup() {
  WRITE_PERI_REG(RTC_CNTL_BROWN_OUT_REG, 0);
  Serial.begin(115200);

  WiFi.mode(WIFI_STA);
  Serial.println();
  Serial.print("Connecting to ");
  Serial.println(ssid);
  WiFi.begin(ssid, password);
  while (WiFi.status() != WL_CONNECTED) {
    Serial.print(".");
    delay(500);
  }
  Serial.println();
  Serial.print("ESP32-CAM IP Address: ");
  Serial.println(WiFi.localIP());

  camera_config_t config;
  config.ledc_channel = LEDC_CHANNEL_0;
  config.ledc_timer = LEDC_TIMER_0;
  config.pin_d0 = Y2_GPIO_NUM;
  config.pin_d1 = Y3_GPIO_NUM;
  config.pin_d2 = Y4_GPIO_NUM;
  config.pin_d3 = Y5_GPIO_NUM;
  config.pin_d4 = Y6_GPIO_NUM;
  config.pin_d5 = Y7_GPIO_NUM;
  config.pin_d6 = Y8_GPIO_NUM;
  config.pin_d7 = Y9_GPIO_NUM;
  config.pin_xclk = XCLK_GPIO_NUM;
  config.pin_pclk = PCLK_GPIO_NUM;
  config.pin_vsync = VSYNC_GPIO_NUM;
  config.pin_href = HREF_GPIO_NUM;
  config.pin_sscb_sda = SIOD_GPIO_NUM;
  config.pin_sscb_scl = SIOC_GPIO_NUM;
  config.pin_pwdn = PWDN_GPIO_NUM;
  config.pin_reset = RESET_GPIO_NUM;
  config.xclk_freq_hz = 20000000;
  config.pixel_format = PIXFORMAT_JPEG;

  // init with high specs to pre-allocate larger buffers  使用高规格初始化以预分配更大的缓冲区
  if(psramFound()){
    config.frame_size = FRAMESIZE_SVGA;
    config.jpeg_quality = 10;  //0-63 lower number means higher quality
    config.fb_count = 2;
  } else {
    config.frame_size = FRAMESIZE_CIF;
    config.jpeg_quality = 12;  //0-63 lower number means higher quality
    config.fb_count = 1;
  }

  // camera init
  esp_err_t err = esp_camera_init(&config);
  if (err != ESP_OK) {
    Serial.printf("Camera init failed with error 0x%x", err);
    delay(1000);
    ESP.restart();
  }

  sendPhoto();
}

void loop() {
  unsigned long currentMillis = millis();
  if (currentMillis - previousMillis >= timerInterval) {
    sendPhoto();
    previousMillis = currentMillis;
  }
}

String sendPhoto() {
  String getAll;
  String getBody;

  camera_fb_t * fb = NULL;
  fb = esp_camera_fb_get();if(!fb) {Serial.println("Camera capture failed");delay(1000);ESP.restart();}

  Serial.println("Try Connecting to server: " + serverName);
  if (client.connect(serverName.c_str(), serverPort)) {
    Serial.println("Connection successful!");
    String head = "--RandomNerdTutorials\r\nContent-Disposition: form-data; name=\"imageFile\"; filename=\"esp32-cam.jpg\"\r\nContent-Type: image/jpeg\r\n\r\n";
    String tail = "\r\n--RandomNerdTutorials--\r\n";

    uint32_t imageLen = fb->len;
    uint32_t extraLen = head.length() + tail.length();
    uint32_t totalLen = imageLen + extraLen;

    client.println("POST " + serverPath + " HTTP/1.1");
    client.println("Host: " + serverName);
    client.println("Content-Length: " + String(totalLen));
    client.println("Content-Type: multipart/form-data; boundary=RandomNerdTutorials");
    client.println();
    client.print(head);


    uint8_t *fbBuf = fb->buf;
    size_t fbLen = fb->len;
    for (size_t n=0; n<fbLen; n=n+1024) {
      if (n+1024 < fbLen) {
        client.write(fbBuf, 1024);
        fbBuf += 1024;//指针移动
      }
      else if (fbLen%1024>0) {
        size_t remainder = fbLen%1024;
        client.write(fbBuf, remainder);
      }
    }
    client.print(tail);

    esp_camera_fb_return(fb);

    int timoutTimer = 10000;
    long startTimer = millis();
    boolean state = false;

    while ((startTimer + timoutTimer) > millis()) {
      Serial.print(".");
      delay(100);
      while (client.available()) {
        char c = client.read();
        if (c == '\n') {
          if (getAll.length()==0) { state=true; }
          getAll = "";
        }
        else if (c != '\r') { getAll += String(c); }
        if (state==true) { getBody += String(c); }
        startTimer = millis();
      }
      if (getBody.length()>0) { break; }
    }
    Serial.println();
    client.stop();
    Serial.println(getBody);
  }
  else {
    getBody = "Connection to " + serverName +  " failed.";
    Serial.println(getBody);
  }
  return getBody;
}
其使用的直接编码发送
  uint8_t *fbBuf = fb->buf;
    size_t fbLen = fb->len;
    for (size_t n=0; n<fbLen; n=n+1024) {
      if (n+1024 < fbLen) {
        client.write(fbBuf, 1024);
        fbBuf += 1024;
      }
      else if (fbLen%1024>0) {
        size_t remainder = fbLen%1024;
        client.write(fbBuf, remainder);
      }
    }
    client.print(tail);
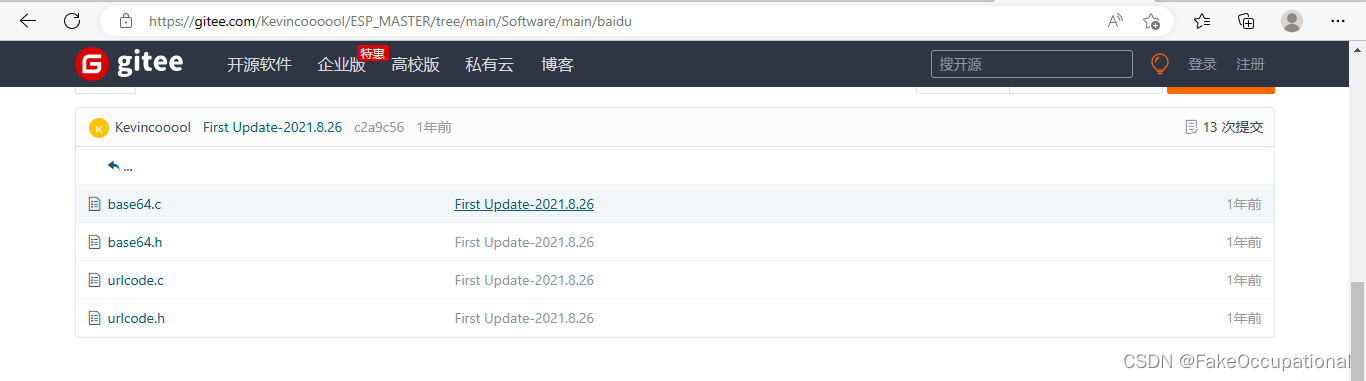
BASE64转码出错
// 代码参照 https://github.com/AHUT-GeekTeam/ESP32CAM_BaiduAI
  String base64image = base64::encode(fb->buf,fb->len);
  uint16_t len = base64image.length();Serial.print(len);// 输出为0
  //看来 base64 库只是为 arduino 芯片的 avr 系列(Nano/Uno/Mega)编写的。ESP32 不是同一个 MCU https://forum.arduino.cc/t/encode-esp32-cam-image-to-bse64/628743   https://forum.arduino.cc/t/esp32-cam-encode-image-to-base64/635807
         for(uint16_t i = 0;i < len;i += 4096) //分段发送
        if(len > i + 4096)
        client.print(base64image.substring(i,i+4096));
        else{
            client.print(base64image.substring(i));
            break;
        }
        client.print(tail);
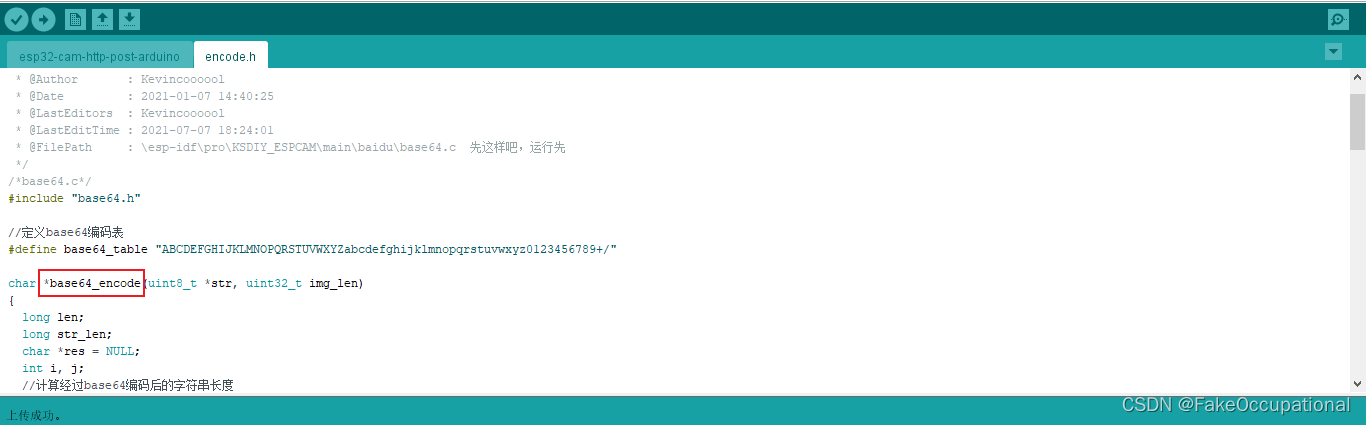
解决方案
完整代码
encode.h
/*
 * @Descripttion :
 * @version      :
 * @Author       : Kevincoooool
 * @Date         : 2021-01-07 14:40:25
 * @LastEditors  : Kevincoooool
 * @LastEditTime : 2021-07-07 18:24:01
 * @FilePath     : \esp-idf\pro\KSDIY_ESPCAM\main\baidu\base64.c  先这样吧,运行先
 */
/*base64.c*/
#include "base64.h"

//定义base64编码表
#define base64_table "ABCDEFGHIJKLMNOPQRSTUVWXYZabcdefghijklmnopqrstuvwxyz0123456789+/"

char *base64_encode(uint8_t *str, uint32_t img_len)
{
  long len;
  long str_len;
  char *res = NULL;
  int i, j;
  //计算经过base64编码后的字符串长度
  str_len = img_len;
  if (str_len % 3 == 0)
    len = str_len / 3 * 4;
  else
    len = (str_len / 3 + 1) * 4;

  res = (char*)malloc(sizeof(char) * len + 1);
  res[len] = '\0';

  //以3个8位字符为一组进行编码
  for (i = 0, j = 0; i < len - 2; j += 3, i += 4)
  {
    res[i] = base64_table[str[j] >> 2];                   //取出第一个字符的前6位并找出对应的结果字符
    res[i + 1] = base64_table[(str[j] & 0x3) << 4 | (str[j + 1] >> 4)];   //将第一个字符的后位与第二个字符的前4位进行组合并找到对应的结果字符
    res[i + 2] = base64_table[(str[j + 1] & 0xf) << 2 | (str[j + 2] >> 6)]; //将第二个字符的后4位与第三个字符的前2位组合并找出对应的结果字符
    res[i + 3] = base64_table[str[j + 2] & 0x3f];             //取出第三个字符的后6位并找出结果字符
  }

  switch (str_len % 3)
  {
  case 1:
    res[i - 2] = '=';
    res[i - 1] = '=';
    break;
  case 2:
    res[i - 1] = '=';
    break;
  }

  return res;
}

//uint8_t *base64_decode(uint8_t *code)
//{
//  //根据base64表,以字符找到对应的十进制数据
//  int table[] = {0, 0, 0, 0, 0, 0, 0, 0, 0, 0, 0, 0,
//           0, 0, 0, 0, 0, 0, 0, 0, 0, 0, 0, 0,
//           0, 0, 0, 0, 0, 0, 0, 0, 0, 0, 0, 0,
//           0, 0, 0, 0, 0, 0, 0, 62, 0, 0, 0,
//           63, 52, 53, 54, 55, 56, 57, 58,
//           59, 60, 61, 0, 0, 0, 0, 0, 0, 0, 0,
//           1, 2, 3, 4, 5, 6, 7, 8, 9, 10, 11, 12,
//           13, 14, 15, 16, 17, 18, 19, 20, 21,
//           22, 23, 24, 25, 0, 0, 0, 0, 0, 0, 26,
//           27, 28, 29, 30, 31, 32, 33, 34, 35,
//           36, 37, 38, 39, 40, 41, 42, 43, 44,
//           45, 46, 47, 48, 49, 50, 51};
//  long len;
//  long str_len;
//  uint8_t *res;
//  int i, j;
//
//  //计算解码后的字符串长度
//  len = strlen((const char *)code);
//  //判断编码后的字符串后是否有=
//  if (strstr((const char *)code, "=="))
//    str_len = len / 4 * 3 - 2;
//  else if (strstr((const char *)code, "="))
//    str_len = len / 4 * 3 - 1;
//  else
//    str_len = len / 4 * 3;
//
//  res = malloc(sizeof(uint8_t) * str_len + 1);
//  res[str_len] = '\0';
//
//  //以4个字符为一位进行解码
//  for (i = 0, j = 0; i < len - 2; j += 3, i += 4)
//  {
//    res[j] = ((uint8_t)table[code[i]]) << 2 | (((uint8_t)table[code[i + 1]]) >> 4);       //取出第一个字符对应base64表的十进制数的前6位与第二个字符对应base64表的十进制数的后2位进行组合
//    res[j + 1] = (((uint8_t)table[code[i + 1]]) << 4) | (((uint8_t)table[code[i + 2]]) >> 2); //取出第二个字符对应base64表的十进制数的后4位与第三个字符对应bas464表的十进制数的后4位进行组合
//    res[j + 2] = (((uint8_t)table[code[i + 2]]) << 6) | ((uint8_t)table[code[i + 3]]);      //取出第三个字符对应base64表的十进制数的后2位与第4个字符进行组合
//  }
//
//  return res;
//}
主文件
/*
Rui Santos
Complete project details at https://RandomNerdTutorials.com/esp32-cam-post-image-photo-server/
Permission is hereby granted, free of charge, to any person obtaining a copy
of this software and associated documentation files.
The above copyright notice and this permission notice shall be included in all
copies or substantial portions of the Software.
*/
#include <Arduino.h>
#include <WiFi.h>
#include "soc/soc.h"
#include "soc/rtc_cntl_reg.h"
#include "esp_camera.h"
#include <Base64.h>
#include "encode.h"// base64_buf = base64_encode(_jpg_buf, _jpg_buf_len);
const char* ssid = "------";
const char* password = "-----";
String serverName = "192.168.31.28"; // REPLACE WITH YOUR Raspberry Pi IP ADDRESS
//String serverName = "example.com"; // OR REPLACE WITH YOUR DOMAIN NAME
String serverPath = "/upload.php"; // The default serverPath should be upload.php
const int serverPort = 5001;
WiFiClient client;
// CAMERA_MODEL_AI_THINKER
#define PWDN_GPIO_NUM 32
#define RESET_GPIO_NUM -1
#define XCLK_GPIO_NUM 0
#define SIOD_GPIO_NUM 26
#define SIOC_GPIO_NUM 27
#define Y9_GPIO_NUM 35
#define Y8_GPIO_NUM 34
#define Y7_GPIO_NUM 39
#define Y6_GPIO_NUM 36
#define Y5_GPIO_NUM 21
#define Y4_GPIO_NUM 19
#define Y3_GPIO_NUM 18
#define Y2_GPIO_NUM 5
#define VSYNC_GPIO_NUM 25
#define HREF_GPIO_NUM 23
#define PCLK_GPIO_NUM 22
const int timerInterval = 30000; // time between each HTTP POST image
unsigned long previousMillis = 0; // last time image was sent
void setup() {
WRITE_PERI_REG(RTC_CNTL_BROWN_OUT_REG, 0);
Serial.begin(115200);
WiFi.mode(WIFI_STA);
Serial.println();
Serial.print("Connecting to ");
Serial.println(ssid);
WiFi.begin(ssid, password);
while (WiFi.status() != WL_CONNECTED) {
Serial.print(".");
delay(500);
}
Serial.println();
Serial.print("ESP32-CAM IP Address: ");
Serial.println(WiFi.localIP());
camera_config_t config;
config.ledc_channel = LEDC_CHANNEL_0;
config.ledc_timer = LEDC_TIMER_0;
config.pin_d0 = Y2_GPIO_NUM;
config.pin_d1 = Y3_GPIO_NUM;
config.pin_d2 = Y4_GPIO_NUM;
config.pin_d3 = Y5_GPIO_NUM;
config.pin_d4 = Y6_GPIO_NUM;
config.pin_d5 = Y7_GPIO_NUM;
config.pin_d6 = Y8_GPIO_NUM;
config.pin_d7 = Y9_GPIO_NUM;
config.pin_xclk = XCLK_GPIO_NUM;
config.pin_pclk = PCLK_GPIO_NUM;
config.pin_vsync = VSYNC_GPIO_NUM;
config.pin_href = HREF_GPIO_NUM;
config.pin_sscb_sda = SIOD_GPIO_NUM;
config.pin_sscb_scl = SIOC_GPIO_NUM;
config.pin_pwdn = PWDN_GPIO_NUM;
config.pin_reset = RESET_GPIO_NUM;
config.xclk_freq_hz = 20000000;
config.pixel_format = PIXFORMAT_JPEG;
// init with high specs to pre-allocate larger buffers 使用高规格初始化以预分配更大的缓冲区
if(psramFound()){
config.frame_size = FRAMESIZE_SVGA;
config.jpeg_quality = 10; //0-63 lower number means higher quality
config.fb_count = 2;
} else {
config.frame_size = FRAMESIZE_CIF;
config.jpeg_quality = 12; //0-63 lower number means higher quality
config.fb_count = 1;
}
// camera init
esp_err_t err = esp_camera_init(&config);
if (err != ESP_OK) {
Serial.printf("Camera init failed with error 0x%x", err);
delay(1000);
ESP.restart();
}
sendPhoto();
}
void loop() {
unsigned long currentMillis = millis();
if (currentMillis - previousMillis >= timerInterval) {
sendPhoto();
previousMillis = currentMillis;
}
}
String sendPhoto() {
String getAll;
String getBody;
camera_fb_t * fb = NULL;
fb = esp_camera_fb_get();if(!fb) {Serial.println("Camera capture failed");delay(1000);ESP.restart();}
Serial.println("Try Connecting to server: " + serverName);
if (client.connect(serverName.c_str(), serverPort)) {
Serial.println("Connection successful!");
String head = "--RandomNerdTutorials\r\nContent-Disposition: form-data; name=\"imageFile\"; filename=\"esp32-cam.jpg\"\r\nContent-Type: image/jpeg\r\n\r\n";
String tail = "\r\n--RandomNerdTutorials--\r\n";
uint32_t imageLen = fb->len; uint32_t extraLen = head.length() + tail.length(); uint32_t totalLen = imageLen + extraLen;
client.println("POST " + serverPath + " HTTP/1.1"); client.println("Host: " + serverName); client.println("Content-Length: " + String(totalLen));
client.println("Content-Type: multipart/form-data; boundary=RandomNerdTutorials"); client.println(); client.print(head);
// Serial.printf("Picture file name: %s\n", photo_path);//保存
// File file = SPIFFS.open(photo_path, FILE_WRITE);
// if (!file) {
// Serial.println("Failed to open file in writing mode");
// }
// else {
// file.write(fb->buf, fb->len);
// Serial.print("The picture has been saved in ");
// Serial.print(photo_path);
// Serial.print(" - Size: ");
// Serial.print(file.size());
// Serial.println(" bytes");
// }
// file.close();
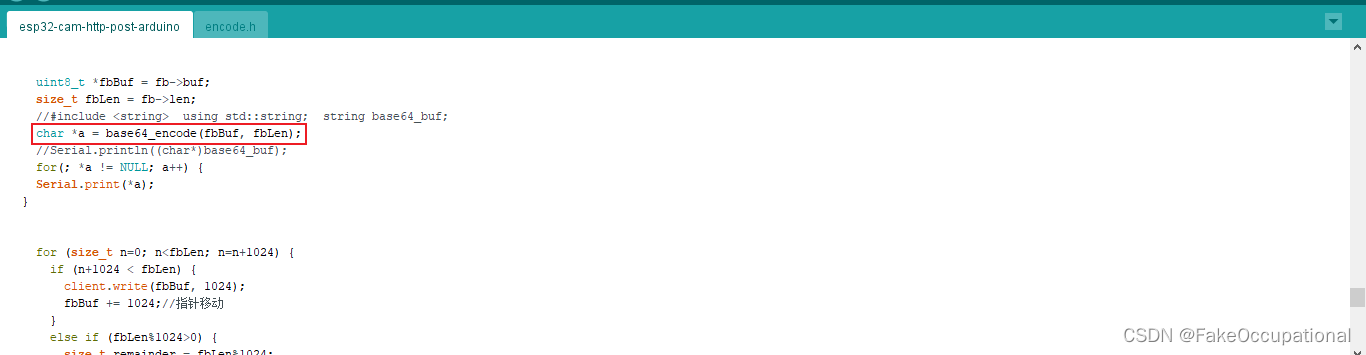
uint8_t *fbBuf = fb->buf;
size_t fbLen = fb->len;
//#include <string> using std::string; string base64_buf;
char *a = base64_encode(fbBuf, fbLen);
//Serial.println((char*)base64_buf);
for(; *a != NULL; a++) {
Serial.print(*a);
}
for (size_t n=0; n<fbLen; n=n+1024) {
if (n+1024 < fbLen) {
client.write(fbBuf, 1024);
fbBuf += 1024;//指针移动
}
else if (fbLen%1024>0) {
size_t remainder = fbLen%1024;
client.write(fbBuf, remainder);
}
}
client.print(tail);
esp_camera_fb_return(fb);
int timoutTimer = 10000;
long startTimer = millis();
boolean state = false;
while ((startTimer + timoutTimer) > millis()) {
Serial.print(".");
delay(100);
while (client.available()) {
char c = client.read();
if (c == '\n') {
if (getAll.length()==0) { state=true; }
getAll = "";
}
else if (c != '\r') { getAll += String(c); }
if (state==true) { getBody += String(c); }
startTimer = millis();
}
if (getBody.length()>0) { break; }
}
Serial.println();
client.stop();
Serial.println(getBody);
}
else {
getBody = "Connection to " + serverName + " failed.";
Serial.println(getBody);
}
return getBody;
}
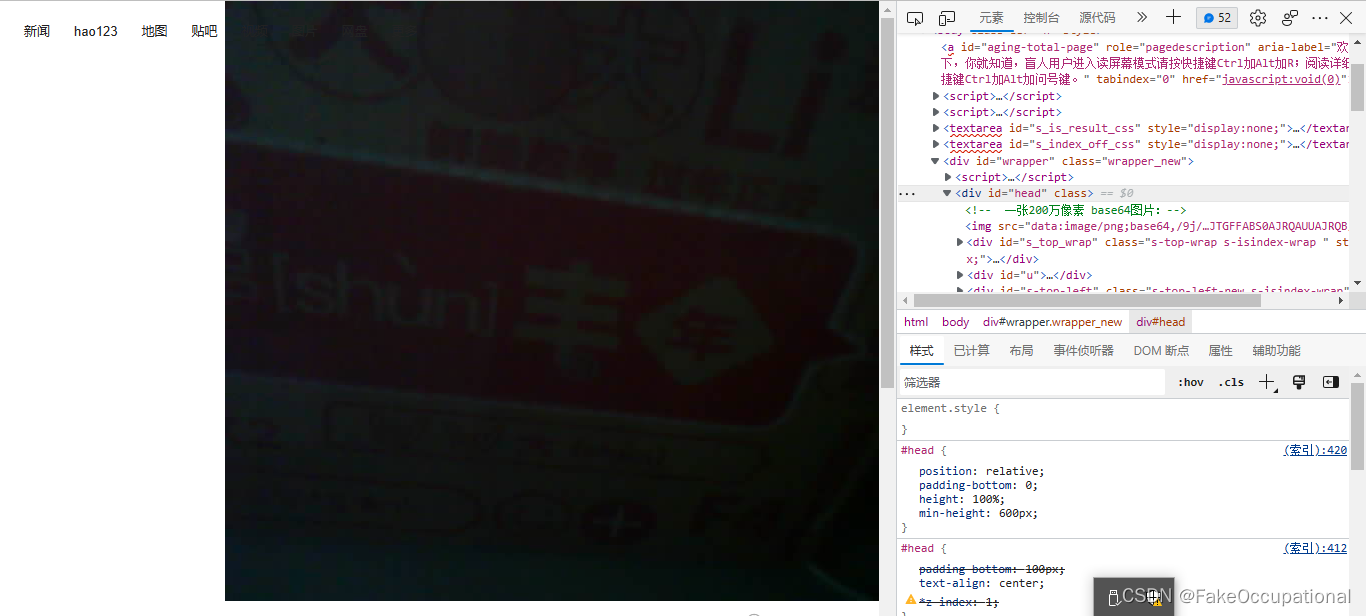
输出结果并可视化

我把它复制下来,随便找个前端可视化了一下(嗯,可能焦距不对,色彩也不行,但是跑通了)


 该代码示例展示了如何使用ESP32-CAM模块捕获JPEG图像并通过WiFi连接上传至服务器。程序遇到了base64编码库不适用于ESP32的问题,随后找到了并应用了一个自定义的base64编码函数来替代,成功实现了图片的编码和发送。


 1800
1800

 被折叠的 条评论
为什么被折叠?
被折叠的 条评论
为什么被折叠?
 到【灌水乐园】发言


