


基本思想:学习oak双目相机实现rgb彩色图和depth深度图的移动测距
前言:
设备型号:OAK-D-Pro
一、环境配置参考
台式机ubuntu系统调用OAK相机_MFT小白的博客-优快云博客
二、python版本
python调用OAK相机实现人脸检测的简单demo_MFT小白的博客-优快云博客
三、测试
其中 utility 文件夹为oak官网 depthai_cpp_example 文件夹中
获取地址:GitHub - richard-xx/depthai_cpp_example
git clone https://github.com/richard-xx/depthai_cpp_example.gitcmakelist.txt
cmake_minimum_required(VERSION 3.16)
project(test_depthai)

set(CMAKE_CXX_STANDARD 14)
find_package(OpenCV REQUIRED)
find_package(depthai CONFIG REQUIRED)

include_directories(${CMAKE_CURRENT_LIST_DIR}/include)
include_directories(${CMAKE_CURRENT_LIST_DIR}/include/utility)

add_executable(test_depthai main.cpp)

target_link_libraries(test_depthai ${OpenCV_LIBS} depthai::opencv)
main.cpp
#include <iostream>
#include "depthai/depthai.hpp"
#include "utility.hpp"
#define Rgb 0
#define spatial_location_calculator 1
static constexpr float stepSize = 0.05f;
static std::atomic<bool> newConfig{false};
#if Rgb
int main() {
dai::Pipeline pipeline;
auto camRgb = pipeline.create<dai::node::ColorCamera>();
auto xoutVideo = pipeline.create<dai::node::XLinkOut>();
xoutVideo->setStreamName("video");
camRgb->setBoardSocket(dai::CameraBoardSocket::RGB);
camRgb->setResolution(dai::ColorCameraProperties::SensorResolution::THE_1080_P);
camRgb->setVideoSize(1920, 1080);
camRgb->video.link(xoutVideo->input);
xoutVideo->input.setBlocking(false);
xoutVideo->input.setQueueSize(1);
dai::Device device(pipeline);
auto video = device.getOutputQueue("video");
while (true) {
auto videoIn = video->get<dai::ImgFrame>();
cv::Mat frame = videoIn->getCvFrame();
cv::imshow("video", frame);
int key = cv::waitKey(1);
if (key == 'q' || key = 27) {
return 0;
}
}
return 0;
}
#elif spatial_location_calculator
int main() {
using namespace std;
// Create pipeline
dai::Pipeline pipeline;
dai::Device device;
// Define sources and outputs
auto camRgb = pipeline.create<dai::node::ColorCamera>();
auto monoLeft = pipeline.create<dai::node::MonoCamera>();
auto monoRight = pipeline.create<dai::node::MonoCamera>();
auto stereo = pipeline.create<dai::node::StereoDepth>();
auto spatialDataCaulator = pipeline.create<dai::node::SpatialLocationCalculator>();
// Properties
camRgb->setBoardSocket(dai::CameraBoardSocket::RGB);
camRgb->setResolution(dai::ColorCameraProperties::SensorResolution::THE_1080_P);
camRgb->setPreviewSize(1920, 1080);
monoLeft->setBoardSocket(dai::CameraBoardSocket::LEFT);
monoLeft->setResolution(dai::MonoCameraProperties::SensorResolution::THE_720_P);
monoRight->setBoardSocket(dai::CameraBoardSocket::RIGHT);
monoRight->setResolution(dai::MonoCameraProperties::SensorResolution::THE_720_P);
try {
auto calibData = device.readCalibration2();
auto lensPosition = calibData.getLensPosition(dai::CameraBoardSocket::RGB);
if (lensPosition) {
camRgb->initialControl.setManualFocus(lensPosition);
}
} catch (const std::exception &ex) {
std::cout << ex.what() << std::endl;
return 1;
}
bool lrcheck = true;
bool subpixel = true;
stereo->setDefaultProfilePreset(dai::node::StereoDepth::PresetMode::HIGH_ACCURACY);
stereo->setLeftRightCheck(lrcheck);
stereo->setSubpixel(subpixel);
stereo->setDepthAlign(dai::CameraBoardSocket::RGB);
// config
dai::Point2f topLeft(0.4f, 0.4f);
dai::Point2f bottomRight(0.6f, 0.6f);
dai::SpatialLocationCalculatorConfigData config;
config.depthThresholds.lowerThreshold = 100;
config.depthThresholds.upperThreshold = 5000;
config.roi = dai::Rect(topLeft, bottomRight);
spatialDataCaulator->initialConfig.addROI(config);
spatialDataCaulator->inputConfig.setWaitForMessage(false);
auto xoutRgb = pipeline.create<dai::node::XLinkOut>();
auto xoutDepth = pipeline.create<dai::node::XLinkOut>();
auto xouSpatialData = pipeline.create<dai::node::XLinkOut>();
auto xinspatialCalcConfig = pipeline.create<dai::node::XLinkIn>();
xoutRgb->setStreamName("rgb");
xoutDepth->setStreamName("depth");
xouSpatialData->setStreamName("spatialData");
xinspatialCalcConfig->setStreamName("spatialCalcConfig");
// Linking
camRgb->video.link(xoutRgb->input);
monoLeft->out.link(stereo->left);
monoRight->out.link(stereo->right);
stereo->depth.link(spatialDataCaulator->inputDepth);
spatialDataCaulator->passthroughDepth.link(xoutDepth->input);
spatialDataCaulator->out.link(xouSpatialData->input);
xinspatialCalcConfig->out.link(spatialDataCaulator->inputConfig);
// Connect to device and start pipeline
device.startPipeline(pipeline);
// Output queue will be used to get the depth frames from the outputs defined above
auto rgbQueue = device.getOutputQueue("rgb",8,false);
auto depthQueue = device.getOutputQueue("depth", 8, false);
auto spatialCalcQueue = device.getOutputQueue("spatialData", 8, false);
auto spatialCalcConfigInQueue = device.getInputQueue("spatialCalcConfig");
auto color = cv::Scalar(255,255,255);
std::cout << "Use WASD keys to move ROI!" << std::endl;
while (true) {
auto inRgb = rgbQueue->get<dai::ImgFrame>();
auto inDepth = depthQueue->get<dai::ImgFrame>();
cv::Mat rgbFrame = inRgb->getCvFrame();
cv::Mat depthFrame = inDepth->getCvFrame();
cv::Mat depthFrameColor;
cv::normalize(depthFrame, depthFrameColor, 255, 0, cv::NORM_INF, CV_8UC1);
cv::equalizeHist(depthFrameColor, depthFrameColor);
cv::applyColorMap(depthFrameColor, depthFrameColor, cv::COLORMAP_JET);
auto spatialData = spatialCalcQueue->get<dai::SpatialLocationCalculatorData>()->getSpatialLocations();
for(auto depthData : spatialData) {
auto roi = depthData.config.roi;
roi = roi.denormalize(depthFrameColor.cols, depthFrameColor.rows);
auto xmin = (int)roi.topLeft().x;
auto ymin = (int)roi.topLeft().y;
auto xmax = (int)roi.bottomRight().x;
auto ymax = (int)roi.bottomRight().y;
auto depthMin = depthData.depthMin;
auto depthMax = depthData.depthMax;
cv::rectangle(depthFrameColor, cv::Rect(cv::Point(xmin, ymin), cv::Point(xmax, ymax)), color, cv::FONT_HERSHEY_SIMPLEX);
std::stringstream depthX;
depthX << "X: " << (int)depthData.spatialCoordinates.x << " mm";
cv::putText(depthFrameColor, depthX.str(), cv::Point(xmin + 10, ymin + 20), cv::FONT_HERSHEY_TRIPLEX, 0.5, color);
std::stringstream depthY;
depthY << "Y: " << (int)depthData.spatialCoordinates.y << " mm";
cv::putText(depthFrameColor, depthY.str(), cv::Point(xmin + 10, ymin + 35), cv::FONT_HERSHEY_TRIPLEX, 0.5, color);
std::stringstream depthZ;
depthZ << "Z: " << (int)depthData.spatialCoordinates.z << " mm";
cv::putText(depthFrameColor, depthZ.str(), cv::Point(xmin + 10, ymin + 50), cv::FONT_HERSHEY_TRIPLEX, 0.5, color);
cv::rectangle(rgbFrame, cv::Rect(cv::Point(xmin, ymin), cv::Point(xmax, ymax)), color, cv::FONT_HERSHEY_SIMPLEX);
std::stringstream depthX_;
depthX_ << "X: " << (int)depthData.spatialCoordinates.x << " mm";
cv::putText(rgbFrame, depthX_.str(), cv::Point(xmin + 10, ymin + 20), cv::FONT_HERSHEY_TRIPLEX, 0.5, color);
std::stringstream depthY_;
depthY_ << "Y: " << (int)depthData.spatialCoordinates.y << " mm";
cv::putText(rgbFrame, depthY_.str(), cv::Point(xmin + 10, ymin + 35), cv::FONT_HERSHEY_TRIPLEX, 0.5, color);
std::stringstream depthZ_;
depthZ_ << "Z: " << (int)depthData.spatialCoordinates.z << " mm";
cv::putText(rgbFrame, depthZ_.str(), cv::Point(xmin + 10, ymin + 50), cv::FONT_HERSHEY_TRIPLEX, 0.5, color);
}
// Show the frame
cv::imshow("rgb", rgbFrame);
cv::imshow("depth", depthFrameColor);
int key = cv::waitKey(1);
switch(key) {
case 'q':
return 0;
case 'w':
if (topLeft.y - stepSize >= 0) {
topLeft.y -= stepSize;
bottomRight.y -= stepSize;
newConfig = true;
}
break;
case 'a':
if (topLeft.x - stepSize >= 0) {
topLeft.x -= stepSize;
bottomRight.x -= stepSize;
newConfig = true;
}
break;
case 's':
if (bottomRight.y + stepSize <= 1) {
topLeft.y += stepSize;
bottomRight.y += stepSize;
newConfig = true;
}
break;
case 'd':
if (bottomRight.x + stepSize <= 1) {
topLeft.x += stepSize;
bottomRight.x += stepSize;
newConfig = true;
}
break;
default:
break;
}
if(newConfig) {
config.roi = dai::Rect(topLeft, bottomRight);
dai::SpatialLocationCalculatorConfig cfg;
cfg.addROI(config);
spatialCalcConfigInQueue->send(cfg);
newConfig = false;
}
}
return 0;
}
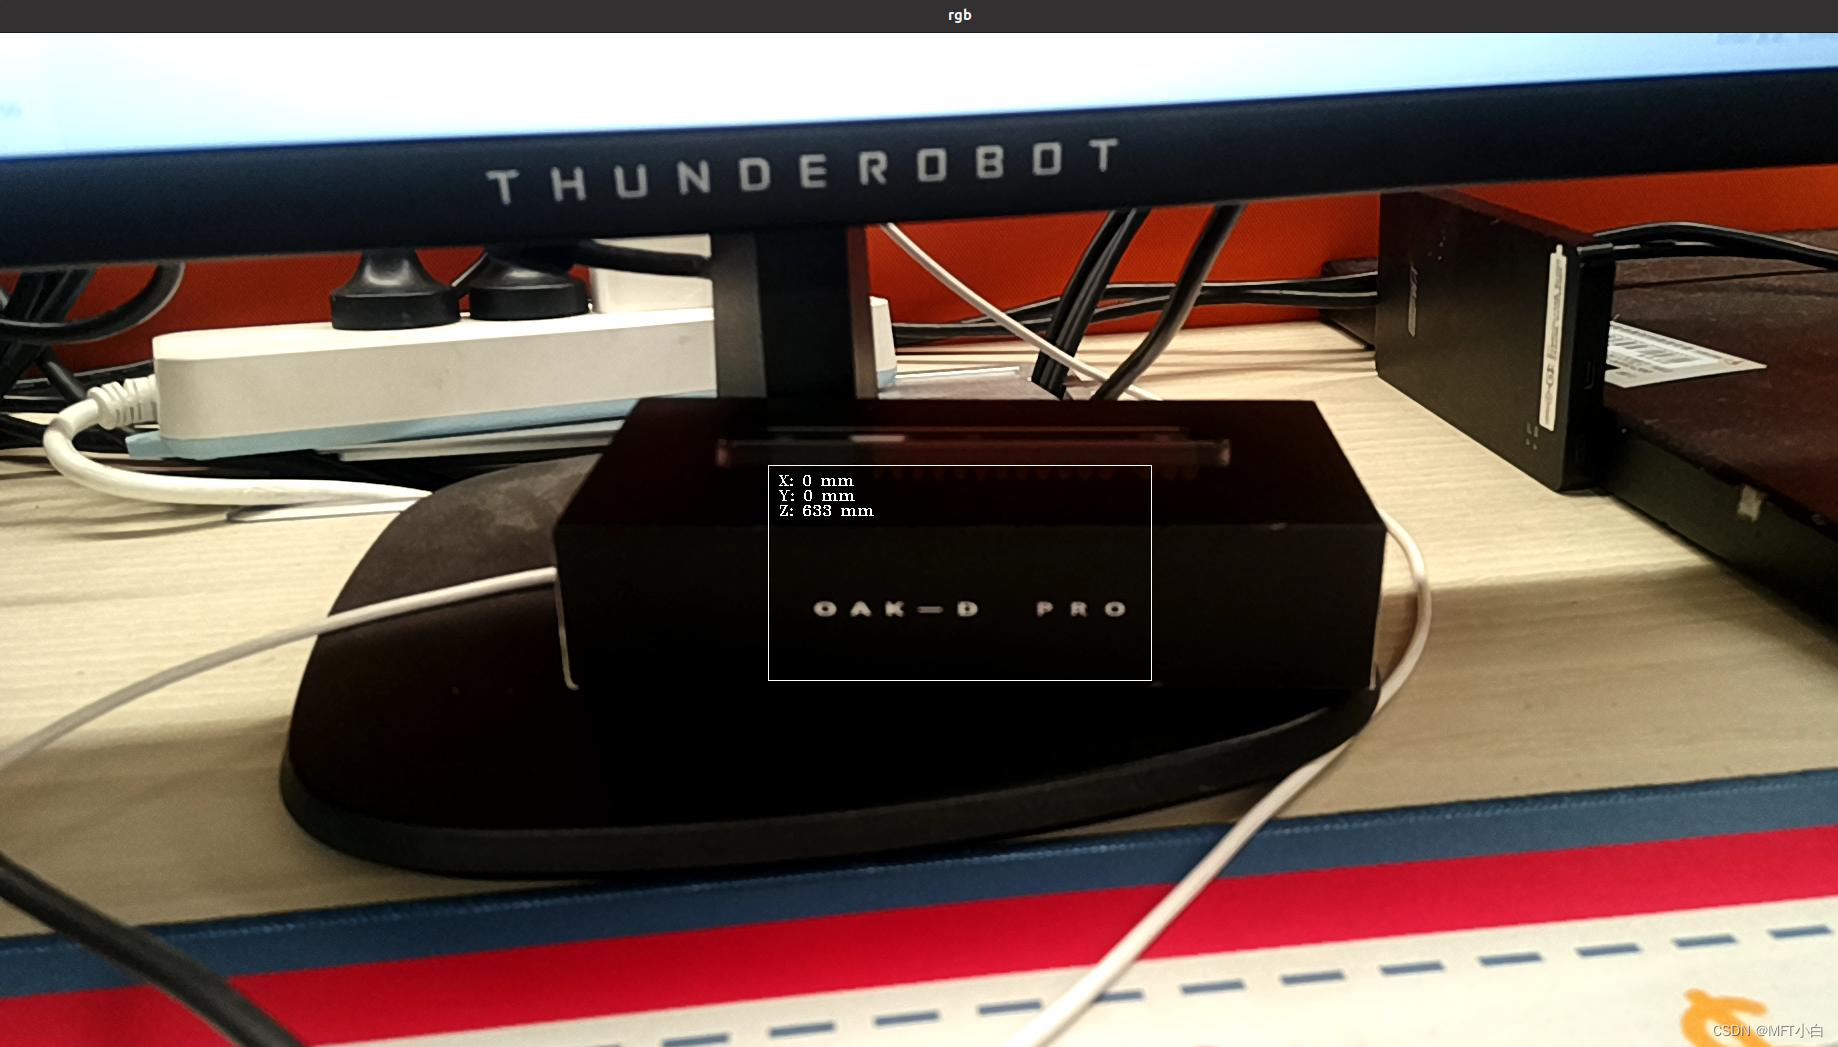
#endif效果图:

参考文章:


 9955
9955

 被折叠的 条评论
为什么被折叠?
被折叠的 条评论
为什么被折叠?
 到【灌水乐园】发言


