


Pytorch的基本数据结构是张量Tensor。张量的定义有很多,在机器学习中我们可以简单理解为多维数组。Pytorch的张量和numpy中的array很类似。
本节我们主要介绍张量的参数、数据类型、张量的维度、张量的尺寸、张量和numpy数组等基本概念。
文章目录
一、数据类型
张量的数据类型和numpy.array基本一一对应,但是不支持str类型。
具体如下:
| torch.float64(torch.double) | torch.float32(torch.float) | torch.float16 |
|---|---|---|
| torch.int64(torch.long), | torch.int32(torch.int) | torch.int16 |
| torch.int8 | torch.uint8 | torch.bool |
1、自动推断数据类型
import torch
import numpy as np
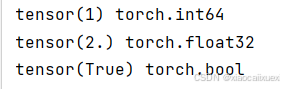
#自动推断数据类型
i = torch.tensor(1)
print(i,i.dtype)
x = torch.tensor(2.0)
print(x,x.dtype)
b = torch.tensor(True)
print(b,b.dtype)
运行结果如下:
2、指定数据类型
i = torch.tensor(1,dtype = torch.int32)
print(i,i.dtype)
x = torch.tensor(2.0,dtype = torch.double)#torch.double等价于torch.float64
print(x,x.dtype)
运行结果如下:

3.不同类型进行转换
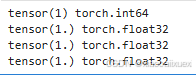
i = torch.tensor(1)
print(i,i.dtype)
x = i.float()#调用float方法转换成浮点型类型
print(x,x.dtype)
y = i.type(torch.float)#使用type函数转换成浮点类型
print(y,y.dtype)
z = i.type_as(x)#使用type_as方法转换成某个Tensor相同类型
print(z,z.dtype)
#思考如何使用type_as方法转换成float64类型
运行结果如下:
二、张量的维度
不同类型的数据可以用不同维度(dimension)的张量来表示。
标量为0维张量,向量为1维张量,矩阵为2维张量。
彩色图像有rgb三个通道,可以表示为3维张量。
视频还有时间维,可以表示为4维张量。
可以简单地总结为:有几层中括号,就是多少维的张量。
1、标量(0维张量)
scalar = torch.tensor(True)
print(scalar)
print(scalar.dim())#标量,0维向量
运行结果如下:

2、向量(1维张量)
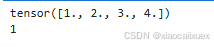
vector = torch.tensor([1.0,2.0,3.0,4.0])
print(vector)
print(vector.dim())#向量,1维张量
运行结果如下:
3、矩阵(2维张量)
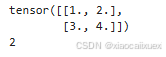
matrix = torch.tensor([[1.0,2.0],[3.0,4.0]])
print(matrix)
print(matrix.dim())
运行结果如下:
4、3维张量
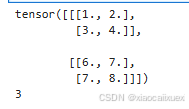
tensor3 = torch.tensor([[[1.0,2.0],[3.0,4.0]],[[6.0,7.0],[7.0,8.0]]])
print(tensor3)
print(tensor3.dim())
#同理可得4维张量及更高维度的张量,请自行尝试
运行结果如下:
三、张量的尺寸
可以使用 shape属性或者 size()方法查看张量在每一维的长度.
可以使用view方法改变张量的尺寸。
如果view方法改变尺寸失败,可以使用reshape方法
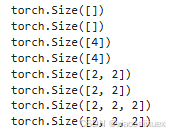
1、查看每一维的长度
#基于上面代码直接运行
print(scalar.size())
print(scalar.shape)
print(vector.size())
print(vector.shape)
print(matrix.size())
print(matrix.shape)
print(tensor3.size())
print(tensor3.shape)
运行结果如下:
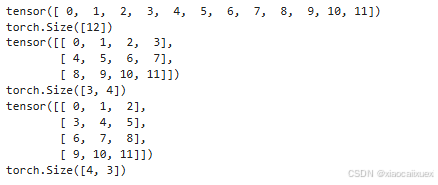
2、view方法改变张量尺寸
vector = torch.arange(0,12)
print(vector)
print(vector.shape)

matrix34 = vector.view(3,4)
print(matrix34)
print(matrix34.shape)

matrix43 = vector.view(4,-1)#-1表示该位置长度由程序自动推断
print(matrix43)
print(matrix43.shape)
运行结果如下:
matrix26 = torch.arange(0,12).view(2,6)
print(matrix26)
print(matrix26.shape)

#转置操作让张量存储结构扭曲,直接使用view会失败,可以用reshape方法
matrix62 = matrix26.t()
print(matrix62.is_contiguous())

#直接使用view会失败,可以使用reshape方法
# matrix34 = matrix62.view(3,4)
matrix34 = matrix62.reshape(3,4)
#等价于matrix34 = matrix62.contiguous().view(3,4)
print(matrix34)
四、张量和numpy数组
可以用numpy方法从Tensor得到numpy数组,也可以用torch.from_numpy从numpy数组得到Tensor。
这两种方法关联的Tensor和numpy数组是共享数据内存的。
如果改变其中一个,另外一个的值也会发生改变。
如果有需要,可以用张量的clone方法拷贝张量,中断这种关联。
此外,还可以使用item方法从标量张量得到对应的Python数值。
使用tolist方法从张量得到对应的Python数值列表。
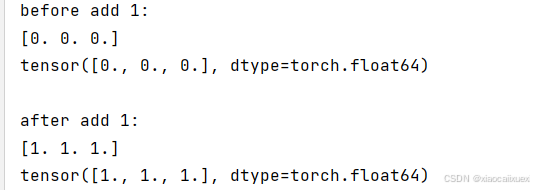
#torch.from_numpy函数从numpy数组得到Tensor
arr = np.zeros(3)
tensor = torch.from_numpy(arr)
print("before add 1:")
print(arr)
print(tensor)

print("\nafter add 1:")
np.add(arr,1,out = arr) #结果将存储在arr中,而不是返回新数组
print(arr)
print(tensor)
运行结果如下:
2、numpy方法从Tensor得到numpy数组
tensor = torch.zeros(3)
arr = tensor.numpy()
print("before add 1:")
print(tensor)
print(arr)

print("\nafter add 1:")
tensor.add_(1)
print(tensor)
print(arr)
运行结果如下:
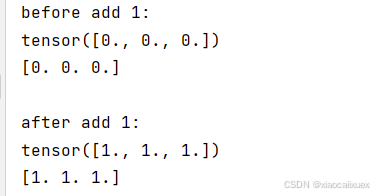
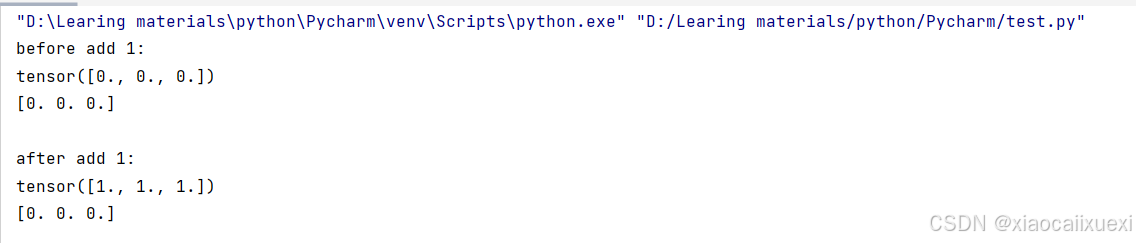
3.使用clone()方法拷贝张量
tensor = torch.zeros(3)

#使用clone()方法拷贝张量,拷贝完的张量和原始张量内存独立
arr = tensor.clone().numpy()
print("before add 1:")
print(tensor)
print(arr)
print("\nafter add 1:")
tensor.add_(1)
print(tensor)
print(arr)
运行结果如下:
4.使用item方法和tolist方法把张量转换成python输值和数值列表
scalar = torch.tensor(1.0)
s = scalar.item()
print(s)
print(type(s))

tensor = torch.rand(2,2)
t = tensor.tolist()
print(t)
print(type(t))
运行结果如下:


 2238
2238

 被折叠的 条评论
为什么被折叠?
被折叠的 条评论
为什么被折叠?
 到【灌水乐园】发言


