


目录
背景简介
最近几天项目到达收尾阶段,需要在真实传感器上运行测试一下我们的系统。实验室正好拥有 Inter RealSense L515 这款传感器,故计划基于此测试。但是同门的师姐都是在 ROS 系统上运行,网上的资料也大多如此,最次也是 Ubuntu 系统,鲜少有 Win10 下的相关中文资料。但是 L515 本身是支持 Win10 系统的,故撰此博客记录配置过程,以飨后来者。
Step 1 准备 SDK
登陆IntelRealSense的官方github,网址如右:https://github.com/IntelRealSense/librealsense/releases
这里顺便提供一下IntelRealSense的官网上介绍SDK的部分,上面的很多资料以及介绍都是非常有用的:https://www.intelrealsense.com/sdk-2/
目前(2021年12月9日)的最新版本是Intel® RealSense™ SDK 2.0 (v2.49.0),在对应位置的Assets模块中,下载:Intel.RealSense.SDK-WIN10-2.49.0.3474.exe,一共791MB
不过不知为何,上述链接死活就是没法下载,类似的情况之前其实也遇到过。最后没办法,在优快云上搜索到了别人上传的该安装文件,最后通过万能的某宝成功搞了下来,并一路默认完成安装。
这里提供一下上述SDK的网盘下载地址:
链接:https://pan.baidu.com/s/1_rtzxeIq2thyZd58ngeasw
提取码:qri0
Step 2 连接设备
&esmp; L515 的连接方法非常简单,用自带的 USB 连接线将传感器与 PC 连接即可。插上即可,不必点击任何按钮。
这部分的详细教程在官网上有图文并茂的介绍,不过其实都是傻瓜式操作,不看也罢。这里提供下官网教程链接:https://www.intelrealsense.com/get-started-depth-camera/
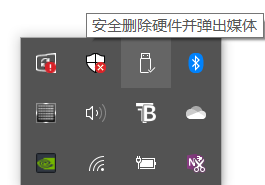
成功连接后,电脑上应该有下列图标的提示。
然后打开 SDK 中安装的Intel RealSense Viewer
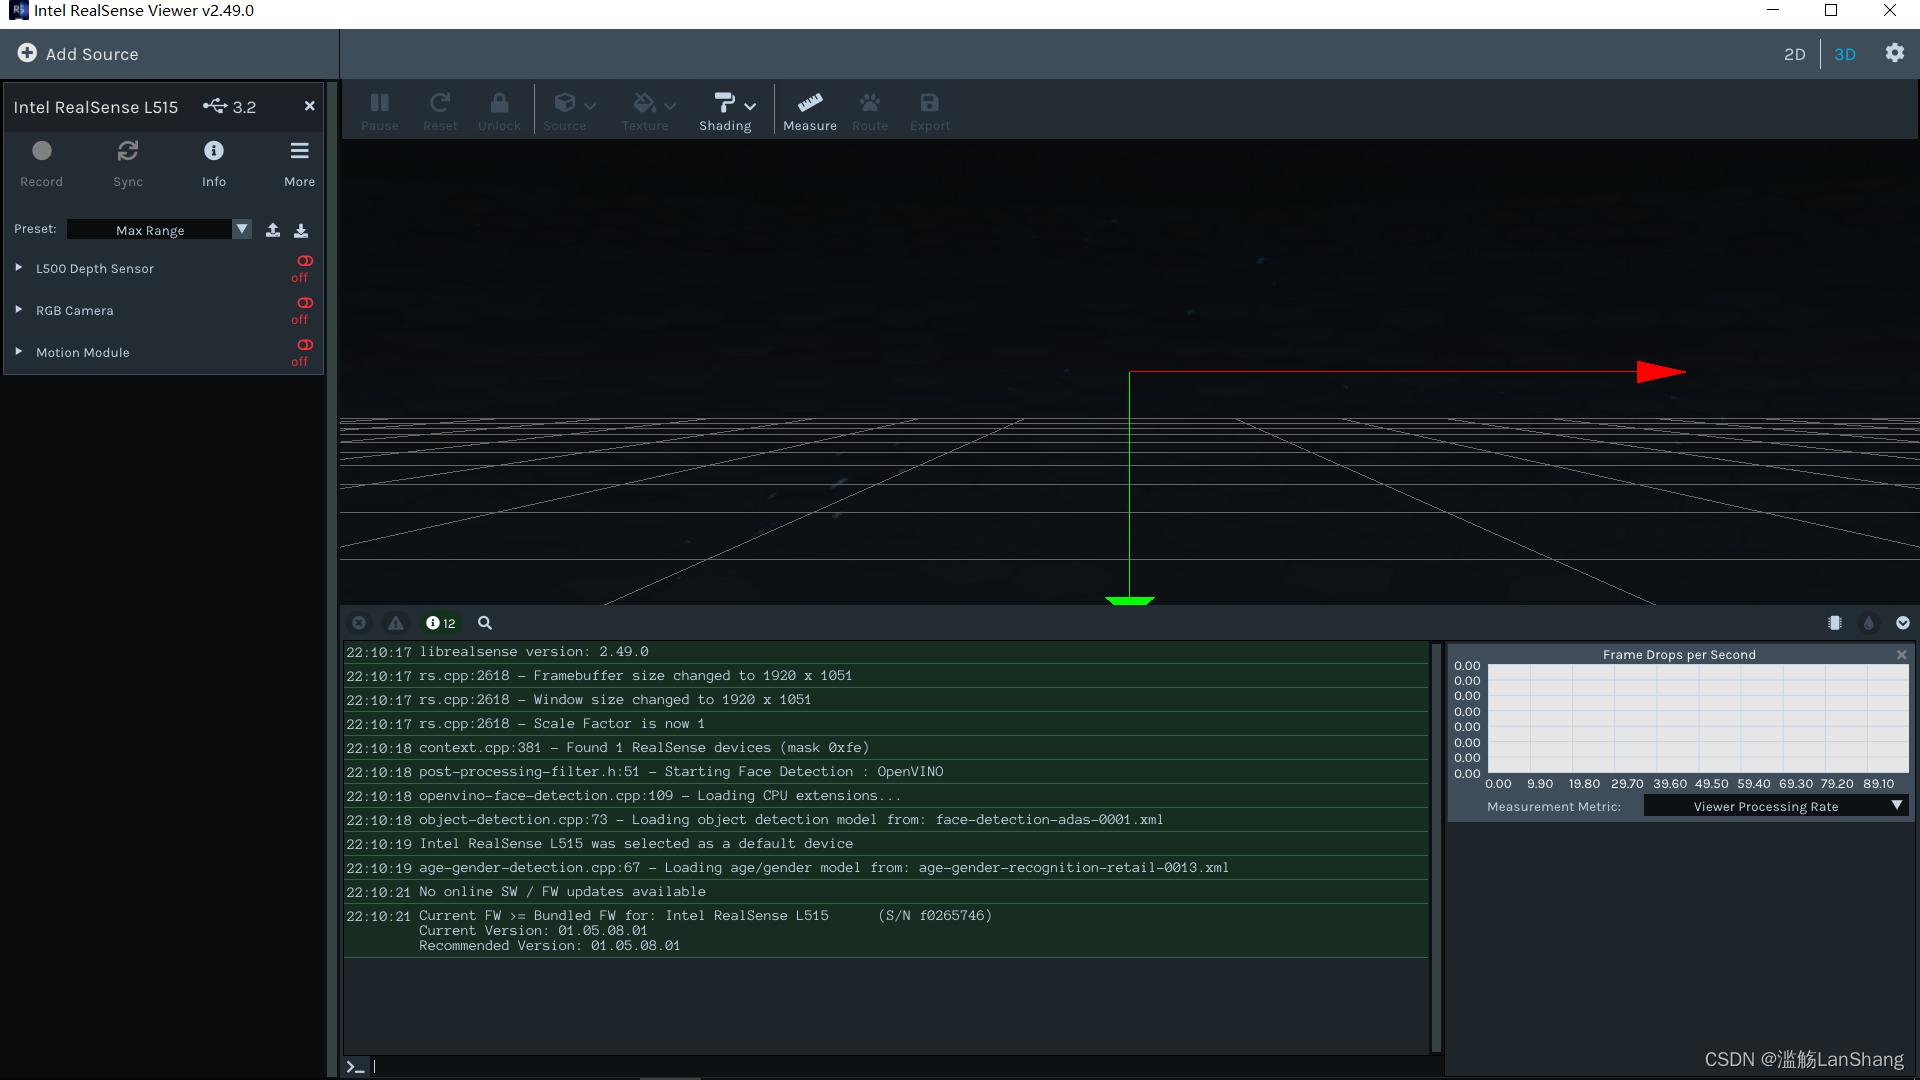
可以在左侧看到 L515 已经被成功识别,将下侧三个红色的按钮中的L500 Depth Sensor以及Motion Module点开后,就可以在右侧的空间中看到传感器当前的深度画面如下:
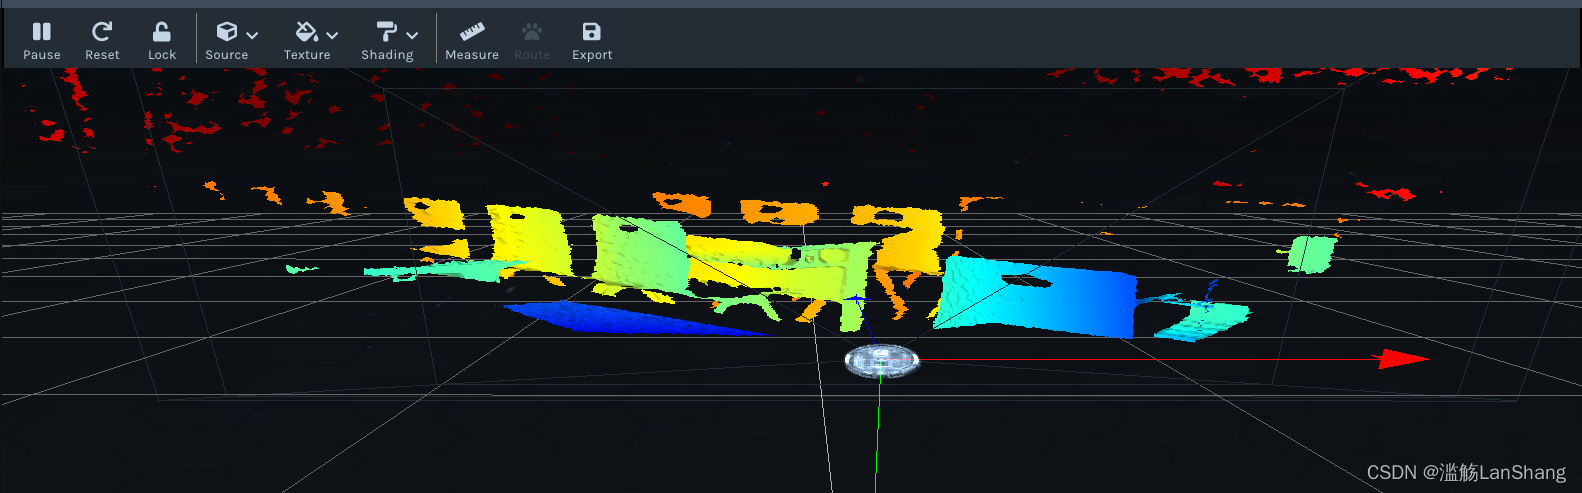 可以看到一排排的桌椅,此时设备就已连接成功了。
Step 3 测试例程
打开Intel RealSense SDK 2.0的安装目录中的samples文件夹,可见名为rs-examples.sln的 VS2015 解决方案,此即 SDK 自带的例程。该解决方案在我电脑上的绝对路径是:C:\Program Files (x86)\Intel RealSense SDK 2.0\samples\rs-examples.sln,此应是默认安装路径,读者可以参考。
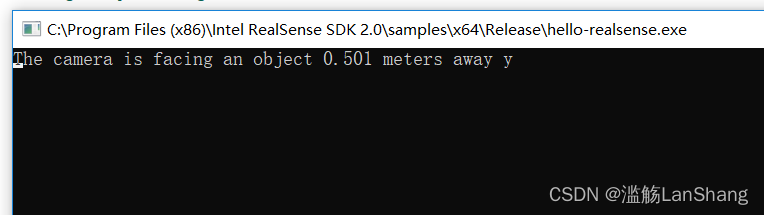
打开解决方案后,可见左侧有很多例程项目,将hello-realsense项目右键设置为启动项目,然后点击本地Windows调试器生成运行,注意我这里采用的是Release x64模式。或者不想编译的话,直接在 SDK 根目录的tools文件夹下,也已经有上述所有例程的可执行文件,直接运行即可。
注意启动例程的时候,要关闭Intel Realsense Viewer,否则两者之间会发生冲突,例程无法正常运行,显示结果。
通过查看源代码,可知该例程显示的是相机深度图像中心点的距离,注意测试的时候不要太近也不要太远,否则都无法正常测距。我这里测试的效果如下:
 除此之外还有其他很多例程,这里就不继续测试了,有兴趣的读者可以自己逐个查看源代码,明晰功能,测试效果。或者前往官网相关部分查看每个例程的介绍:https://dev.intelrealsense.com/docs/code-samples
Step 4 配置环境
我们在ORBSLAM2中配置Intel RealSense SDK 2.0的环境。
在 SDK 的根目录下,可见官方已经将对应 Visual Stuidio 的属性表文件给我们弄好了:glfw-imgui.props、intel.realsense.props、opencv.props
将上述属性表,直接拖到ORBSLAM2的属性管理器中即可,只是注意这里我采用的是Release x64模式,并且我没有使用 SDK 自带的OpenCV3.4的属性表,而是使用我自己的OpenCV3.1
在ORBSLAM2的工程目录下新建main.cpp,将之前的例程中rs-hello-realsense.cpp文件的内容复制进去,然后生成运行,测试能否成功运行。若运行成功,则说明环境配置OK
这里要注意,glfw-imgui这个第三方库貌似 SDK 中并未提供库文件,不过例程的解决方案一旦编译,这些第三方库的库文件也会自动生成,库文件的生成目录在我电脑上是:C:\Program Files (x86)\Intel RealSense SDK 2.0\samples\x64\Release\glfw-imgui.lib 。因此,需要将上述库目录以及附加依赖项追加到对应的属性表中,上述测试main函数才能成功运行。
Step 5 相机标定
运行ORBSLAM2,需要相关的yaml配置文件,其中就包含相机的几个内参。Intel RealSense SDK 2.0的 API 似乎有获取内参的相关命令,因此我们就以此获取其内参。
获取内参的代码参考的是这篇博客:https://blog.youkuaiyun.com/ahelloyou/article/details/108965550,在此致以感谢。保险起见,这里将他的代码精简附载在附录A中,需要的读者可以直接取用。
注意采用USB3.0接口,否则直接运行他的代码将报错。
基于我所采用的相机,其输出如下:
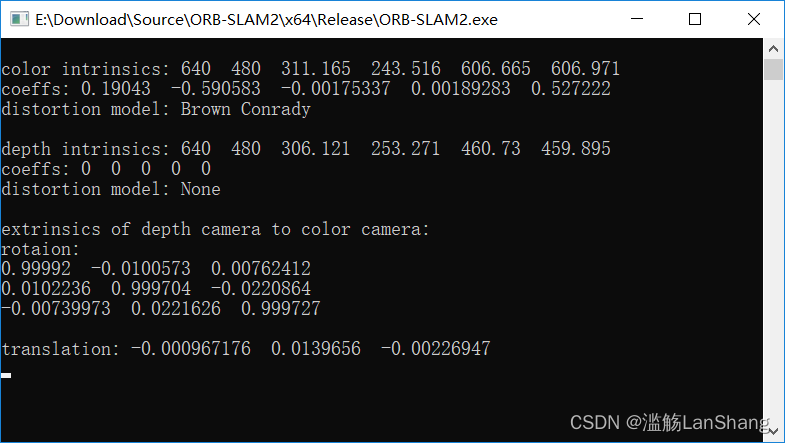 由于我不清楚其彩色相机内参输出的诸参数之间的对应关系,这里就暂且参照 ORBSLAM2 参数文件中参数标明的顺序以及其大小与正负,审慎地将六个畸变参数按照输出次序视作k1、k2、p1、k3、p2,将ppx作为cx,ppy作为cy,写入 yaml 文件中。
官网https://www.intelrealsense.com/lidar-camera-l515/上提供了L515的相关参数文件,但是原谅我实在没有找到他的baseline数据,深度比例也没有找到,因此无奈之下只能参照https://blog.youkuaiyun.com/weixin_41732319/article/details/102469604这篇博客中D435i的数据,即50mm。将其换算成米,然后乘以fx,最终得到Camera.bf是30.33325。深度图比例DepthMapFactor则暂时设作1000.0
如果有读者能够得到准确的yaml文件参数,万望联系我,不胜感谢之至。我上述采用的yaml文件附载在附录B中。
Step 6 编写入口
由于ORBSLAM2本身工程性极佳,封装得非常完善,因此入口程序非常好编写,这里直接放在附录C里了。
Step 7 实地运行
大抵是由于 yaml 参数文件的问题,具体运行起来非常容易丢失,而且特征的分布看起来也不太完全,建图的效果也不太对劲。但不管怎么讲,究竟是配置完成并跑出来了。
参数问题是大问题,不过由于我们的项目暂时用不上建图与定位部分的功能,因此这里就暂不深究。希望在此能够抛砖引玉,期待后来者解决。
附录A:获取内参代码
#include <librealsense2/rs.hpp>
#include <opencv2/opencv.hpp>

#include <iostream>


int main(int argc, char * argv[]) try
{
	// 注意采用USB3.0接口否则报错
	rs2::log_to_console(RS2_LOG_SEVERITY_ERROR);

	rs2::config cfg;

	// 配置彩色图像流:分辨率640*480,图像格式:BGR, 帧率:30帧/秒
	cfg.enable_stream(RS2_STREAM_COLOR, 640, 480, RS2_FORMAT_BGR8, 30);
	///配置深度图像流:分辨率640*480,图像格式:Z16, 帧率:30帧/秒
	cfg.enable_stream(RS2_STREAM_DEPTH, 640, 480, RS2_FORMAT_Z16, 30);

	rs2::pipeline pipe;

	pipe.start(cfg);

	rs2::frameset data;
	data = pipe.wait_for_frames();		// 等待一帧数据,默认等待5s

	rs2::depth_frame depth = data.get_depth_frame();
	rs2::video_frame color = data.get_color_frame();
	rs2::stream_profile dprofile = depth.get_profile();
	rs2::stream_profile cprofile = color.get_profile();

	// 获取彩色相机内参
	rs2::video_stream_profile cvsprofile(cprofile);
	rs2_intrinsics color_intrin = cvsprofile.get_intrinsics();
	std::cout << "\ncolor intrinsics: ";
	std::cout << color_intrin.width << "  " << color_intrin.height << "  ";
	std::cout << color_intrin.ppx << "  " << color_intrin.ppy << "  ";
	std::cout << color_intrin.fx << "  " << color_intrin.fy << std::endl;
	std::cout << "coeffs: ";
	for (auto value : color_intrin.coeffs)
		std::cout << value << "  ";
	std::cout << std::endl;
	std::cout << "distortion model: " << color_intrin.model << std::endl;	//畸变模型

	// 获取深度相机内参
	rs2::video_stream_profile dvsprofile(dprofile);
	rs2_intrinsics depth_intrin = dvsprofile.get_intrinsics();
	std::cout << "\ndepth intrinsics: ";
	std::cout << depth_intrin.width << "  " << depth_intrin.height << "  ";
	std::cout << depth_intrin.ppx << "  " << depth_intrin.ppy << "  ";
	std::cout << depth_intrin.fx << "  " << depth_intrin.fy << std::endl;
	std::cout << "coeffs: ";
	for (auto value : depth_intrin.coeffs)
		std::cout << value << "  ";
	std::cout << std::endl;
	std::cout << "distortion model: " << depth_intrin.model << std::endl;	//畸变模型

	// 获取深度相机相对于彩色相机的外参,即变换矩阵: P_color = R * P_depth + T
	rs2_extrinsics extrin = dprofile.get_extrinsics_to(cprofile);
	std::cout << "\nextrinsics of depth camera to color camera: \nrotaion: " << std::endl;
	for (int i = 0; i < 3; ++i) {
		for (int j = 0; j < 3; ++j) {
			float value = extrin.rotation[3 * i + j];
			std::cout << value << "  ";
		}
		std::cout << std::endl;
	}
	std::cout << std::endl;

	std::cout << "translation: ";
	for (auto value : extrin.translation)
		std::cout << value << "  ";
	std::cout << std::endl;

	while (1)
	{
		// 等待一帧数据,默认等待5s
		data = pipe.wait_for_frames();

		rs2::depth_frame depth = data.get_depth_frame();  //获取深度图像数据
		rs2::video_frame color = data.get_color_frame();  //获取彩色图像数据
		int color_width = color.get_width();
		int color_height = color.get_height();

		int depth_width = depth.get_width();
		int depth_height = depth.get_height();

		if (!color || !depth) break;					  //如果获取不到数据则退出

		// 将彩色图像和深度图像转换为Opencv格式
		cv::Mat image(cv::Size(color_width, color_height), CV_8UC3, (void*)color.get_data(), cv::Mat::AUTO_STEP);
		cv::Mat depthmat(cv::Size(depth_width, depth_height), CV_16U, (void*)depth.get_data(), cv::Mat::AUTO_STEP);

		// 显示
		cv::imshow("image", image);
		cv::imshow("depth", depthmat);
		cv::waitKey(1);
	}
	return EXIT_SUCCESS;
}
catch (const rs2::error & e)
{
	// 捕获相机设备的异常
	std::cerr << "RealSense error calling " << e.get_failed_function() << "(" << e.get_failed_args() << "):\n    " << e.what() << std::endl;
	return EXIT_FAILURE;
}
catch (const std::exception& e)
{
	std::cerr << "Other error : " << e.what() << std::endl;
	return EXIT_FAILURE;
}
附录B:yaml 参数文件
%YAML:1.0

#--------------------------------------------------------------------------------------------
# Camera Parameters. Adjust them!
#--------------------------------------------------------------------------------------------

# Camera calibration and distortion parameters (OpenCV)
Camera.fx: 606.665
Camera.fy: 606.971
Camera.cx: 311.165
Camera.cy: 243.516

Camera.k1: 0.19043
Camera.k2: -0.590583
Camera.k3: 0.00189283
Camera.p1: -0.00175337
Camera.p2: 0.527222

Camera.width: 640
Camera.height: 480

# Camera frames per second
Camera.fps: 30.0

# IR projector baseline times fx (aprox.)
Camera.bf: 30.33325

# Color order of the images (0: BGR, 1: RGB. It is ignored if images are grayscale)
Camera.RGB: 1

# Close/Far threshold. Baseline times.
ThDepth: 40.0

# Deptmap values factor
DepthMapFactor: 1000.0

#--------------------------------------------------------------------------------------------
# ORB Parameters
#--------------------------------------------------------------------------------------------

# ORB Extractor: Number of features per image
ORBextractor.nFeatures: 1000

# ORB Extractor: Scale factor between levels in the scale pyramid
ORBextractor.scaleFactor: 1.2

# ORB Extractor: Number of levels in the scale pyramid
ORBextractor.nLevels: 8

# ORB Extractor: Fast threshold
# Image is divided in a grid. At each cell FAST are extracted imposing a minimum response.
# Firstly we impose iniThFAST. If no corners are detected we impose a lower value minThFAST
# You can lower these values if your images have low contrast
ORBextractor.iniThFAST: 20
ORBextractor.minThFAST: 7

#--------------------------------------------------------------------------------------------
# Viewer Parameters
#--------------------------------------------------------------------------------------------
Viewer.KeyFrameSize: 0.05
Viewer.KeyFrameLineWidth: 1
Viewer.GraphLineWidth: 0.9
Viewer.PointSize: 2
Viewer.CameraSize: 0.08
Viewer.CameraLineWidth: 3
Viewer.ViewpointX: 0
Viewer.ViewpointY: -0.7
Viewer.ViewpointZ: -1.8
Viewer.ViewpointF: 500
附录C:入口程序
#include <librealsense2/rs.hpp>
#include <opencv2/opencv.hpp>

#include <string>
#include <iostream>

#include<System.h>


int main(int argc, char * argv[]) try
{
	rs2::config cfg;

	// 配置彩色图像流:分辨率640*480,图像格式:BGR, 帧率:30帧/秒
	cfg.enable_stream(RS2_STREAM_COLOR, 640, 480, RS2_FORMAT_BGR8, 30);
	///配置深度图像流:分辨率640*480,图像格式:Z16, 帧率:30帧/秒
	cfg.enable_stream(RS2_STREAM_DEPTH, 640, 480, RS2_FORMAT_Z16, 30);

	rs2::pipeline pipe;

	pipe.start(cfg);

	rs2::frameset data;

	std::string voc = "E:\\Download\\Source\\ORB-SLAM2\\Run\\Vocabulary\\ORBvoc.bin";
	std::string settings = "E:\\L515.yaml";

	ORB_SLAM2::System SLAM(voc, settings, ORB_SLAM2::System::RGBD, true);

	while (1)
	{
		data = pipe.wait_for_frames();

		rs2::depth_frame depth = data.get_depth_frame();
		rs2::video_frame color = data.get_color_frame();
		int color_width = color.get_width();
		int color_height = color.get_height();

		int depth_width = depth.get_width();
		int depth_height = depth.get_height();

		if (!color || !depth) break;

		cv::Mat imRGB(cv::Size(color_width, color_height), CV_8UC3, (void*)color.get_data(), cv::Mat::AUTO_STEP);
		cv::Mat imD(cv::Size(depth_width, depth_height), CV_16U, (void*)depth.get_data(), cv::Mat::AUTO_STEP);

		SLAM.TrackRGBD(imRGB, imD, color.get_timestamp());

		// cv::imshow("image", image);
		// cv::imshow("depth", depthmat);
		// cv::waitKey(1);
	}
	SLAM.Shutdown();

	return EXIT_SUCCESS;
}
catch (const rs2::error & e)
{
	std::cerr << "RealSense error calling " << e.get_failed_function() << "(" << e.get_failed_args() << "):\n    " << e.what() << std::endl;
	return EXIT_FAILURE;
}
catch (const std::exception& e)
{
	std::cerr << "Other error : " << e.what() << std::endl;
	return EXIT_FAILURE;
}


 1789
1789

 被折叠的 条评论
为什么被折叠?
被折叠的 条评论
为什么被折叠?
 到【灌水乐园】发言


