


禁止转载
好博客汇总
-
Python点云数据处理(六)Open3d补充:点云基本处理 - 知乎 https://zhuanlan.zhihu.com/p/353971365?utm_id=0
-
open3d绘制点云1–单帧点云 - 知乎 https://zhuanlan.zhihu.com/p/591249741
-
(168条消息) open3D 的使用,pcd可视化,3D bbox可视化,web_visualizer使用等。_CV矿工的博客-优快云博客 https://blog.youkuaiyun.com/ZauberC/article/details/127260203
-
open3d.geometry.AxisAlignedBoundingBox — Open3D 0.17.0 documentation http://www.open3d.org/docs/release/python_api/open3d.geometry.AxisAlignedBoundingBox.html
-
Open3D 可视化(1)——简单可视化_o3d.visualization.draw_geometries_Dove_1234的博客-优快云博客 https://blog.youkuaiyun.com/baidu_39332177/article/details/127792817
-
爆肝5万字❤️Open3D 点云数据处理基础(Python版) - 小智博客 http://imyhq.com/design/312.html#23__191
点云显示(有阴影的那种)
场景:在win用ssh连到Linux,使用Linux的资源渲染点云
步骤
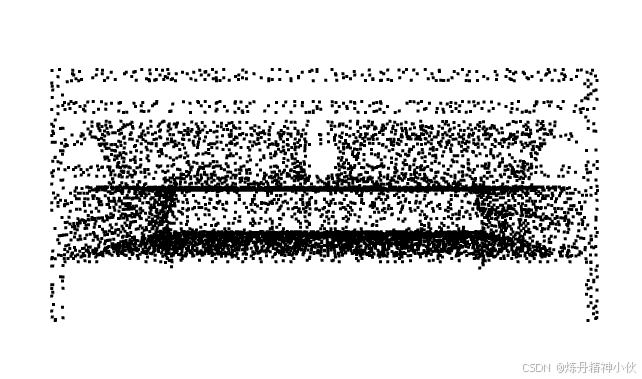
点云可视化-纯色 的
import open3d as o3d
import numpy as np
import matplotlib.pyplot as plt

if __name__ == '__main__':

	###############
    point_size_set = 3
    ################

    # 加载点云数据
    points = np.load('bed_ret_mn40.npy')
    points = points[0, :, :]

    points = np.concatenate((points, np.zeros_like(points)), axis=-1)
    # np.save('C:/Users/mi/Desktop/trash/test_query_pc.npy', points)

    pcd = o3d.geometry.PointCloud()
    pcd.points = o3d.utility.Vector3dVector(points[:, :3])

    # 将颜色数组赋值给点云对象
    pcd.colors = o3d.utility.Vector3dVector(points[:, 3:])

    vis = o3d.visualization.Visualizer()
    vis.create_window()

    opt = vis.get_render_option()
    opt.point_size =point_size_set

    vis.add_geometry(pcd)

    vis.update_geometry(pcd)
    vis.run()

    vis.destroy_window()
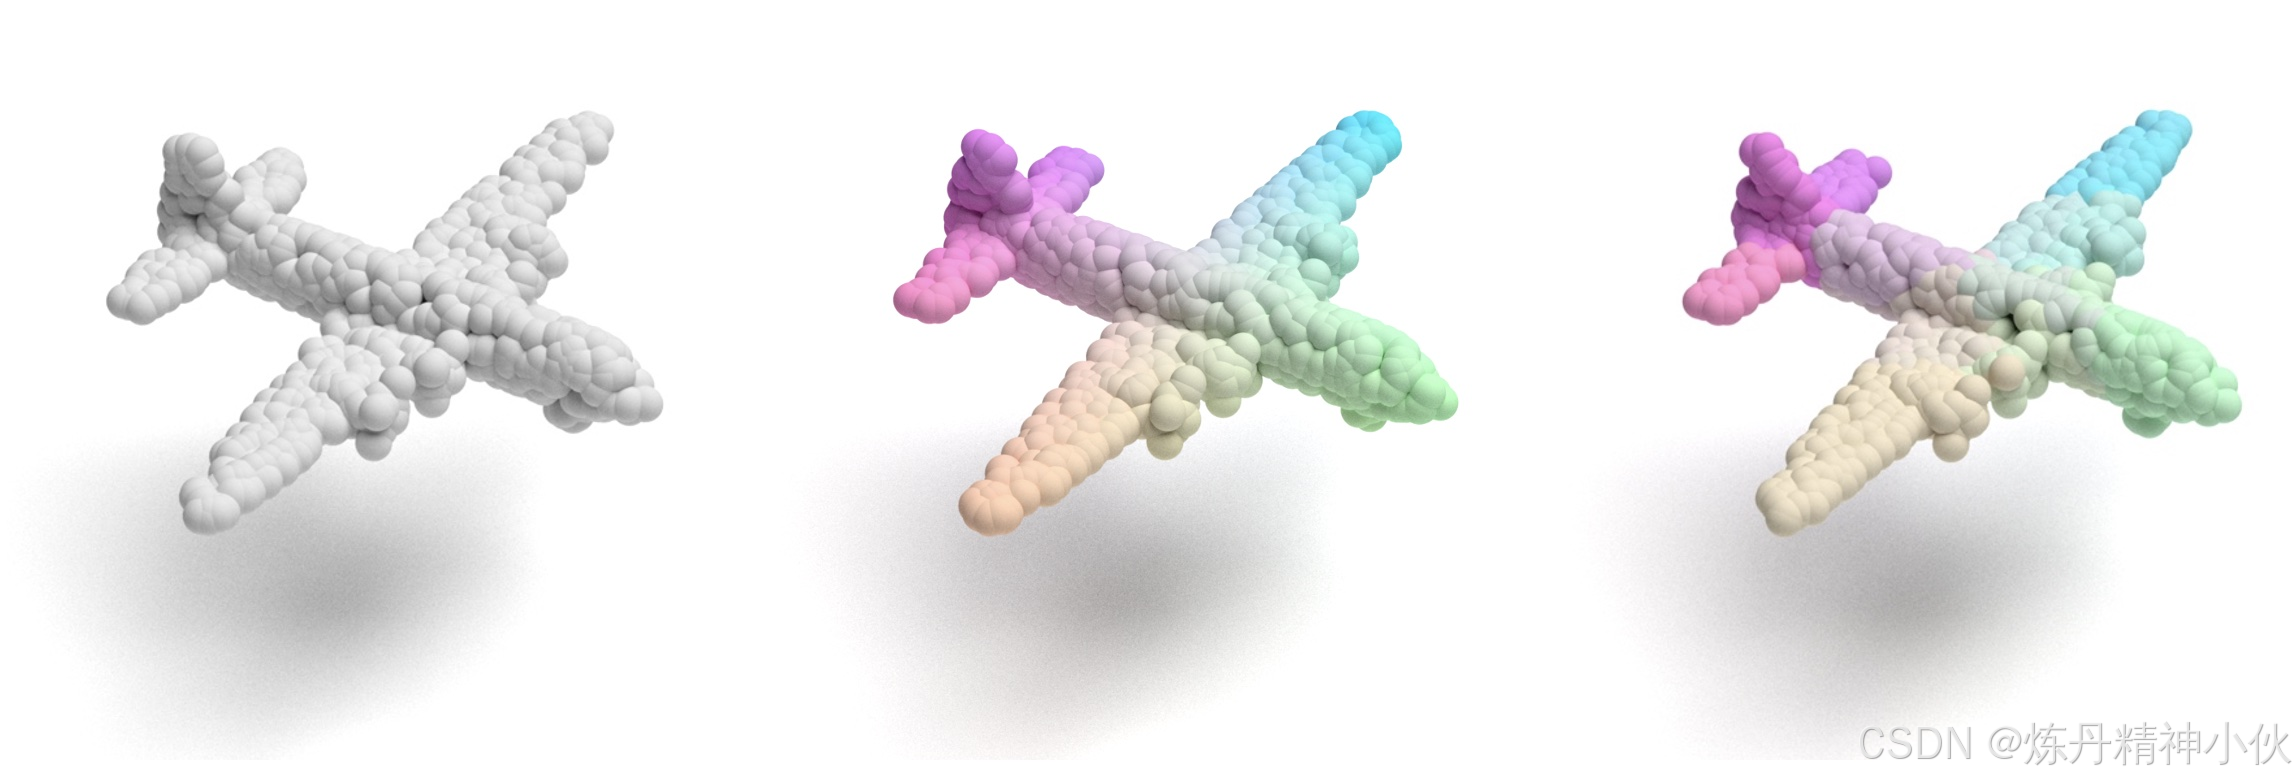
点云可视化
import open3d as o3d
import numpy as np
import matplotlib.pyplot as plt

####  彩虹色
if __name__ == '__main__':
    # 加载点云数据
    points = np.load('C:/Users/mi/Desktop/trash/bed_ret_mn40.npy')、

	# 注意,我们只需要一个点云,即point 需要是[N,3]
    points = points[0, :, :]  # 里面有多个点云  [5, 8192,3]

    pcd = o3d.geometry.PointCloud()
    pcd.points = o3d.utility.Vector3dVector(points[:, :3])

    # 获取高度范围
    min_height = np.min(points[:, 2])
    max_height = np.max(points[:, 2])

    # 根据高度值计算归一化的值
    normalized_heights = (points[:, 2] - min_height) / (max_height - min_height)

    # 创建彩虹色映射
    cmap = plt.cm.get_cmap('rainbow')

    # 将归一化的高度值映射到彩虹色映射上
    gradient_colors = cmap(normalized_heights)

    # 将颜色数组赋值给点云对象
    pcd.colors = o3d.utility.Vector3dVector(gradient_colors[:, :3])

    # 显示点云
    o3d.visualization.draw_geometries([pcd], window_name="pc show", point_show_normal=False,
                                      width=800, height=600)

or
1. 支持设置点云显示的点的大小
2. 可调彩虹色 渐变的轴
import open3d as o3d
import numpy as np
import matplotlib.pyplot as plt

####  彩虹色
if __name__ == '__main__':

	###############
    color_dim =1
    point_size_set = 15
    ################

    # 加载点云数据
    points = np.load('C:/Users/mi/Desktop/trash/shapenet_query_pc/shelf.npy')
    # 注意,我们只需要一个点云,即point 需要是[N,3]
    # 注意,我们只需要一个点云,即point 需要是[N,3]
    # 注意,我们只需要一个点云,即point 需要是[N,3]
    # 注意,我们只需要一个点云,即point 需要是[N,3]

    # points = points[6, :, :]
    # np.save('C:/Users/mi/Desktop/trash/test_query_pc.npy', points)

    pcd = o3d.geometry.PointCloud()
    pcd.points = o3d.utility.Vector3dVector(points[:, :3])

    # 获取高度范围
    min_height = np.min(points[:, color_dim])
    max_height = np.max(points[:, color_dim])

    # 根据高度值计算归一化的值
    normalized_heights = (points[:, color_dim] - min_height) / (max_height - min_height)

    # 创建彩虹色映射
    cmap = plt.cm.get_cmap('rainbow')

    # 将归一化的高度值映射到彩虹色映射上
    gradient_colors = cmap(normalized_heights)

    # 将颜色数组赋值给点云对象
    pcd.colors = o3d.utility.Vector3dVector(gradient_colors[:, :3])

    vis = o3d.visualization.Visualizer()
    vis.create_window()

    opt = vis.get_render_option()
    opt.point_size =point_size_set

    vis.add_geometry(pcd)

    vis.update_geometry(pcd)
    vis.run()

    vis.destroy_window()

点云语义分割可视化
测试文件Area_5_office_10.npy下载
用open3D可以弹出一个窗口,支持鼠标旋转和放缩,很方便
方案1:npy文件包含位置和颜色
#不显示天花板和天花板上的灯
#coding=utf-8
import open3d as o3d
import numpy as np

np.set_printoptions(suppress=True) # 取消默认科学计数法,open3d无法读取科学计数法表示
data = np.load("C:/Users/mi/Desktop/trash/Area_5_office_10.npy")# point_num, x、y、z、r、g、b、label

data = data[data[:,6]!=0] # 0 cell:去除天花板
data = data[data[:,6]!=12] # 12 :去除天花板上的灯

b = np.array([1 , 1, 1,255, 255, 255]) # 每一列要除的数
np.savetxt('scene.txt', data[:,:6]/b)
# 读取点云并可视化
pcd =o3d.io.read_point_cloud("scene.txt", format='xyzrgb') # 原npy文件中的数据正好是按x y z r g b进行排列
# print(pcd)
o3d.visualization.draw_geometries([pcd], width=1200, height=600)
或者
import open3d as o3d
import numpy as np
from copy import deepcopy
import time

if __name__ == '__main__':
    i = 53
    dis = 0

    points = np.load('F:/temp_save/npy/pc_' + str(i) + '_.npy')
    gt = np.load('F:/temp_save/npy/gt_l_' + str(i) + '_.npy').reshape(-1, 1)
    pre_point_1 = np.load('F:/temp_save/npy/point_LGMask_pre_l_' + str(i) + '_.npy').reshape(-1, 1)
    pre_point_2 = np.load('F:/temp_save/npy/point_2_pre_l_' + str(i) + '_.npy').reshape(-1, 1)
    points = np.concatenate([points, gt, pre_point_1, pre_point_2], axis=-1)
    # concatenate((a, b, c), axis=0)
    points = points[points[:, 6] != 0]  # 不要天花板类
    points = points[points[:, 2] < 2.5]  # 尽量排掉 日光灯

    gt = points[:, 6]
    pre_point_1 = points[:, 7]
    pre_point_2 = points[:, 8]

    # 随机生成13个类别的颜色
    # colors_0 = np.random.randint(255, size=(13, 3)) / 255.
    colors_0 = [[0, 255, 0],
                [19, 0, 255],
                [0, 255, 255],
                [255, 255, 0],
                [255, 0, 255],
                [100, 100, 255],
                [200, 200, 100],
                [170, 121, 200],
                [255, 0, 0],
                [200, 100, 100],
                [10, 200, 100],
                [200, 200, 200],
                [50, 50, 50]]
    colors_0 = np.array(colors_0) / 255

    pcd = o3d.geometry.PointCloud()
    pcd.points = o3d.utility.Vector3dVector(points[:, :3])

    # 显示现实颜色
    pcd.colors = o3d.utility.Vector3dVector(points[:, 3:6] / 255)

    # gt
    pcd1 = deepcopy(pcd)
    pcd1.translate((0, dis, 0))  # 整体进行y轴方向平移5
    # 为各个预测标签指定颜色
    colors = colors_0[gt.astype(np.uint8)]
    pcd1.colors = o3d.utility.Vector3dVector(colors[:, :3])

    #  pre  point_1颜色
    pcd2 = deepcopy(pcd1)
    pcd2.translate((0, dis, 0))  # 整体进行y轴方向平移5
    # 为各个预测标签指定颜色
    colors = colors_0[pre_point_1.astype(np.uint8)]
    pcd2.colors = o3d.utility.Vector3dVector(colors[:, :3])

    #  pre point_2颜色
    pcd3 = deepcopy(pcd2)
    pcd3.translate((0, dis, 0))  # 整体进行y轴方向平移5
    # 为各个预测标签指定颜色
    colors = colors_0[pre_point_2.astype(np.uint8)]
    pcd3.colors = o3d.utility.Vector3dVector(colors[:, :3])

    # 点云显示
    # o3d.visualization.draw_geometries([pcd, pcd1, pcd2, pcd3], window_name="PointNet++语义分割结果",
    #                                   point_show_normal=False,
    #                                   width=800,  # 窗口宽度
    #                                   height=600)


    vis = o3d.visualization.Visualizer()
    vis.create_window()

    opt = vis.get_render_option()
    opt.point_size =5
    opt.background_color = np.asarray([1, 1, 1])


    # vis.add_geometry(pcd)
    # vis.add_geometry(pcd1)
    # vis.add_geometry(pcd2)
    vis.add_geometry(pcd3)

    vis.update_geometry(pcd)
    vis.run()

    vis.destroy_window()

方案2:npy 文件 位置跟颜色分离
- 点跟颜色分离处理
- 点由原始的输入提供
- 颜色可自定义为,现实颜色、gt label颜色、pre label 颜色
import open3d as o3d
import numpy as np
from copy import deepcopy

if __name__ == '__main__':
    # point_num, x、y、z、r、g、b、label
    points = np.load('C:/Users/mi/Desktop/trash/Area_5_office_10.npy')

	data = data[data[:,6]!=0] # 0 cell:去除天花板
	data = data[data[:,6]!=12] # 12 :去除天花板上的灯

    preds = points[:,-1]
    print(preds.shape, points.shape)
    print(set(preds))

    # 随机生成13个类别的颜色
    colors_0 = np.random.randint(255, size=(13, 3)) / 255.

	# 获取场景的点
    pcd = o3d.geometry.PointCloud()
    pcd.points = o3d.utility.Vector3dVector(points[:, :3])

    # 为各个真实标签指定颜色
    colors = colors_0[points[:, -1].astype(np.uint8)]
    pcd.colors = o3d.utility.Vector3dVector(colors[:, :3])

    # 显示现实颜色
    pcd1 = deepcopy(pcd)
    pcd1.translate((0, 5, 0))  # 整体进行y轴方向平移5
    pcd1.colors = o3d.utility.Vector3dVector(points[:,3:6]/255)

    # 点云显示
    o3d.visualization.draw_geometries([pcd, pcd1], window_name="xxx语义分割结果",
                                      point_show_normal=False,
                                      width=800,  # 窗口宽度
                                      height=600)

方案3:同时显示现实颜色、gt、pre label
文件下载
import open3d as o3d
import numpy as np
from copy import deepcopy

if __name__ == '__main__':

    # pc_num, 6.
    #6: xyzrgb
    points = np.load('C:/Users/mi/Desktop/trash/pc.npy')

    # pc_num
    gt = np.load('C:/Users/mi/Desktop/trash/gt_l.npy')
    # pc_num, 1
    gt = gt.reshape(-1,1)

    # pc_num
    pre = np.load('C:/Users/mi/Desktop/trash/pre_l.npy')
    # pc_num, 1
    pre = pre.reshape(-1,1)
    points = np.concatenate([points, gt, pre], axis=-1)
    # concatenate((a, b, c), axis=0)
    points = points[points[:, 6] != 0]
    points = points[points[:, 6] != 12]

    gt = points[:,6]
    pre = points[:,7]

    # 随机生成13个类别的颜色
    colors_0 = np.random.randint(255, size=(13, 3)) / 255.
    pcd = o3d.geometry.PointCloud()
    pcd.points = o3d.utility.Vector3dVector(points[:, :3])

    # 为各个真实标签指定颜色
    colors = colors_0[gt.astype(np.uint8)]
    pcd.colors = o3d.utility.Vector3dVector(colors[:, :3])

    # 显示现实颜色
    pcd1 = deepcopy(pcd)
    pcd1.translate((0, 9, 0))  # 整体进行y轴方向平移5
    # 为各个预测标签指定颜色
    # colors = colors_0[preds.astype(np.uint8)]
    pcd1.colors = o3d.utility.Vector3dVector(points[:,3:6]/255)

    #  pre 颜色
    pcd2 = deepcopy(pcd1)
    pcd2.translate((0, 9, 0))  # 整体进行y轴方向平移5
    # 为各个预测标签指定颜色
    colors = colors_0[pre.astype(np.uint8)]
    pcd2.colors = o3d.utility.Vector3dVector(colors[:, :3])

    # 点云显示
    o3d.visualization.draw_geometries([pcd, pcd1, pcd2], window_name="PointNet++语义分割结果",
                                      point_show_normal=False,
                                      width=800,  # 窗口宽度
                                      height=600)

用open3D 可视化点云的方向统一
- 有时候需要将real、gt 和 pred 的图都展示,但视角要统一。
- 先在一个图上(比如 gt )确定展示的视角(鼠标控制)
- ctr+c
- 在新的图(比如real),打开后只需 ctr+v,即可旋转到跟gt一样的视角
区域放大
放大图片区域,在比较语义分割实验效果上有用


import cv2 as cv
import sys
import numpy as np

def big_part_in_img_2(img, need_big_part_pos, big_show_pos, need_big_part_half_l, line_type=1):

    time = 4   # 放大倍数
    line_big = 5  # 连线的宽度
    line_color = (0, 0, 0) # 连线的颜色
    rectangle_line_big = 7  # 矩形框的宽度
    rectangle_color =(0,0,255) # 矩形框的颜色


    big_half_l = need_big_part_half_l * time

    # 需要被放大的区域
    part = img[(need_big_part_pos[0] - need_big_part_half_l):(need_big_part_pos[0] + need_big_part_half_l),
           (need_big_part_pos[1] - need_big_part_half_l):(need_big_part_pos[1] + need_big_part_half_l)]

    # 双线性插值法
    mask = cv.resize(part, (big_half_l * 2, big_half_l * 2), fx=0, fy=0, interpolation=cv.INTER_LINEAR)
    if img is None is None:
        print('Failed to read picture')
        sys.exit()

    # 放大后局部图的位置img[210:410,670:870
    # aa = img[(big_show_pos[0] - big_half_l):(big_show_pos[0] + big_half_l),
    #      (big_show_pos[0] - big_half_l):(big_show_pos[0] + big_half_l)]
    img[(big_show_pos[0] - big_half_l):(big_show_pos[0] + big_half_l),
    (big_show_pos[1] - big_half_l):(big_show_pos[1] + big_half_l)] = mask

    # 画框并连线
    cv.rectangle(img, ((need_big_part_pos[1] - need_big_part_half_l), (need_big_part_pos[0] - need_big_part_half_l)),
                 ((need_big_part_pos[1] + need_big_part_half_l), (need_big_part_pos[0] + need_big_part_half_l)),
                 rectangle_color, rectangle_line_big)
    cv.rectangle(img, ((big_show_pos[1] - big_half_l), (big_show_pos[0] - big_half_l)),
                 ((big_show_pos[1] + big_half_l), (big_show_pos[0] + big_half_l)), rectangle_color, rectangle_line_big)

    if line_type == 1:
        img = cv.line(img, (big_show_pos[1] - big_half_l, big_show_pos[0] + big_half_l),
                      (need_big_part_pos[1] - need_big_part_half_l, need_big_part_pos[0] - need_big_part_half_l),
                      line_color,line_big, cv.LINE_AA)

        img = cv.line(img, (big_show_pos[1] + big_half_l, big_show_pos[0] + big_half_l),
                      (need_big_part_pos[1] + need_big_part_half_l, need_big_part_pos[0] - need_big_part_half_l),
                      line_color,line_big, cv.LINE_AA)

    elif line_type == 2:
        img = cv.line(img, (big_show_pos[1] - big_half_l, big_show_pos[0] - big_half_l),
                      (need_big_part_pos[1] + need_big_part_half_l, need_big_part_pos[0] - need_big_part_half_l),
                      line_color,line_big, cv.LINE_AA)

        img = cv.line(img, (big_show_pos[1] - big_half_l, big_show_pos[0] + big_half_l),
                      (need_big_part_pos[1] + need_big_part_half_l, need_big_part_pos[0] + need_big_part_half_l),
                      line_color,line_big, cv.LINE_AA)

    elif line_type == 3:

        img = cv.line(img, (big_show_pos[1] - big_half_l, big_show_pos[0] - big_half_l),
                      (need_big_part_pos[1] - need_big_part_half_l, need_big_part_pos[0] + need_big_part_half_l),
                      line_color,line_big, cv.LINE_AA)

        img = cv.line(img, (big_show_pos[1] + big_half_l, big_show_pos[0] - big_half_l),
                      (need_big_part_pos[1] + need_big_part_half_l, need_big_part_pos[0] + need_big_part_half_l),
                      line_color,line_big, cv.LINE_AA)

    elif line_type == 4:
        img = cv.line(img, (big_show_pos[1] + big_half_l, big_show_pos[0] - big_half_l),
                      (need_big_part_pos[1] - need_big_part_half_l, need_big_part_pos[0] - need_big_part_half_l),
                      line_color,line_big, cv.LINE_AA)

        img = cv.line(img, (big_show_pos[1] + big_half_l, big_show_pos[0] + big_half_l),
                      (need_big_part_pos[1] - need_big_part_half_l, need_big_part_pos[0] + need_big_part_half_l),
                      line_color,line_big, cv.LINE_AA)

    return img

if __name__ == '__main__':

    name = 'real'
    img = cv.imread('C:/Users/mi/Desktop/trash/vis/'+name+'.png')

    img = img[20:-25, 20:-25,:]  # 去除图片边缘不要的信息
    # cv.imwrite('test.jpg', img)


    # 将图换到更大的背景下
    arr = np.ones((1500, 2500, 3))*255
    arr[0+300:img.shape[0]+300, 0+300:img.shape[1]+300,:] = img
    cv.imwrite('test_2.jpg', arr)
    img = cv.imread('test_2.jpg')
    # exit()


    # need_big_part_pos = [200, 1000], 200表示在图的上下滑动位置; 1000表示在图的左右滑动位置
    #
    # need_big_part_pos 是需要放大的区域中心位置
    # big_show_pos是放大后的区域显示的位置
    #
    # line_type = 3.其中:
    # 1:big_show_pos 在need_big_part_pos上边
    # 2: big_show_pos 在need_big_part_pos 右边
    # 3: big_show_pos 在need_big_part_pos 下边
    # 4: big_show_pos 在need_big_part_pos 左边
    img = big_part_in_img_2(img,need_big_part_half_l=60,  need_big_part_pos = [480, 1100],
                            big_show_pos = [350, 1750], line_type=2)
    img = big_part_in_img_2(img,need_big_part_half_l=60,  need_big_part_pos = [550, 930],
                            big_show_pos = [1100, 600], line_type=3)


    # 展示结果

    # cv.imwrite(name+'_ed.png', img)
    # exit()

    h, w = img.shape[:2]
    if w > 800:
        img = cv.resize(img, (800, int(h * 800 / w)))

    cv.imshow('img', img)
    cv.waitKey(0)
    cv.destroyAllWindows()
目标检测可视化
每个检测的Box,可由
- box_center: box中心的位置,xyz
- box_size:每个Box 长宽高的一半, lwh
- Box_angle:默认box 绕z轴旋转,r
文件下载
import open3d as o3d
import numpy as np
from copy import deepcopy

i =9

# pc_num, xyz
points = np.load('C:/Users/mi/Desktop/trash/box/npy/gt_pc_'+str(i)+'_.npy')
# pc_num, rgb
color = np.load('C:/Users/mi/Desktop/trash/box/npy/color_'+str(i)+'_.npy')

# gt
# box_num,xyz
gt_box_center = np.load('C:/Users/mi/Desktop/trash/box/npy/gt_box_center_'+str(i)+'_.npy')
#box_num,angle
gt_box_angles = np.load('C:/Users/mi/Desktop/trash/box/npy/gt_box_angle_'+str(i)+'_.npy').reshape(-1,1)
# box_num,lwh
gt_box_size = np.load('C:/Users/mi/Desktop/trash/box/npy/gt_box_size_'+str(i)+'_.npy')


point_cloud = o3d.geometry.PointCloud()
point_cloud.points = o3d.utility.Vector3dVector(points[:, :3])
point_cloud.colors = o3d.utility.Vector3dVector(color/255)

vis = o3d.visualization.Visualizer()
vis.create_window()
vis.add_geometry(point_cloud)


gt_boxes = np.concatenate([gt_box_center, gt_box_size, gt_box_angles], axis=-1)
for i, box in enumerate(gt_boxes):
    b = o3d.geometry.OrientedBoundingBox()
    b.center = box[:3]
    b.extent = box[3:6]
    # with heading
    R = o3d.geometry.OrientedBoundingBox.get_rotation_matrix_from_xyz((0, 0, box[6]))
    b.rotate(R, b.center)
    b.color = (1,1,0)
    vis.add_geometry(b)

# vis.get_render_option().background_color = np.asarray([0, 0, 0]) # 设置一些渲染属性
vis.run()
vis.destroy_window()


 2192
2192

 被折叠的 条评论
为什么被折叠?
被折叠的 条评论
为什么被折叠?
 到【灌水乐园】发言


