一、背景
在游戏研发过程中,有时候会对一个物体经过多次围绕不同的轴进行不同角度的旋转,从而计算得到一个方向,以此来检测在该对应的方向上是否有对应的物体或别的对象,因此本节对Quaternion.AngleAxis进行简单的记录;
二、Quaternion.AngleAxis
对该API进行理解:
- Quaternion:四元数,这个在Unity中基本就是用于计算方位、旋转的;
- AngleAxis:这个就表示围绕一个轴,进行指定的角度旋转
整体就是:指定一个轴,围绕该轴旋转指定的角度,得到一个新的旋转结果;
三、实践
1、动画演示
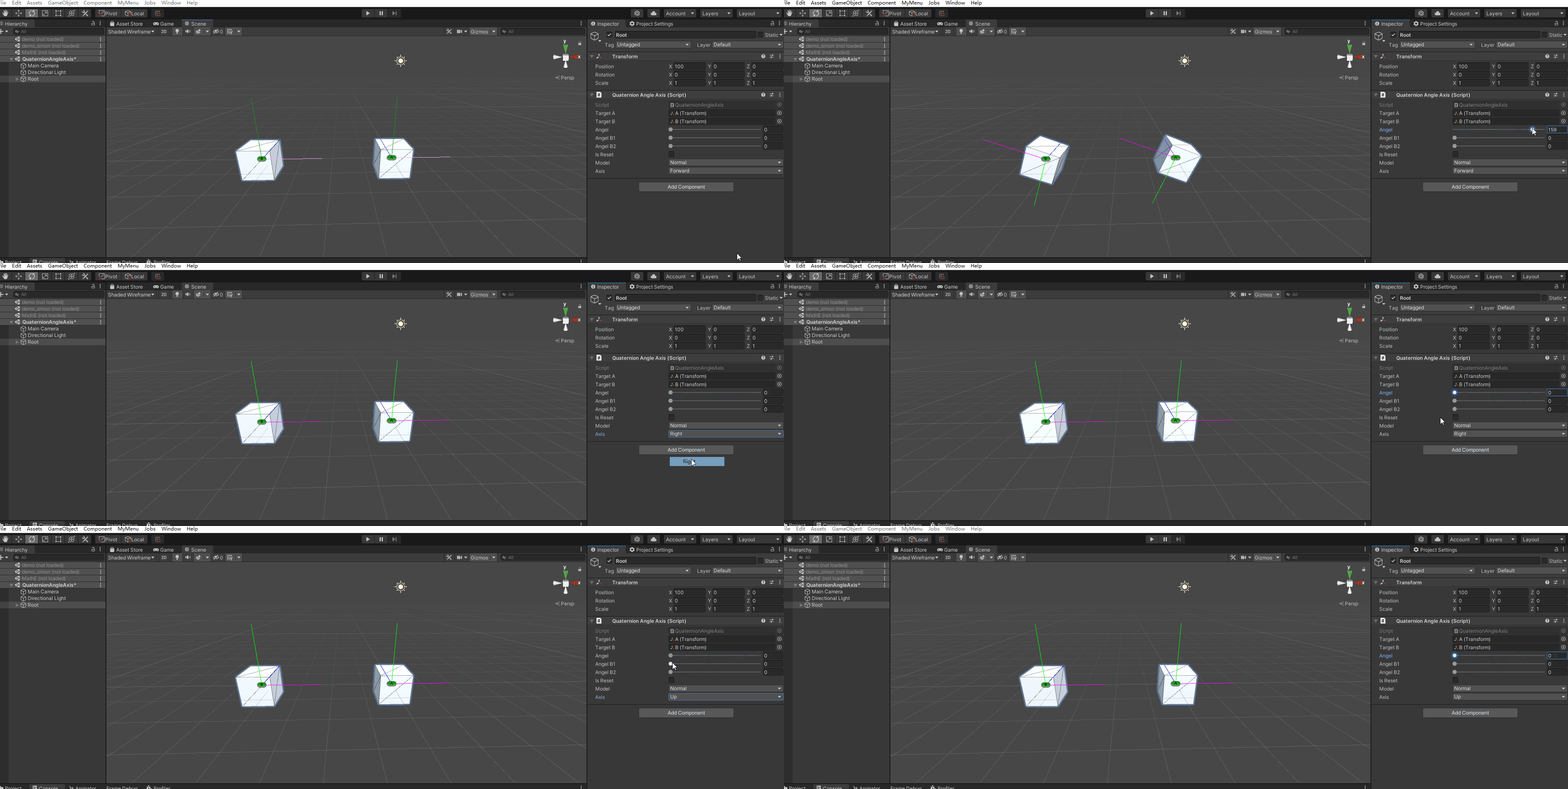
在上图中可以看到有两个Cube,都在以相同的角度,围绕相同的轴在旋转;这里只是简单的用了该API的结果:
 targetA.rotation = Quaternion.AngleAxis(angel, direction);
 targetB.rotation = Quaternion.AngleAxis(angel, direction);
Angel:代表旋转多少度,比如上图中的滑动条控制的数值0-180;当然0是不会有任何变化的;
direction:代表的是轴,也就是围绕哪一个轴进行旋转;上面的动画中只是采用基本的
Vector3.up、Vector3.right,Vector3.forward进行基本的演示。但在实际的操作中的方向大多数不是这几个基本的的方向,有更多其它的方向。
2、世界坐标轴和本地坐标轴旋转差异
动画演示:

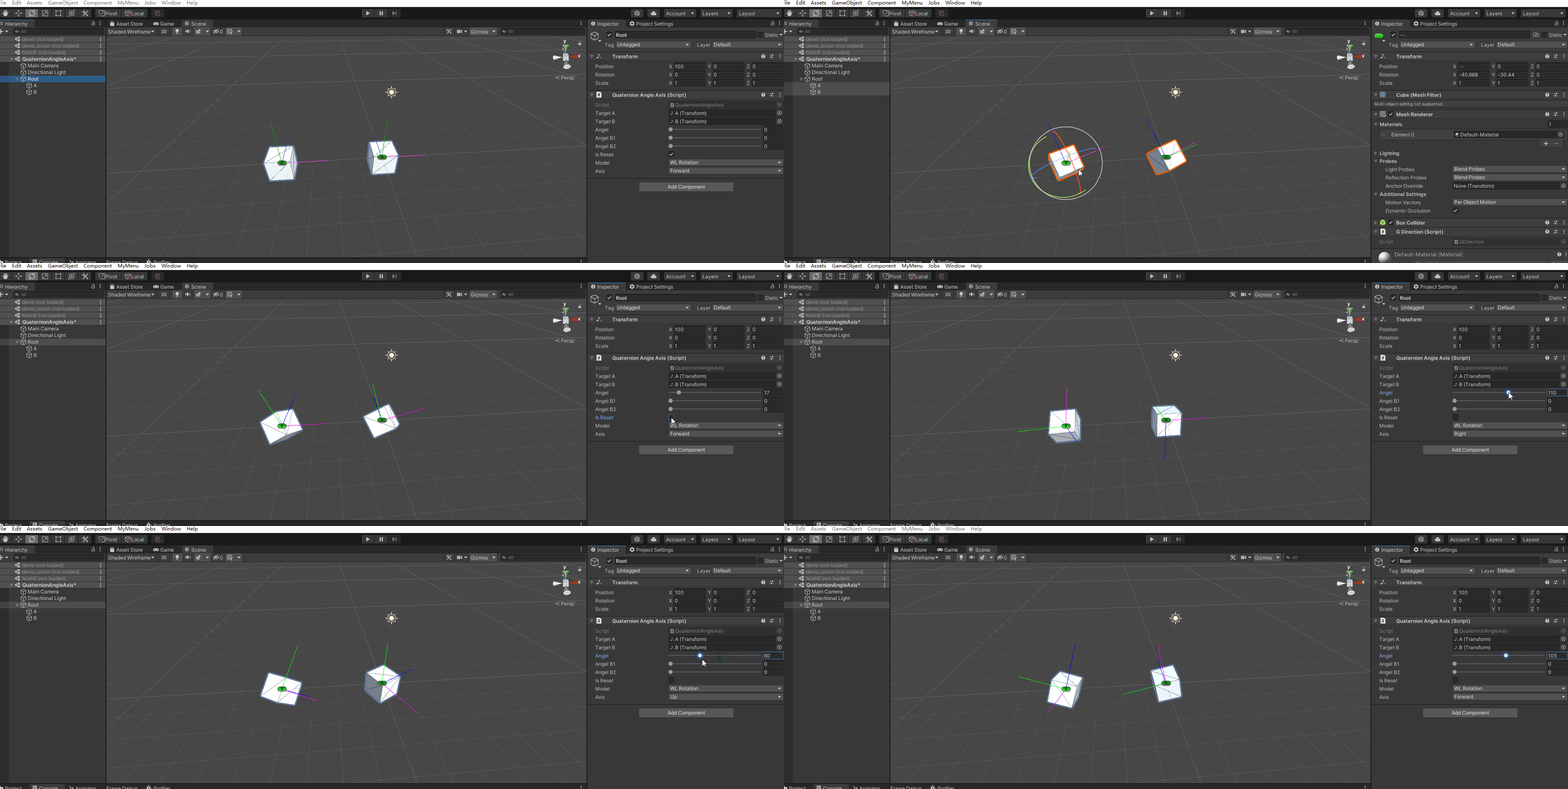
首先将CubeA和CubeB都调整一个相同的旋转角度;然后在分别在有右侧的面板中调节参数,对它们进行旋转;可以发现旋转的实际效果是不一样的【可以根据xyz轴的方向来发明细发现】;这是因为旋转的时候采用的坐标轴不一样;
CubeA:采用世界坐标轴的方式进行旋转;
CubeB:采用的是CubeB本身的坐标轴进行旋转的;
targetA.rotation = Quaternion.AngleAxis(angel, direction);
targetB.rotation = Quaternion.AngleAxis(angel, rotationB * direction);
rotationB * direction:表示CubeB本身的指定轴的方向;比如Vector3.right表示的是右侧,但是它不能直接代表Cube本身的右侧,其中的原因是Cube本身是存在旋转的;
- 如果CubeB不旋转,且在场景中没有父节点;或者所有的父节点都没有旋转;那么此刻CubeB右侧和Vector3.right是在同一个方向;
- 如果CubeB旋转了,那么就需要用CubeB当前的旋转乘以Vector3.right,其结果才真正表示Cube的右侧;
3、 Quaternion相乘
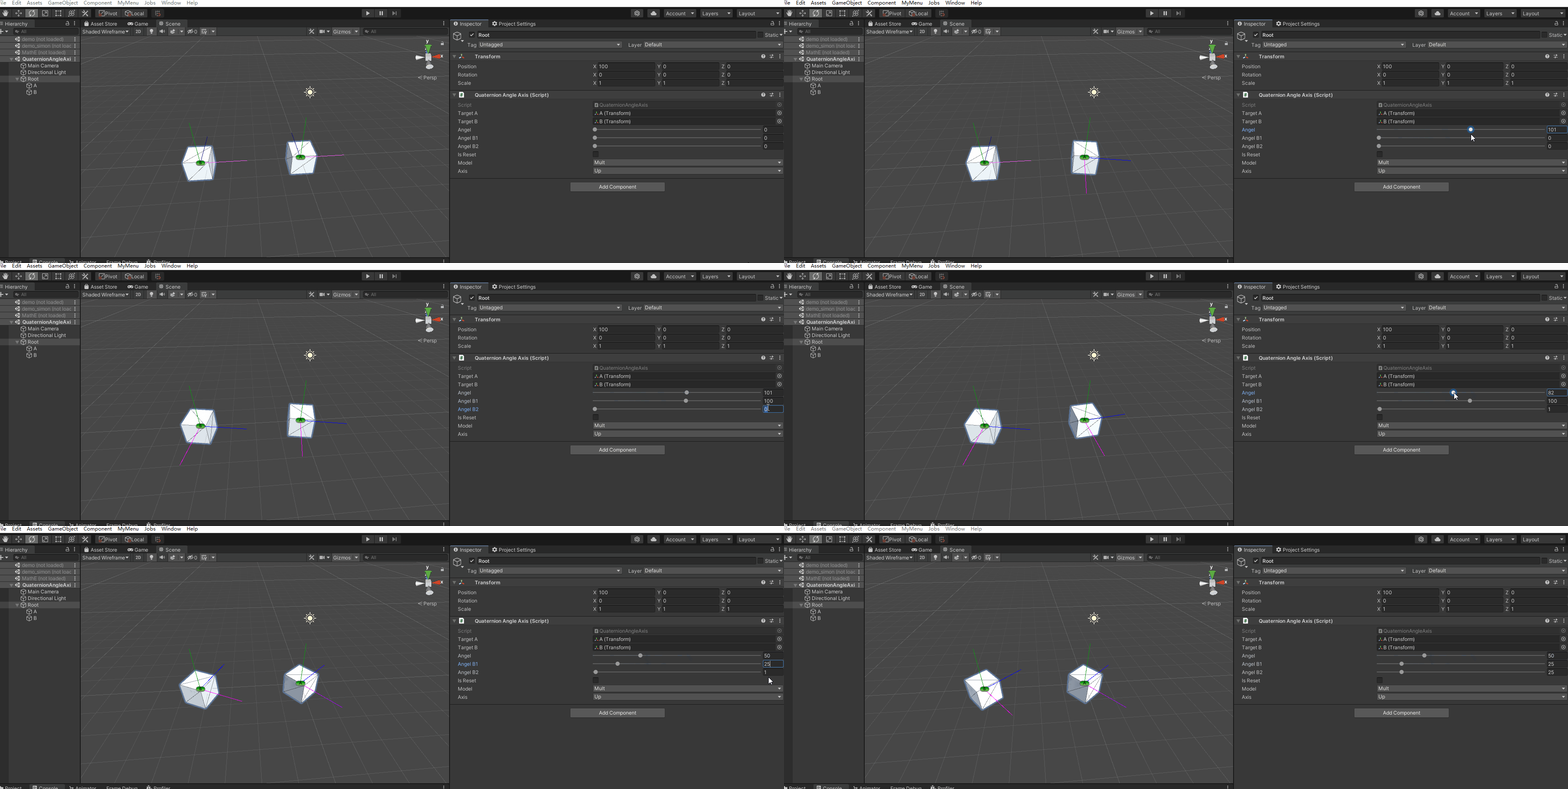
如果两个旋转的方向结果相乘,那么结果会是什么:看演示

从上面的动画可以看出:
- 对CubeA进行围绕Y轴旋转指定角度A,然后CubeB进行调节下面角度B1、B2
- 当角度A =B1+B2时,两个旋转的结果是一样的;也就是具有相同的旋转行为;
 targetA.rotation = Quaternion.AngleAxis(angel, rotationA * direction);


 targetB.rotation = Quaternion.AngleAxis(angelB1, rotationB * direction) *
                           Quaternion.AngleAxis(angelB2, rotationB * direction);
两个Quaternion.AngleAxis 相乘;也就是Quaternion相乘其实就是表示两个旋转角度累加;
四、源码
using System;
using System.Collections;
using System.Collections.Generic;
using UnityEngine;

public class QuaternionAngleAxis : MonoBehaviour
{
    [SerializeField] private Transform targetA;
    [SerializeField] private Transform targetB;
    [SerializeField] [Range(0, 180)] private int angel;
    [SerializeField] [Range(0, 180)] private int angelB1;
    [SerializeField] [Range(0, 180)] private int angelB2;

    [SerializeField] private bool isReset;


    public enum Axis
    {
        Up,
        Forward,
        Right,
    }


    public enum TestModel
    {
        /// <summary>
        /// 普通旋转
        /// </summary>
        Normal,

        /// <summary>
        /// 世界坐标和本身旋转
        /// </summary>
        WLRotation,

        /// <summary>
        /// 旋转相乘
        /// </summary>
        Mult,
    }

    private Quaternion rotationA;
    private Quaternion rotationB;

    public TestModel model;
    public Axis axis = Axis.Right;
    private Vector3 direction;

    private void OnDrawGizmos()
    {
        if (isReset)
        {
            rotationA = targetA.rotation;
            rotationB = targetB.rotation;
            return;
        }


        switch (axis)
        {
            case Axis.Forward:
                direction = Vector3.forward;
                break;
            case Axis.Right:
                direction = Vector3.right;
                break;
            case Axis.Up:
                direction = Vector3.up;
                break;
        }


        switch (model)
        {
            case TestModel.Normal:
                NormalAngelAxis();
                break;
            case TestModel.WLRotation:
                WLRotationAngelAxis();
                break;
            case TestModel.Mult:
                MultAngelAxis();
                break;
        }
    }


    void NormalAngelAxis()
    {
        targetA.rotation = Quaternion.AngleAxis(angel, direction);
        targetB.rotation = Quaternion.AngleAxis(angel, direction);
    }


    void WLRotationAngelAxis()
    {
        targetA.rotation = Quaternion.AngleAxis(angel, direction);
        targetB.rotation = Quaternion.AngleAxis(angel, rotationB * direction);
    }

    void MultAngelAxis()
    {
        targetA.rotation = Quaternion.AngleAxis(angel, rotationA * direction);


        targetB.rotation = Quaternion.AngleAxis(angelB1, rotationB * direction) *
                           Quaternion.AngleAxis(angelB2, rotationB * direction);
    }
}
结语:
最近好像开始长胖了–【valaki】


 本文介绍了Unity中Quaternion.AngleAxis的使用,详细讲解了如何围绕轴旋转物体以及世界坐标轴与本地坐标轴旋转的区别。通过实例展示了Quaternion相乘的原理,并提供了源代码实现,帮助读者理解旋转的叠加效果。


 3527
3527

 被折叠的 条评论
为什么被折叠?


