


 本文介绍如何从特定版本的Ubuntu构建Docker镜像,并详细记录了构建过程中的每一步指令及输出结果。此外,还分享了如何运行、管理构建好的容器。
下载 dockerfile
https://github.com/tianon/docker-brew-ubuntu-core
但是这里有 5 个版本的 ubuntu,而我是需要其中一个版本。
所以不用 git clone,改用 DownGit
https://minhaskamal.github.io/DownGit/#/home
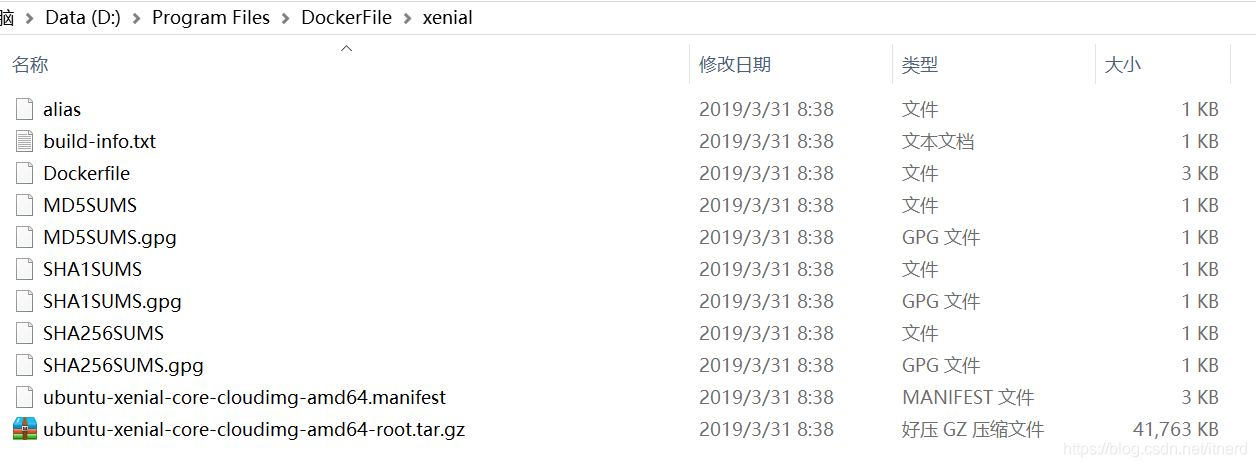
把 这个 repo 中的 xenial 的文件夹地址复制到 downgit 中,就可以单独下载了
准备好dockerfile 如下:
D:\Program Files\DockerFile\xenial>docker build -t ubuntu1604 .
Sending build context to Docker daemon  42.78MB
Step 1/6 : FROM scratch
 --->
Step 2/6 : ADD ubuntu-xenial-core-cloudimg-amd64-root.tar.gz /
 ---> 2ac194a2ee5a
Step 3/6 : RUN set -xe          && echo '#!/bin/sh' > /usr/sbin/policy-rc.d     && echo 'exit 101' >> /usr/sbin/policy-rc.d     && chmod +x /usr/sbin/policy-rc.d               && dpkg-divert --local --rename --add /sbin/initctl     && cp -a /usr/sbin/policy-rc.d /sbin/initctl    && sed -i 's/^exit.*/exit 0/' /sbin/initctl             && echo 'force-unsafe-io' > /etc/dpkg/dpkg.cfg.d/docker-apt-speedup             && echo 'DPkg::Post-Invoke { "rm -f /var/cache/apt/archives/*.deb /var/cache/apt/archives/partial/*.deb /var/cache/apt/*.bin || true"; };' > /etc/apt/apt.conf.d/docker-clean   && echo 'APT::Update::Post-Invoke { "rm -f /var/cache/apt/archives/*.deb /var/cache/apt/archives/partial/*.deb /var/cache/apt/*.bin || true"; };' >> /etc/apt/apt.conf.d/docker-clean   && echo 'Dir::Cache::pkgcache ""; Dir::Cache::srcpkgcache "";' >> /etc/apt/apt.conf.d/docker-clean              && echo 'Acquire::Languages "none";' > /etc/apt/apt.conf.d/docker-no-languages          && echo 'Acquire::GzipIndexes "true"; Acquire::CompressionTypes::Order:: "gz";' > /etc/apt/apt.conf.d/docker-gzip-indexes               && echo 'Apt::AutoRemove::SuggestsImportant "false";' > /etc/apt/apt.conf.d/docker-autoremove-suggests
 ---> Running in 491e712c34b3
+ echo #!/bin/sh
+ echo exit 101
+ chmod +x /usr/sbin/policy-rc.d
+ dpkg-divert --local --rename --add /sbin/initctl
Adding 'local diversion of /sbin/initctl to /sbin/initctl.distrib'
+ cp -a /usr/sbin/policy-rc.d /sbin/initctl
+ sed -i s/^exit.*/exit 0/ /sbin/initctl
+ echo force-unsafe-io
+ echo DPkg::Post-Invoke { "rm -f /var/cache/apt/archives/*.deb /var/cache/apt/archives/partial/*.deb /var/cache/apt/*.bin || true"; };
+ echo APT::Update::Post-Invoke { "rm -f /var/cache/apt/archives/*.deb /var/cache/apt/archives/partial/*.deb /var/cache/apt/*.bin || true"; };
+ echo Dir::Cache::pkgcache ""; Dir::Cache::srcpkgcache "";
+ echo Acquire::Languages "none";
+ echo Acquire::GzipIndexes "true"; Acquire::CompressionTypes::Order:: "gz";
+ echo Apt::AutoRemove::SuggestsImportant "false";
Removing intermediate container 491e712c34b3
 ---> ff63e4407973
Step 4/6 : RUN rm -rf /var/lib/apt/lists/*
 ---> Running in ebbc6dfdfebc
Removing intermediate container ebbc6dfdfebc
 ---> 2371df2dda37
Step 5/6 : RUN mkdir -p /run/systemd && echo 'docker' > /run/systemd/container
 ---> Running in 16030a00d96a
Removing intermediate container 16030a00d96a
 ---> 5deb3a56c379
Step 6/6 : CMD ["/bin/bash"]
 ---> Running in 6303e60f6185
Removing intermediate container 6303e60f6185
 ---> 1e406fcdce89
Successfully built 1e406fcdce89
Successfully tagged ubuntu1604:latest
SECURITY WARNING: You are building a Docker image from Windows against a non-Windows Docker host. All files and directories added to build context will have '-rwxr-xr-x' permissions. It is recommended to double check and reset permissions for sensitive files and directories.


D:\Program Files\DockerFile\xenial>docker images
REPOSITORY          TAG                 IMAGE ID            CREATED              SIZE
ubuntu1604          latest              1e406fcdce89        About a minute ago   118MB
然后就可以登入啦:
D:\Program Files\DockerFile\xenial>docker run -it ubuntu1604 /bin/bash
root@2b4aa04dad22:/# ll
total 72
drwxr-xr-x   1 root root 4096 Mar 31 08:49 ./
drwxr-xr-x   1 root root 4096 Mar 31 08:49 ../
-rwxr-xr-x   1 root root    0 Mar 31 08:49 .dockerenv*
drwxr-xr-x   2 root root 4096 Feb 22 10:06 bin/
drwxr-xr-x   2 root root 4096 Apr 12  2016 boot/
drwxr-xr-x   5 root root  360 Mar 31 08:49 dev/
drwxr-xr-x   1 root root 4096 Mar 31 08:49 etc/
drwxr-xr-x   2 root root 4096 Apr 12  2016 home/
drwxr-xr-x   8 root root 4096 Sep 13  2015 lib/
drwxr-xr-x   2 root root 4096 Feb 22 10:06 lib64/
drwxr-xr-x   2 root root 4096 Feb 22 10:05 media/
drwxr-xr-x   2 root root 4096 Feb 22 10:05 mnt/
drwxr-xr-x   2 root root 4096 Feb 22 10:05 opt/
dr-xr-xr-x 141 root root    0 Mar 31 08:49 proc/
drwx------   2 root root 4096 Feb 22 10:06 root/
drwxr-xr-x   1 root root 4096 Feb 22 10:06 run/
drwxr-xr-x   1 root root 4096 Mar 31 08:44 sbin/
drwxr-xr-x   2 root root 4096 Feb 22 10:05 srv/
dr-xr-xr-x  13 root root    0 Mar 31 08:49 sys/
drwxrwxrwt   2 root root 4096 Feb 22 10:06 tmp/
drwxr-xr-x   1 root root 4096 Feb 22 10:05 usr/
drwxr-xr-x   1 root root 4096 Feb 22 10:06 var/
root@2b4aa04dad22:/# exit
exit

D:\Program Files\DockerFile\xenial>docker ps -a
CONTAINER ID        IMAGE               COMMAND             CREATED             STATUS                      PORTS               NAMES
2b4aa04dad22        ubuntu1604          "/bin/bash"         56 seconds ago      Exited (0) 11 seconds ago                       quirky_keller
刚才直接 exit,退出的同时把 container 关闭了,见上面 container 的状态为 exited。
可以启动它:
D:\Program Files\DockerFile\xenial>docker start quirky_keller
quirky_keller

D:\Program Files\DockerFile\xenial>docker ps -a
CONTAINER ID        IMAGE               COMMAND             CREATED             STATUS              PORTS               NAMES
2b4aa04dad22        ubuntu1604          "/bin/bash"         13 minutes ago      Up 13 seconds                           quirky_keller
登入可以用 docker attach quirky_keller,但 exit 时,container 又退出了
可以改用 exec
D:\Program Files\DockerFile\xenial>docker exec -it 2b4aa04dad22  /bin/bash
root@2b4aa04dad22:/# ls
bin  boot  dev  etc  home  lib  lib64  media  mnt  opt  proc  root  run  sbin  srv  sys  tmp  usr  var
root@2b4aa04dad22:/# exit
exit

D:\Program Files\DockerFile\xenial>docker ps -a
CONTAINER ID        IMAGE               COMMAND             CREATED             STATUS              PORTS               NAMES
2b4aa04dad22        ubuntu1604          "/bin/bash"         22 minutes ago      Up 9 minutes                            quirky_keller
D:\Program Files\DockerFile\xenial>docker attach 2b4aa04dad22
root@2b4aa04dad22:/#
root@2b4aa04dad22:/# ls
bin  boot  dev  etc  home  lib  lib64  media  mnt  opt  proc  root  run  sbin  srv  sys  tmp  usr  var
root@2b4aa04dad22:/# exit
exit

D:\Program Files\DockerFile\xenial>docker ps -a
CONTAINER ID        IMAGE               COMMAND             CREATED             STATUS                     PORTS               NAMES
2b4aa04dad22        ubuntu1604          "/bin/bash"         23 minutes ago      Exited (0) 6 seconds ago                       quirky_keller
如果你看这个 container 不爽,你可以 docker rm 它!
D:\Program Files\DockerFile\xenial>docker rm 2b4aa04dad22
2b4aa04dad22

D:\Program Files\DockerFile\xenial>docker ps -a
CONTAINER ID        IMAGE               COMMAND             CREATED             STATUS              PORTS               NAMES
bingo!


 5226
5226

 被折叠的 条评论
为什么被折叠?
被折叠的 条评论
为什么被折叠?
 到【灌水乐园】发言


