


一、准备数据集
数据集就用 cifar10吧,大家喜欢用别的也可以;
cifar10的结果对比地址:Classification datasets results (rodrigob.github.io)

网络结构就选用alexnet作为对比结果吧
完整代码在github:
二、共享目录
既然是分布式,一定涉及到共享问题(比如:代码)
如果是ubuntu:
1、选一台机器当作server
sudo apt install nfs-kernel-server
2、在server机器上建立一个目录
/path/share
3、vim /etc/exports添加
/path/share *(rw,sync,no_root_squash,no_subtree_check)
4、执行
export -a
sudo /etc/init.d/nfs-kernel-server restart
5、其他机器建立个/path/share
6、修改/etc/fstab
增加一行
server机器的ip:/path/share /path/share nfs defaults 0 0
7、mount -a出现下图就可以了

三、启动分布式环境
1、选择一台机器作为master(head node,这是ray的叫法),其他机器是worker
2、master执行
ray start --head --port 6379 --dashboard-host '0.0.0.0' --dashboard-port 8265 --gcs-server-port 8075 --object-manager-port 8076 --node-manager-port 8077 --min-worker-port 10002 --max-worker-port 19999 --autoscaling-config=~/ray_bootstrap_config.yaml3、其他worker执行
ray start --address='192.168.xx.xx:6379' (这个命令2执行完了会自动给你)
三、训练(基于pytorch,基于mindspore,【data parallelism】)
1、pytorch
这里在github上,大家可以直接下载大佬的github:GitHub - haoxuhao/pytorch-disttrain: A simple demo of distributed training in Pytorch
这个作者代码里提供了,好几种脚本,上面截图的是多机多卡的运行方式:
我们来试试:
1、我们是2机,每机2卡
2、我们先用world size = 2;每机用1卡
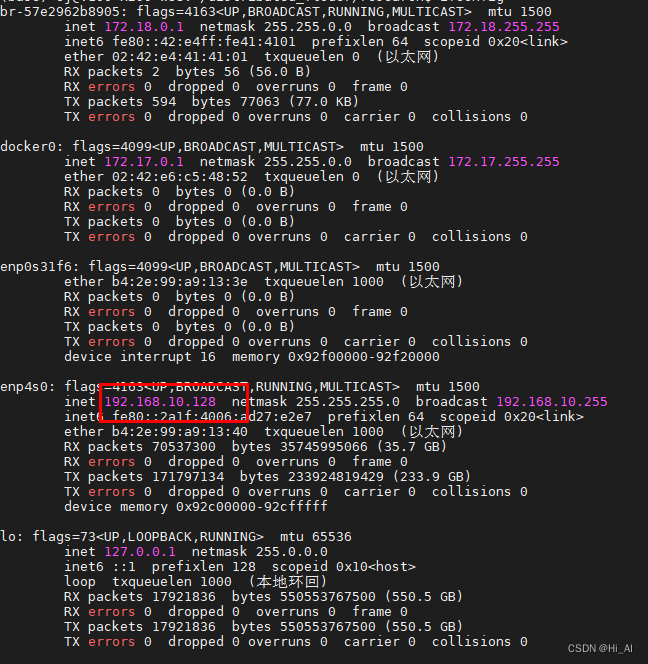
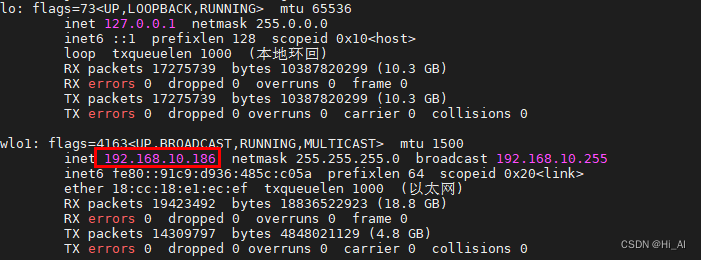
***重点*** nccl配置
必须了解清楚自己每个机器的网络:
#node 1
# node 2
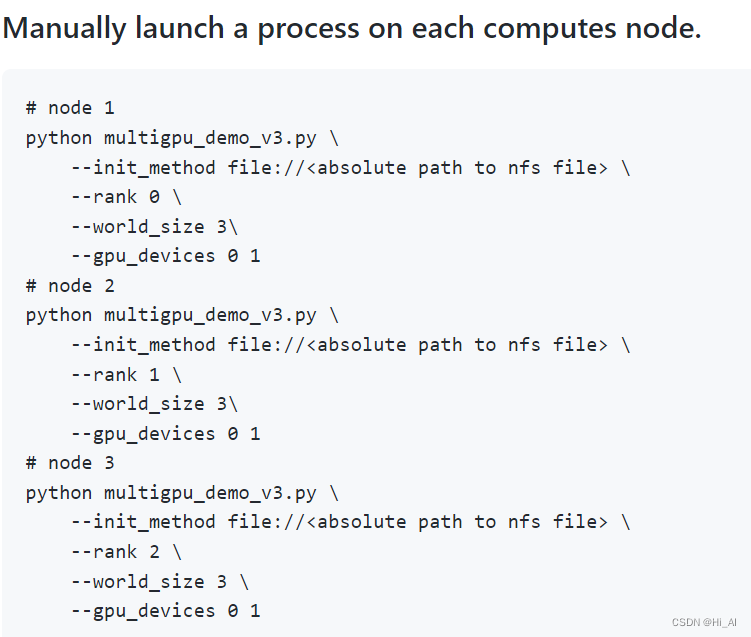
3、编辑执行命令(下面,init method 是采用网络连接的方式,也可以是nfs文件方式):
#node1
NCCL_SOCKET_IFNAME=enp4s0 NCCL_IB_DISABLE=1 NCCL_P2P_DISABLE=1 NCCL_DEBUG=INFO NCCL_IB_CUDA_SUPPORT=0 python multigpu_demo_v3.py --init_method 'tcp://192.168.10.xx:23456' --rank 0 --world_size 2 --batch_size 256 --gpu_devices 1
#node2
NCCL_SOCKET_IFNAME=wlo1 NCCL_IB_DISABLE=1 NCCL_P2P_DISABLE=0 NCCL_IB_CUDA_SUPPORT=0 NCCL_DEBUG=INFO python multigpu_demo_v3.py --init_method 'tcp://192.168.10.xx:23456' --rank 1 --world_size 2 --batch_size 256 --gpu_devices 1
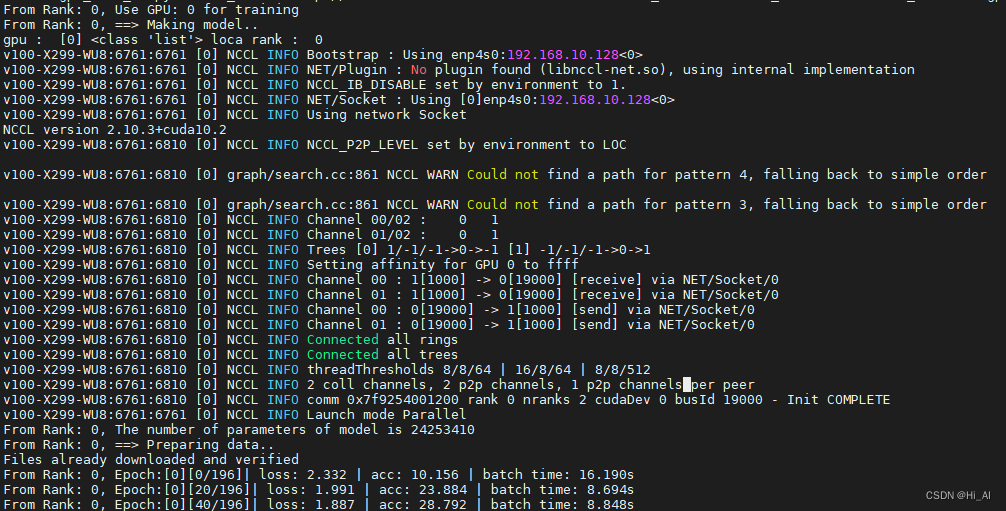
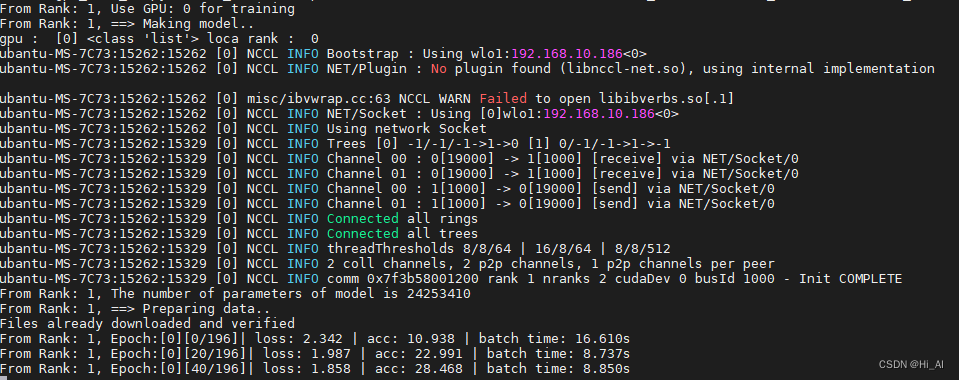
大家运行后看到下面的图,就代表程序运行起来了
#node1
#node2
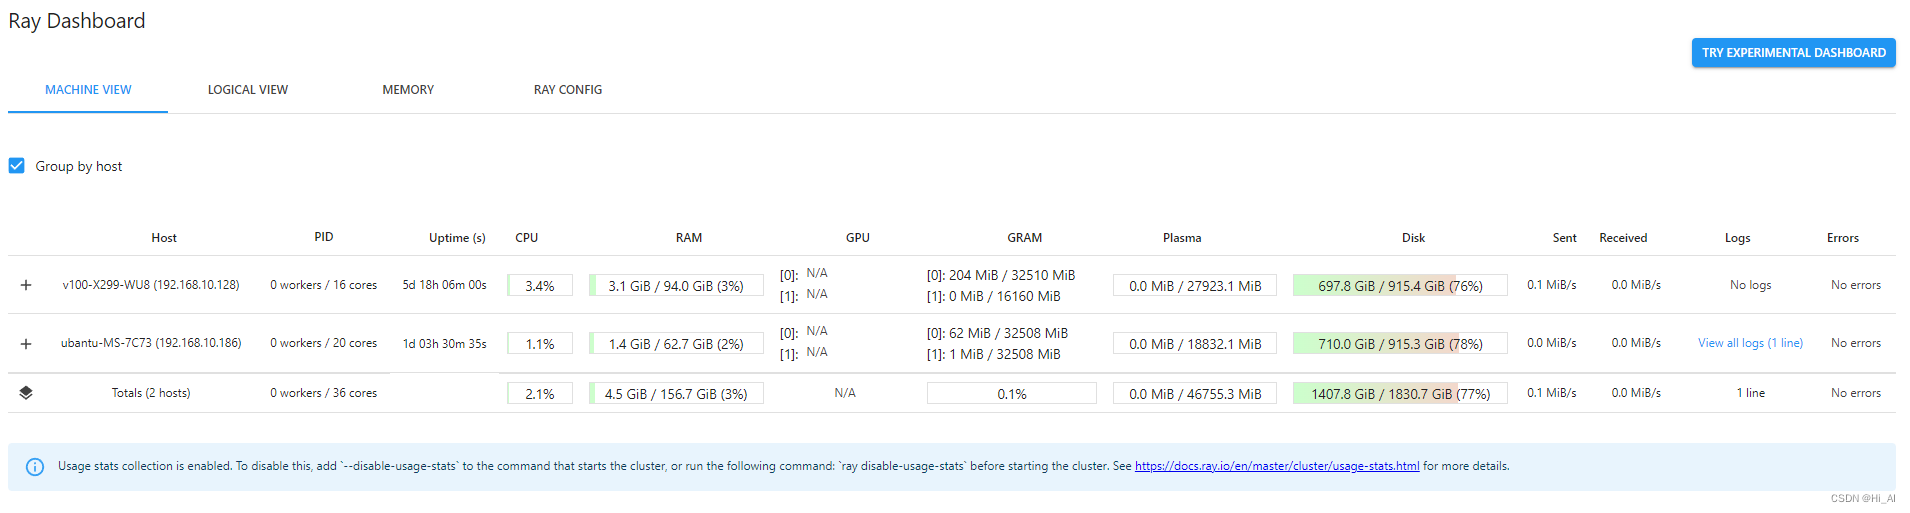
也可以用ray 的dashboard查看,资源使用情况
2、mindspore


 2258
2258

 被折叠的 条评论
为什么被折叠?
被折叠的 条评论
为什么被折叠?
 到【灌水乐园】发言


