


我的使用安装环境是Ubuntu20,使用vscode+cmake进行编译与调试。
安装KDL库前必须安装好Eigen库。
KDL库是机械臂的运动学、动力学、轨迹规划的开源第三方库,功能强大。
一、Eigen库安装
首先可以搜索一下
sudo apt search eigen3
然后就出来了这几个选择,选择一个安装,很多其他的库安装也可以先搜索一下,这个命令还挺好用的
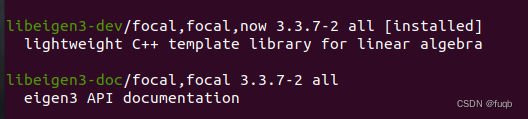
sudo apt install libeigen3-dev
二、KDL库安装
首先将远程代码仓的代码拷贝到本地
git clone https://github.com/orocos/orocos_kinematics_dynamics.git
然后切换到对应的目录
cd orocos_kinematics_dynamics/
cd orocos_kdl
然后创建build文件夹
mkdir build
然后编译以及安装
cd build
cmake ..
make
sudo make install
正常来说到这里KDL库就已经安装好了。
三、KDL库使用
找个新的文件夹,打开命令行,执行(目的是运行vscode打开当前文件夹)
code .
然后创建CMakeLists.txt以及main.cc两个文件
CMakeLists.txt中内容为:
cmake_minimum_required(VERSION 3.10)
project(learn_kdl)
find_package(Eigen3 REQUIRED CONFIG)
find_package(orocos_kdl REQUIRED)
add_executable(main main.cc)
target_link_libraries(main Eigen3::Eigen orocos-kdl orocos-kdl-models)
main.cc中的内容参考的KDL源码下的examples文件夹下的trajectory_example.cpp
内容如下
/**
 * \file path_example.cpp
 * An example to demonstrate the use of trajectory generation
 * functions.
 *
 * There are is a matlab/octave file in the examples directory to visualise the results
 * of this example program. (visualize_trajectory.m)
 *
 */

#include <frames.hpp>
#include <frames_io.hpp>
#include <trajectory.hpp>
#include <trajectory_segment.hpp>
#include <trajectory_stationary.hpp>
#include <trajectory_composite.hpp>
#include <trajectory_composite.hpp>
#include <velocityprofile_trap.hpp>
#include <path_roundedcomposite.hpp>
#include <rotational_interpolation_sa.hpp>
#include <utilities/error.h>
#include <utilities/utility.h>
#include <trajectory_composite.hpp>

int main(int argc,char* argv[]) {
	using namespace KDL;
	// Create the trajectory:
    // use try/catch to catch any exceptions thrown.
    // NOTE:  exceptions will become obsolete in a future version.
	try {
        // Path_RoundedComposite defines the geometric path along
        // which the robot will move.
		//
		Path_RoundedComposite* path = new Path_RoundedComposite(0.2,0.01,new RotationalInterpolation_SingleAxis());
		// The routines are now robust against segments that are parallel.
		// When the routines are parallel, no rounding is needed, and no attempt is made
		// add constructing a rounding arc.
		// (It is still not possible when the segments are on top of each other)
		// Note that you can only rotate in a deterministic way over an angle less then PI!
		// With an angle == PI, you cannot predict over which side will be rotated.
		// With an angle > PI, the routine will rotate over 2*PI-angle.
		// If you need to rotate over a larger angle, you need to introduce intermediate points.
		// So, there is a common use case for using parallel segments.
		path->Add(Frame(Rotation::RPY(PI,0,0), Vector(-1,0,0)));
		path->Add(Frame(Rotation::RPY(PI_2,0,0), Vector(-0.5,0,0)));
		path->Add(Frame(Rotation::RPY(0,0,0), Vector(0,0,0)));
		path->Add(Frame(Rotation::RPY(0.7,0.7,0.7), Vector(1,1,1)));
		path->Add(Frame(Rotation::RPY(0,0.7,0), Vector(1.5,0.3,0)));
		path->Add(Frame(Rotation::RPY(0.7,0.7,0), Vector(1,1,0)));

		// always call Finish() at the end, otherwise the last segment will not be added.
		path->Finish();

        // Trajectory defines a motion of the robot along a path.
        // This defines a trapezoidal velocity profile.
		VelocityProfile* velpref = new VelocityProfile_Trap(0.5,0.1);
		velpref->SetProfile(0,path->PathLength());
		Trajectory* traject = new Trajectory_Segment(path, velpref);


		Trajectory_Composite* ctraject = new Trajectory_Composite();
		ctraject->Add(traject);
		ctraject->Add(new Trajectory_Stationary(1.0,Frame(Rotation::RPY(0.7,0.7,0), Vector(1,1,0))));

		// use the trajectory
		double dt=0.1;
		std::ofstream of("./trajectory.dat");
		for (double t=0.0; t <= traject->Duration(); t+= dt) {
			Frame current_pose;
			current_pose = traject->Pos(t);
			for (int i=0;i<4;++i)
				for (int j=0;j<4;++j)
					of << current_pose(i,j) << "\t";
			of << "\n";
			// also velocities and accelerations are available !
			//traject->Vel(t);
			//traject->Acc(t);
		}
		of.close();

		// you can get some meta-info on the path:
		for (int segmentnr=0;  segmentnr < path->GetNrOfSegments(); segmentnr++) {
			double starts,ends;
			Path::IdentifierType pathtype;
			if (segmentnr==0) {
				starts = 0.0;
			} else {
				starts = path->GetLengthToEndOfSegment(segmentnr-1);
			}
			ends = path->GetLengthToEndOfSegment(segmentnr);
			pathtype = path->GetSegment(segmentnr)->getIdentifier();
			std::cout << "segment " << segmentnr << " runs from s="<<starts << " to s=" <<ends;
			switch(pathtype) {
				case Path::ID_CIRCLE:
					std::cout << " circle";
					break;
				case Path::ID_LINE:
					std::cout << " line ";
					break;
				default:
					std::cout << " unknown ";
					break;
			}
			std::cout << std::endl;
		}
        std::cout << " trajectory written to the ./trajectory.dat file " << std::endl;

        delete ctraject;
	} catch(Error& error) {
		std::cout <<"I encountered this error : " << error.Description() << std::endl;
		std::cout << "with the following type " << error.GetType() << std::endl;
	}
}
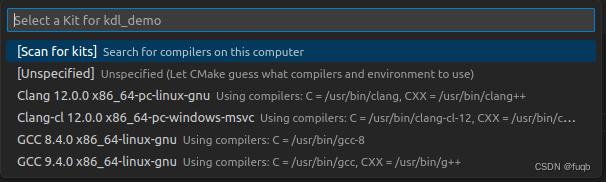
然后在vscode的最底下这栏,设置好编译器,我用的是clang,也可以用其他的,比如gcc,如果没有需要自行安装。

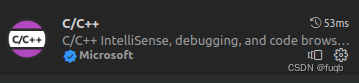
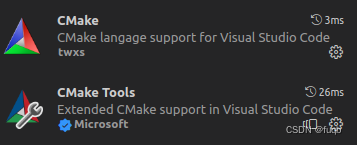
还需要在vscode中安装好c++以及cmake的扩展
好了,一切就像,可以开始编译了,点击vscode的最底下这栏的build,然后开始编译

没有问题的话就可以运行编译出来的可执行文件了,

最底下这栏,可以设置是debug模式还是release模式,点击三角形或者虫子符号,就可以运行了,最右边的main是可执行文件名称,如果有多个可执行文件,可以执行哪个。
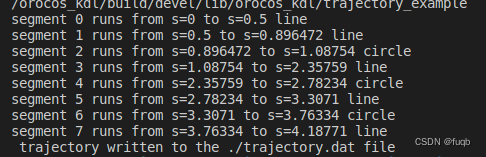
执行结果如上所示,结束。


 6811
6811

 被折叠的 条评论
为什么被折叠?
被折叠的 条评论
为什么被折叠?
 到【灌水乐园】发言


