


1. GeForce RTX 5080显卡MMCV源码编译
mmcv==2.2.0 版本存在numpy版本问题,因此使用mmcv==2.1.0
-
mmcv==2.1.0 下载链接:https://github.com/open-mmlab/mmcv/archive/refs/tags/v2.1.0.zip -
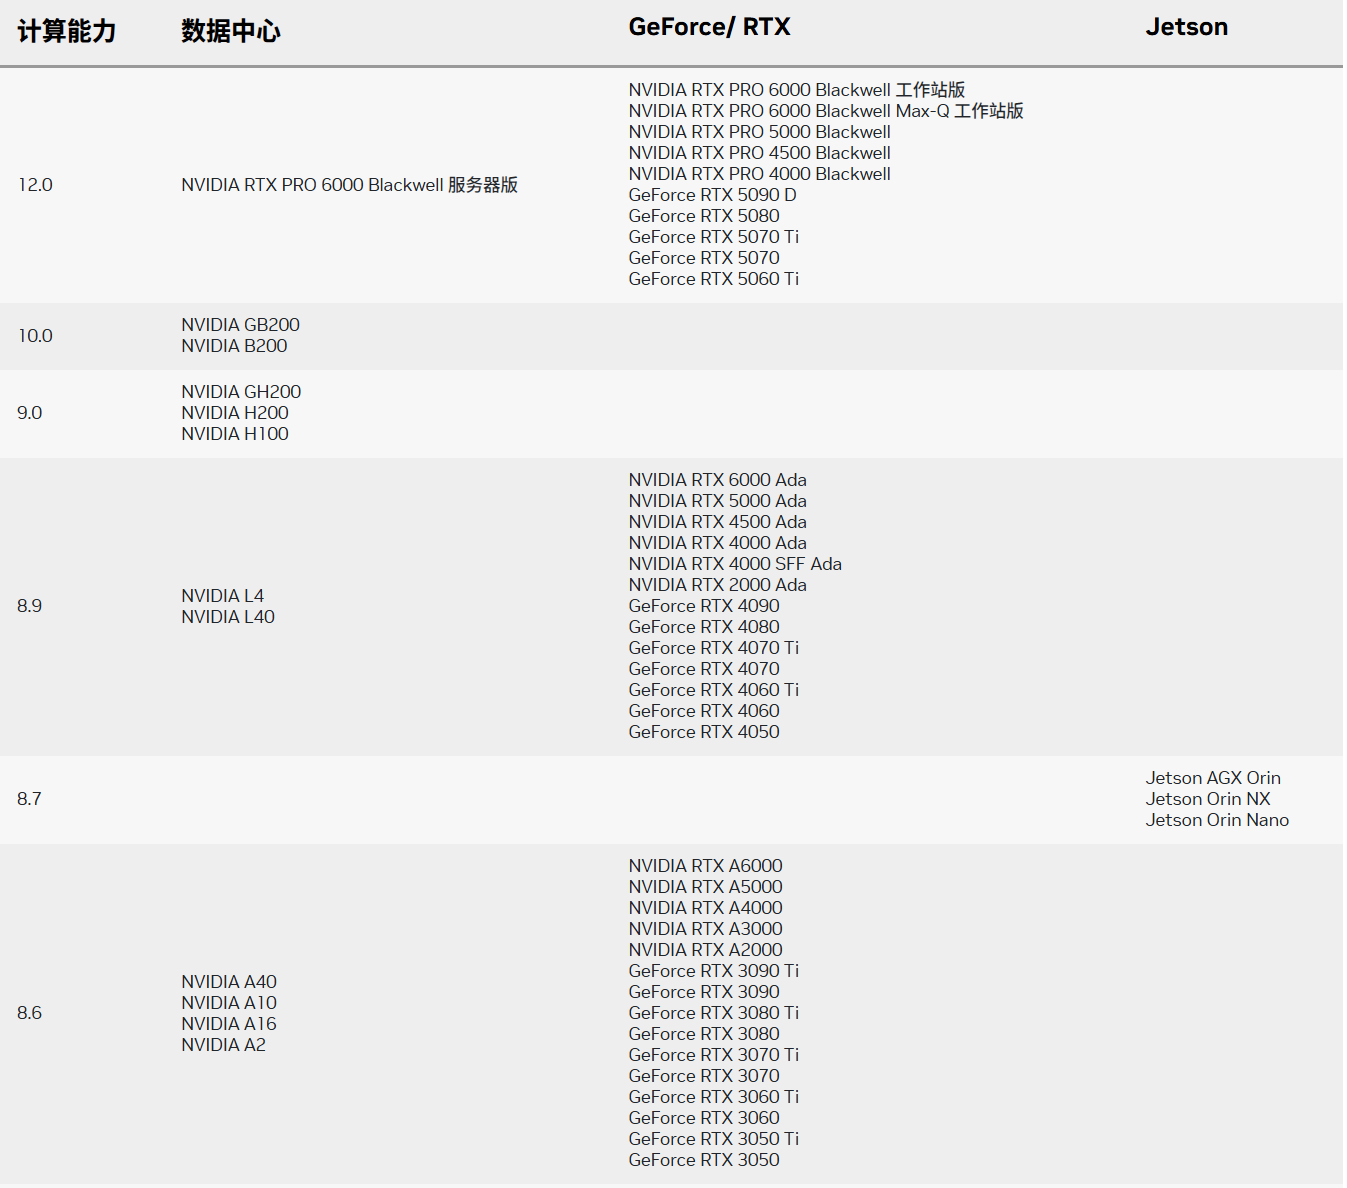
硬件计算能力查看:https://developer.nvidia.cn/cuda-gpus ,
GeForce RTX 5080 CUDA Capability:12.0
-
各个平台
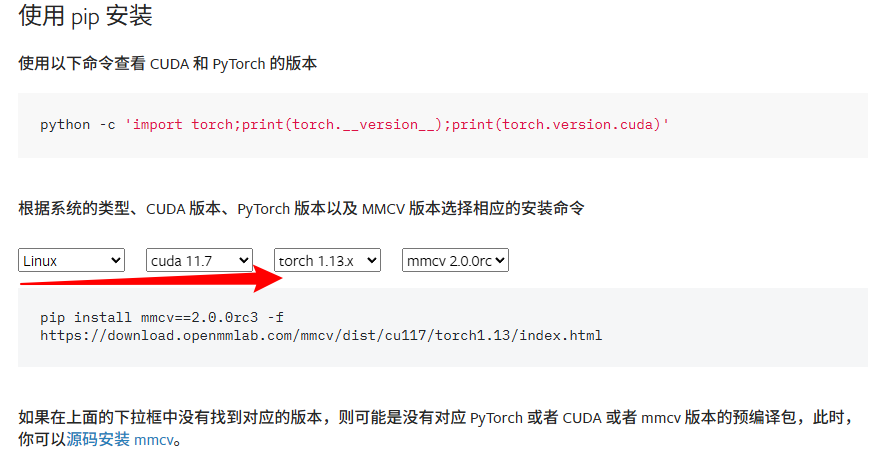
mmcv安装:https://mmcv-zh-cn.readthedocs.io/zh-cn/2.x/get_started/installation.html#pip
-
mmdetection3d教程:https://mmdetection3d.readthedocs.io/zh-cn/latest/get_started.html#id1
# [1]创建虚拟环境
conda create --name mmdet3d python=3.9
# [2]激活环境
activate mmdet3d
# [3]安装torch CUDA 12.8
pip install torch==2.7.1 torchvision==0.22.1 torchaudio==2.7.1 --index-url https://download.pytorch.org/whl/cu128
# [4]设置cl.exe 将 C:\Program Files (x86)\Microsoft Visual Studio\2019\Community\VC\Tools\MSVC\14.27.29110\bin\Hostx86\x64,添加到高级环境变量中,注意 Visual Studio 2019 版本Community与本机一致。
# [5] 设置计算能力和查看
set TORCH_CUDA_ARCH_LIST=12.0
echo %TORCH_CUDA_ARCH_LIST%
# [6] 设置和查看MMCV_WITH_OPS
set MMCV_WITH_OPS=1
echo %MMCV_WITH_OPS%
# [7]
set MAX_JOBS=8
echo %MAX_JOBS%
# [8] mmcv源码编译
setup.py build_ext  # 如果成功, cl 将被启动用于编译算子
# [9] mmcv源码安装
python setup.py develop
# [10] 验证
python .dev_scripts/check_installation.py
# Start checking the installation of mmcv ...
# CPU ops were compiled successfully.
# CUDA ops were compiled successfully.
# mmcv has been installed successfully.

# Environment information:
# ------------------------------------------------------------
# sys.platform: win32
# Python: 3.9.23 (main, Jun  5 2025, 13:25:08) [MSC v.1929 64 bit (AMD64)]
# CUDA available: True
# MUSA available: False
# numpy_random_seed: 2147483648
# GPU 0: NVIDIA GeForce RTX 5080
# CUDA_HOME: C:\Program Files\NVIDIA GPU Computing Toolkit\CUDA\v12.8
# NVCC: Cuda compilation tools, release 12.8, V12.8.61
# MSVC: 用于 x64 的 Microsoft (R) C/C++ 优化编译器 19.29.30159 版
# GCC: n/a
# PyTorch: 2.7.1+cu128
# PyTorch compiling details: PyTorch built with:
#   - C++ Version: 201703
#   - MSVC 192930158
#   - Intel(R) oneAPI Math Kernel Library Version 2025.1-Product Build 20250306 for Intel(R) 64 architecture applications
#   - Intel(R) MKL-DNN v3.7.1 (Git Hash 8d263e693366ef8db40acc569cc7d8edf644556d)
#   - OpenMP 2019
#   - LAPACK is enabled (usually provided by MKL)
#   - CPU capability usage: AVX512
#   - CUDA Runtime 12.8
#   - NVCC architecture flags: -gencode;arch=compute_50,code=sm_50;-gencode;arch=compute_60,code=sm_60;-gencode;arch=compute_61,code=sm_61;-gencode;arch=compute_70,code=sm_70;-gencode;arch=compute_75,code=sm_75;-gencode;arch=compute_80,code=sm_80;-gencode;arch=compute_86,code=sm_86;-gencode;arch=compute_90,code=sm_90;-gencode;arch=compute_100,code=sm_100;-gencode;arch=compute_120,code=sm_120
#   - CuDNN 90.7.1
#   - Magma 2.5.4
#   - Build settings: BLAS_INFO=mkl, BUILD_TYPE=Release, COMMIT_SHA=e2d141dbde55c2a4370fac5165b0561b6af4798b, CUDA_VERSION=12.8, CUDNN_VERSION=9.7.1, CXX_COMPILER=C:/actions-runner/_work/pytorch/pytorch/pytorch/.ci/pytorch/windows/tmp_bin/sccache-cl.exe, CXX_FLAGS=/DWIN32 /D_WINDOWS /GR /EHsc /Zc:__cplusplus /bigobj /FS /utf-8 -DUSE_PTHREADPOOL -DNDEBUG -DUSE_KINETO -DLIBKINETO_NOROCTRACER -DLIBKINETO_NOXPUPTI=ON -DUSE_FBGEMM -DUSE_XNNPACK -DSYMBOLICATE_MOBILE_DEBUG_HANDLE /wd4624 /wd4068 /wd4067 /wd4267 /wd4661 /wd4717 /wd4244 /wd4804 /wd4273, LAPACK_INFO=mkl, PERF_WITH_AVX=1, PERF_WITH_AVX2=1, TORCH_VERSION=2.7.1, USE_CUDA=ON, USE_CUDNN=ON, USE_CUSPARSELT=OFF, USE_GFLAGS=OFF, USE_GLOG=OFF, USE_GLOO=ON, USE_MKL=ON, USE_MKLDNN=ON, USE_MPI=OFF, USE_NCCL=OFF, USE_NNPACK=OFF, USE_OPENMP=ON, USE_ROCM=OFF, USE_ROCM_KERNEL_ASSERT=OFF,

# TorchVision: 0.22.1+cu128
# OpenCV: 4.10.0
# MMEngine: 0.10.7
# MMCV: 2.1.0
# MMCV Compiler: MSVC 192930159
# MMCV CUDA Compiler: 12.8
# ------------------------------------------------------------
2. 环境创建
#1.创建虚拟环境
conda create -n mmdet3d python=3.9
#1.1激活虚拟环境
conda activate mmdet3d
#2.安装pytorch v2.7.1 安装torch CUDA 12.8
pip install torch==2.7.1 torchvision==0.22.1 torchaudio==2.7.1 --index-url https://download.pytorch.org/whl/cu128
#3.安装mmdetection3d
pip install openmim
#3.1下载v1.3.0的mmdet3d
# git clone https://github.com/open-mmlab/mmdetection3d.git -b v1.3.0 目前没有该分支,只有dev-1.x
wget https://github.com/open-mmlab/mmdetection3d/archive/refs/tags/v1.3.0.zip
wget https://github.com/open-mmlab/mmdetection3d/archive/refs/tags/v1.4.0.zip
cd mmdetection3d
pip
#4.安装 cumm-cuxxx spconv-cuxxx
pip install cumm-cu128
pip install spconv-cu120
#5.配置 mmdet3d中的BEVFusion(所在位置不要改变,./mmdetection3d/)
python projects/BEVFusion/setup.py develop
#6.安装其他依赖
pip install mmengine
# 如果通过源码安装mmcv可忽略
pip install mmcv==2.1.0 -f https://download.openmmlab.com/mmcv/dist/cu118/torch2.1/index.html
pip install mmdet==3.2.0
# 7.环境测试
# 为了验证 MMDetection3D 是否安装正确。
# 步骤 1. 我们需要下载配置文件和模型权重文件。
mim download mmdet3d --config pointpillars_hv_secfpn_8xb6-160e_kitti-3d-car --dest .
# 下载将需要几秒钟或更长时间,这取决于您的网络环境。完成后,您会在当前文件夹中发现两个文件 pointpillars_hv_secfpn_8xb6-160e_kitti-3d-car.py 和 hv_pointpillars_secfpn_6x8_160e_kitti-3d-car_20220331_134606-d42d15ed.pth。
# 步骤 2. 推理验证。
# 方案 a:如果您从源码安装 MMDetection3D,那么直接运行以下命令进行验证:
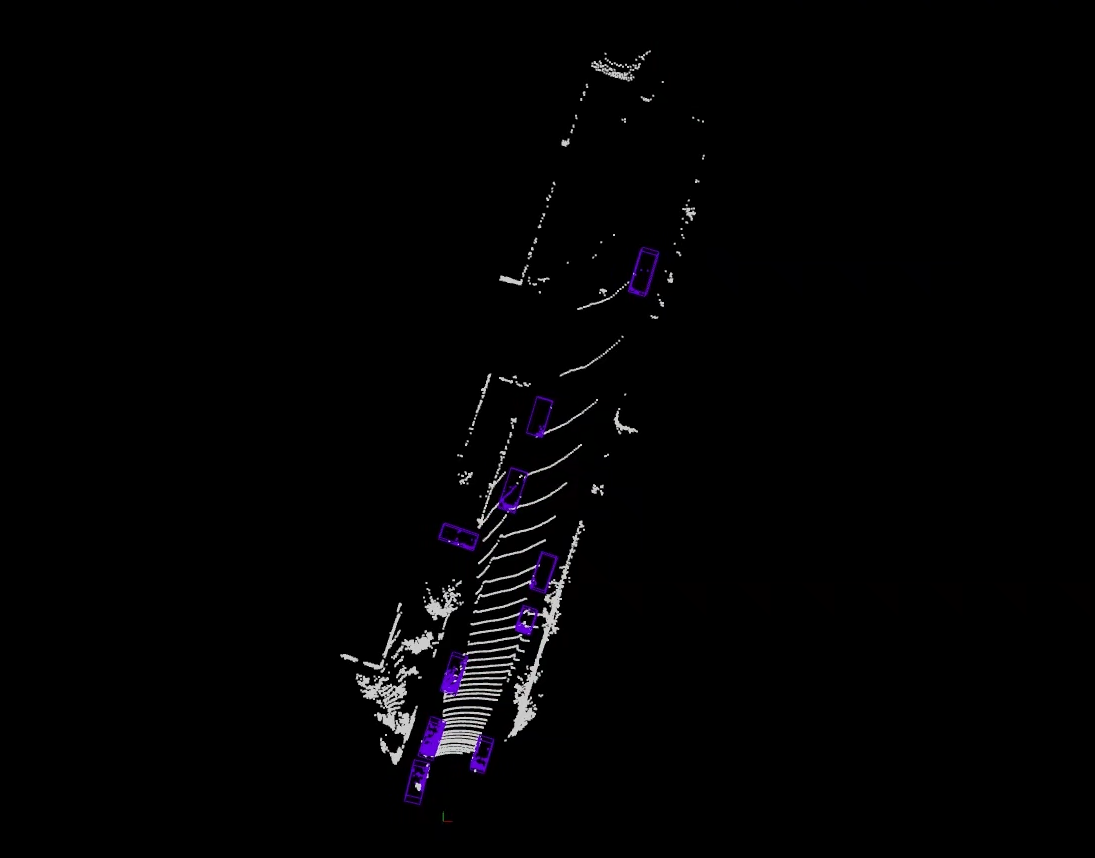
python demo/pcd_demo.py demo/data/kitti/000008.bin pointpillars_hv_secfpn_8xb6-160e_kitti-3d-car.py hv_pointpillars_secfpn_6x8_160e_kitti-3d-car_20220331_134606-d42d15ed.pth --show
# 您会看到一个带有点云的可视化界面,其中包含有在汽车上绘制的检测框。如果你在没有显示设备的服务器上安装 MMDetection3D ,你可以忽略 --show 参数。Demo 仍会将预测结果保存到 outputs/pred/000008.json 文件中。
# 测试时如果出现显示警告:mmengine - WARNING - Display device not found. --show is forced to False
set DISPLAY=127.0.0.1:0
# 8. 测试BEVFusion
# 使用 BEVFusion model进行测试: https://drive.google.com/file/d/1QkvbYDk4G2d6SZoeJqish13qSyXA4lp3/view?usp=share_link
# 安装BEVFusion
python projects/BEVFusion/setup.py develop
# 测试
#python projects/BEVFusion/demo/multi_modality_demo.py demo/data/nuscenes/n015-2018-07-24-11-22-45+0800__LIDAR_TOP__1532402927 647951.pcd.bin demo/data/nuscenes/ demo/data/nuscenes/n015-2018-07-24-11-22-45+0800.pkl projects/BEVFusion/configs/bevfusion_lidar-cam_voxel0075_second_secfpn_8xb4-cyclic-20e_nus-3d.py .\bevfusion_converted.pth --cam-type all --score-thr 0.2 --show
# 测试时如果出现显示警告:mmengine - WARNING - Display device not found. --show is forced to False
#set DISPLAY=127.0.0.1:0


 1731
1731


 到【灌水乐园】发言


