


 这个代码示例展示了如何使用NeoPixel库控制LED显示不同颜色的循环,包括红色、绿色、蓝色和它们的组合。通过调整DELAYVAL变量,可以改变颜色变化之间的延迟时间。代码中涉及的关键词包括RGB颜色值、NeoPixel库、延迟控制和LED显示。
数字量LED显示案例:
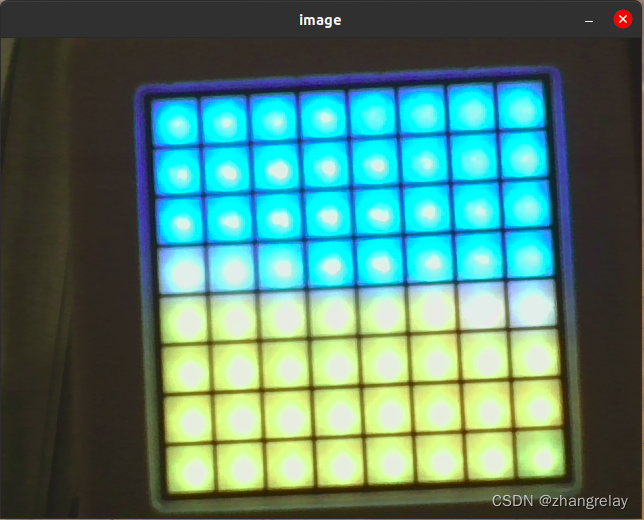
cocube测试led刷新
代码如下:
  for(DELAYVAL=1;DELAYVAL<10;DELAYVAL++)
  {
        // The first NeoPixel in a strand is #0, second is 1, all the way up
        // to the count of pixels minus one.
        for(int i=0; i<NUMPIXELS; i++) { // For each pixel...

          // pixels.Color() takes RGB values, from 0,0,0 up to 255,255,255
          // Here we're using a moderately bright green color:
          pixels.setPixelColor(i, pixels.Color(1, 0, 0));

          pixels.show();   // Send the updated pixel colors to the hardware.

          delay(DELAYVAL); // Pause before next pass through loop
        }
        for(int i=0; i<NUMPIXELS; i++) { // For each pixel...

          // pixels.Color() takes RGB values, from 0,0,0 up to 255,255,255
          // Here we're using a moderately bright green color:
          pixels.setPixelColor(i, pixels.Color(0, 1, 0));

          pixels.show();   // Send the updated pixel colors to the hardware.

          delay(DELAYVAL); // Pause before next pass through loop
        }
        for(int i=0; i<NUMPIXELS; i++) { // For each pixel...

          // pixels.Color() takes RGB values, from 0,0,0 up to 255,255,255
          // Here we're using a moderately bright green color:
          pixels.setPixelColor(i, pixels.Color(0, 0, 1));

          pixels.show();   // Send the updated pixel colors to the hardware.

          delay(DELAYVAL); // Pause before next pass through loop
        }
        for(int i=0; i<NUMPIXELS; i++) { // For each pixel...

          // pixels.Color() takes RGB values, from 0,0,0 up to 255,255,255
          // Here we're using a moderately bright green color:
          pixels.setPixelColor(i, pixels.Color(1, 1, 0));

          pixels.show();   // Send the updated pixel colors to the hardware.

          delay(DELAYVAL); // Pause before next pass through loop
        }
        for(int i=0; i<NUMPIXELS; i++) { // For each pixel...

          // pixels.Color() takes RGB values, from 0,0,0 up to 255,255,255
          // Here we're using a moderately bright green color:
          pixels.setPixelColor(i, pixels.Color(0, 1, 1));

          pixels.show();   // Send the updated pixel colors to the hardware.

          delay(DELAYVAL); // Pause before next pass through loop
        }
        for(int i=0; i<NUMPIXELS; i++) { // For each pixel...

          // pixels.Color() takes RGB values, from 0,0,0 up to 255,255,255
          // Here we're using a moderately bright green color:
          pixels.setPixelColor(i, pixels.Color(1, 0, 1));

          pixels.show();   // Send the updated pixel colors to the hardware.

          delay(DELAYVAL); // Pause before next pass through loop
        }
        for(int i=0; i<NUMPIXELS; i++) { // For each pixel...

          // pixels.Color() takes RGB values, from 0,0,0 up to 255,255,255
          // Here we're using a moderately bright green color:
          pixels.setPixelColor(i, pixels.Color(1, 1, 1));

          pixels.show();   // Send the updated pixel colors to the hardware.

          delay(DELAYVAL); // Pause before next pass through loop
        }
  }
注释为原版程序,未作修改。
简单解释一下:
// NeoPixel Ring 简单草图 (c) 2013 Shae Erisson
// 在 GPLv3 许可下发布以匹配其余的
// Adafruit NeoPixel 库
参考:Adafruit_NeoPixel
// 在设置 NeoPixel 库时,设置有多少像素,
// 以及使用哪个引脚发送信号。 请注意,对于旧版 NeoPixel
// 删除可能需要更改的第三个参数——参见
// strandtest 示例以获取有关可能值的更多信息。
NUMPIXELS是LED数量,8*8一共64个。
DELAYVAL是刷新时延,1ms-9ms。
pixels.setPixelColor(i, pixels.Color(1, 0, 0));
分别为RGB颜色显示。
pixels.Color(1, 0, 0) 红色亮度1
pixels.Color(0, 1, 0) 绿色亮度1
pixels.Color(0, 0, 1) 蓝色亮度1
pixels.Color(255, 0, 0) 红色亮度255
pixels.Color(0, 255, 0) 绿色亮度255
pixels.Color(0, 0, 255) 蓝色亮度255
// pixels.Color() takes RGB values, from 0,0,0 up to 255,255,255


 2969
2969

 被折叠的 条评论
为什么被折叠?
被折叠的 条评论
为什么被折叠?
 到【灌水乐园】发言


