MoveIt Doucument

Tutorials — MoveIt Documentation: Humble documentation

MoveItCpp Tutorial

Introduction

MoveItCpp is a new high level interface, a unified C++ API that does not require the use of ROS Actions, Services, and Messages to access the core MoveIt functionality, and an alternative (not a full replacement) for the existing MoveGroup API, we recommend this interface for advanced users needing more realtime control or for industry applications. This interface has been developed at PickNik Robotics by necessity for our many commercial applications.

ros2 launch moveit2_tutorials moveit_cpp_tutorial.launch.py


static const std::string PLANNING_GROUP = "panda_arm";
static const std::string LOGNAME = "moveit_cpp_tutorial";

/* Otherwise robot with zeros joint_states */
rclcpp::sleep_for(std::chrono::seconds(1));

RCLCPP_INFO(LOGGER, "Starting MoveIt Tutorials...");

auto moveit_cpp_ptr = std::make_shared<moveit_cpp::MoveItCpp>(node);
moveit_cpp_ptr->getPlanningSceneMonitor()->providePlanningSceneService();

auto planning_components = std::make_shared<moveit_cpp::PlanningComponent>(PLANNING_GROUP, moveit_cpp_ptr);
auto robot_model_ptr = moveit_cpp_ptr->getRobotModel();
auto robot_start_state = planning_components->getStartState();
auto joint_model_group_ptr = robot_model_ptr->getJointModelGroup(PLANNING_GROUP);

Visualization

moveit_visual_tools::MoveItVisualTools visual_tools(node, "panda_link0", "moveit_cpp_tutorial",
                                                    moveit_cpp_ptr->getPlanningSceneMonitor());
visual_tools.deleteAllMarkers();
visual_tools.loadRemoteControl();

Eigen::Isometry3d text_pose = Eigen::Isometry3d::Identity();
text_pose.translation().z() = 1.75;
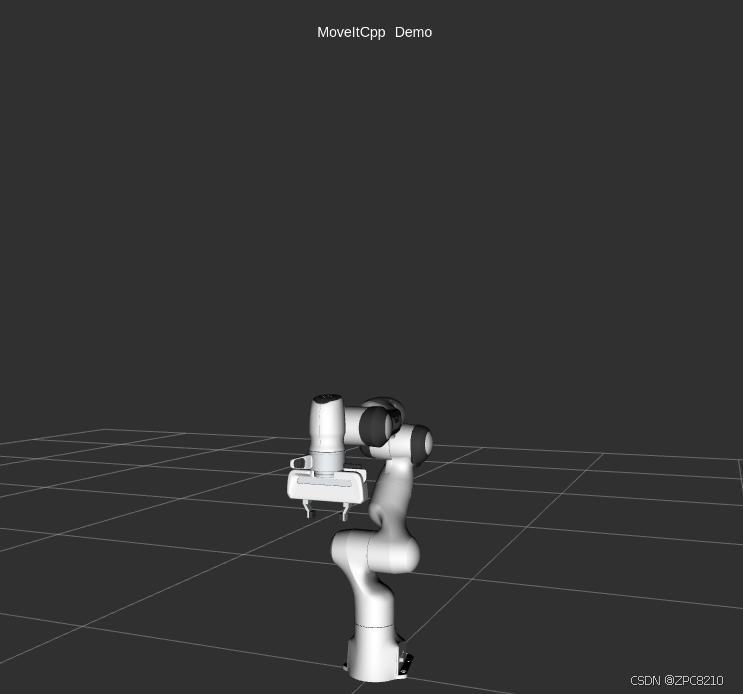
visual_tools.publishText(text_pose, "MoveItCpp_Demo", rvt::WHITE, rvt::XLARGE);
visual_tools.trigger();

Start the demo 

visual_tools.prompt("Press 'next' in the RvizVisualToolsGui window to start the demo");

Planning with MoveItCpp

There are multiple ways to set the start and the goal states of the plan they are illustrated in the following plan examples

Plan #1

We can set the start state of the plan to the current state of the robot

planning_components->setStartStateToCurrentState();

The first way to set the goal of the plan is by using geometry_msgs::PoseStamped ROS message type as follow

geometry_msgs::msg::PoseStamped target_pose1;
target_pose1.header.frame_id = "panda_link0";
target_pose1.pose.orientation.w = 1.0;
target_pose1.pose.position.x = 0.28;
target_pose1.pose.position.y = -0.2;
target_pose1.pose.position.z = 0.5;
planning_components->setGoal(target_pose1, "panda_link8");

Now, we call the PlanningComponents to compute the plan and visualize it. Note that we are just planning

auto plan_solution1 = planning_components->plan();

 Check if PlanningComponents succeeded in finding the plan

if (plan_solution1)
{

Visualize the start pose in Rviz

visual_tools.publishAxisLabeled(robot_start_state->getGlobalLinkTransform("panda_link8"), "start_pose");

Visualize the goal pose in Rviz

visual_tools.publishAxisLabeled(target_pose1.pose, "target_pose");
visual_tools.publishText(text_pose, "setStartStateToCurrentState", rvt::WHITE, rvt::XLARGE);

Visualize the trajectory in Rviz

  visual_tools.publishTrajectoryLine(plan_solution1.trajectory, joint_model_group_ptr);
  visual_tools.trigger();

  /* Uncomment if you want to execute the plan */
  /* planning_components->execute(); // Execute the plan */
}

Plan #1 visualization:

Start the next plan

visual_tools.prompt("Press 'next' in the RvizVisualToolsGui window to continue the demo");
visual_tools.deleteAllMarkers();
visual_tools.trigger();

Plan #2

Here we will set the current state of the plan using moveit::core::RobotState

auto start_state = *(moveit_cpp_ptr->getCurrentState());
geometry_msgs::msg::Pose start_pose;
start_pose.orientation.w = 1.0;
start_pose.position.x = 0.55;
start_pose.position.y = 0.0;
start_pose.position.z = 0.6;

start_state.setFromIK(joint_model_group_ptr, start_pose);

planning_components->setStartState(start_state);

We will reuse the old goal that we had and plan to it.

auto plan_solution2 = planning_components->plan();
if (plan_solution2)
{
  moveit::core::RobotState robot_state(robot_model_ptr);
  moveit::core::robotStateMsgToRobotState(plan_solution2.start_state, robot_state);

  visual_tools.publishAxisLabeled(robot_state.getGlobalLinkTransform("panda_link8"), "start_pose");
  visual_tools.publishAxisLabeled(target_pose1.pose, "target_pose");
  visual_tools.publishText(text_pose, "moveit::core::RobotState_Start_State", rvt::WHITE, rvt::XLARGE);
  visual_tools.publishTrajectoryLine(plan_solution2.trajectory, joint_model_group_ptr);
  visual_tools.trigger();

  /* Uncomment if you want to execute the plan */
  /* planning_components->execute(); // Execute the plan */
}

Plan #2 visualization:

Start the next plan

visual_tools.prompt("Press 'next' in the RvizVisualToolsGui window to continue the demo");
visual_tools.deleteAllMarkers();
visual_tools.trigger();

Plan #3

We can also set the goal of the plan using moveit::core::RobotState

auto target_state = *robot_start_state;
geometry_msgs::msg::Pose target_pose2;
target_pose2.orientation.w = 1.0;
target_pose2.position.x = 0.55;
target_pose2.position.y = -0.05;
target_pose2.position.z = 0.8;

target_state.setFromIK(joint_model_group_ptr, target_pose2);

planning_components->setGoal(target_state);

We will reuse the old start that we had and plan from it.

auto plan_solution3 = planning_components->plan();
if (plan_solution3)
{
  moveit::core::RobotState robot_state(robot_model_ptr);
  moveit::core::robotStateMsgToRobotState(plan_solution3.start_state, robot_state);

  visual_tools.publishAxisLabeled(robot_state.getGlobalLinkTransform("panda_link8"), "start_pose");
  visual_tools.publishAxisLabeled(target_pose2, "target_pose");
  visual_tools.publishText(text_pose, "moveit::core::RobotState_Goal_Pose", rvt::WHITE, rvt::XLARGE);
  visual_tools.publishTrajectoryLine(plan_solution3.trajectory, joint_model_group_ptr);
  visual_tools.trigger();

  /* Uncomment if you want to execute the plan */
  /* planning_components->execute(); // Execute the plan */
}

Plan #3 visualization:

Start the next plan

visual_tools.prompt("Press 'next' in the RvizVisualToolsGui window to continue the demo");
visual_tools.deleteAllMarkers();
visual_tools.trigger();

Plan #4

We can set the start state of the plan to the current state of the robot We can set the goal of the plan using the name of a group states for panda robot we have one named robot state for “panda_arm” planning group called “ready” see panda_arm.xacro

/* // Set the start state of the plan from a named robot state */
/* planning_components->setStartState("ready"); // Not implemented yet */

t the goal state of the plan from a named robot state

planning_components->setGoal("ready");

Again we will reuse the old start that we had and plan from it.

auto plan_solution4 = planning_components->plan();
if (plan_solution4)
{
  moveit::core::RobotState robot_state(robot_model_ptr);
  moveit::core::robotStateMsgToRobotState(plan_solution4.start_state, robot_state);

  visual_tools.publishAxisLabeled(robot_state.getGlobalLinkTransform("panda_link8"), "start_pose");
  visual_tools.publishAxisLabeled(robot_start_state->getGlobalLinkTransform("panda_link8"), "target_pose");
  visual_tools.publishText(text_pose, "Goal_Pose_From_Named_State", rvt::WHITE, rvt::XLARGE);
  visual_tools.publishTrajectoryLine(plan_solution4.trajectory, joint_model_group_ptr);
  visual_tools.trigger();

  /* Uncomment if you want to execute the plan */
  /* planning_components->execute(); // Execute the plan */
}

Plan #4 visualization:

Start the next plan

visual_tools.prompt("Press 'next' in the RvizVisualToolsGui window to continue the demo");
visual_tools.deleteAllMarkers();
visual_tools.trigger();

Plan #5

We can also generate motion plans around objects in the collision scene.

First we create the collision object

moveit_msgs::msg::CollisionObject collision_object;
collision_object.header.frame_id = "panda_link0";
collision_object.id = "box";

shape_msgs::msg::SolidPrimitive box;
box.type = box.BOX;
box.dimensions = { 0.1, 0.4, 0.1 };

geometry_msgs::msg::Pose box_pose;
box_pose.position.x = 0.4;
box_pose.position.y = 0.0;
box_pose.position.z = 1.0;

collision_object.primitives.push_back(box);
collision_object.primitive_poses.push_back(box_pose);
collision_object.operation = collision_object.ADD;

Add object to planning scene

{  // Lock PlanningScene
  planning_scene_monitor::LockedPlanningSceneRW scene(moveit_cpp_ptr->getPlanningSceneMonitor());
  scene->processCollisionObjectMsg(collision_object);
}  // Unlock PlanningScene
planning_components->setStartStateToCurrentState();
planning_components->setGoal("extended");

auto plan_solution5 = planning_components->plan();
if (plan_solution5)
{
  visual_tools.publishText(text_pose, "Planning_Around_Collision_Object", rvt::WHITE, rvt::XLARGE);
  visual_tools.publishTrajectoryLine(plan_solution5.trajectory, joint_model_group_ptr);
  visual_tools.trigger();

  /* Uncomment if you want to execute the plan */
  /* planning_components->execute(); // Execute the plan */
}

Plan #5 visualization:

评论
添加红包

请填写红包祝福语或标题

红包个数最小为10个

红包金额最低5元

当前余额3.43前往充值 >
需支付:10.00
成就一亿技术人!
领取后你会自动成为博主和红包主的粉丝 规则
hope_wisdom
发出的红包
实付
使用余额支付
点击重新获取
扫码支付
钱包余额 0

抵扣说明:

1.余额是钱包充值的虚拟货币,按照1:1的比例进行支付金额的抵扣。
2.余额无法直接购买下载,可以购买VIP、付费专栏及课程。

余额充值