


 本文介绍了如何在SpringBoot项目中整合MyBatis-Plus,完成数据的分页查询并展示在前端页面上。通过在pom.xml添加依赖,创建UserService接口及其实现类,更新User实体类和Mapper接口,然后在Controller中处理数据并传递到视图。同时,对前端页面进行修改以显示分页信息,并配置MyBatisConfig以实现分页拦截器。
1.首先在pom.xml中引入相关依赖:
        <dependency>
            <groupId>com.baomidou</groupId>
            <artifactId>mybatis-plus-boot-starter</artifactId>
            <version>3.4.3.1</version>
        </dependency>


        //如果报错:NoClassDefFoundError: org/mybatis/logging/LoggerFactory,说明没有引入下列依赖:
        <dependency>
            <groupId>com.baomidou</groupId>
            <artifactId>mybatis-plus-extension</artifactId>
            <version>3.4.3.1</version>
        </dependency>
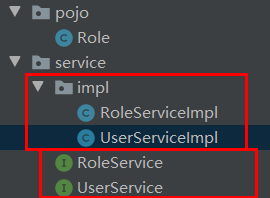
2.新建相关的文件(一个接口,一个实现类)
实现逻辑:controller调用service,service调用mapper。
对User类进行修改:
User.java
package com.it.springbootoracle.bean;

import com.baomidou.mybatisplus.annotation.TableField;
import com.baomidou.mybatisplus.annotation.TableName;
import lombok.AllArgsConstructor;
import lombok.Data;
import lombok.NoArgsConstructor;

@NoArgsConstructor
@AllArgsConstructor
@TableName("user_test")
@Data
public class User {

    //数据库中没有的字段
    @TableField(exist = false)
    private int age;
    //数据库字段
    private String userName;
    private String password;

}
对TableController进行修改:
找到dynamic_table
    @GetMapping("/dynamic_table")
    public String dynamic_table(Model model){

//        //表格内容的遍历
//        List<User> users = Arrays.asList(new User("zhangsan", "123456"),
//                new User("lisi", "123444"),
//                new User("haha", "aaaaa"),
//                new User("hehe ", "aaddd"));
//        model.addAttribute("users",users);

        List<User> list = userService.list();
        model.addAttribute("users",list);

        return "tables/dynamic_table";
    }
在service包中新建userService接口类:
UserService.java
package com.it.springbootoracle.service;

import com.baomidou.mybatisplus.extension.service.IService;
import com.it.springbootoracle.bean.User;

public interface UserService extends IService<User> {

}
在impl包中新建UserServiceImpl实现类:
UserServiceImpl .java
package com.it.springbootoracle.service.impl;

import com.baomidou.mybatisplus.extension.service.impl.ServiceImpl;
import com.it.springbootoracle.bean.User;
import com.it.springbootoracle.mapper.UserMapper;
import com.it.springbootoracle.service.UserService;
import org.springframework.stereotype.Service;


@Service
public class UserServiceImpl extends ServiceImpl<UserMapper, User> implements UserService {

}
对userMapper进行修改:
UserMapper .java
package com.it.springbootoracle.mapper;

import com.baomidou.mybatisplus.core.mapper.BaseMapper;
import com.it.springbootoracle.bean.User;


public interface UserMapper extends BaseMapper<User> {

}
3.找到dynamic_table,对其所要查询与展示的字段进行修改:
dynamic_table.html(400行左右)
        <thead>
        <tr>
            <th>#</th>
            <th>用户名</th>
            <th>密码</th>
        </tr>
        </thead>
        <tbody>
        <tr class="gradeX" th:each="user,stats:${users}">
            <td th:text="${stats.count}"></td>
            <td th:text="${user.userName}">4</td>
            <td th:text="${user.password}">X</td>
        </tr>

        </tbody>
ctrl + F9刷新html文件
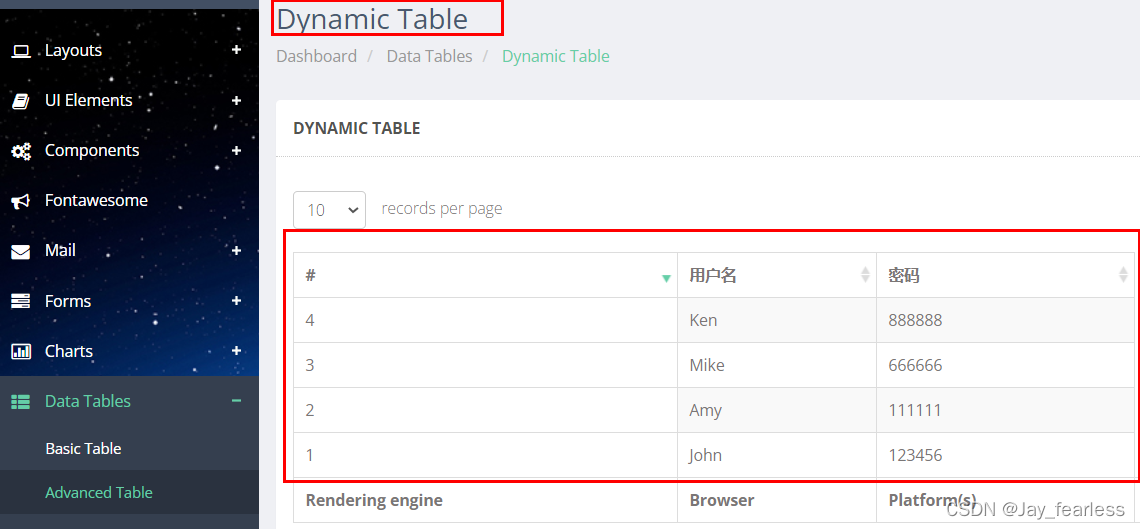
4.运行项目,找到dynamic_table,发现我们的数据已经展现在了界面上面:
数据库中user_test表:
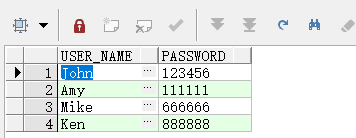
页面展示的数据:
5.设置分页
在table下添加分页的代码:
<div class="row-fluid">
    <div class="span6">
        <div class="dataTables_info" id="dynamic-table_info">
            当前第[[${users.current}]]页  总计 [[${users.pages}]]页  共[[${users.total}]]条记录
        </div>
    </div>
    <div class="span6">
        <div class="dataTables_paginate paging_bootstrap pagination">
            <ul>
                <li class="prev disabled"><a href="#">← 前一页</a></li>
                <li th:class="${num == users.current?'active':''}"
                    th:each="num:${#numbers.sequence(1,users.pages)}" >
                    <a th:href="@{/dynamic_table(pn=${num})}">[[${num}]]</a>
                </li>
                <li class="next disabled"><a href="#">下一页 → </a></li>
            </ul>
        </div>
    </div>
</div>
在config包下新建MyBatisConfig类来管理分页:
MyBatisConfig.java
package com.it.springbootoracle.config;

import com.baomidou.mybatisplus.extension.plugins.MybatisPlusInterceptor;
import com.baomidou.mybatisplus.extension.plugins.inner.PaginationInnerInterceptor;
import org.springframework.context.annotation.Bean;
import org.springframework.context.annotation.Configuration;

@Configuration
public class MyBatisConfig {
    /**
     * MybatisPlusInterceptor
     * @return
     */
    @Bean
    public MybatisPlusInterceptor paginationInterceptor() {
        MybatisPlusInterceptor mybatisPlusInterceptor = new MybatisPlusInterceptor();
        // 设置请求的页面大于最大页后操作, true调回到首页,false 继续请求  默认false
        // paginationInterceptor.setOverflow(false);
        // 设置最大单页限制数量,默认 500 条,-1 不受限制
        // paginationInterceptor.setLimit(500);
        // 开启 count 的 join 优化,只针对部分 left join

        //这是分页拦截器
        PaginationInnerInterceptor paginationInnerInterceptor = new PaginationInnerInterceptor();
        paginationInnerInterceptor.setOverflow(true);
        paginationInnerInterceptor.setMaxLimit(500L);
        mybatisPlusInterceptor.addInnerInterceptor(paginationInnerInterceptor);

        return mybatisPlusInterceptor;
    }

}
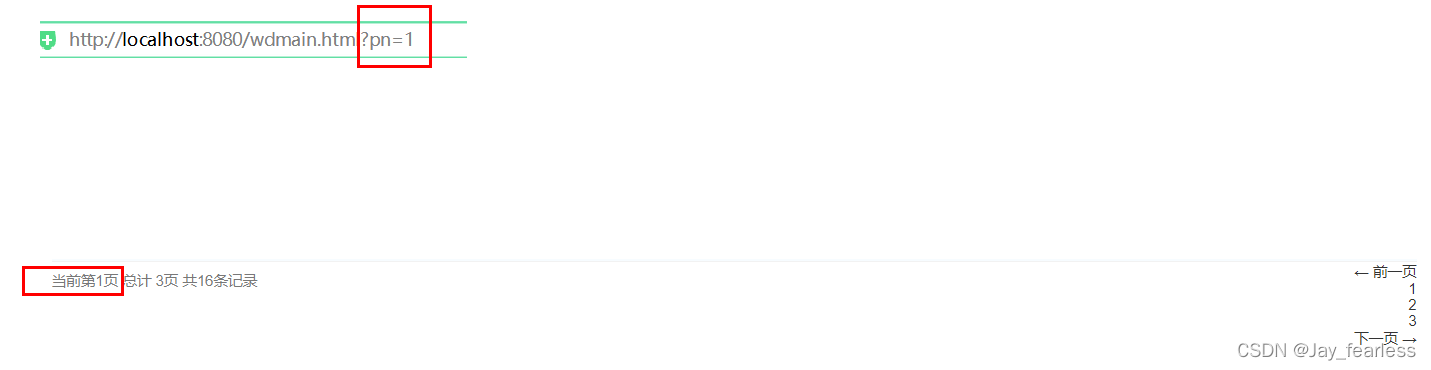
我们本次选用wdmain页面作为主显示页面
对wdmain.html的table和分页进行修改
<div class="main-middle-bottom">
            <div class="main-title-reload" >
                <i class="iconfont icon-refresh" id="tabRefresh" ></i>
            </div>
            <div class="matter" id="homeTab">
                <table>
                <thead>
                <tr>
                    <th>事项编号</th>
                    <th>事项名称</th>
                    <th>创建人</th>
                    <th>事项类型</th>
                    <th>最新操作时间</th>
                    <th>截止时间</th>
<!--                    <th>紧急程度</th>-->
                </tr>
                </thead>
                <tbody>
                <tr th:each="user,stats:${gzinfo.records}">
                    <td th:text="${user.gzid}">1905050001</td>
                    <td th:text="${user.gzname}">当前执行人显示测试</td>
                    <td th:text="${user.cjr}">admin</td>
                    <td th:text="${user.gzlx}">测试流程节点</td>
                    <td th:text="${user.optime}">20190911 15:35:07</td>
                    <td th:text="${user.ddtime}">20191002</td>
<!--                    <td th:text="${user.emergency}">20191002</td>-->
                </tr>
                </tbody>
            </table>

                <div class="row-fluid">
                    <div class="span6">
                        <div class="dataTables_info" id="dynamic-table_info">
                            当前第[[${gzinfo.current}]]页  总计 [[${gzinfo.pages}]]页  共[[${gzinfo.total}]]条记录
                        </div>
                    </div>
                    <div class="span6">
                        <div class="dataTables_paginate paging_bootstrap pagination">
                            <ul>
                                <li class="prev disabled"><a href="#">← 前一页</a></li>
                                <li th:class="${num == gzinfo.current?'active':''}"
                                    th:each="num:${#numbers.sequence(1,gzinfo.pages)}" >
                                    <a th:href="@{/wdmain.html(pn=${num})}">[[${num}]]</a>
                                </li>
                                <li class="next disabled"><a href="#">下一页 → </a></li>
                            </ul>
                        </div>
                    </div>
                </div>

            </div>
        </div>
    </div>
运行项目 -> 测试页面间的切换:


 1307
1307

 被折叠的 条评论
为什么被折叠?
被折叠的 条评论
为什么被折叠?
 到【灌水乐园】发言


