


Scrapy基础必须掌握
目标
1.掌握scrapyl的安装
2.应用创建scrapy的项目
3.应用创建scrapy.爬虫
4.应用运行scrapyl爬虫
5.应用scrapy定位以及提取数据或属性值的方法
6.掌握responsel响应对象的常用属性
1. 安装scrapy
命令:
sudo apt-get install scrapy  # Linux
或者:
pip/pip3 install scrapy  # Windows 若是conda环境  要先进入虚拟环境
- 基本流程

2.scrapy.项目开发流程
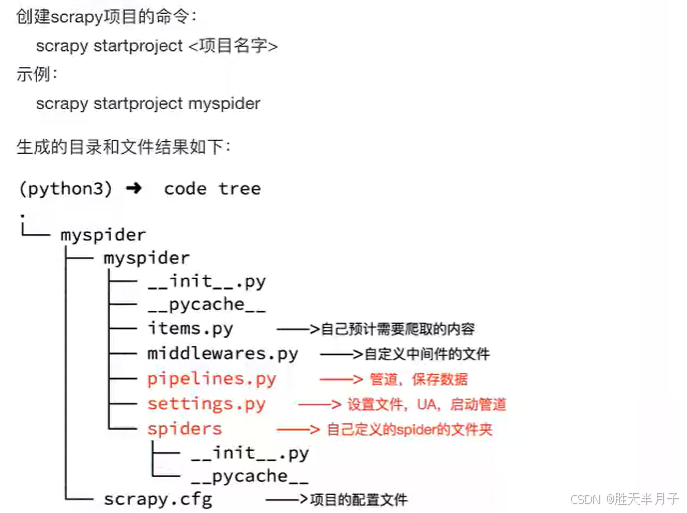
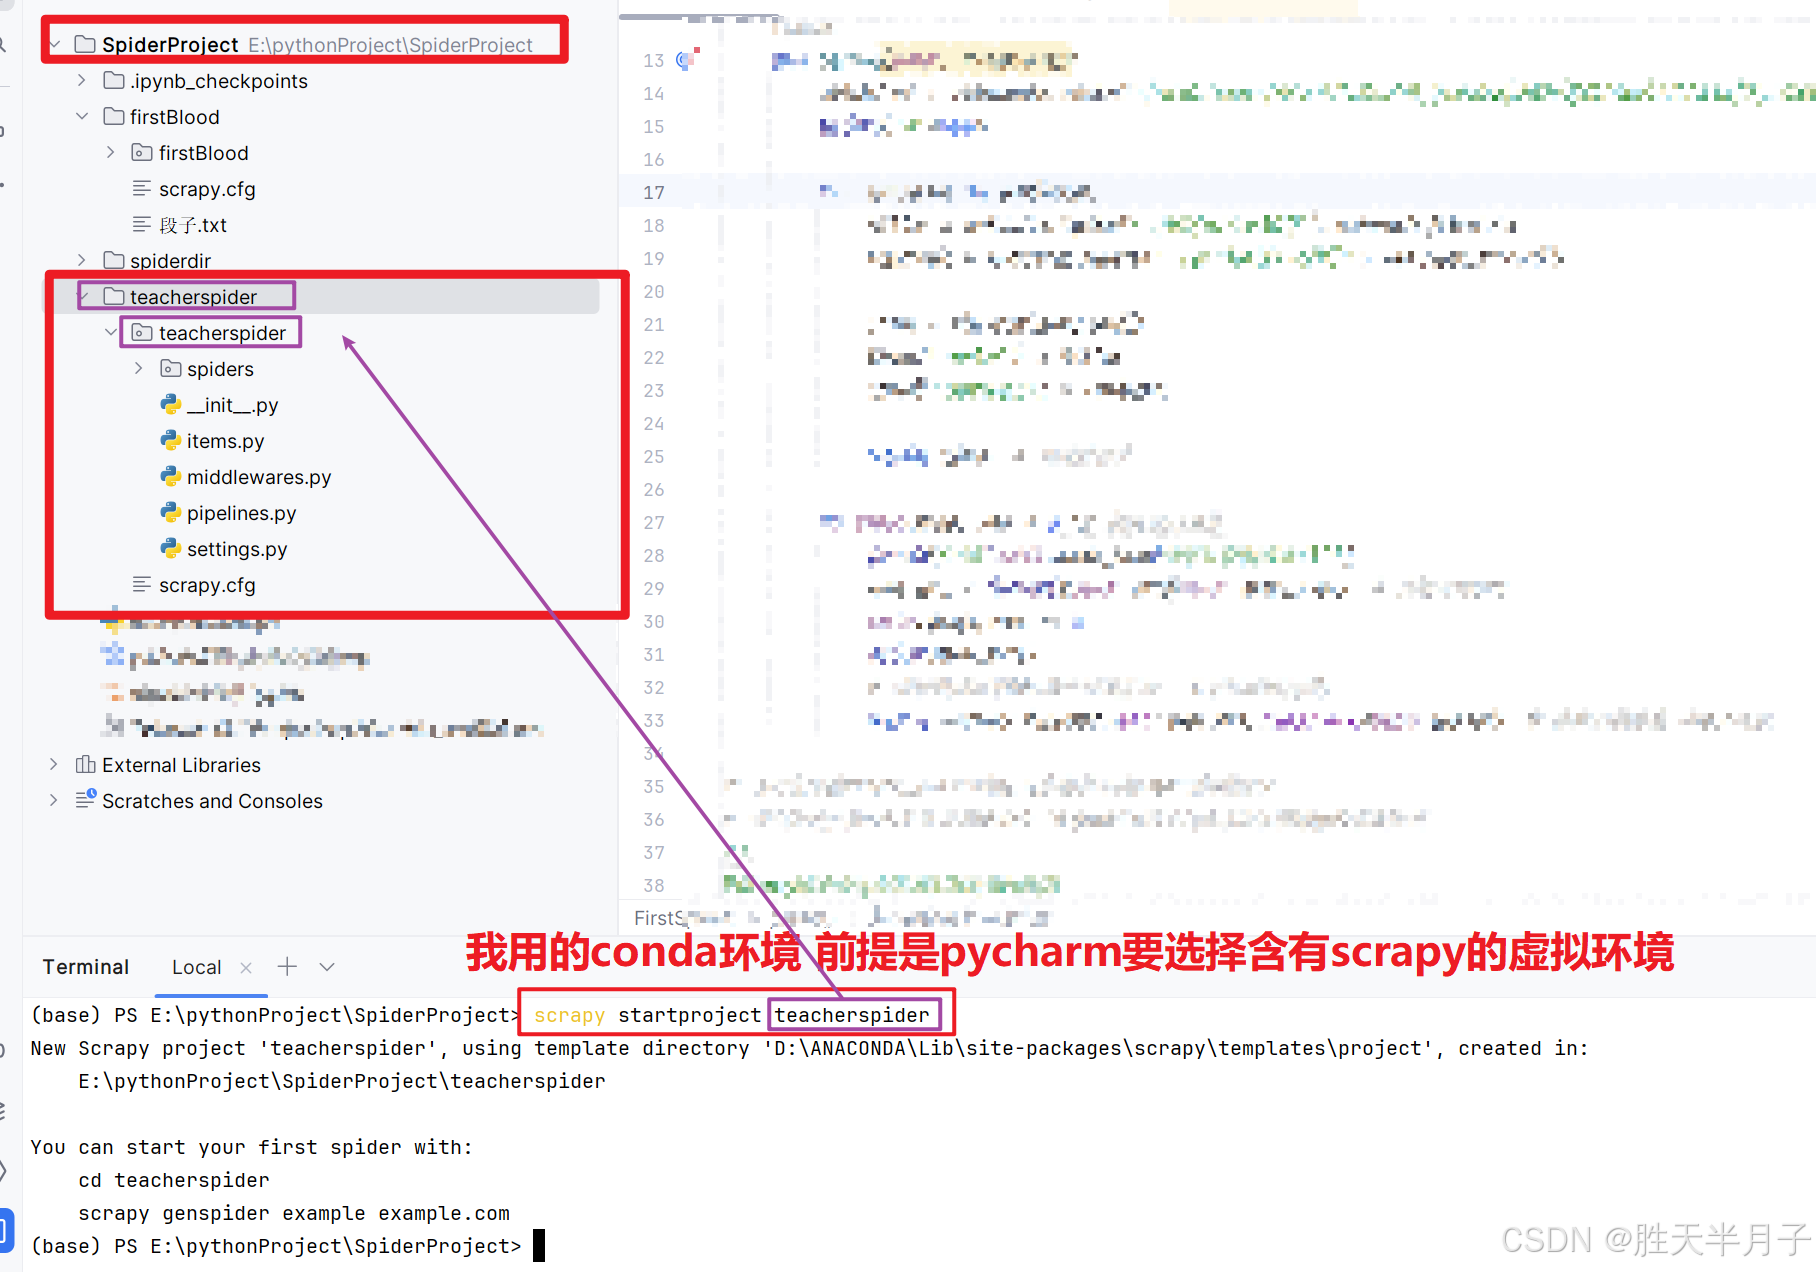
1.创建项目:
	scrapy startproject mySpider
2.生成一个爬虫:
	scrapy genspider itcast www.xxx.com
3.提取数据: xpath  正则表达式 等手段
	根据网站结构在spider中实现数据采集相关内容
4.保存数据:
	使用pipeline进行数据后续处理和保存
3.创建项目
通过命令将scrapy.项目的的文件生成出来,后续步骤都是在项目文件中进行相关操作。
下面以抓取传智师资库来学习scrapy的入门使用:https://www.itheima.com/teacher.html#ajavaee

4. 创建爬虫
通过命令创建出爬虫文件,爬虫文件为主要的代码作业文件,通常一个网站的爬取动作都会在爬虫文件
中进行编写。
命令:
在项目路径下执行:
scrapy genspider <爬虫名字> <允许爬取的域名>
- 爬虫名字:作为爬虫运行时的参数
- 允许爬取的域名:为对于爬虫设置的爬取范围,设置之后用于过滤要爬取的url,如果爬取的url与允许的域不同则被过滤掉。
示例:
cd myspider   先进入
scrapy genspider itcast itcast.cn
本例 :
cd teacherspider   先进入
scrapy genspider itcast itcast.cn
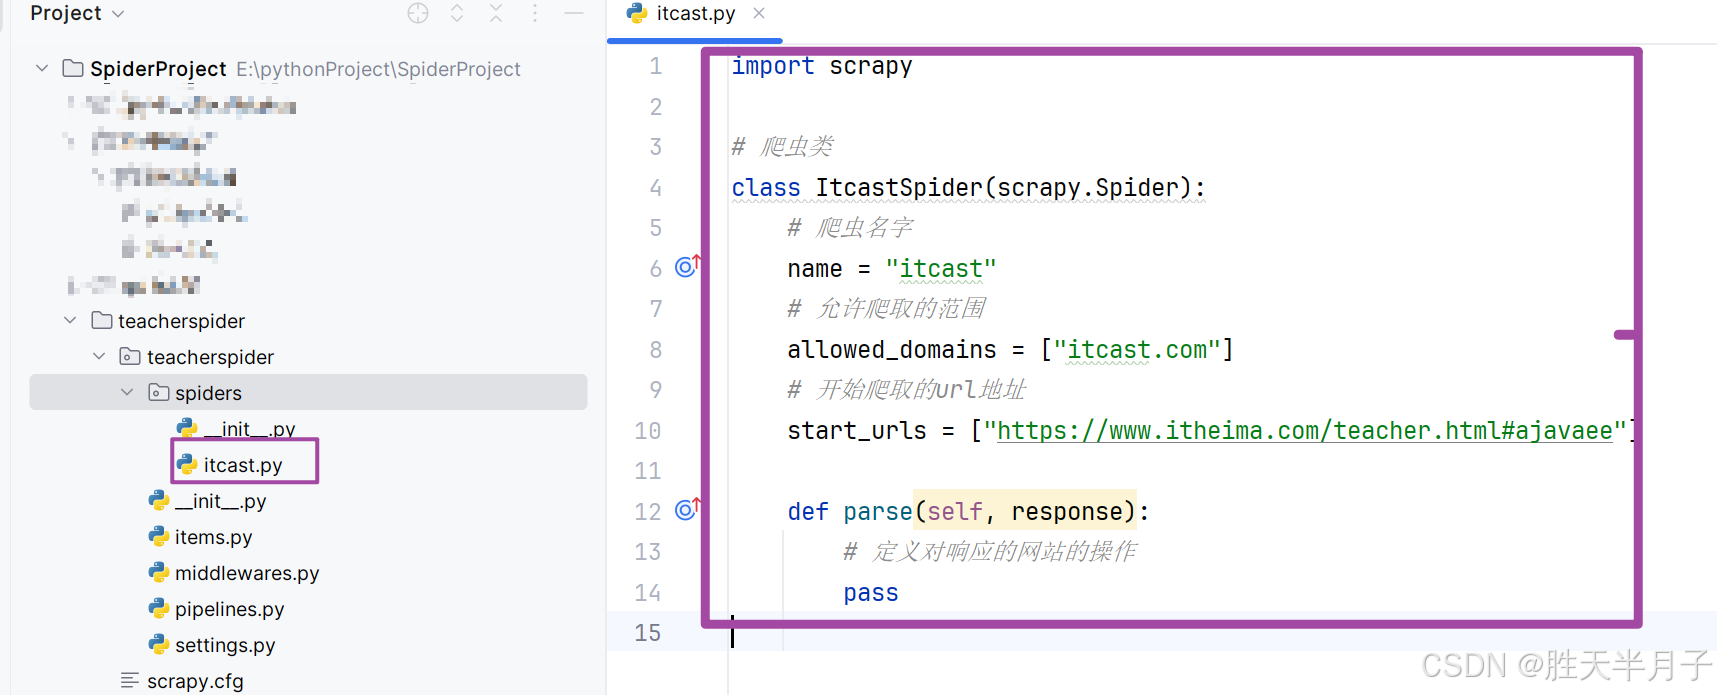
itcast.py文件内容:
import scrapy

# 爬虫类
class ItcastSpider(scrapy.Spider):
    # 爬虫名字
    name = "itcast"
    # 允许爬取的范围
    allowed_domains = ["itcast.com"]
    # 开始爬取的url地址
    start_urls = ["https://www.itheima.com/teacher.html#ajavaee"]

    def parse(self, response):
        # 定义对响应的网站的操作
        pass
5. 完善爬虫
因为我们目标爬取的信息页面的地址是:https://www.itheima.com/teacher.html#ajavaee
因此:对itcast.py文件内容做如下修改
- 修改起始的url
- 检查修改允许的域名
- 在parse方法中实现爬取逻辑
    # 爬虫名字
    name = "itcast"
    # 允许爬取的范围
    allowed_domains = ["itcast.com"]
    # 开始爬取的url地址
    start_urls = ["https://www.itheima.com/teacher.html#ajavaee"]

- 测试爬虫
import scrapy

# 爬虫类
class ItcastSpider(scrapy.Spider):
    # 爬虫名字
    name = "itcast"
    # 允许爬取的范围
    allowed_domains = ["itcast.com"]
    # 开始爬取的url地址
    start_urls = ["https://www.itheima.com/teacher.html#ajavaee"]

    def parse(self, response):
        # 获取所有教师节点
        node_list = response.xpath("//div[@class='li_txt']")
        print(len(node_list))
(webdev) PS E:\pythonProject\SpiderProject\teacherspider> scrapy crawl itcast --nolog
145
5.1 爬取信息
import time
import scrapy
# 爬虫类
class ItcastSpider(scrapy.Spider):
# 爬虫名字
name = "itcast"
# 允许爬取的范围
allowed_domains = ["itcast.com"]
# 开始爬取的url地址
start_urls = ["https://www.itheima.com/teacher.html#ajavaee"]
def parse(self, response):
# 获取所有教师节点
node_list = response.xpath("//div[@class='li_txt']")
# print(len(node_list))
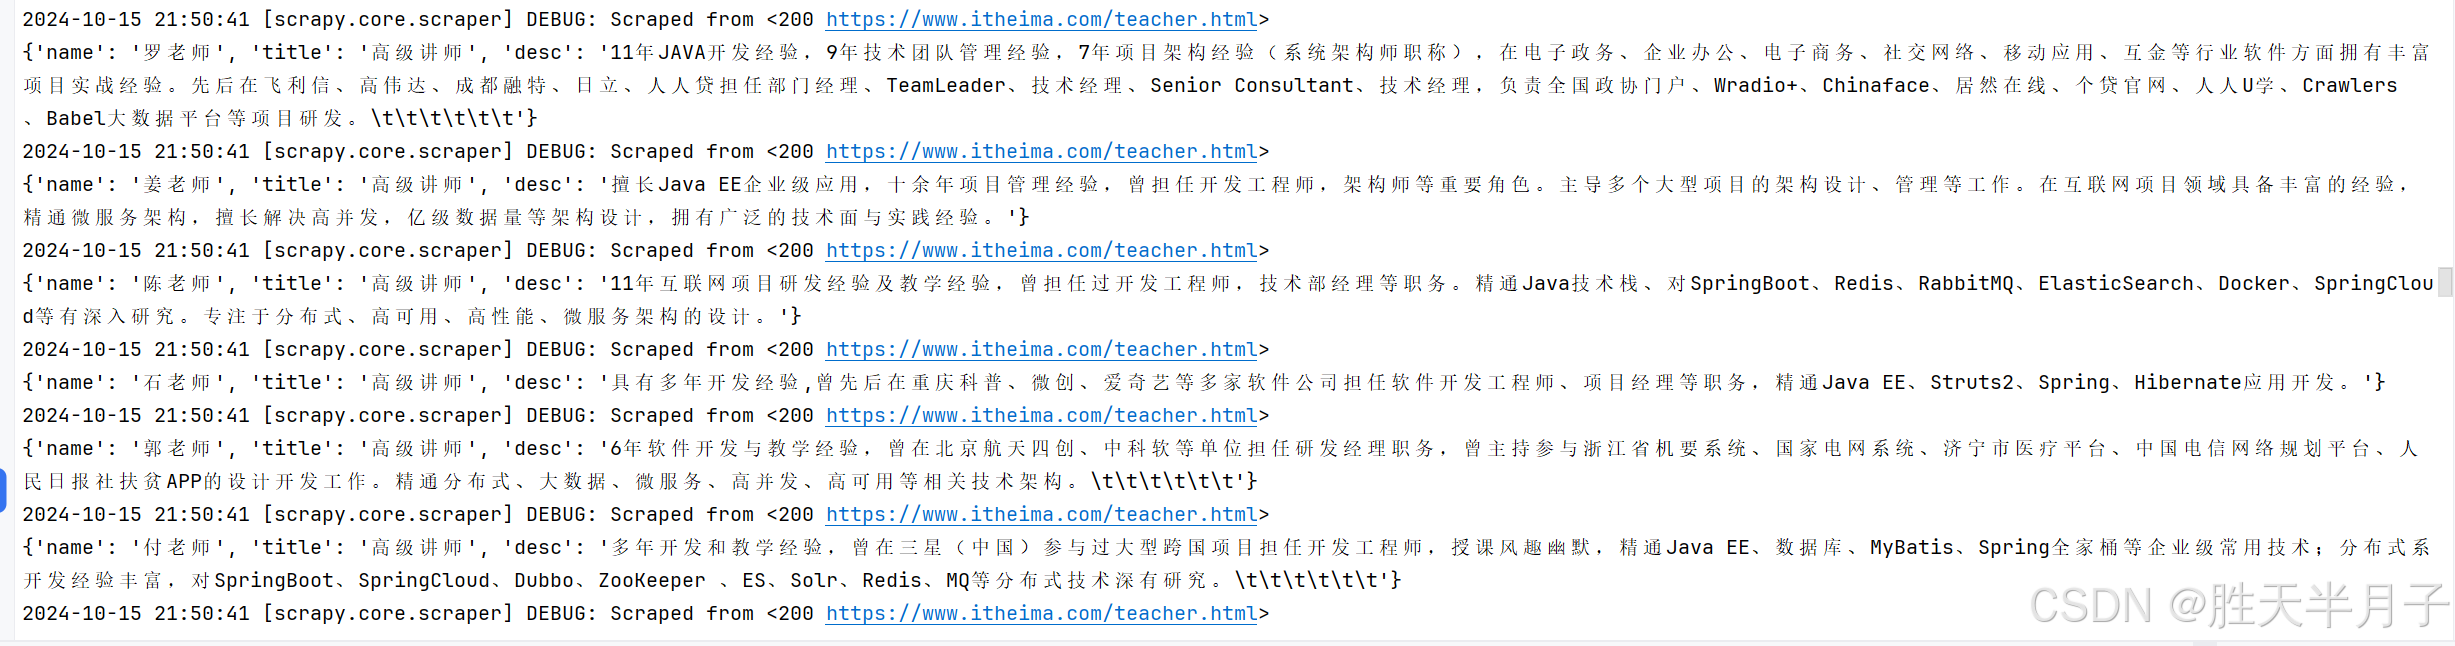
# 遍历节点
for node in node_list:
temp = {}
# xpath返回的是选择器对象
# extract用于从选择器对象中提取数据
# xpath只含有一个结果 建议使用extract_first 多个值 使用extract
temp['name'] = node.xpath('./h3/text()')[0].extract() # 等效于node.xpath('./h3/text()').extract_first()
temp['title'] = node.xpath('./h4/text()')[0].extract()
temp['desc'] = node.xpath('./p/text()')[0].extract()
# time.sleep(0.05)
yield temp
注意:
- scrapy.Spiderl爬虫类中必须有名为parsef的解析
- 如果网站结构层次比较复杂,望可以自定义其他解析函数
- 在解析函数中提取的url地址如果要发送请求,则必须属于allowed_domains范围内,但是start_urls中的url地址不受这个限制,我们会在后续的课程中学习如何在解析函数中构造发送请求
- 启动爬虫的时候注意启动的位置,是在项目路径下启动
- parse()函数中使用yield返回数据,注意:解析函数中的yieldi能够传递的对象只能是:Baseltem,Request,dict,None
5.2 定位元素以及提取数据、属性值的方法
解析并获取scrapyl爬虫中的数据:利用kpath规则字符串进行定位和提取
1.response.xpath方法的返回结果是一个类似Iist的类型,其中包含的是selector对象,操作和列表一样,
但是有一些额外的方法
2.额外方法extract():返回一个包含有字符串的列表
3.额外方法extract_first():返回列表中的第一个字符串,列表为空没有返回None
关于extract 和 extract_first()的区别:
详情请见文章:extract 和 extract_first()
5.3 response响应对象的常用属性
- response.url:当前响应的url地址
- response.request.url:当前响应对应的请求的url地址
- response.headers:响应头
- response.requests.headers:当前响应的请求头
- response.body:响应体,也就是html代码,byte类型
- response.status:响应状态码
6. 保存数据
| 利用管道(piplines.py)对数据进行处理和保存
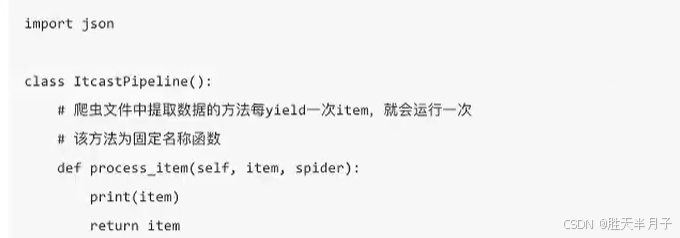
6.1在pipelines.py文件中定义对数据的操作
1.定义一个管道类
2.重写管道类的process_item方法
3.process_item方法处理完item之后必须返回给引擎
6.2 在settings.py配置启用管道
ITEM_PIPELINES = {
   "teacherspider.pipelines.TeacherspiderPipeline": 300,
}
配置项中键为使用的管道类,管道类使用进行分割,第一个为项目目录,第二个为文件,第三个为定义的管道类
class TeacherspiderPipeline:
    # 爬虫文件中提取数据的方法每yield一次1tem,就会运行一次
    # 该方法为固定名称函数

    def __init__(self):
        self.file = open('itcast.json','w')

    # spider 哪个爬虫运行  哪个爬虫就过来
    def process_item(self, item, spider):
        # print('itcast:',item)

        # 将字典数据序列化
        json_data = json.dumps(item,ensure_ascii=False) + ',\n'

        # 写入文件
        self.file.write(json_data)
        # 默认使用完管道 之后需要将数据返回给引擎
        return item

    def __del__(self):
        self.file.close()
7.运行scrapy
命令:在项目目录下执行scrapy crawl<爬虫名字>
示例:scrapy crawl itcast
Xpath helper
xpath helper我设置的是免费下载 ,若不是 请私信


 1万+
1万+

 被折叠的 条评论
为什么被折叠?
被折叠的 条评论
为什么被折叠?
 到【灌水乐园】发言


