


参考:
https://github.com/Zhefan-Xu/NavRL?tab=readme-ov-file
https://github.com/Zhefan-Xu/isaac-go2-ros2
1. Isaac Sim 安装
博主这边是按照github上的建议,拉的docker镜像,这样有利于隔离本机原本的isaac sim环境。
1)download Isaac Sim version 2023.1.0-hotfix.1:
```
# 容器下载,如果已经有容器,则可以跳过
# Docker installation using  the convenience script
curl -fsSL https://get.docker.com -o get-docker.sh
sudo sh get-docker.sh
# Post-install steps for Docker
sudo groupadd docker
sudo usermod -aG docker $USER
newgrp docker
# Verify Docker
docker run hello-world
```
2)Then, download the Isaac Sim to your docker container:
	#拉取指定镜像
	docker pull nvcr.io/nvidia/isaac-sim:2023.1.0-hotfix.1
    #运行 isaac-sim
    docker run --name isaac-sim --entrypoint bash -it --runtime=nvidia --gpus all -e "ACCEPT_EULA=Y" --rm --network=host \
    -e "PRIVACY_CONSENT=Y" \
    -v ~/docker/isaac-sim/cache/kit:/isaac-sim/kit/cache:rw \
    -v ~/docker/isaac-sim/cache/ov:/root/.cache/ov:rw \
    -v ~/docker/isaac-sim/cache/pip:/root/.cache/pip:rw \
    -v ~/docker/isaac-sim/cache/glcache:/root/.cache/nvidia/GLCache:rw \
    -v ~/docker/isaac-sim/cache/computecache:/root/.nv/ComputeCache:rw \
    -v ~/docker/isaac-sim/logs:/root/.nvidia-omniverse/logs:rw \
    -v ~/docker/isaac-sim/data:/root/.local/share/ov/data:rw \
    -v ~/docker/isaac-sim/documents:/root/Documents:rw \
    nvcr.io/nvidia/isaac-sim:2023.1.0-hotfix.1
3)Move the downloaded Isaac Sim from the docker container to your local machine:
bash docker ps # check your container ID in another terminal
# Replace <id_container> with the output from the previous command
docker cp <id_container>:isaac-sim/. /path/to/local/folder # absolute path
Isaac Sim version 2023.1.0-hotfix.1 is now installed on your local machine.
2. NavRL 训练环境设置
1)设置环境变量,创建虚拟环境
# Set the ISAACSIM_PATH environment variable
echo 'export ISAACSIM_PATH="path/to/isaac_sim-2023.1.0-hotfix.1"' >> ~/.bashrc

git clone https://github.com/Zhefan-Xu/NavRL.git
cd ~/NavRL/isaac-training
bash setup.sh  # 这里会创建一个名为NavRL的虚拟环境
2)测试安装正确并运行一个训练demo
# Activate NavRL virtual environment
conda activate NavRL
# Run a training example with default settings
python training/scripts/train.py
使用默认参数运行一个包含两个机器人的训练示例来验证安装。
3. 训练你自己的RL策略
训练环境设置和卫生参数可在NavRL/isaac-training/train/cfg中找到。
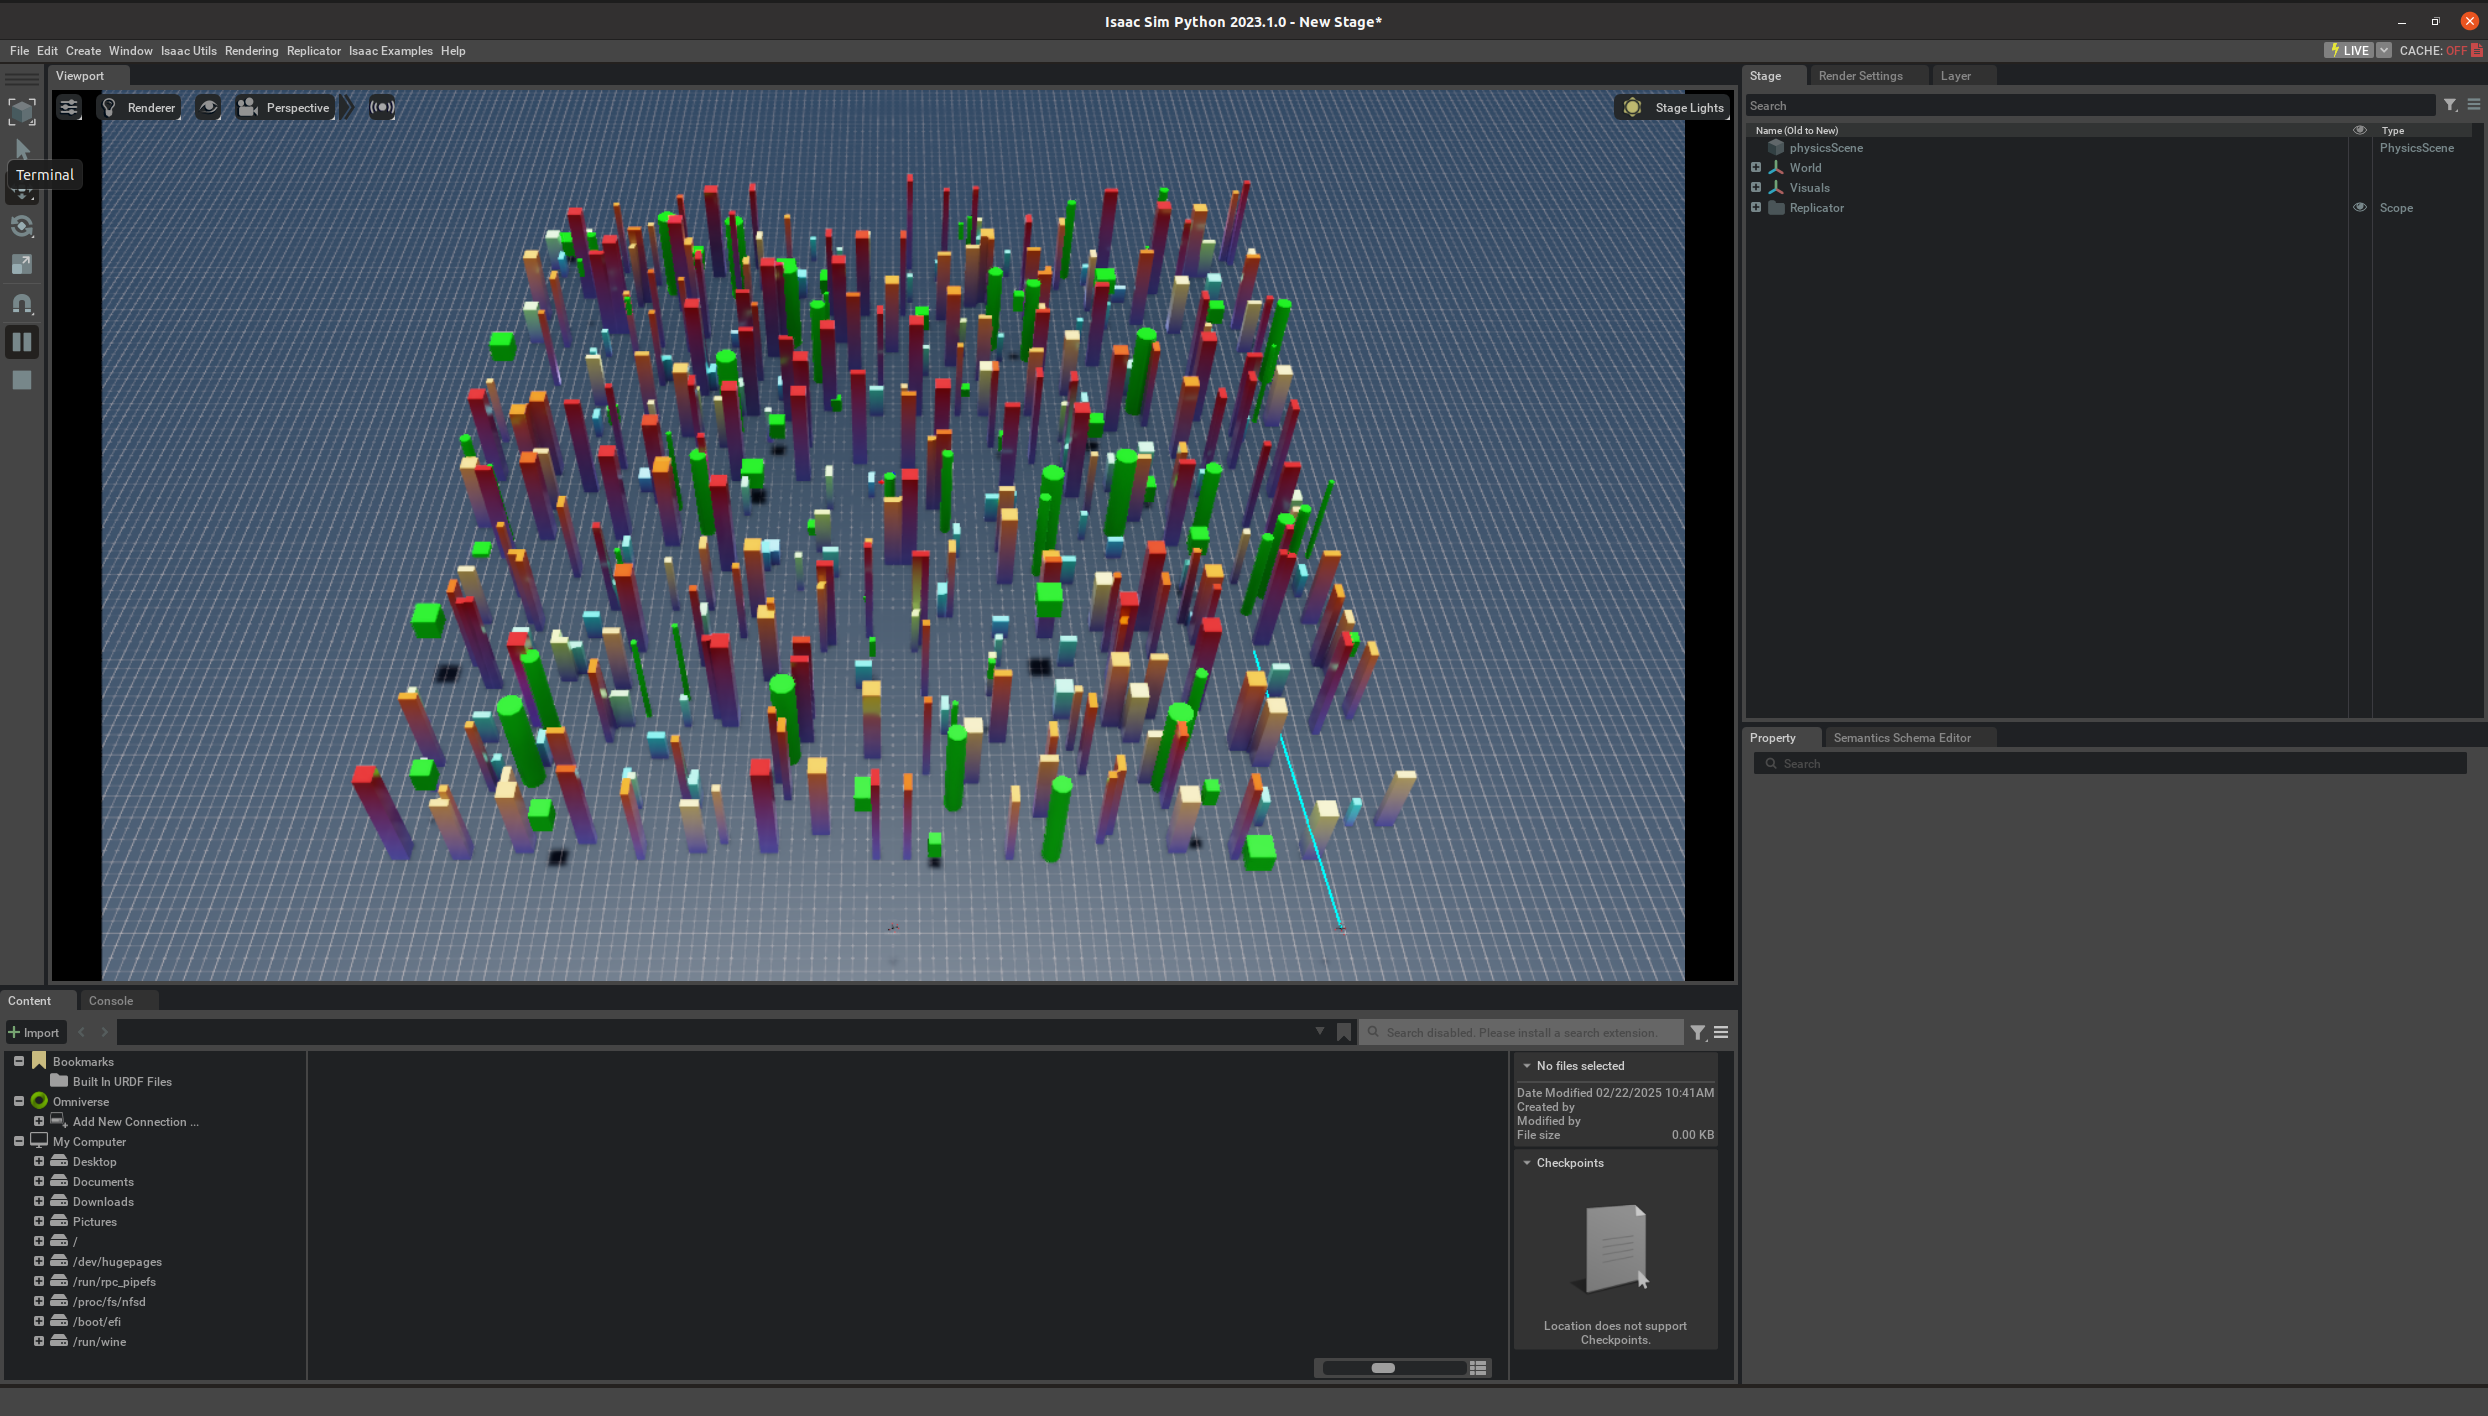
以下示例展示了1024个机器人、350个静态障碍物和80个动态障碍物(需要使用RTX 4090)进行训练。我们建议使用 Wandb 来监控您的培训和评估统计数据。需要注意的是,这里运行会离线渲染,不会打开isaac sim。训练示意 viedo.
python training/scripts/train.py headless=True env.num_envs=1024 env.num_obstacles=350 \
env_dyn.num_obstacles=80 wandb.mode=online
4. NavRL ROS2 部署–环境搭建
博主这里只验证了ROS2环境,ROS1 可以参考NavRL
本节演示了使用 Unitree Go2 四足机器人使用 ROS2 和 Isaac Sim 部署 NavRL 的示例。确保您的系统满足以下要求:
Ubuntu 22.04 LTS
ROS2 Humble
开始之前,请根据此链接安装模拟器。这个验证环境也是原作者写的一个仓库,博主就是从这里开始运到各种问题!!!
-
作者这个验证环境是基于 Isaac Sim 4.2.0 and Isaac Lab 1.2.0 版本的,必须严格对应。同时,博主不建议用pip来安装isaacsim,这回产生各种包不兼容的问题,直接以通过源码安装即可。
# !!!! pip 安装示意,十分不建议!! pip install 'isaacsim[all,extscache]==4.2.0.1' --extra-index-url https://pypi.nvidia.com -
源码安装 Isaac Sim 4.2.0 and Isaac Lab 1.2.0
1) 从官网下载 IsaacSim 4.2.0 安装包
https://download.isaacsim.omniverse.nvidia.com/isaac-sim-standalone%404.2.0-rc.18%2Brelease.16044.3b2ed111.gl.linux-x86_64.release.zip
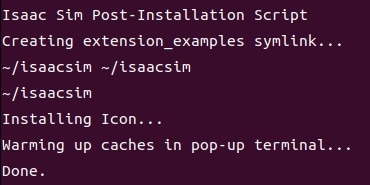
2)安装IsaacSim 4.2.0mkdir ~/isaacsim cd ~/Downloads unzip isaac-sim-standalone@4.2.0-rc.18+release.16044.3b2ed111.gl.linux-x86_64.release.zip -d ~/isaacsim cd ~/isaacsim ./omni.isaac.sim.post.install.sh ./isaac-sim.selector.sh其中,执行 ./omni.isaac.sim.post.install.sh 需要等待一段时间,完成后终端输出信息为:
最后 ./isaac-sim.selector.sh 弹出如下窗口:
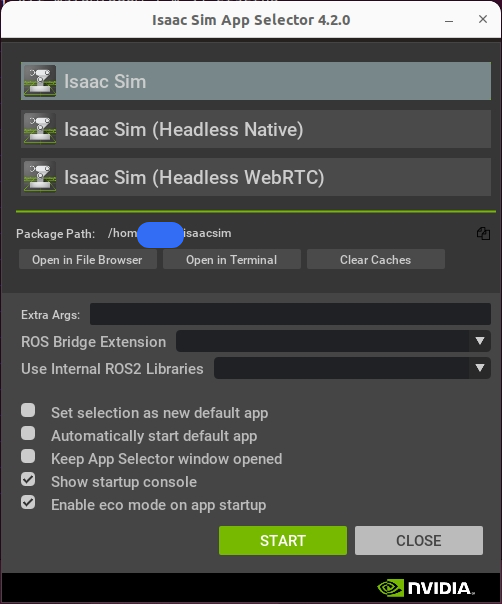
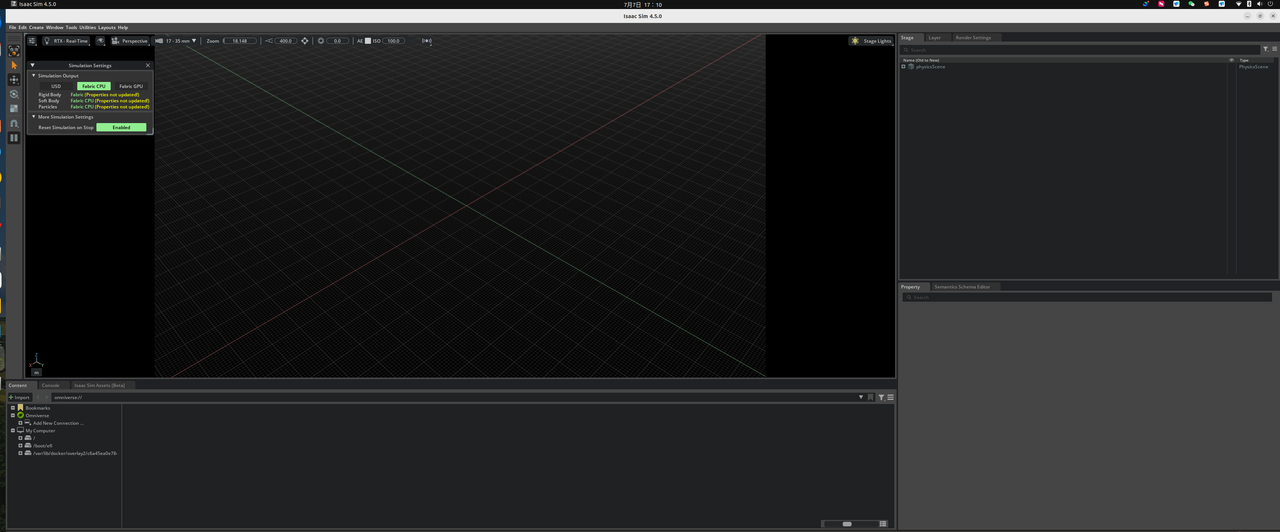
点击 START ,即可弹出如下窗口:

2)安装Isaac Lab 1.2.0
安装文档:
https://isaac-sim.github.io/IsaacLab/v1.2.0/index.html
github 直接安装:
https://github.com/isaac-sim/IsaacLab/releases/tag/v1.2.0
3)创建Isaac Sim符号链接
注意!!!一定要先创建符号连接,再配置环境,否则会找不到isaacsim包cd IsaacLab # 创建软链接到你的isaac sim目录下 # 该命令里的 path_to_isaac_sim 要替换成你isaac-sim所在的目录,如我的是: # /home/ai/omniverse/pkg/isaac-sim-4.1.0 ln -s path_to_isaac_sim _isaac_sim # 我的软链接命令 # ln -s /home/ai/omniverse/pkg/isaac-sim-4.1.0 _isaac_sim4)配置环境
#创建虚拟环境
./isaaclab.sh --conda # 创建conda环境,默认名字为 isaaclab
 conda activate isaaclab
#安装依赖
sudo apt install cmake build-essential
cd IsaacLab
./isaaclab.sh --install
5)验证安装
有两种开启方法,由于我们上面使用conda部署了环境,所以建议在conda虚拟环境里直接使用python命令来运行例子,即这里的方法2:# 方法1: Using the isaaclab.sh executable ./isaaclab.sh -p source/standalone/tutorials/00_sim/launch_app.py # 方法2: Using python in your virtual environment python source/standalone/tutorials/00_sim/launch_app.py如果看到了这个,那么安装就成功了!
-
配置Isaac Sim Unitree Go2 ROS2–作者写的验证框架
安装相关依赖conda activate isaaclab # 这里的isaaclab就是前面 **4)配置环境**步骤生成的虚拟环境 #这一步比较重要,这里将虚拟环境与ros2桥接在一起 conda install -c conda-forge libstdcxx-ng拉仓库运行测试
git clone https://github.com/Zhefan-Xu/isaac-go2-ros2.git
conda activate isaaclab
python isaac_go2_ros2.py
模拟加载完成后,机器人可以由键盘进行远程操作:
W 向前,A左转,S:向后,D:右,Z:左转,C:右转。 -
遇到的问题
博主在python isaac_go2_ros2.py这一步遇到很多问题,具体原因我怀疑是torch版本不匹配,但是实际上指定版本后,torch版本应该是和Isaac Sim 4.2.0 and Isaac Lab 1.2.0绑定的,为torch2.4.0,按道理应该和作者环境一致了。遇到的问题主要是在初始化实例的时候,某些参数对应不上,或者包None的错误,导致其他参数位置对应不上:
-
ValueError: Included color maps are: dict_keys(['magma', 'inferno', 'plasma', 'viridis']). If you want to use a matplotlib color map you can pass it as color_map=matplotlib.pyplot.get_cmap(name) Set the environment variable HYDRA_FULL_ERROR=1 for a complete stack trace. Fatal Python error: Segmentation fault
原因:Isaac lab 传给 color_meshes_by_height 的 color_map 不是内置的 [‘magma’,‘inferno’,‘plasma’,‘viridis’],所以抛异常。
解决方案:打开 ~/IsaacLab/source/extensions/omni.isaac.lab/omni/isaac/lab/terrains/terrain_generator.pyif self.cfg.color_scheme == "height": self.terrain_mesh = color_meshes_by_height(self.terrain_mesh) 改成 if self.cfg.color_scheme == "height": self.terrain_mesh = color_meshes_by_height([self.terrain_mesh], color_map="viridis") -
TypeError: xxxx _MISSING_TYPE'错误
原因,作者在初始化实例的时候,某些参数默认没有传递,导致出错,主要发生在:
1 )~/isaac-go2-ros2/go2/go2_env.py
具体报错:File "~/IsaacLab/source/extensions/omni.isaac.lab/omni/isaac/lab/envs/mdp/commands/velocity_command.py", line 136, in _update_command self.cfg.heading_control_stiffness * heading_error, TypeError: unsupported operand type(s) for *: '_MISSING_TYPE' and 'Tensor'这里只是其中一个type报错,实际上还有很多,都集中在下面的解决方案里了
解决方案:#将 ~/isaac-go2-ros2/go2/go2_env.py代码中 class CommandsCfg: """Command specifications for the MDP.""" base_vel_cmd = mdp.UniformVelocityCommandCfg( asset_name="unitree_go2", resampling_time_range=(0.0, 0.0), debug_vis=True, ranges=mdp.UniformVelocityCommandCfg.Ranges( lin_vel_x=(0.0, 0.0), lin_vel_y=(0.0, 0.0), ang_vel_z=(0.0, 0.0), heading=(0, 0) ), ) **改成** class CommandsCfg: """Command specifications for the MDP.""" base_vel_cmd = mdp.UniformVelocityCommandCfg( asset_name="unitree_go2", resampling_time_range=(1.0, 5.0), rel_heading_envs=1.0, rel_standing_envs=0.0, debug_vis=True, heading_control_stiffness=0.0, ranges=mdp.UniformVelocityCommandCfg.Ranges( lin_vel_x=(0.0, 0.0), lin_vel_y=(0.0, 0.0), ang_vel_z=(0.0, 0.0), heading=(0, 0) ), )2)~/isaac-go2-ros2/env/sim_env.py
具体报错:~/IsaacLab/source/extensions/omni.isaac.lab/omni/isaac/lab/terrains/terrain_importer.py 中这一行 ############################ self.terrain_levels = torch.randint( 0, max_init_level + 1, (num_envs,), device=dev ) ############################ TypeError: randint() received an invalid combination of arguments - got (int, int, tuple, device=str), but expected one of: * (int high, tuple of ints size, *, torch.Generator generator, Tensor out = None, torch.dtype dtype = None, torch.layout layout = None, torch.device device = None, bool pin_memory = False, bool requires_grad = False) * (int high, tuple of ints size, *, Tensor out = None, torch.dtype dtype = None, torch.layout layout = None, torch.device device = None, bool pin_memory = False, bool requires_grad = False) * (int low, int high, tuple of ints size, *, torch.Generator generator, Tensor out = None, torch.dtype dtype = None, torch.layout layout = None, torch.device device = None, bool pin_memory = False, bool requires_grad = False) * (int low, int high, tuple of ints size, *, Tensor out = None, torch.dtype dtype = None, torch.layout layout = None, torch.device device = None, bool pin_memory = False, bool requires_grad = False)实际上这里代码是没有错的,而是在实例化的时候,作者少传了num_envs这个参数
#在 ~/isaac-go2-ros2/env/sim_env.py 每一个出现的地方
prim_path="/World/obstacleTerrain",
#下面补充一行
num_envs=1,
-
5. NavRL ROS2 部署–部署运行训练好的policy
首先,将 NavRL/ros2 文件夹从该仓库复制到您的 ros2 工作区中。
cp -r ros2 /path/to/ros2_ws/src
colcon build --symlink-install
然后,启动模拟并部署NavRL导航。
# Launch Isaac Go2 simulator
conda activate isaaclab
cd /path/to/isaac-go2-ros2
python isaac-go2-ros2.py

# Start the perception and safety module
ros2 launch navigation_runner perception.launch.py
ros2 launch navigation_runner safe_action.launch.py # optional

# Turn on Rviz2 visualization
ros2 launch navigation_runner rviz.launch.py

# Run the navigation launch
conda activate NavRL
conda install -c conda-forge libstdcxx-ng  # 这里也要下载这个依赖,作者把这个忽略了
# 这里可能会出现一些缺少依赖包的问题,直接pip安装即可
ros2 launch navigation_runner navigation.launch.py
Isaac Sim 窗口将显示环境,而 RViz 窗口则显示数据。使用 RViz 的 2D 导航目标工具来设定导航目标。实验结果见:https://www.bilibili.com/video/BV1WjJCzFExD/?vd_source=0605977334fda3406a6c82619c3fb0d3


 403
403


 到【灌水乐园】发言


