


DeepSeek本地部署
1、安装Ollama
Ollama是一个开源工具,专本用于本地运行管理和部署语言大模型(LLMs),简化了LLMs的安装配置和运行流程;
Ollama的官方网址为:Download Ollama on Windows ,可以根据自己的机器进行选择下载;
windous和mac系统安装配置比较简单,下面主要讲解linux系统的安装和配置;
下载和安装:
# 安装命令
curl -fsSL https://ollama.com/install.sh | sh
正常情况下会出现以下错
ztsk@ztskserver:~/work/AI/ollama$ curl -fsSL https://ollama.com/install.sh | sh
>>> Installing ollama to /usr/local
>>> Downloading Linux amd64 bundle
curl: (28) Failed to connect to github.com port 443 after 130986 ms: Connection tim


gzip: stdin: unexpected end of file
tar: Child returned status 1
tar: Error is not recoverable: exiting now
出现该错误是是因为需要科学上网,我把ollama的安装已经下载好了,可以在附件中获取;
或者直接从 Releases · ollama/ollama GitHub网站中下载对应的安装包,然后手动安装;
同时需要修改ollama的安装脚本ollama_install.sh;该脚本也已经修改过来,可以在附件中获取;
或者可以从百度网盘中下载:
链接: https://pan.baidu.com/s/1cDI_LgYp1YrO7RBPRIp_oA
提取码: zvqb
安装过程如下:
ztsk@ztskserver:~/work/AI/ollama$ ./ollama_install_new.sh
>>> Installing ollama to /usr/local
>>> Downloading Linux amd64 bundle
>>> Creating ollama user...
>>> Adding ollama user to render group...
>>> Adding ollama user to video group...
>>> Adding current user to ollama group...
>>> Creating ollama systemd service...
>>> Enabling and starting ollama service...
Created symlink /etc/systemd/system/default.target.wants/ollama.service → /etc/systma.service.
>>> The Ollama API is now available at 127.0.0.1:11434.
>>> Install complete. Run "ollama" from the command line.
WARNING: No NVIDIA/AMD GPU detected. Ollama will run in CPU-only mode.
我安装部署的机器没有gpu,可以后面选择deepseek-r1模型可以选择1.5b或者7b的模型;
ollama安装好后可以使用查看是否安装成功和版本情况
ztsk@ztskserver:~/work/AI/ollama$ ollama
Usage:
  ollama [flags]
  ollama [command]

Available Commands:
  serve       Start ollama
  create      Create a model from a Modelfile
  show        Show information for a model
  run         Run a model
  stop        Stop a running model
  pull        Pull a model from a registry
  push        Push a model to a registry
  list        List models
  ps          List running models
  cp          Copy a model
  rm          Remove a model
  help        Help about any command

Flags:
  -h, --help      help for ollama
  -v, --version   Show version information

Use "ollama [command] --help" for more information about a command.
ztsk@ztskserver:~/work/AI/ollama$ ollama -v
ollama version is 0.5.7
2、DeepSeek模型下载
可以使用ollama的指令直接进行拉取各种大模型,包括DeepSeek-r1的各个版本;
ztsk@ztskserver:~/work/AI/ollama$ ollama pull deepseek-r1:7b
pulling manifest
pulling 96c415656d37... 100% ▕████████████████████▏ 4.7 GB
pulling 369ca498f347... 100% ▕████████████████████▏  387 B
pulling 6e4c38e1172f... 100% ▕████████████████████▏ 1.1 KB
pulling f4d24e9138dd... 100% ▕████████████████████▏  148 B
pulling 40fb844194b2... 100% ▕████████████████████▏  487 B
verifying sha256 digest
writing manifest
success
可以使用ollama命令查看当前有哪些推理大模型
ztsk@ztskserver:~/work/AI/ollama$ ollama list
NAME                ID              SIZE      MODIFIED
deepseek-r1:7b      0a8c26691023    4.7 GB    7 minutes ago
deepseek-r1:1.5b    a42b25d8c10a    1.1 GB    9 hours ago
当前有两个推理大模型,分别是deepseek-r1:7b和deepseek-r1:1.5b
3、运行deepseek推理大模型
ztsk@ztskserver:~/work/AI/ollama$ ollama run deepseek-r1:7b
>>> 你是谁
<think>

</think>

您好!我是由中国的深度求索(DeepSeek)公司开发的智能助手DeepSeek-R1。如您有任何
任何问题,我会尽我所能为您提供帮助。
4、服务器web页面部署
1、docker安装
-
更新现有软件包列表
sudo apt-get update -
安装必要的软件包
sudo apt-get install apt-transport-https ca-certificates curl software-properties-common -
添加docker官方密钥
curl -fsSL https://download.docker.com/linux/ubuntu/gpg | sudo apt-key add - -
添加docker的APT仓库
sudo add-apt-repository "deb [arch=amd64] https://download.docker.com/linux/ubuntu $(lsb_release -cs) stable" -
更新软件包列表,包括APT仓库
sudo apt-get update -
确保是从docker repo而不是ubuntu repo安装docker
apt-cache policy docker-ce -
安装docker
sudo apt-get install docker-ce
2、web-gui安装部署
docker run -d -p 3000:8080 --add-host=host.docker.internal:host-gateway -v open-webui:/app/backend/data --name open-webui --restart always ghcr.nju.edu.cn/open-webui/open-webui:main
ztsk@ztskserver:~/work/AI/dify/docker$ sudo docker run -d -p 3000:8080 --add-host=host.docker.internal:host-gateway -v open-webui:/app/backend/data --name open-webui --restart always ghcr.io/open-webui/open-webui:main
Unable to find image 'ghcr.io/open-webui/open-webui:main' locally
main: Pulling from open-webui/open-webui
c29f5b76f736: Pull complete
73c4bbda278d: Pull complete
acc53c3e87ac: Pull complete
ad3b14759e4f: Pull complete
b874b4974f13: Pull complete
4f4fb700ef54: Pull complete
dfcf69fcbc2b: Pull complete
e8bfaf4ee0e0: Pull complete
17b8c991f4f9: Pull complete
cac7b012c1cf: Pull complete
19163ec7da38: Pull complete
2d09bb3f2f68: Pull complete
fc4e66cac1ed: Pull complete
2ef6555085fd: Pull complete
9ab170b77d23: Pull complete
Digest: sha256:fbe4e8219e0598d05a6c67340b573a9bbb7d6de493baecc5d8d1f2d75b43f206
Status: Downloaded newer image for ghcr.io/open-webui/open-webui:main
04cd7e9572fb6a225956b2f623ba2396245f13067c071f4fed1228825fba2e24
可以将上述指令中的ghcr.io换成ghcr.nju.edu.cn,安装部署的速度会快很多;
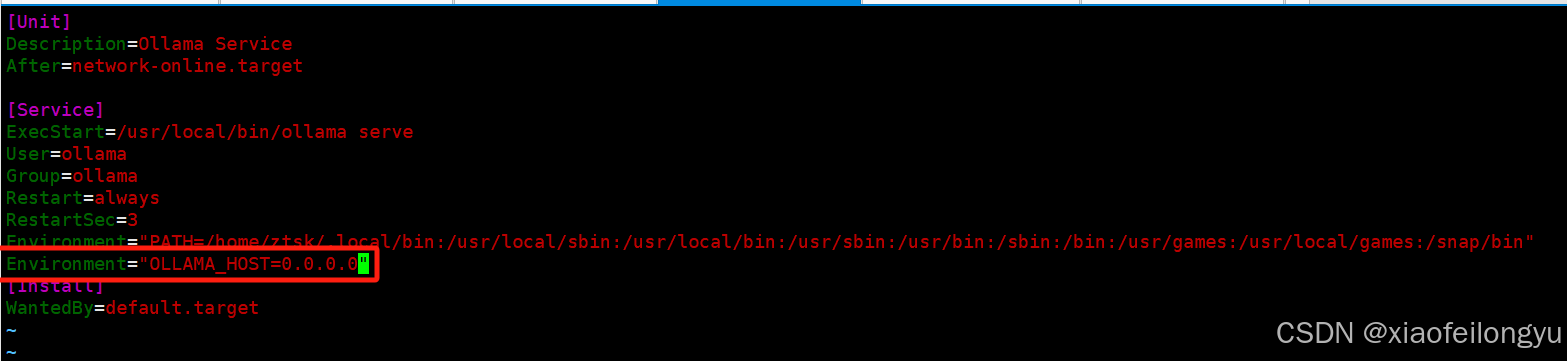
同时需要修改ollama服务的配置文件/etc/systemd/system/ollama.service
在环境变量那边添加ollama的host地址:
Environment="OLLAMA_HOST=0.0.0.0"
重启ollama服务
sudo systemctl daemon-reload
sudo systemctl restart ollama
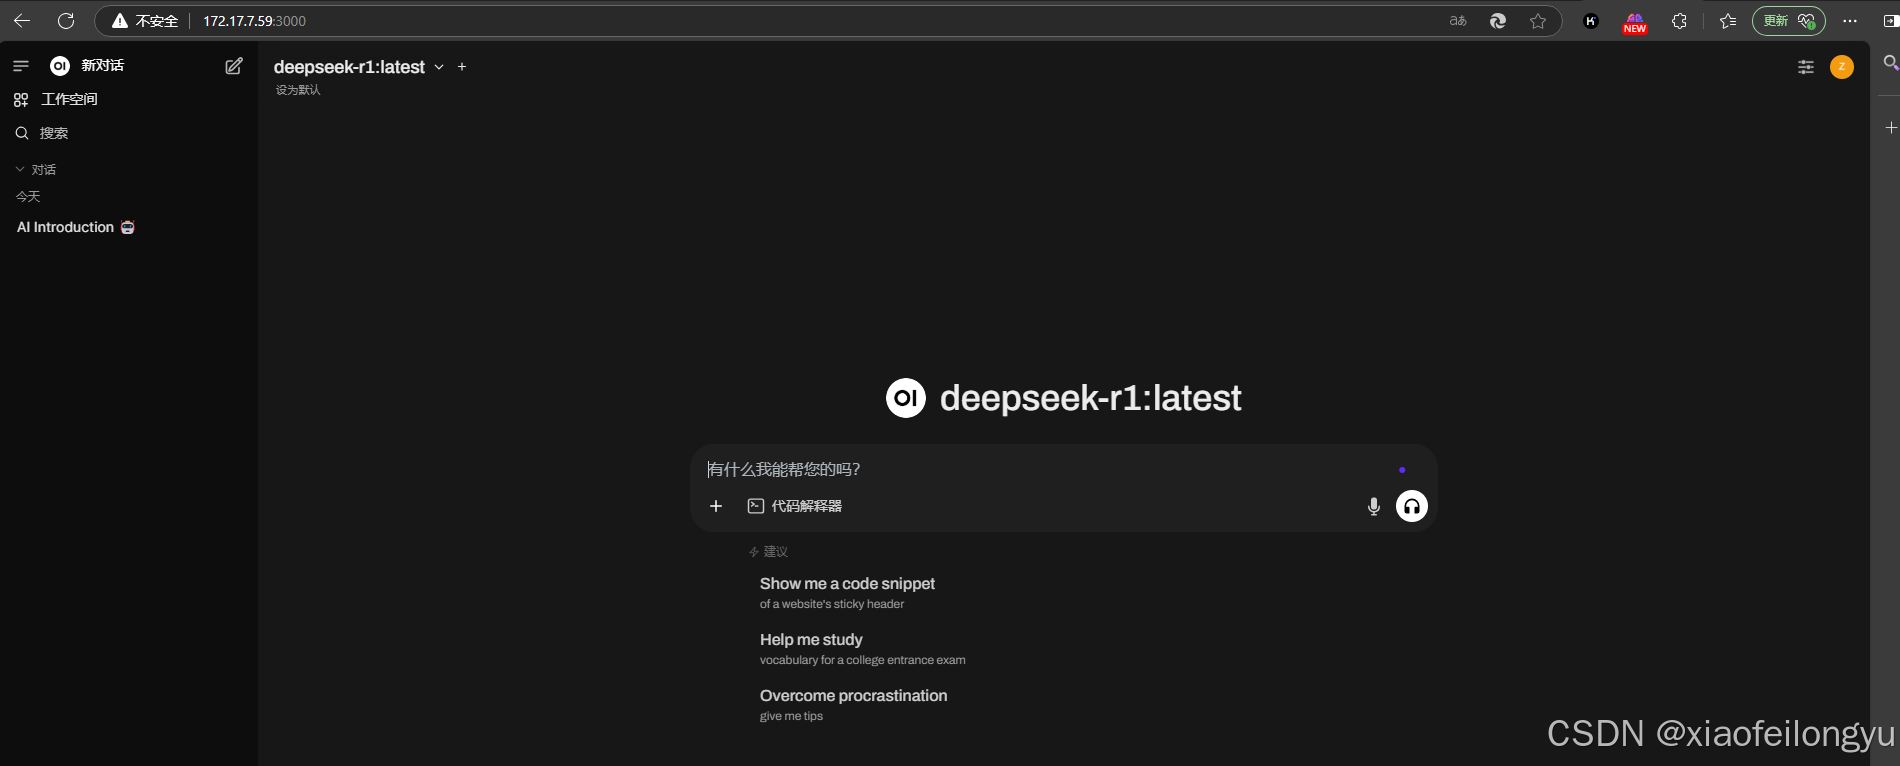
最后打开服务器的网页,ip是部署服务器的地址,端口是3000


 329
329

 被折叠的 条评论
为什么被折叠?
被折叠的 条评论
为什么被折叠?
 到【灌水乐园】发言


