


 本文详细介绍了如何在UE4中创建并设置血条(HP)进度条控件蓝图,包含创建蓝图、添加组件、调整属性及实现进度条与摄像机交互的功能。通过步骤指南,读者可以学会将创建的蓝图类应用到游戏中的人或怪物上,实现动态的HP显示。
声明:本文是自己做的项目,可能不是最好的方法,或有错误使用方式。各位不喜勿喷!
 HP进度
HP进度
 HP背景
HP背景
将上面的资源拖到UE4中(使用UE4自带的颜色也可实现效果,具体参考官方教程 https://docs.unrealengine.com/latest/CHN/Engine/UMG/QuickStart/2/index.html)
网上相关教程:https://answers.unrealengine.com/questions/79728/how-to-make-a-progress-bar-in-umg.html
下面是自己的做法:(注意:下面教程中使用了部分的官方教程截图)
一、创建并设置血条的控件蓝图。
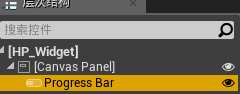
1. 在内容浏览器中添加一个控件蓝图,并命名为HP_Widget。 (控件蓝图,即:widget Blueprint)

2. 双击刚创建的控件蓝图,并拖进一个Progress Bar
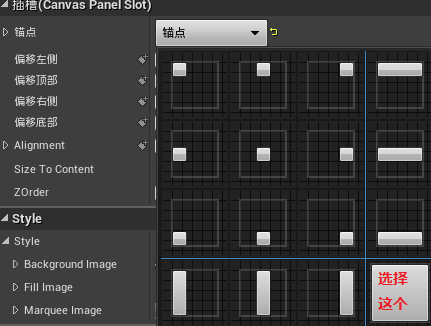
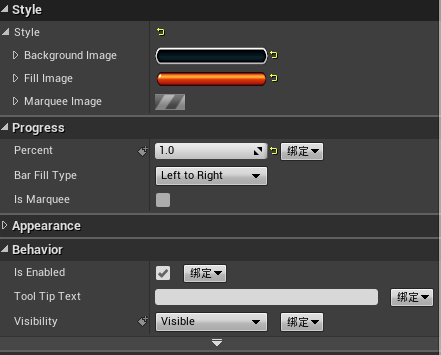
3. 按照下图设置progress Bar后,保存
二、 创建可以添加到游戏中的3D Actor 蓝图类,并命名为HP_Blueprint
直接粘贴了部分官方教程, 见谅。 (对官方教程 感兴趣的可以看下Creating and Adding the 3D Actor to the Game World ,具体见官方教程)
注意:将下面MainMenu换成自己的HP_Widget即可。
In this step, we will create the Actor that will contain and display our UI Menu we created in game.
-
Right-click in the Content Browser, then choose Blueprint from the context menu that appears to create a new Blueprint.

-
Select Actor from the pop-up menu that appears, give the new Blueprint a name, then save the Blueprint.

-
Double-click on the new Blueprint to open it up in the Editor, it should open to the Components tab.

If it does not open up on the Components tab, click the Components tab to jump to it.
-
Click the Add Component button, then find and select the Widget option.

-
Give the component a name (such as MainMenu), then click the Compile and Save buttons.
-
In the Details panel for the new widget component, scroll down to the UI section and under Widget Class, select the MainMenuWidget Blueprint.

-
You can adjust the Draw Size settings to increase the scale of the widget.

-
There is also a Max Interaction option which will determine how far away the player can be to interact with the widget.

-
There are additional options for rendering under the Rendering section (below we have set the component to two sided so the component is visible from behind).

三、给蓝图类添加进度条和朝向摄像机的功能。
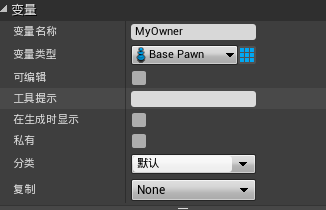
1.新建一个蓝图附加对象的变量MyOwner
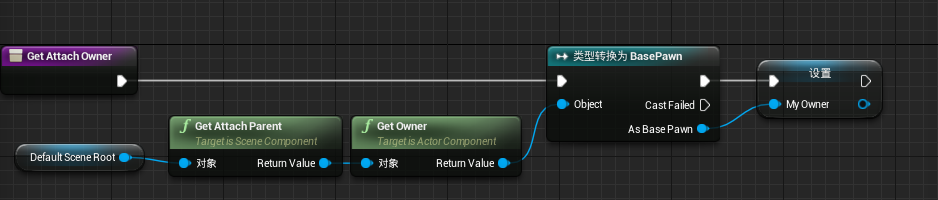
2.新建一个获得蓝图要附加的对象的函数:GetAttachOwner
3. 新建一个变量Progress Bar,存储进度条对象

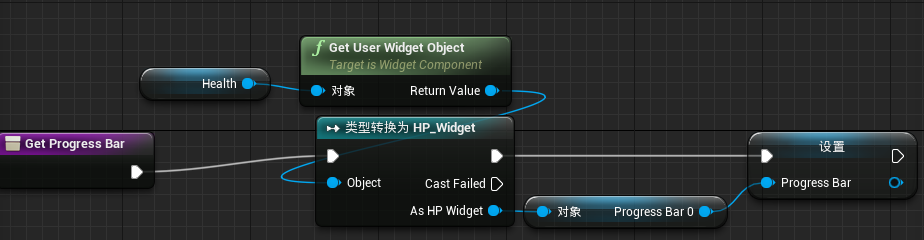
4. 新建一个函数GetProgressBar,用来获得进度条对象
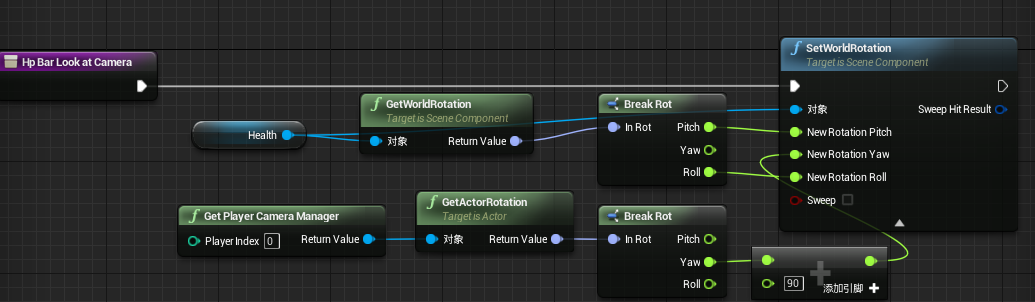
5. 新建一个函数HpBarLookAtCamera,每帧都使血条朝向摄像机
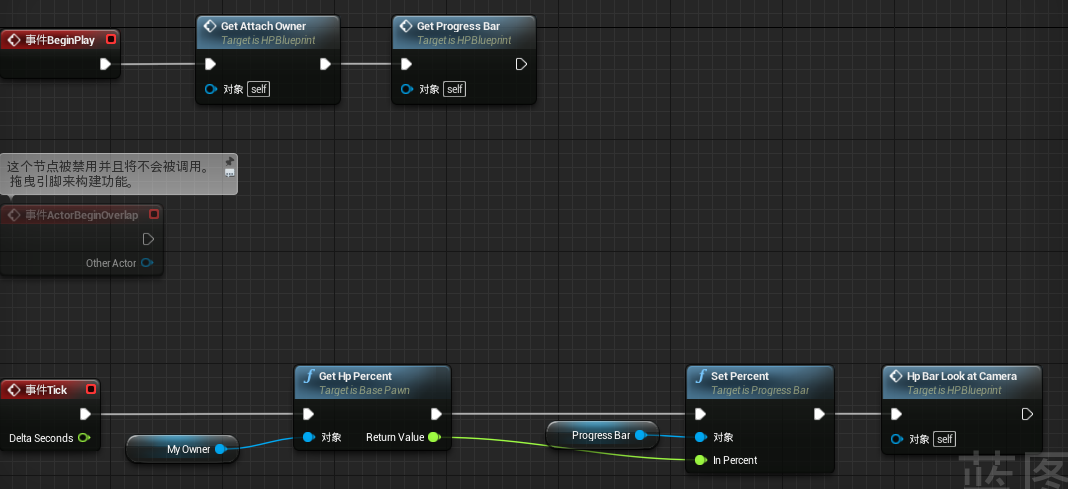
6. 在事件图标中调用各个函数。
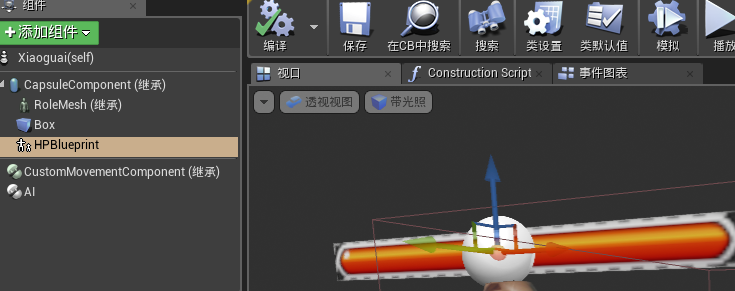
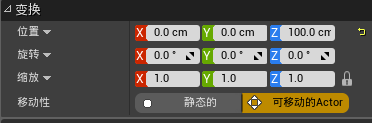
四、将HPBlueprint蓝图类从资源浏览器中拖到人或怪身上,并设置位置就OK了。
注意:不能通过添加组件的方式HPBlueprint蓝图类。


 3124
3124

 被折叠的 条评论
为什么被折叠?
被折叠的 条评论
为什么被折叠?
 到【灌水乐园】发言


