


通过前面的学习,我们了解了Babylon.js中Shader的很多用法,这里将前面的内容综合一下,编写一个稍微复杂一点儿的案例。
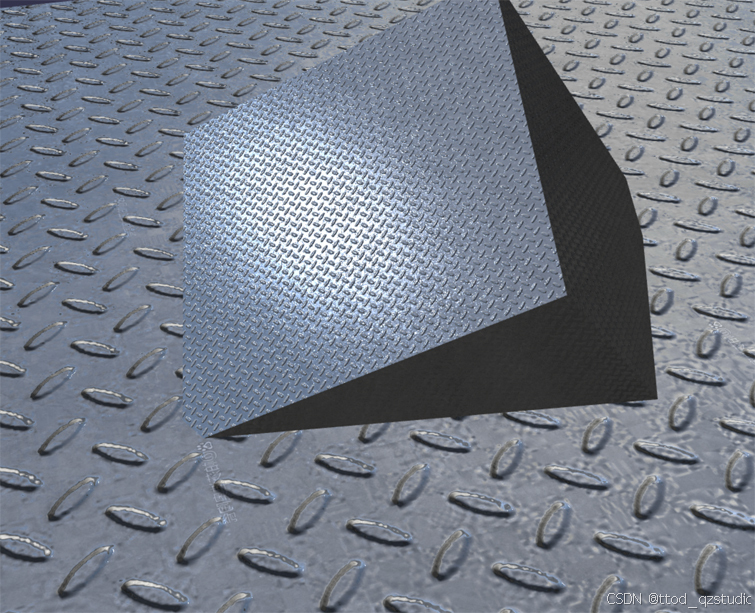
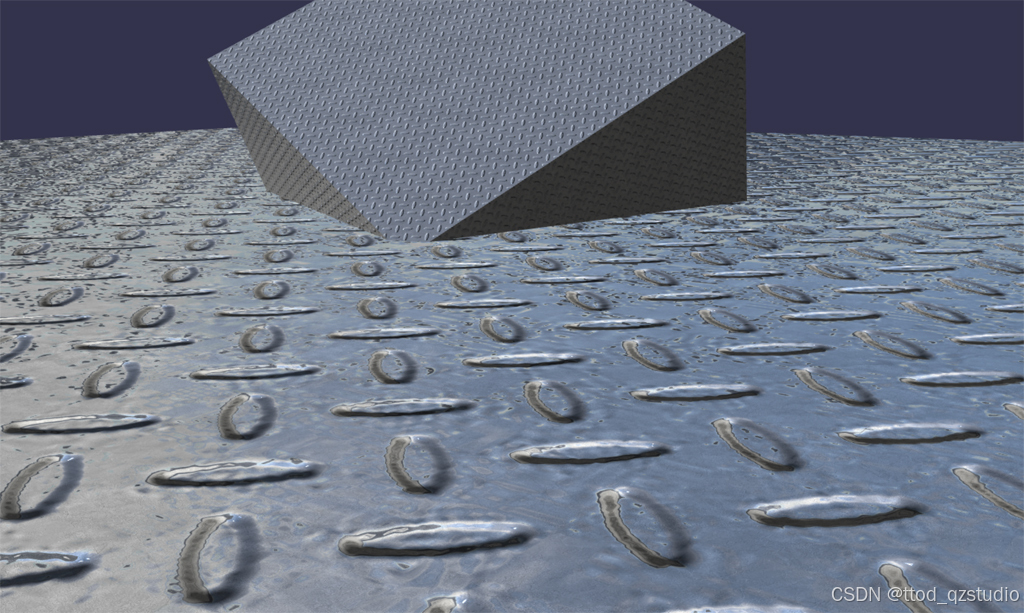
该Shader将能够使用漫反射颜色Diffuse Color和漫反射纹理Diffuse Texture,同时支持法线纹理并可以反射环境纹理,能够接受环境光照和一个平行光照射,能够产生高光效果。效果参考如下:
顶点着色器:
attribute vec3 position;
attribute vec3 normal;
attribute vec2 uv;
attribute vec3 tangent;

uniform mat4 world;
uniform mat4 worldViewProjection;
uniform vec3 cameraPosition;

varying vec3 vPositionW;
varying vec2 vUV;
varying mat3 vTBN;

void main() {
    // 基础变换
    vec4 worldPos = world * vec4(position, 1.0);
    vPositionW = worldPos.xyz;
    gl_Position = worldViewProjection * vec4(position, 1.0);

    // 构建 TBN 矩阵(切线空间 -> 世界空间)
    vec3 T = normalize((world * vec4(tangent, 0.0)).xyz);
    vec3 N = normalize((world * vec4(normal, 0.0)).xyz);
    vec3 B = cross(N, T);
    vTBN = mat3(T, B, N);

    vUV = uv;
}这部分内容不做解释,如果看不太明白可以参考基于Babylon.js的Shader入门之五:让Shader支持法线贴图这篇博客的顶点着色器的讲解内容,总体内容差不多。
片元着色器:
precision highp float;

// 贴图
uniform sampler2D diffuseTexture;    // 漫反射贴图
uniform sampler2D normalTexture;     // 法线贴图
uniform samplerCube environmentTexture; // 环境贴图

// 颜色参数
uniform vec3 diffuseColor;           // 漫反射颜色
uniform float ambientIntensity;      // 环境光强度
uniform vec3 ambientColor;           // 环境光颜色

// 平行光参数
uniform vec3 lightDirection;         // 平行光方向(世界空间)
uniform vec3 lightColor;             // 平行光颜色
uniform float lightIntensity;        // 平行光强度

// 高光参数
uniform float specularPower;         // 高光范围(指数)
uniform float specularIntensity;     // 高光强度

// 菲涅尔参数
uniform float fresnelPower;          // 菲涅尔边缘强度
uniform float fresnelBias;           // 菲涅尔基础值

// 其他
uniform vec3 cameraPosition;         // 相机位置
uniform vec2 scaleDiffuseTex;
uniform vec2 scaleNormalTex;

varying vec3 vPositionW;
varying vec2 vUV;
varying mat3 vTBN;

void main() {
    // 采样漫反射贴图并与颜色混合
    vec2 uvDiffuse = vUV * scaleDiffuseTex;
    vec4 diffuseTextureColor = texture2D(diffuseTexture, uvDiffuse);
    vec3 baseColor = diffuseColor * diffuseTextureColor.rgb;

    // 采样法线贴图并转换到世界空间
    vec2 uvNormal = vUV * scaleNormalTex;
    // vec2 uvNormal = vec2(3.0,3.0);
    vec3 normalColor = texture2D(normalTexture, uvNormal).xyz * 2.0 - 1.0;
    vec3 normalW = normalize(vTBN * normalColor);

    // ================= 光照计算 =================
    // 环境光
    vec3 ambient = ambientColor * ambientIntensity * baseColor;

    // 平行光漫反射
    vec3 lightDir = normalize(-lightDirection);
    float NdotL = max(dot(normalW, lightDir), 0.0);
    vec3 diffuse = lightColor * lightIntensity * NdotL * baseColor;

    // 平行光高光(Blinn-Phong模型)
    vec3 viewDir = normalize(cameraPosition - vPositionW);
    vec3 halfDir = normalize(lightDir + viewDir);
    float specTerm = pow(max(dot(normalW, halfDir), 0.0), specularPower);
    vec3 specular = lightColor * specularIntensity * specTerm;

    // ================= 环境反射 =================
    vec3 reflectDir = reflect(-viewDir, normalW);
    vec3 reflectionColor = textureCube(environmentTexture, reflectDir).rgb;

    // 菲涅尔混合
    float fresnel = fresnelBias + (1.0 - fresnelBias) * pow(1.0 - max(dot(viewDir, normalW), 0.0), fresnelPower);
    vec3 finalColor = mix(baseColor, reflectionColor, fresnel);

    // ================= 最终合成 =================
    finalColor = (ambient + diffuse + specular) * finalColor;

    gl_FragColor = vec4(finalColor, 1.0);
}
大部分内容在前面的博客中都讲解过,只有高光处理的部分前面没有涉及,这里单独说一下。高光计算的部分代码如下:
    // 平行光高光(Blinn-Phong模型)
    vec3 viewDir = normalize(cameraPosition - vPositionW);
    vec3 halfDir = normalize(lightDir + viewDir);
    float specTerm = pow(max(dot(normalW, halfDir), 0.0), specularPower);
    vec3 specular = lightColor * specularIntensity * specTerm;
这四行代码是 Blinn-Phong 光照模型 中计算高光(镜面反射)的核心部分,用于模拟光线在物体表面的镜面反射效果。以下是逐行详细解释:
1. vec3 viewDir = normalize(cameraPosition - vPositionW);
作用
计算从表面点到相机的 视角方向(View Direction)。
cameraPosition:相机在世界空间中的位置(Uniform 变量)。vPositionW:当前片段(像素)在世界空间中的位置(从顶点着色器传递)。normalize(...):将方向向量归一化为单位长度(避免长度影响后续计算)。
物理意义
表示人眼(或相机)观察物体表面的方向,用于后续计算反射效果。
2. vec3 halfDir = normalize(lightDir + viewDir);
作用
计算 半角向量(Halfway Vector),即光线方向与视角方向的中间向量。
lightDir:平行光的方向(已归一化,通常为normalize(-lightDirection))。viewDir:上一步计算的视角方向。normalize(...):确保半角向量是单位向量。
为什么需要半角向量?
Blinn-Phong 模型通过 半角向量与法线的夹角 计算高光,比传统的 Phong 模型(直接计算反射向量)更高效。
3. float specTerm = pow(max(dot(normalW, halfDir), 0.0), specularPower);
作用
计算高光强度项(Specular Term),决定高光的亮度和范围。
normalW:世界空间中的法线方向(来自法线贴图或顶点法线)。dot(normalW, halfDir):法线与半角向量的点积,表示它们的夹角余弦值(范围[-1, 1])。max(..., 0.0):将点积结果限制在[0, 1],避免负值影响。pow(..., specularPower)specularPower(高光指数)控制高光的集中程度。值越大,高光越锐利(如金属);值越小,高光越扩散(如塑料)。
数学意义
![]()
其中:
-
N 是法线,H 是半角向量。
4. vec3 specular = lightColor * specularIntensity * specTerm;
作用
合成最终的高光颜色。
lightColor:平行光的颜色(如vec3(1.0, 1.0, 1.0)表示白光)。specularIntensity:高光强度系数(Uniform 变量),用于艺术调节。specTerm:上一步计算的高光强度项。
物理意义
高光颜色 = 光源颜色 × 高光强度 × 高光衰减项。
- 当法线与半角向量对齐时(
dot(normalW, halfDir) ≈ 1),高光最亮。 - 当夹角增大时,高光强度按指数衰减。
完整流程图示
graph LR
    A[相机位置] --> B[viewDir = normalize(cameraPosition - vPositionW)]
    C[光源方向] --> D[halfDir = normalize(lightDir + viewDir)]
    B --> D
    D --> E[specTerm = pow(max(dot(normalW, halfDir), 0.0), specularPower)]
    E --> F[specular = lightColor * specularIntensity * specTerm]
关键参数的影响
| 参数 | 作用 | 典型值 |
|---|---|---|
specularPower | 控制高光范围(值越大,高光越集中) | 32.0(金属) / 8.0(塑料) |
specularIntensity | 控制高光亮度 | 0.5 ~ 1.0 |
lightColor | 高光的基础颜色 | 与光源一致 |
与其他光照模型的对比
-
Phong 模型:直接计算反射向量 R 与视角向量的夹角,计算量较大。
-
Blinn-Phong 模型:改用半角向量,效率更高,适合实时渲染。
-
PBR 模型:基于物理的镜面反射(如 BRDF),更复杂但更真实。
使用示例:
export function SetMaterial(scene:Scene):void{

    SceneLoader.Append("Models/","Plane.gltf", scene, (scene)=>{
            // 创建 ShaderMaterial
            const material = new ShaderMaterial("Water", scene,
            "./src/assets/Shaders/Water/Water",
            {
                attributes: ["position", "normal", "uv", "tangent", "bitangent"],
                uniforms: [
                    "world", "worldViewProjection", "cameraPosition",
                    "diffuseColor", "ambientIntensity", "ambientColor",
                    "lightDirection", "lightColor", "lightIntensity",
                    "specularPower", "specularIntensity",
                    "fresnelPower", "fresnelBias",
                    "scaleDiffuseTex","scaleNormalTex"
                ],
                samplers: ["diffuseTexture", "normalTexture", "environmentTexture"]
            });

            const diffuseTexture = new Texture("./src/assets/Textures/DaLiShi.jpg", scene);
            const normalTexture = new Texture("./src/assets/Textures/Metal06.jpg", scene);
            const environmentTexture = new CubeTexture("./src/assets/Textures/Environment/Environment", scene);

            // 设置贴图
            material.setTexture("diffuseTexture", diffuseTexture );
            material.setVector2("scaleDiffuseTex", new Vector2(5, 5));

            material.setTexture("normalTexture", normalTexture);
            material.setVector2("scaleNormalTex", new Vector2(5, 5));

            material.setTexture("environmentTexture", environmentTexture);

            // 设置颜色参数
            material.setVector3("diffuseColor", new Vector3(1, 1, 1));
            material.setFloat("ambientIntensity", 0.3);
            material.setVector3("ambientColor", new Vector3(1, 1, 1));

            // 设置平行光参数
            material.setVector3("lightDirection", new Vector3(-1, -1, -1));
            material.setVector3("lightColor", new Vector3(1, 1, 1));
            material.setFloat("lightIntensity", 1.0);

            // 设置高光参数
            material.setFloat("specularPower", 128.0);
            material.setFloat("specularIntensity", 1.0);

            // 设置菲涅尔参数
            material.setFloat("fresnelPower", 5.0);
            material.setFloat("fresnelBias", 0.6);

            // 绑定相机位置(每帧更新)
            scene.onBeforeRenderObservable.add(() => {
                if(scene.activeCamera){
                    material.setVector3("cameraPosition", scene.activeCamera.position); // 设置相机位置
                }
            });

            scene.meshes.forEach((mesh)=>{
                // 获取网格的顶点数据
                if (mesh.isVerticesDataPresent(VertexBuffer.TangentKind)) {
                    // 应用材质到网格
                    console.log("mesh contain tangent = " + mesh.name);
                }
                else{
                    const tangentsArray = ComputeTangents(mesh);
                    if(tangentsArray && tangentsArray.length > 2){
                        console.log("mesh don't contain tangent = " + mesh.name);
                        mesh.setVerticesData(VertexBuffer.TangentKind, tangentsArray, false);
                    }
                }
                mesh.material = material;
            });
        }
    );
}


function ComputeTangents(mesh:AbstractMesh){
    const positions = mesh.getVerticesData( VertexBuffer.PositionKind);
    const uvs = mesh.getVerticesData( VertexBuffer.UVKind);
    const indices = mesh.getIndices();

    if(positions && uvs && indices){
        let tangents = new Array(positions.length).fill(0);
        for (let i = 0; i < indices.length; i += 3) {
            let i0 = indices[i];
            let i1 = indices[i + 1];
            let i2 = indices[i + 2];

            let p0 = new Vector3(positions[i0 * 3], positions[i0 * 3 + 1], positions[i0 * 3 + 2]);
            let p1 = new Vector3(positions[i1 * 3], positions[i1 * 3 + 1], positions[i1 * 3 + 2]);
            let p2 = new Vector3(positions[i2 * 3], positions[i2 * 3 + 1], positions[i2 * 3 + 2]);

            let uv0 = new Vector2(uvs[i0 * 2], uvs[i0 * 2 + 1]);
            let uv1 = new Vector2(uvs[i1 * 2], uvs[i1 * 2 + 1]);
            let uv2 = new Vector2(uvs[i2 * 2], uvs[i2 * 2 + 1]);

            let deltaPos1 = p1.subtract(p0);
            let deltaPos2 = p2.subtract(p0);

            let deltaUV1 = uv1.subtract(uv0);
            let deltaUV2 = uv2.subtract(uv0);

            let r = 1.0 / (deltaUV1.x * deltaUV2.y - deltaUV1.y * deltaUV2.x);
            let tangent = deltaPos1.scale(deltaUV2.y).subtract(deltaPos2.scale(deltaUV1.y)).scale(r);

            tangents[i0 * 4] = tangent.x;
            tangents[i0 * 4 + 1] = tangent.y;
            tangents[i0 * 4 + 2] = tangent.z;
            tangents[i0 * 4 + 3] = 1;

            tangents[i1 * 4] = tangent.x;
            tangents[i1 * 4 + 1] = tangent.y;
            tangents[i1 * 4 + 2] = tangent.z;
            tangents[i1 * 4 + 3] = 1;

            tangents[i2 * 4] = tangent.x;
            tangents[i2 * 4 + 1] = tangent.y;
            tangents[i2 * 4 + 2] = tangent.z;
            tangents[i2 * 4 + 3] = 1;
        }
        return tangents;
    }
    return null;
}
补充说明:
由于这里使用了法线贴图,如果使用Shader的物体表面完全是黑色的,很可能是顶点切线的问题,具体解决方法参考基于Babylon.js的Shader入门之五:让Shader支持法线贴图。


 1610
1610

 被折叠的 条评论
为什么被折叠?
被折叠的 条评论
为什么被折叠?
 到【灌水乐园】发言


