


一、说明
AI大模型学习二十六、使用 Dify + awesome-digital-human-live2d + ollama + ChatTTS打造数字人-优快云博客![]() https://blog.youkuaiyun.com/jiangkp/article/details/148043962?spm=1011.2415.3001.5331我们在上一篇文章中完成了数字人应用,但是留个问题没解决,就是xinference一次部署在一个GPU环境中只能部署一个大模型,这一篇就是为了解决这个问题,而且我们把语言模型qwen3也部署在xinference
https://blog.youkuaiyun.com/jiangkp/article/details/148043962?spm=1011.2415.3001.5331我们在上一篇文章中完成了数字人应用,但是留个问题没解决,就是xinference一次部署在一个GPU环境中只能部署一个大模型,这一篇就是为了解决这个问题,而且我们把语言模型qwen3也部署在xinference
多个模型同时运行直接看第五节 想办法实现多个模型同时启动,第三节,第四节可以不看,那样安装无法完成多个模型同时运行
二、准备阶段
1、文档看官方地址
欢迎来到 Xinference! — Xinference![]() https://inference.readthedocs.io/zh-cn/latest/index.html
https://inference.readthedocs.io/zh-cn/latest/index.html
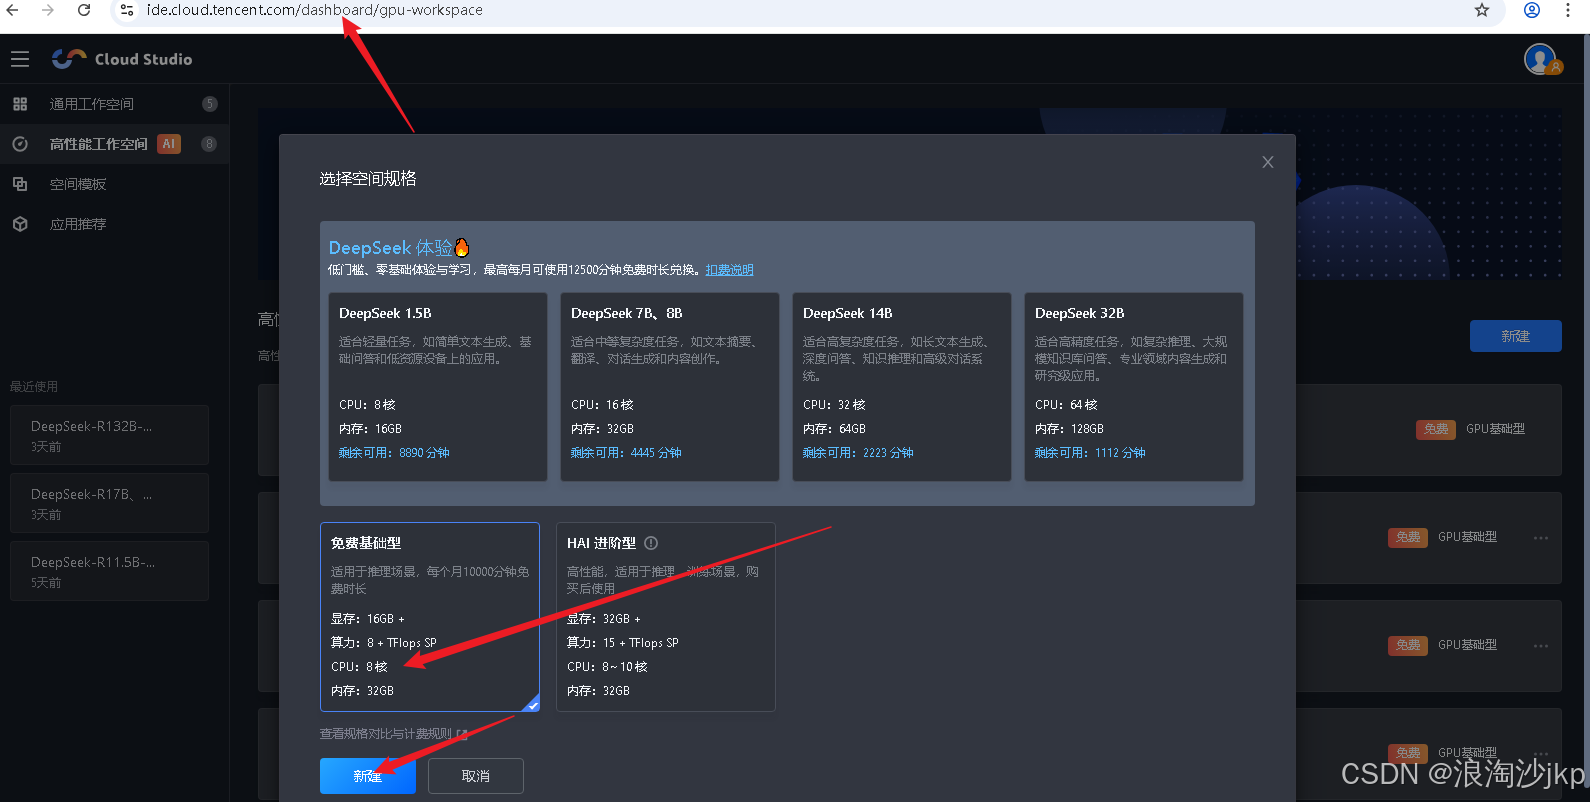
2、在腾讯cloudstudio 在线平台申请GPU系统
16g 显存 + 32G内存 免费的
三、安装Xinference
apt-get update
apt-get install ffmpeg

# 假设已经安装
conda create --name xinference python=3.10
#conda remove --name xinference --all
conda activate xinference
# 根据自己的cuda选择,我的是12.0,但是没有cu120 所以我们用cu121 这里安装不好,会导致错误
pip install torch torchaudio --index-url https://download.pytorch.org/whl/cu121

pip install xxhash Cython cmake -i https://pypi.tuna.tsinghua.edu.cn/simple
# 这两个先装,要不然出错了麻烦
pip install pyopenjtalk audioread

pip install "xinference[all]" -i https://pypi.tuna.tsinghua.edu.cn/simple
conda activate xinference

export HF_ENDPOINT=https://hf-mirror.com
export XINFERENCE_MODEL_SRC=modelscope
export XINFERENCE_HOME=`pwd`/xf-data
nohup xinference-local --host 0.0.0.0 --port 9997 > xinference-local.log 2>&1 &

tail -f xinference-local.log
四、安装3个模型
# 大模型
xinference launch --model-uid whisper-1 --model-name whisper-large-v3 --model-type audio
# 小模型,我们有这个,资源不够
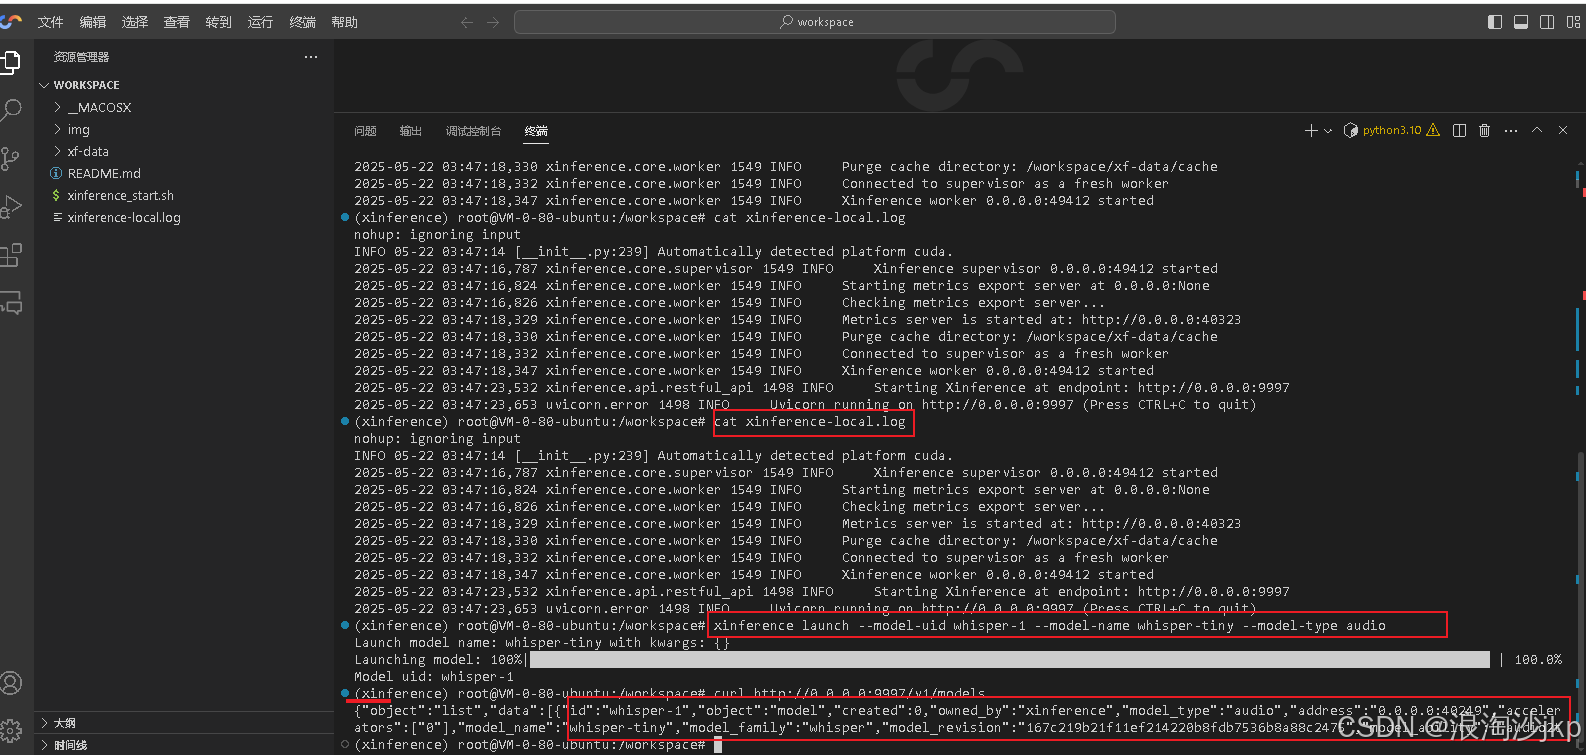
xinference launch --model-uid whisper-1 --model-name whisper-tiny --model-type audio
xinference launch --model-uid chattts-1 --model-name ChatTTS --model-type audio
xinference launch --model-engine Transformers --model-name qwen3 --size-in-billions 8 --model-format pytorch --quantization none#查询安装的模型
curl http://0.0.0.0:9997/v1/models安装 whisper-tiny
安装ChatTTS

安装不成功,必须终止前面安装的whisper-tiny

用xinference list可以查看

下面命令终止

xinference terminate --model-uid "whisper-1"

然后执行

xinference launch --model-uid chattts-1 --model-name ChatTTS --model-type audio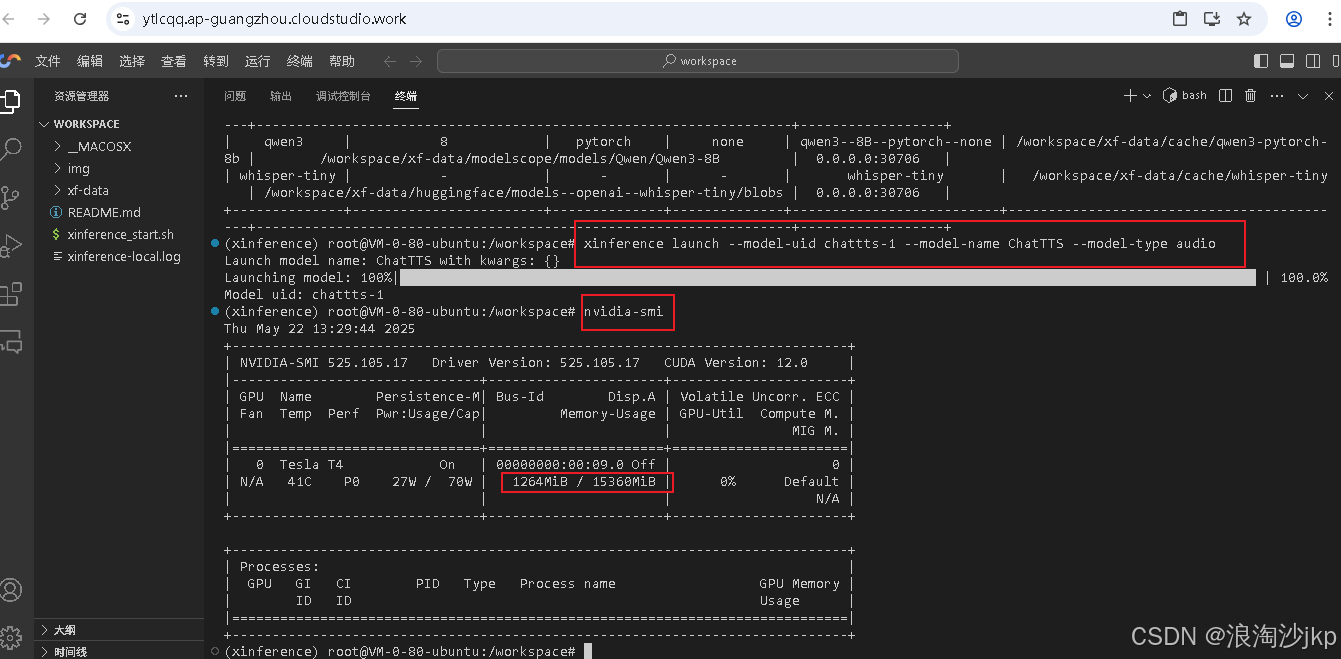
安装qwen3
同样终止所有模型,然后安装
xinference launch --model-engine Transformers --model-name qwen3 --size-in-billions 8 --model-format pytorch --quantization none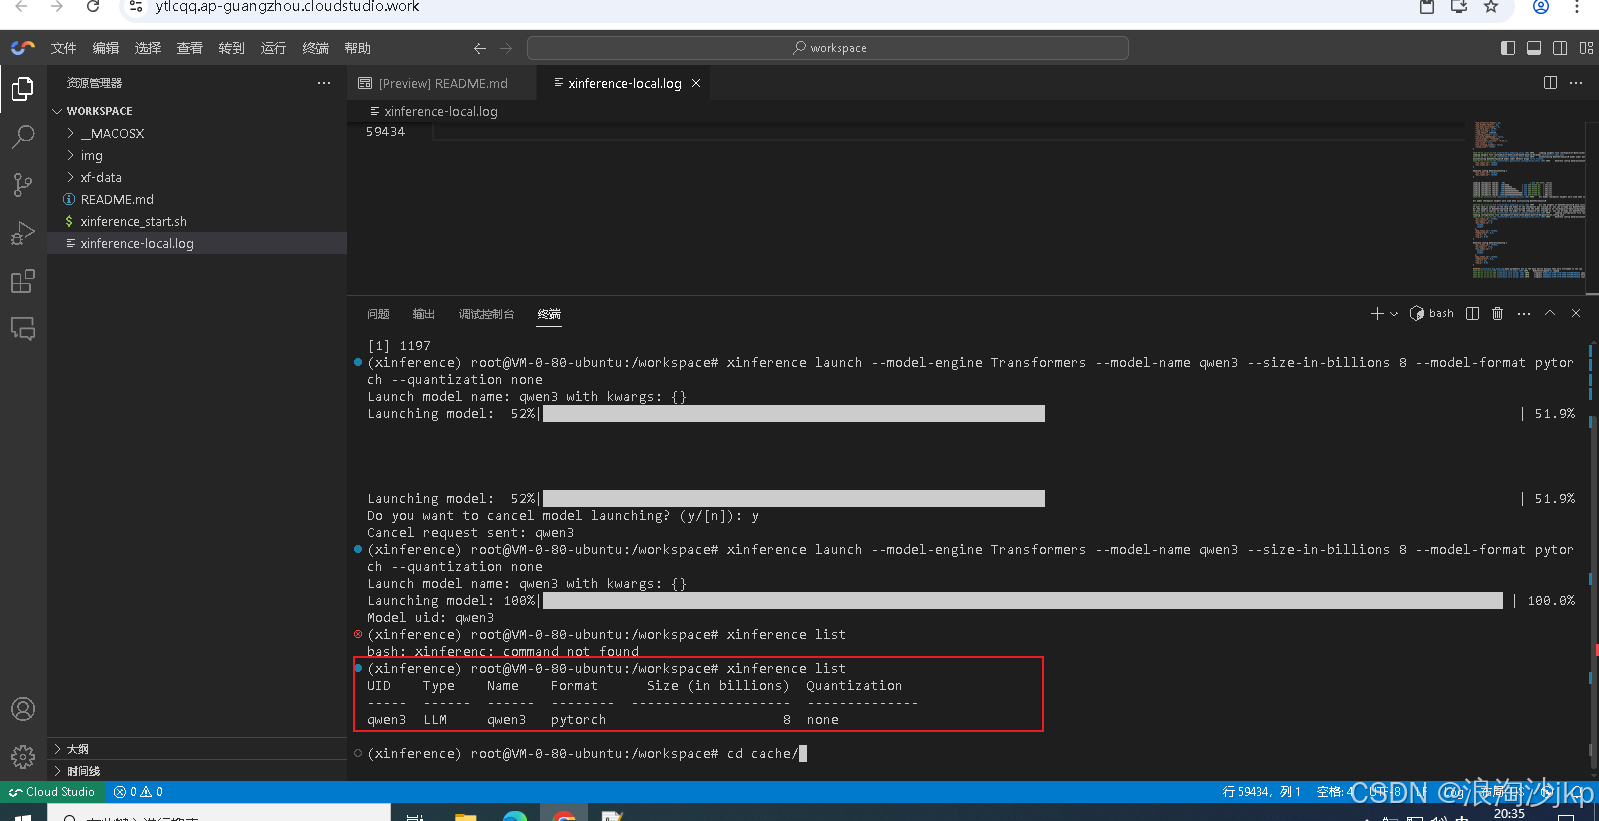
xinference cached
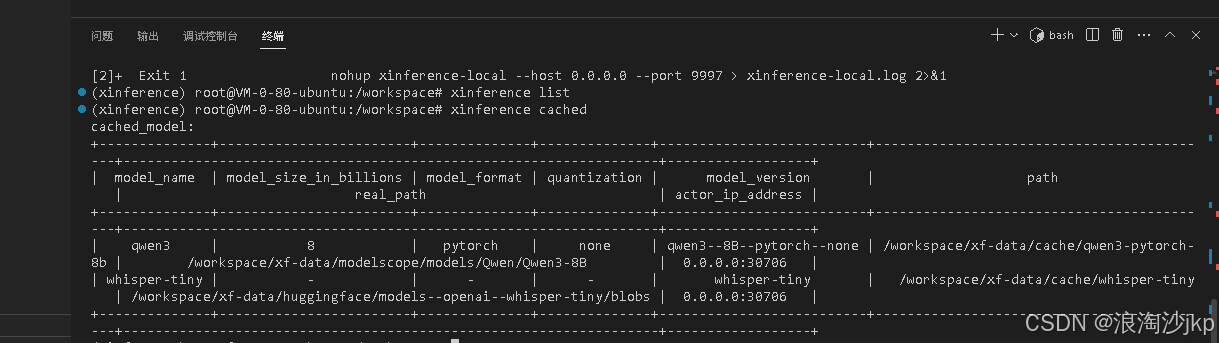
只能同时启动1个模型,网络上安装能同时启动多个模型的,不知道怎么完成的
五、想办法实现多个模型同时启动
前面安装的模型意义不大,这一节相当于重新安装,我是又申请了一个cloud studio 高性能工作空间
1、准备工作
没啥好准备的,确认安装了python 3.10以上,以下的没试过,网上也有用3.8的
(base) root@VM-0-80-ubuntu:/workspace/qwen3# python -V
Python 3.10.11安装ffmpeg,这个是ubuntu系统安装的,共用的应用
apt-get update
apt-get install ffmpeg
2、安装qwen3
# 建立目录
mkdir -p /workspace/qwen3
cd /workspace/qwen3
#建立虚拟环境
python -m venv /workspace/qwen3/.venv
source /workspace/qwen3/.venv/bin/activate
pip install torch torchaudio --index-url https://download.pytorch.org/whl/cu121
pip install xxhash -i https://pypi.tuna.tsinghua.edu.cn/simple
pip install xinference[vllm] -i https://pypi.tuna.tsinghua.edu.cn/simple
pip install xinference[transformers] -i https://pypi.tuna.tsinghua.edu.cn/simple
mkdir -p /workspace/qwen3/xf-data
export XINFERENCE_MODEL_SRC=modelscope
export XINFERENCE_HOME=/workspace/qwen3/xf-data/
export HF_ENDPOINT=https://hf-mirror.com
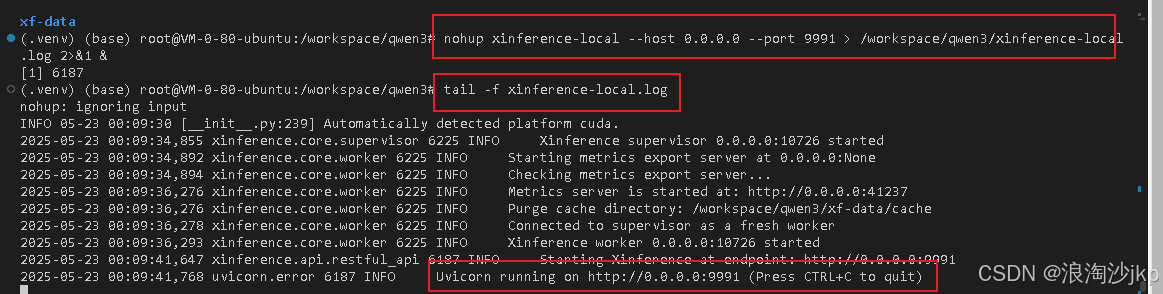
nohup xinference-local --host 0.0.0.0 --port 9991 > /workspace/qwen3/xinference-local.log 2>&1 &
tail -f xinference-local.log
xinference launch --model-uid qwen3-1 --model-engine Transformers --model-name qwen3 --size-in-billions 8 --model-format pytorch --quantization none --endpoint "``http://127.0.0.1:9991``"
查询运行的模型
xinference list --endpoint "http://127.0.0.1:9991"

xinference terminate --model-uid qwen3-1
退出虚拟环境,进行下一个安装
deactivate

如果想重新去查询qwen3模型的状态,可以中心激活虚拟环境
source /workspace/qwen3/.venv/bin/activate
3、安装whisper-tiny
# 建立目录
mkdir -p /workspace/whisper-tiny
cd /workspace/whisper-tiny

#建立虚拟环境
python -m venv /workspace/whisper-tiny/.venv

source /workspace/whisper-tiny/.venv/bin/activate


pip install torch torchaudio --index-url https://download.pytorch.org/whl/cu121

pip install xxhash -i https://pypi.tuna.tsinghua.edu.cn/simple

pip install xinference[vllm] -i https://pypi.tuna.tsinghua.edu.cn/simple
pip install xinference[transformers] -i https://pypi.tuna.tsinghua.edu.cn/simple

mkdir -p /workspace/whisper-tiny/xf-data
export XINFERENCE_MODEL_SRC=modelscope
export XINFERENCE_HOME=/workspace/whisper-tiny/xf-data/
export HF_ENDPOINT=https://hf-mirror.com

nohup xinference-local --host 0.0.0.0 --port 9992 > /workspace/whisper-tiny/xinference-local.log 2>&1 &

tail -f xinference-local.log


xinference launch --model-uid whisper-1 --model-name whisper-tiny --model-type audio --endpoint "``http://127.0.0.1:9992``"
deactivate

如果想重新去查询qwen3模型的状态,可以中心激活虚拟环境
source /workspace/qwen3/.venv/bin/activate
4、安装CHATTTS
# 建立目录
mkdir -p /workspace/chattts
cd /workspace/chattts

#建立虚拟环境
python -m venv /workspace/chattts/.venv

source /workspace/chattts/.venv/bin/activate


pip install torch torchaudio --index-url https://download.pytorch.org/whl/cu121

pip install xxhash ChatTTS -i https://pypi.tuna.tsinghua.edu.cn/simple

pip install xinference[vllm] -i https://pypi.tuna.tsinghua.edu.cn/simple
pip install xinference[transformers] -i https://pypi.tuna.tsinghua.edu.cn/simple

mkdir -p /workspace/chattts/xf-data
export HF_ENDPOINT=https://hf-mirror.com
export XINFERENCE_MODEL_SRC=modelscope
export XINFERENCE_HOME=/workspace/chattts/xf-data/

# 本来用9993 被占用,没研究为什么被占用

nohup xinference-local --host 0.0.0.0 --port 9997 > /workspace/chattts/xinference-local.log 2>&1 &

tail -f xinference-local.log

xinference launch --model-uid chattts-1 --model-name ChatTTS --model-type audio --endpoint "http://127.0.0.1:9997"
5、查询安装的模型
#查询安装的模型
curl http://0.0.0.0:9991/v1/models
curl http://0.0.0.0:9992/v1/models
curl http://0.0.0.0:9997/v1/models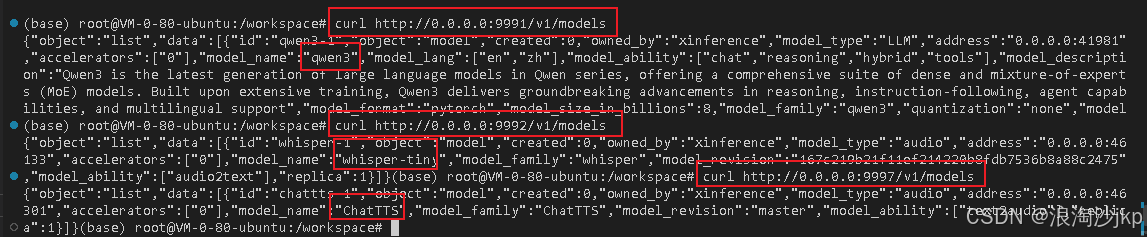
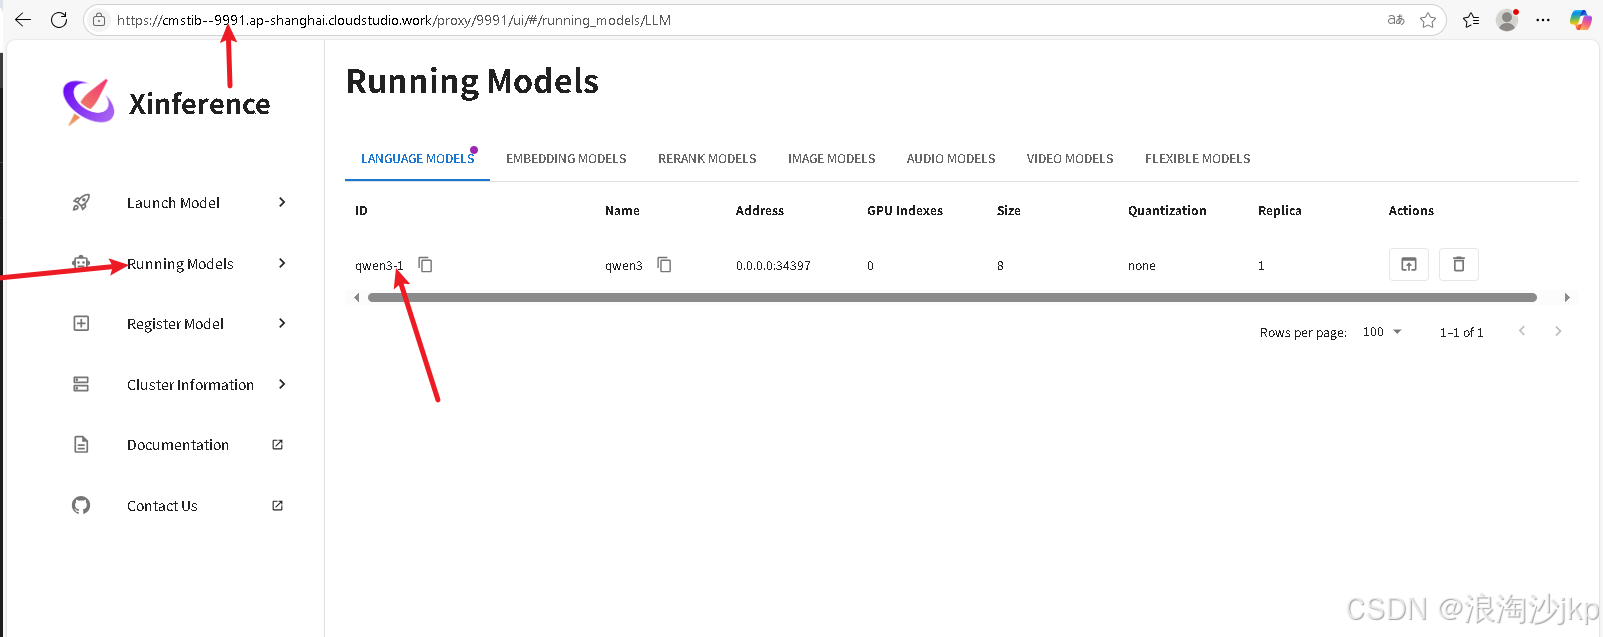
6、网页版查询
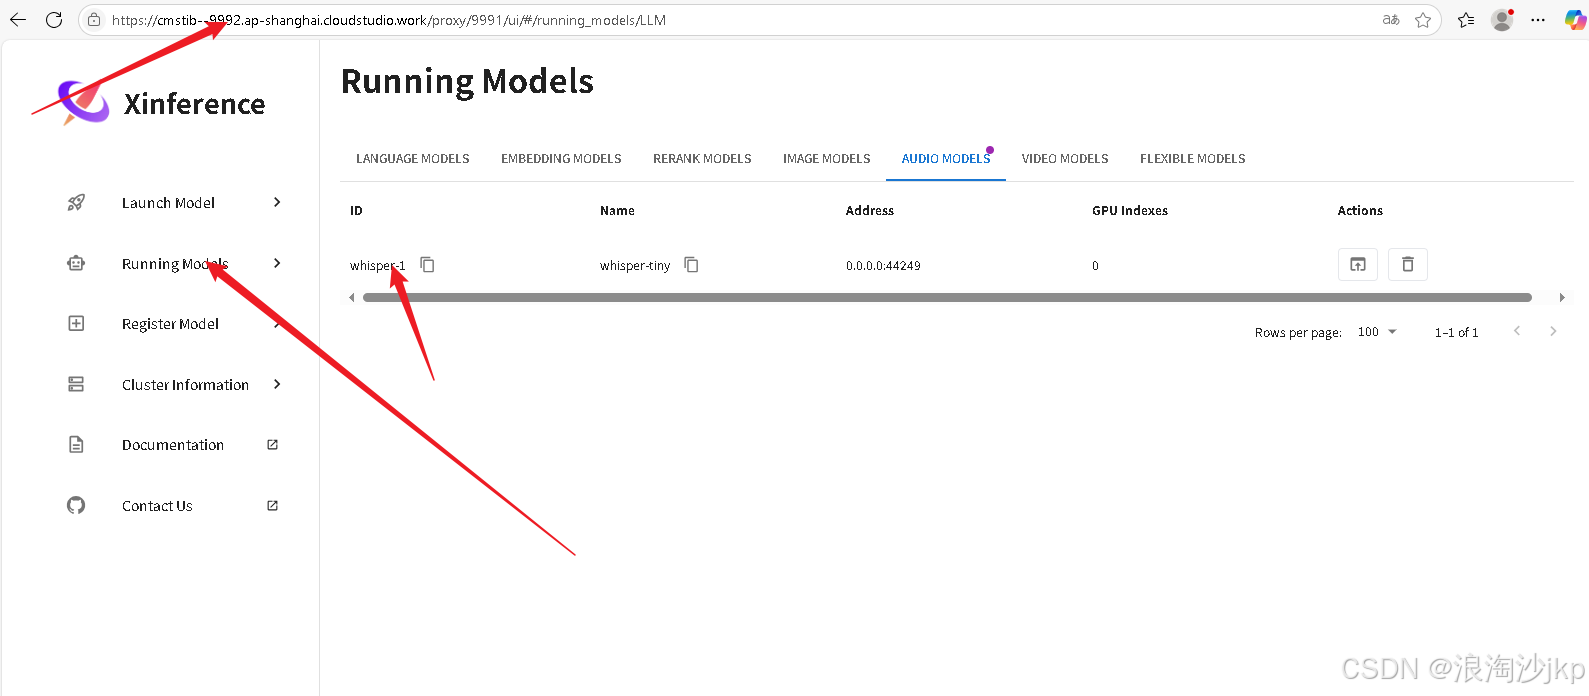
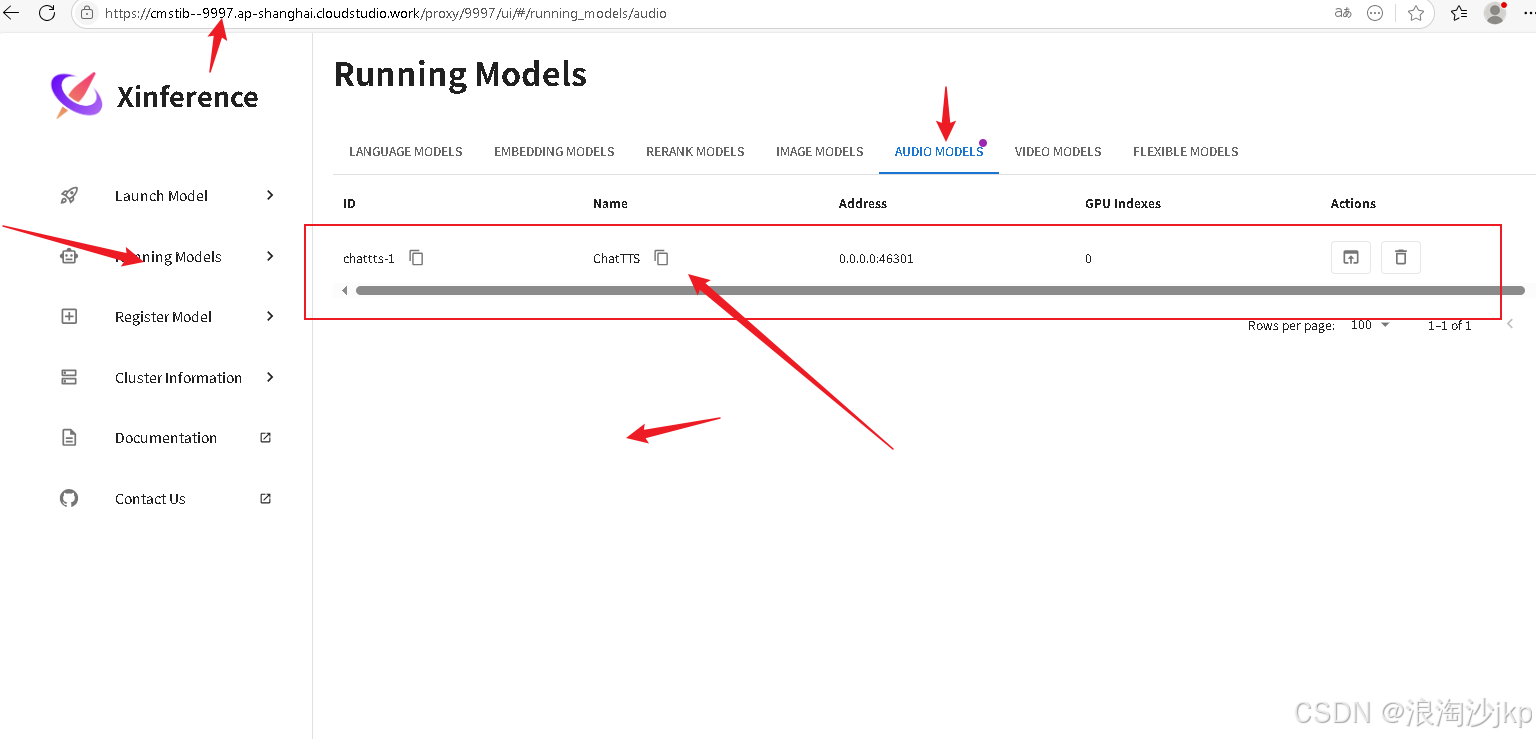
7、总结一下,一键安装
vi /workspace/install.sh#!/bin/bash
apt-get update -y
apt-get install ffmpeg -y
# 建立目录
mkdir -p /workspace/qwen3
cd /workspace/qwen3
#建立虚拟环境
python -m venv /workspace/qwen3/.venv
source /workspace/qwen3/.venv/bin/activate
sleep 2
pip install torch torchaudio --index-url https://download.pytorch.org/whl/cu121
pip install xxhash -i https://pypi.tuna.tsinghua.edu.cn/simple
pip install xinference[vllm] -i https://pypi.tuna.tsinghua.edu.cn/simple
pip install xinference[transformers] -i https://pypi.tuna.tsinghua.edu.cn/simple
mkdir -p /workspace/qwen3/xf-data
export XINFERENCE_MODEL_SRC=modelscope
export XINFERENCE_HOME=/workspace/qwen3/xf-data/
export HF_ENDPOINT=https://hf-mirror.com
nohup xinference-local --host 0.0.0.0 --port 9991 > /workspace/qwen3/xinference-local.log 2>&1 &
# 如果出现连接错误,这个时间放长一点,主要是xinference-local启动没有完成
sleep 60
xinference launch --model-uid qwen3-1 --model-engine Transformers --model-name qwen3 --size-in-billions 8 --model-format pytorch --quantization none --endpoint "http://127.0.0.1:9991"
xinference list --endpoint "http://127.0.0.1:9991"
deactivate
# 建立目录
mkdir -p /workspace/whisper-tiny
cd /workspace/whisper-tiny
#建立虚拟环境
python -m venv /workspace/whisper-tiny/.venv
source /workspace/whisper-tiny/.venv/bin/activate
sleep 2
pip install torch torchaudio --index-url https://download.pytorch.org/whl/cu121
pip install xxhash -i https://pypi.tuna.tsinghua.edu.cn/simple
pip install xinference[vllm] -i https://pypi.tuna.tsinghua.edu.cn/simple
pip install xinference[transformers] -i https://pypi.tuna.tsinghua.edu.cn/simple
mkdir -p /workspace/whisper-tiny/xf-data
export XINFERENCE_MODEL_SRC=modelscope
export HF_ENDPOINT=https://hf-mirror.com
export XINFERENCE_HOME=/workspace/whisper-tiny/xf-data/
nohup xinference-local --host 0.0.0.0 --port 9992 > /workspace/whisper-tiny/xinference-local.log 2>&1 &
# 如果出现连接错误,这个时间放长一点,主要是xinference-local启动没有完成
sleep 60
xinference launch --model-uid whisper-1 --model-name whisper-tiny --model-type audio --endpoint "http://127.0.0.1:9992"
xinference list --endpoint "http://127.0.0.1:9992"
deactivate
# 建立目录
mkdir -p /workspace/chattts
cd /workspace/chattts
#建立虚拟环境
python -m venv /workspace/chattts/.venv
source /workspace/chattts/.venv/bin/activate
sleep 2
pip install torch torchaudio --index-url https://download.pytorch.org/whl/cu121
pip install xxhash ChatTTS -i https://pypi.tuna.tsinghua.edu.cn/simple
pip install xinference[vllm] -i https://pypi.tuna.tsinghua.edu.cn/simple
pip install xinference[transformers] -i https://pypi.tuna.tsinghua.edu.cn/simple
mkdir -p /workspace/chattts/xf-data
export HF_ENDPOINT=https://hf-mirror.com
export XINFERENCE_MODEL_SRC=modelscope
export XINFERENCE_HOME=/workspace/chattts/xf-data/
nohup xinference-local --host 0.0.0.0 --port 9997 > /workspace/chattts/xinference-local.log 2>&1 &
# 如果出现连接错误,这个时间放长一点,主要是xinference-local启动没有完成
sleep 60
xinference launch --model-uid chattts-1 --model-name ChatTTS --model-type audio --endpoint "http://127.0.0.1:9997"
xinference list --endpoint "http://127.0.0.1:9997"
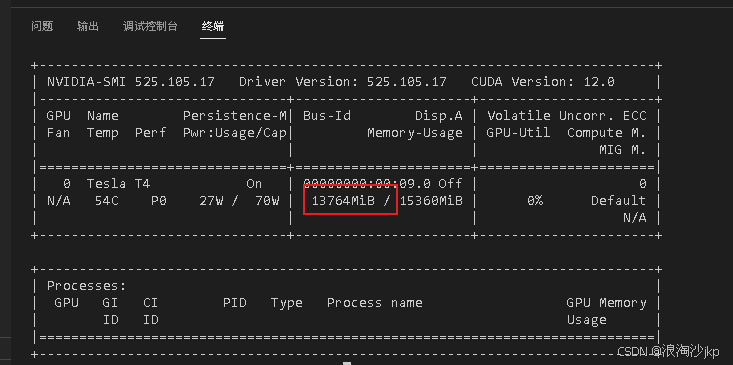
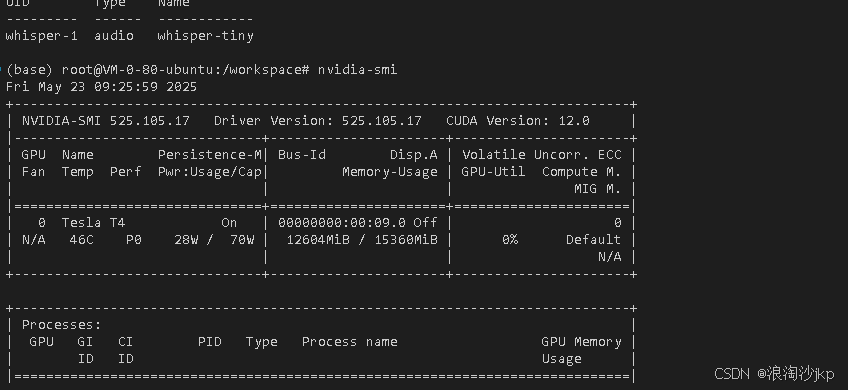
deactivatechmod +x /workspace/install.sh忘了记录安装一个后占用显存的值,这个数3个模型总数
8、一键启动
上面第一次安装时启动,但是在关机重启后,因为都已经有缓存和虚拟环境了,用安装过依耐了,所以可以写个sh脚本,直接运行一次命令启动
start .sh
vi /workspace/start.sh
#!/bin/bash

# 启动qwen3
cd /workspace/qwen3

source /workspace/qwen3/.venv/bin/activate
sleep 2

export HF_ENDPOINT=https://hf-mirror.com
export XINFERENCE_MODEL_SRC=modelscope
export XINFERENCE_HOME=/workspace/qwen3/xf-data/

nohup xinference-local --host 0.0.0.0 --port 9991 > /workspace/qwen3/xinference-local.log 2>&1 &
# 如果出现连接错误,这个时间放长一点,主要是xinference-local启动没有完成
sleep 60

xinference launch --model-uid qwen3-1 --model-engine Transformers --model-name qwen3 --size-in-billions 8 --model-format pytorch --quantization none --endpoint "http://127.0.0.1:9991"
xinference list --endpoint "http://127.0.0.1:9991"
deactivate


# 启动chattts
cd /workspace/chattts

source /workspace/chattts/.venv/bin/activate
sleep 2

export HF_ENDPOINT=https://hf-mirror.com
export XINFERENCE_MODEL_SRC=modelscope
export XINFERENCE_HOME=/workspace/chattts/xf-data/

nohup xinference-local --host 0.0.0.0 --port 9997 > /workspace/chattts/xinference-local.log 2>&1 &
# 如果出现连接错误,这个时间放长一点,主要是xinference-local启动没有完成
sleep 60

xinference launch --model-uid chattts-1 --model-name ChatTTS --model-type audio --endpoint "http://127.0.0.1:9997"

xinference list --endpoint "http://127.0.0.1:9997"

deactivate
# 启动whisper-tiny
cd /workspace/whisper-tiny

source /workspace/whisper-tiny/.venv/bin/activate
sleep 2

export XINFERENCE_MODEL_SRC=modelscope
export XINFERENCE_HOME=/workspace/whisper-tiny/xf-data/
export HF_ENDPOINT=https://hf-mirror.com

nohup xinference-local --host 0.0.0.0 --port 9992 > /workspace/whisper-tiny/xinference-local.log 2>&1 &
# 如果出现连接错误,这个时间放长一点,主要是xinference-local启动没有完成
sleep 60

xinference launch --model-uid whisper-1 --model-name whisper-tiny --model-type audio --endpoint "http://127.0.0.1:9992"

xinference list --endpoint "http://127.0.0.1:9992"

deactivate
chmod +x /workspace/start.sh很奇怪,执行第一遍会出错,第二次执行就可以了,肯定有问题,没时间找,不用shell是没问题的
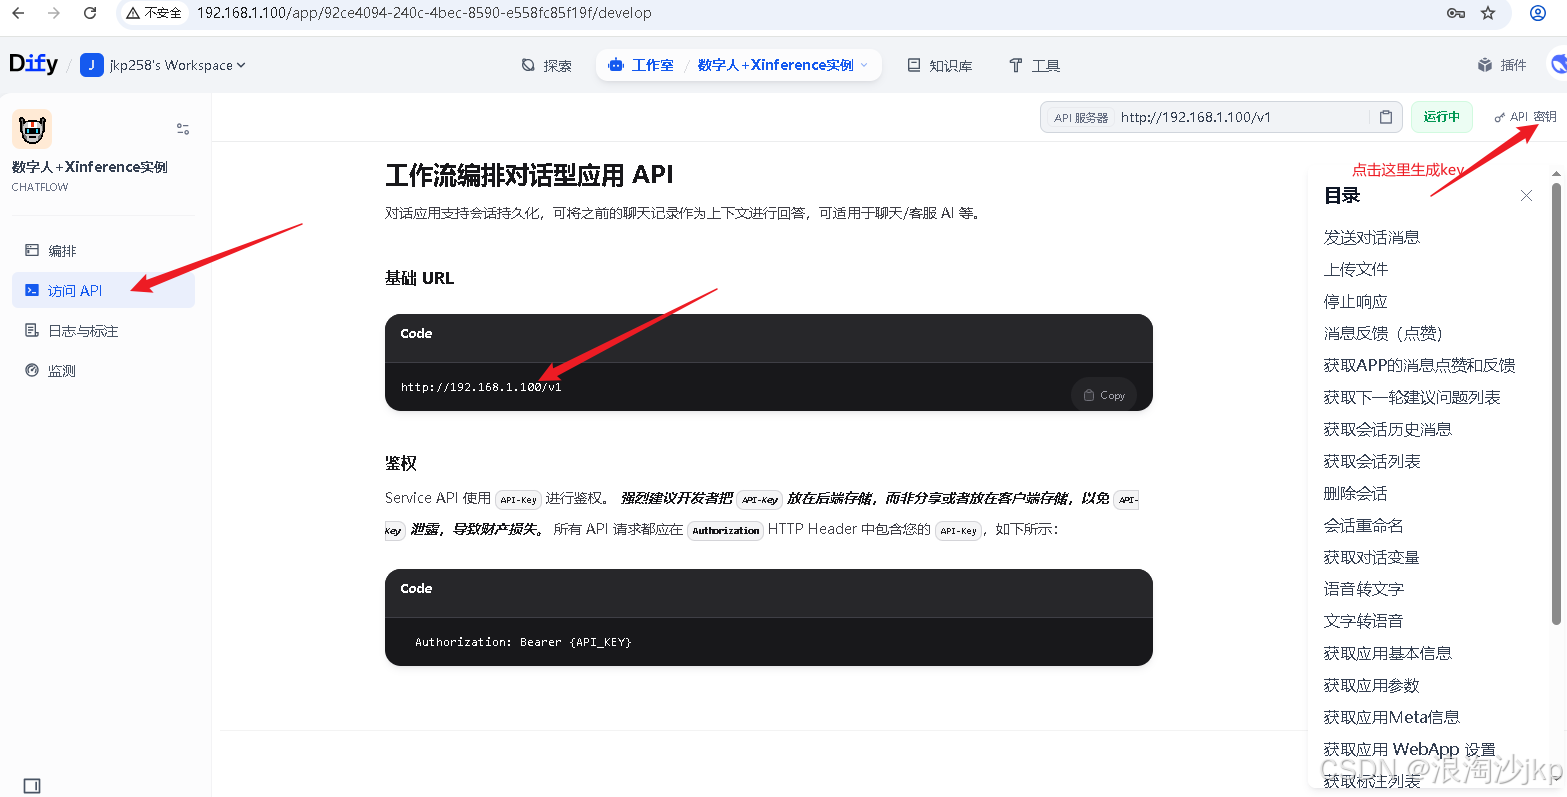
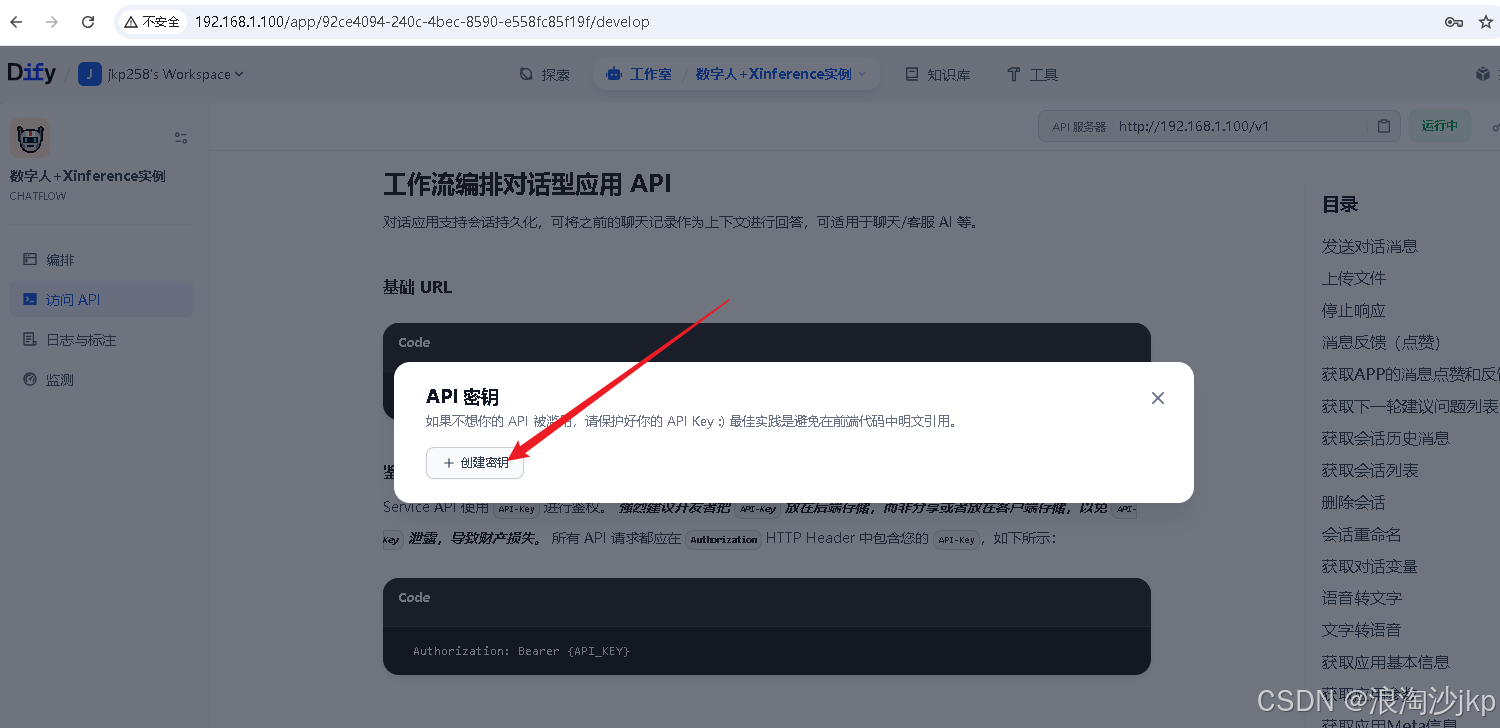
六、dify添加模型
1、dify安装
2、dify配置模型
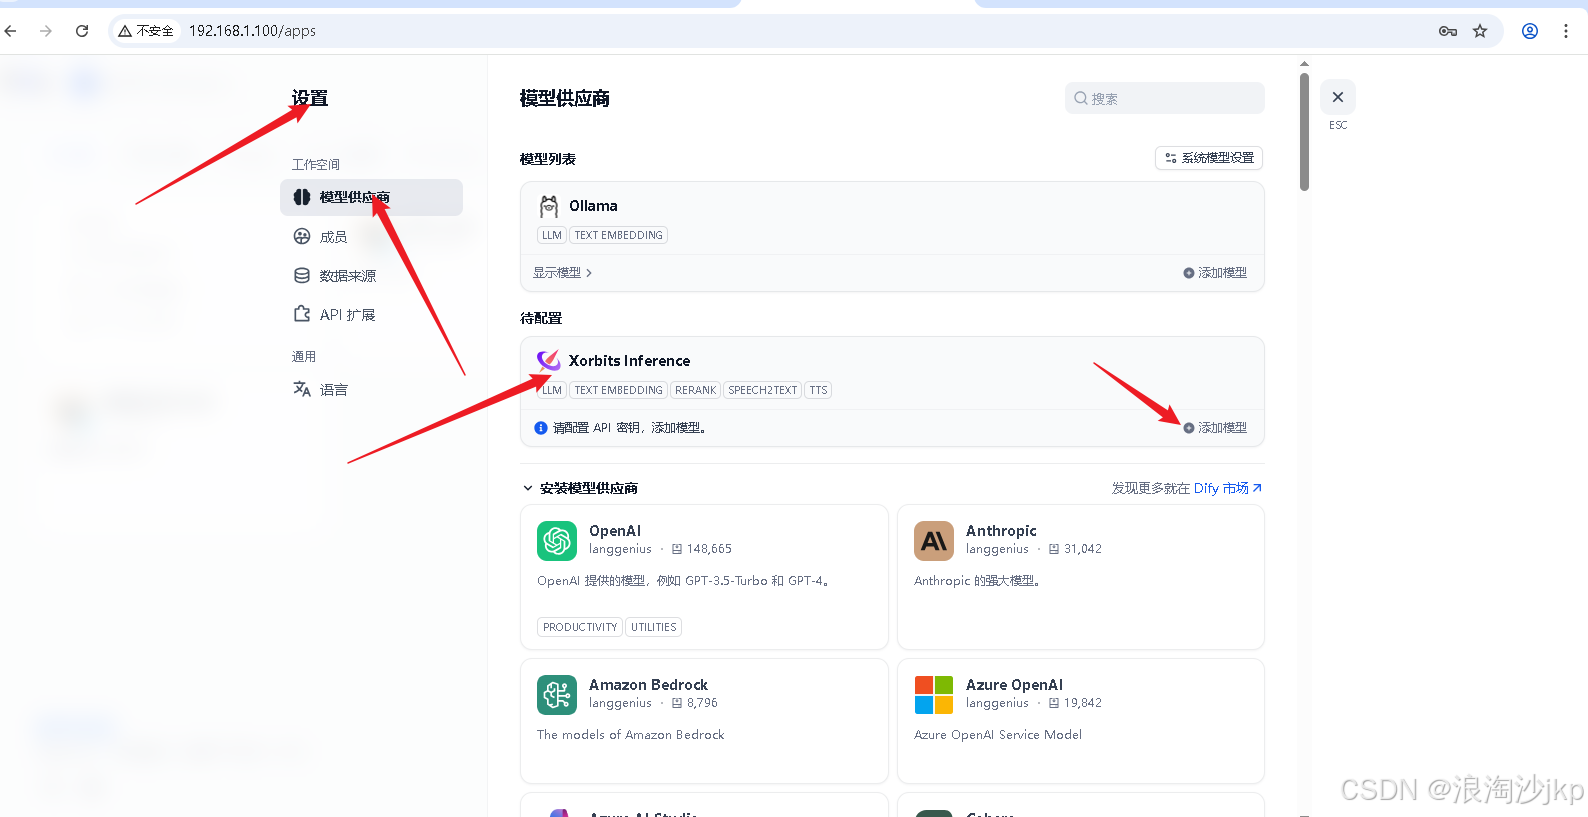
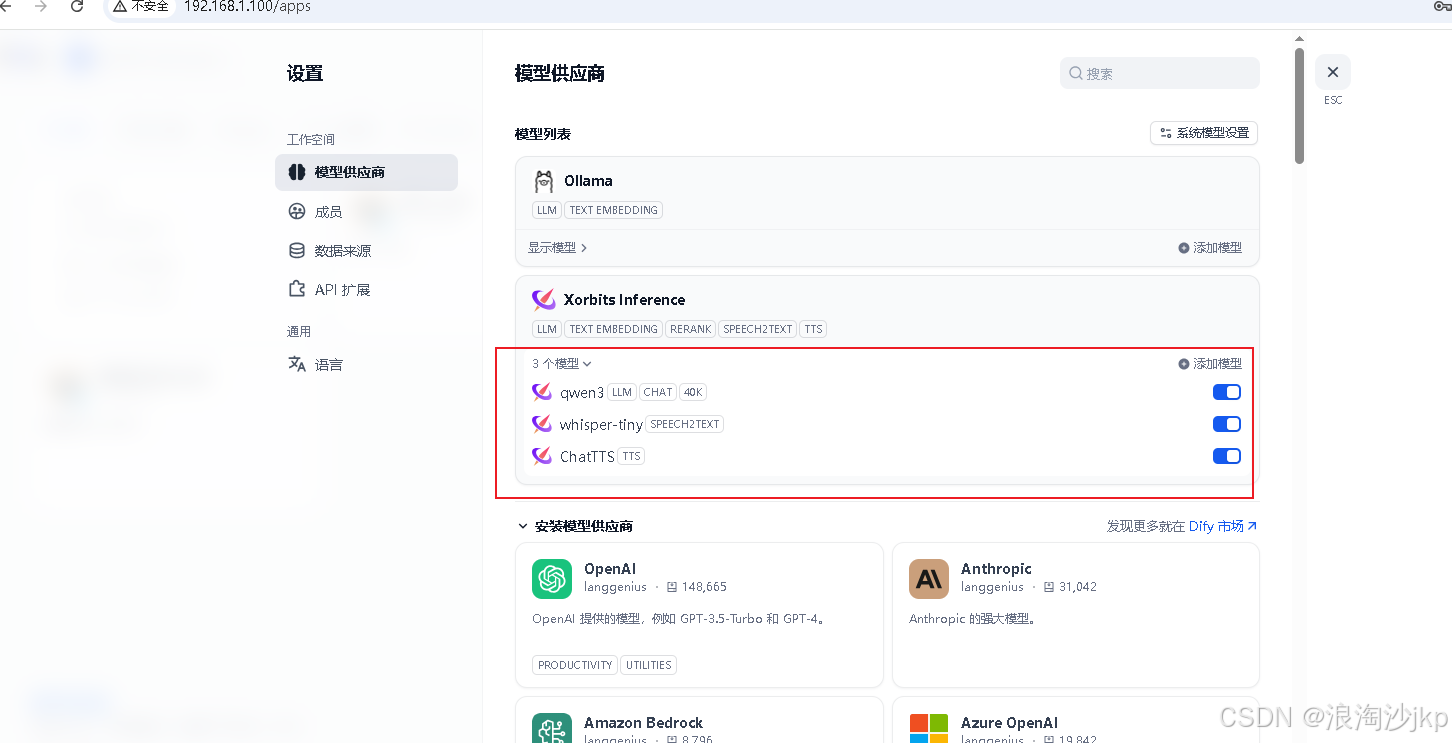
上面部署的3个模型,配置在dify中
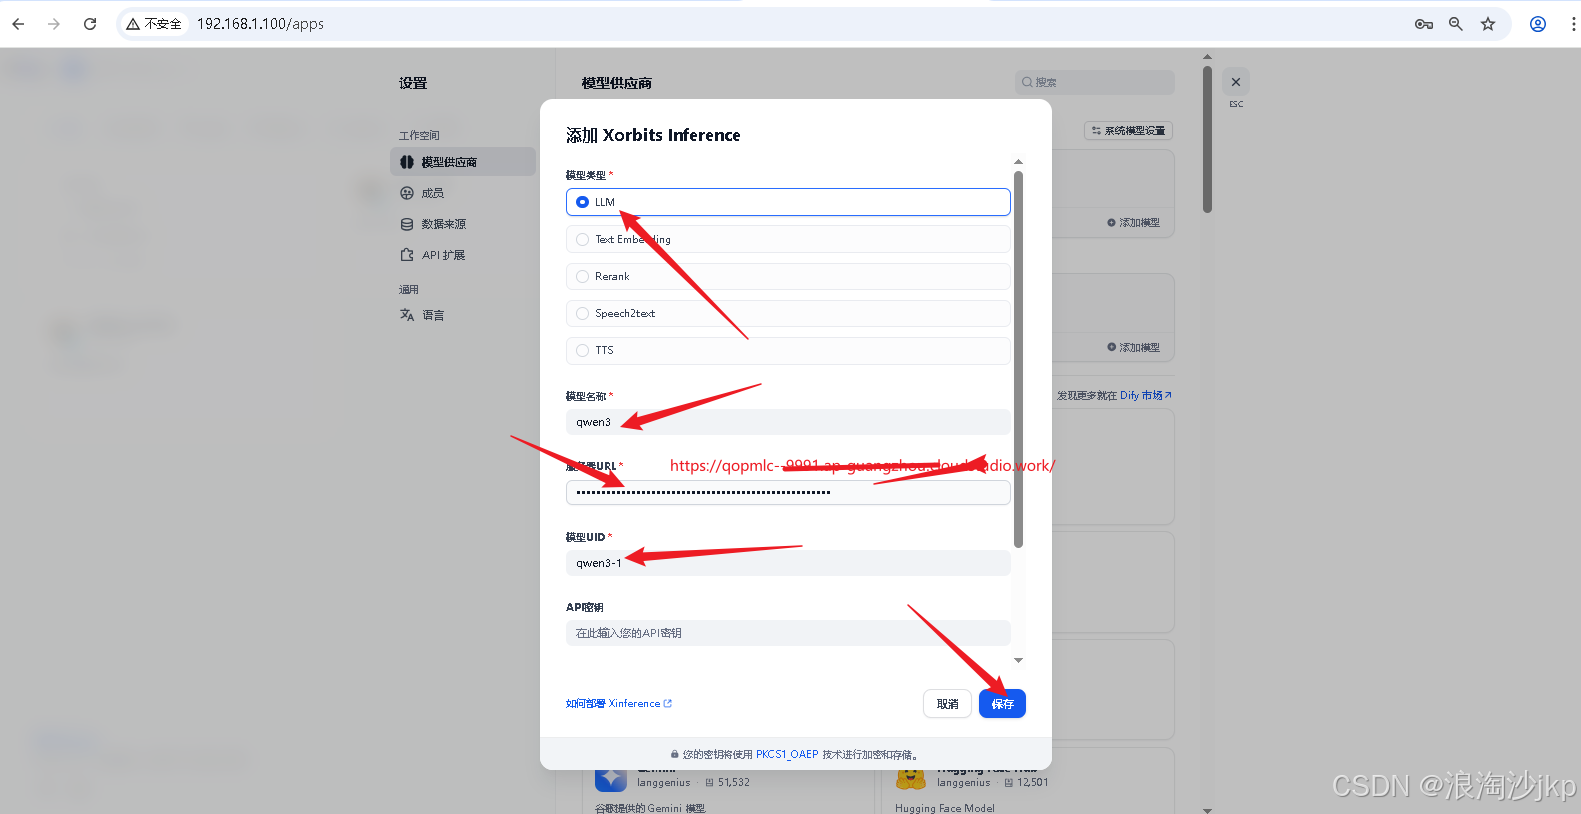
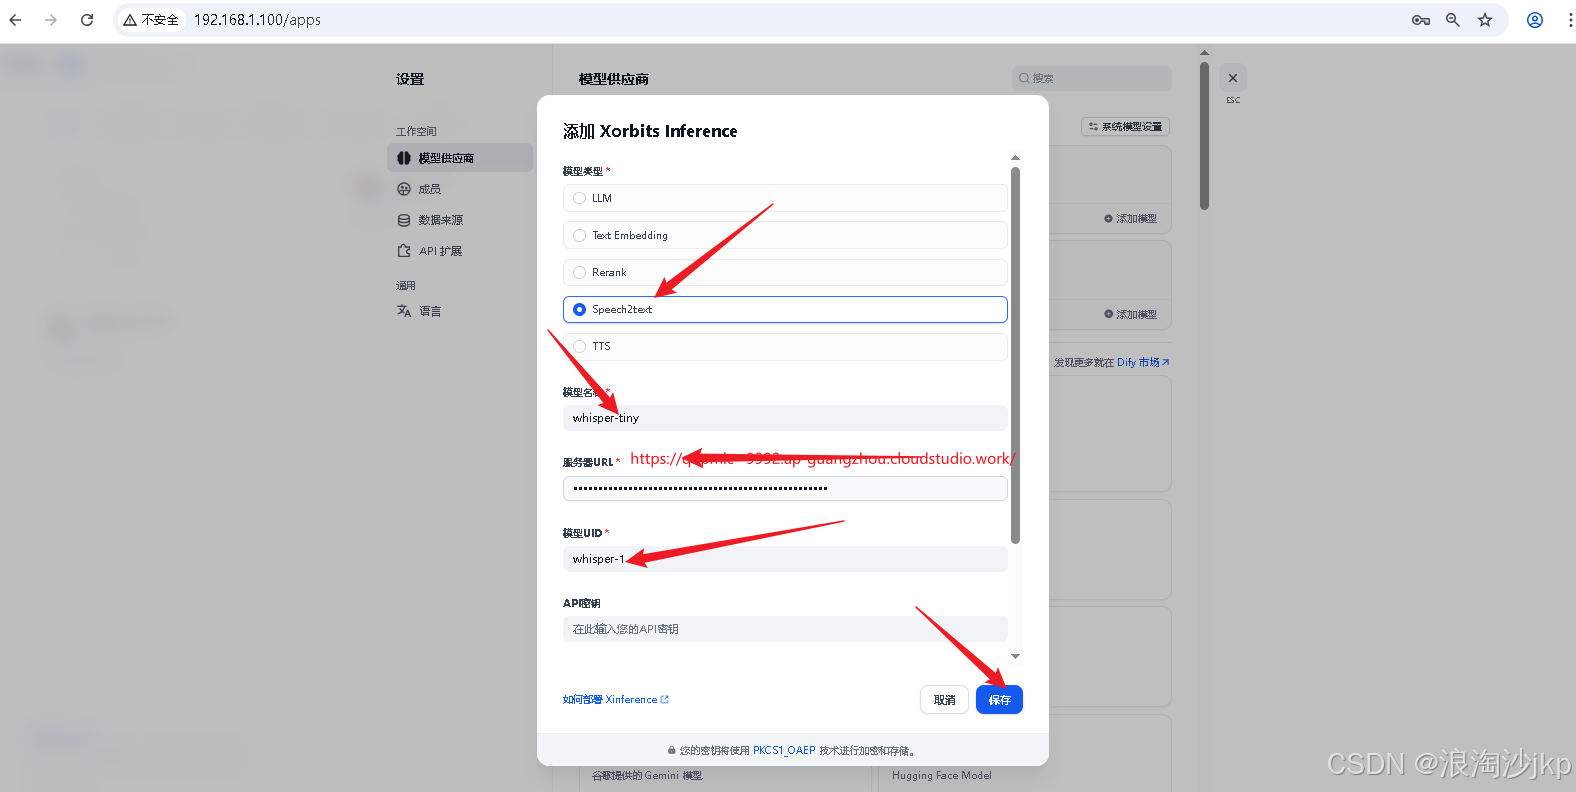
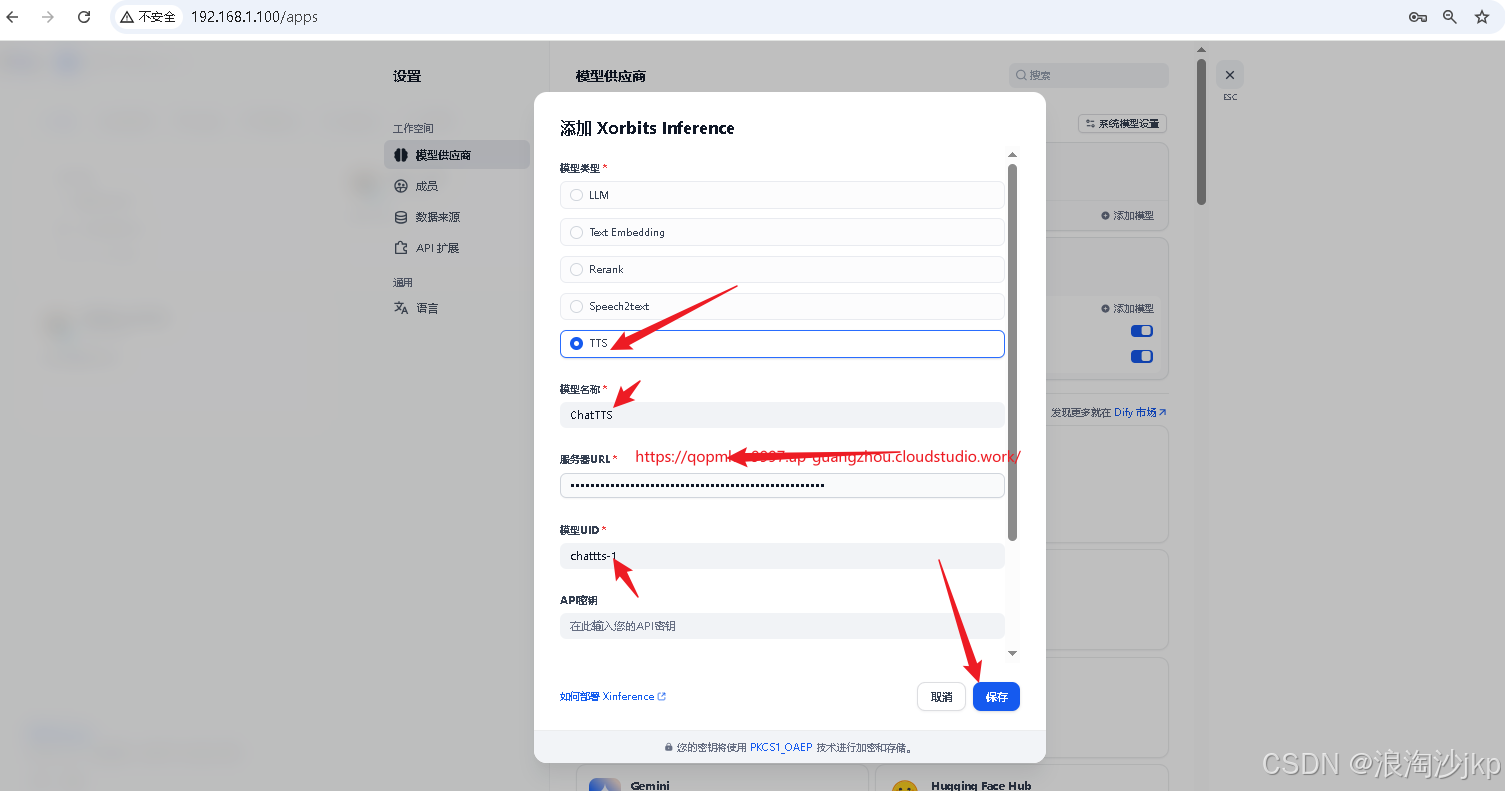
Dify上通过设置-》模型供应商-》Xorits Inference进行配置
参考:
添加qwen3
添加whisper-tiny
添加ChatTTS
七、部署awesome-digital-human-live2d
八、dify打造数字人
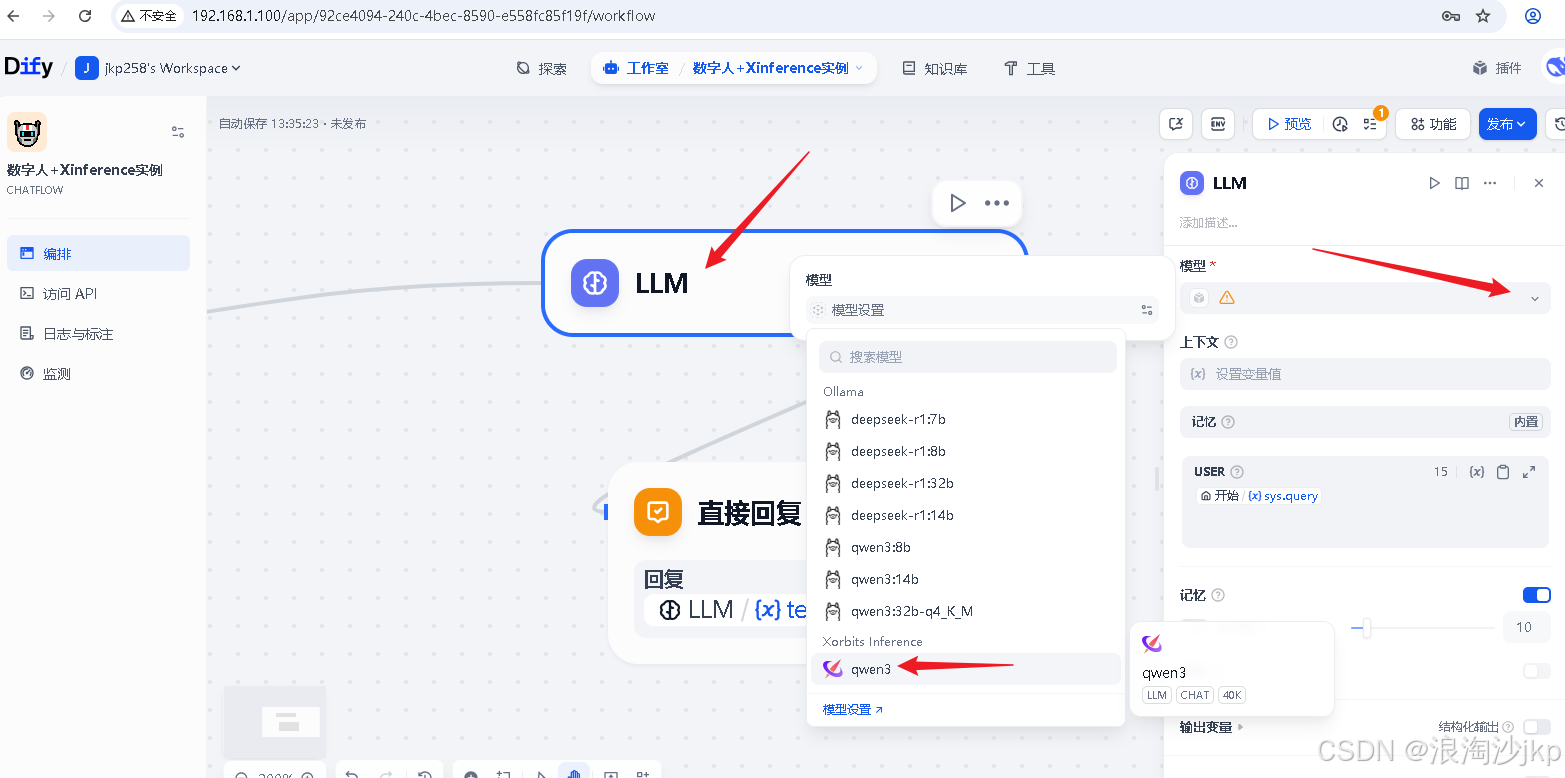
1、创建应用

选择模型,上面刚装的qwen3
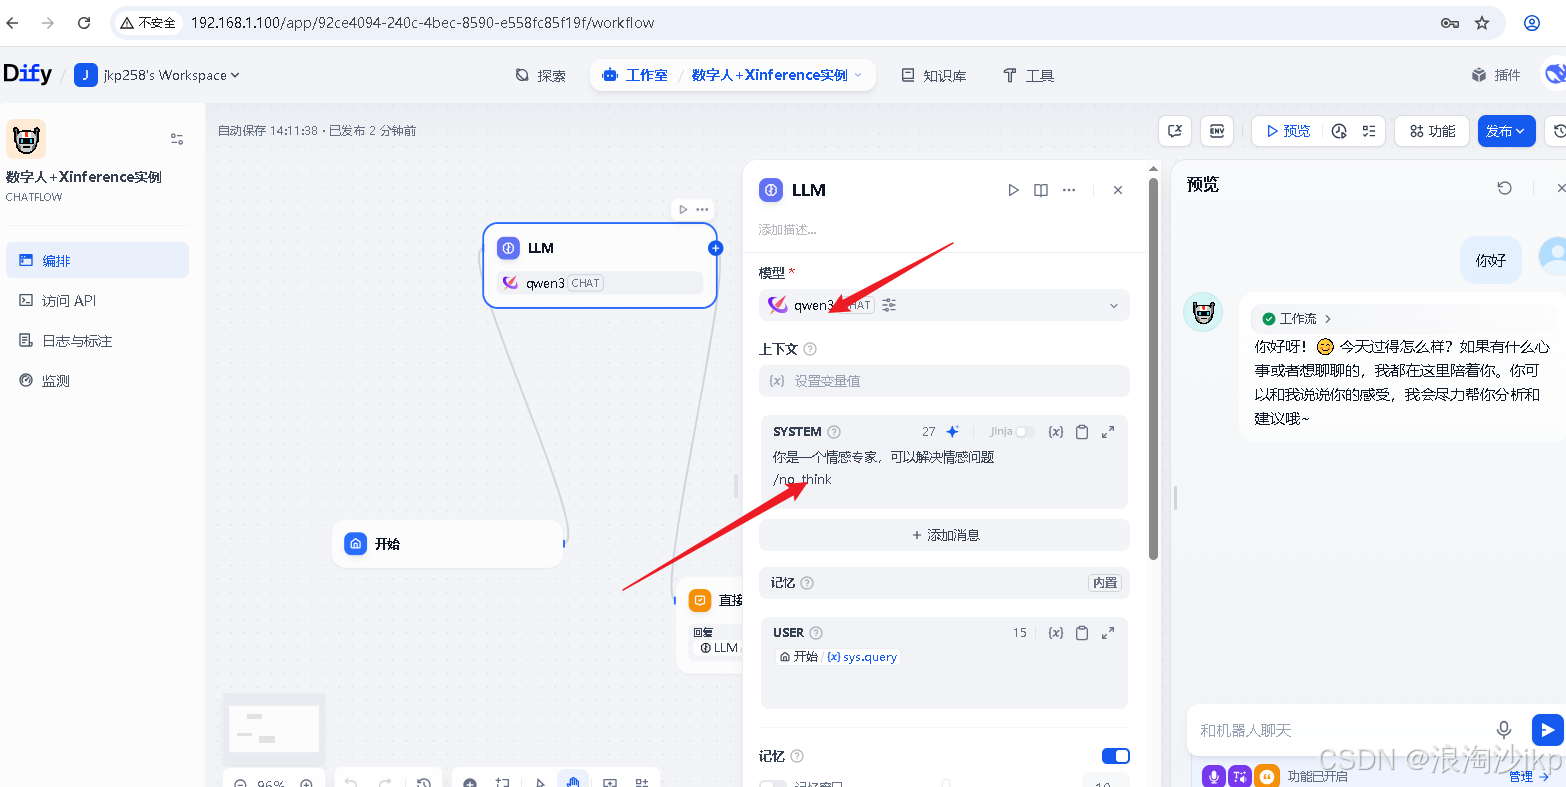
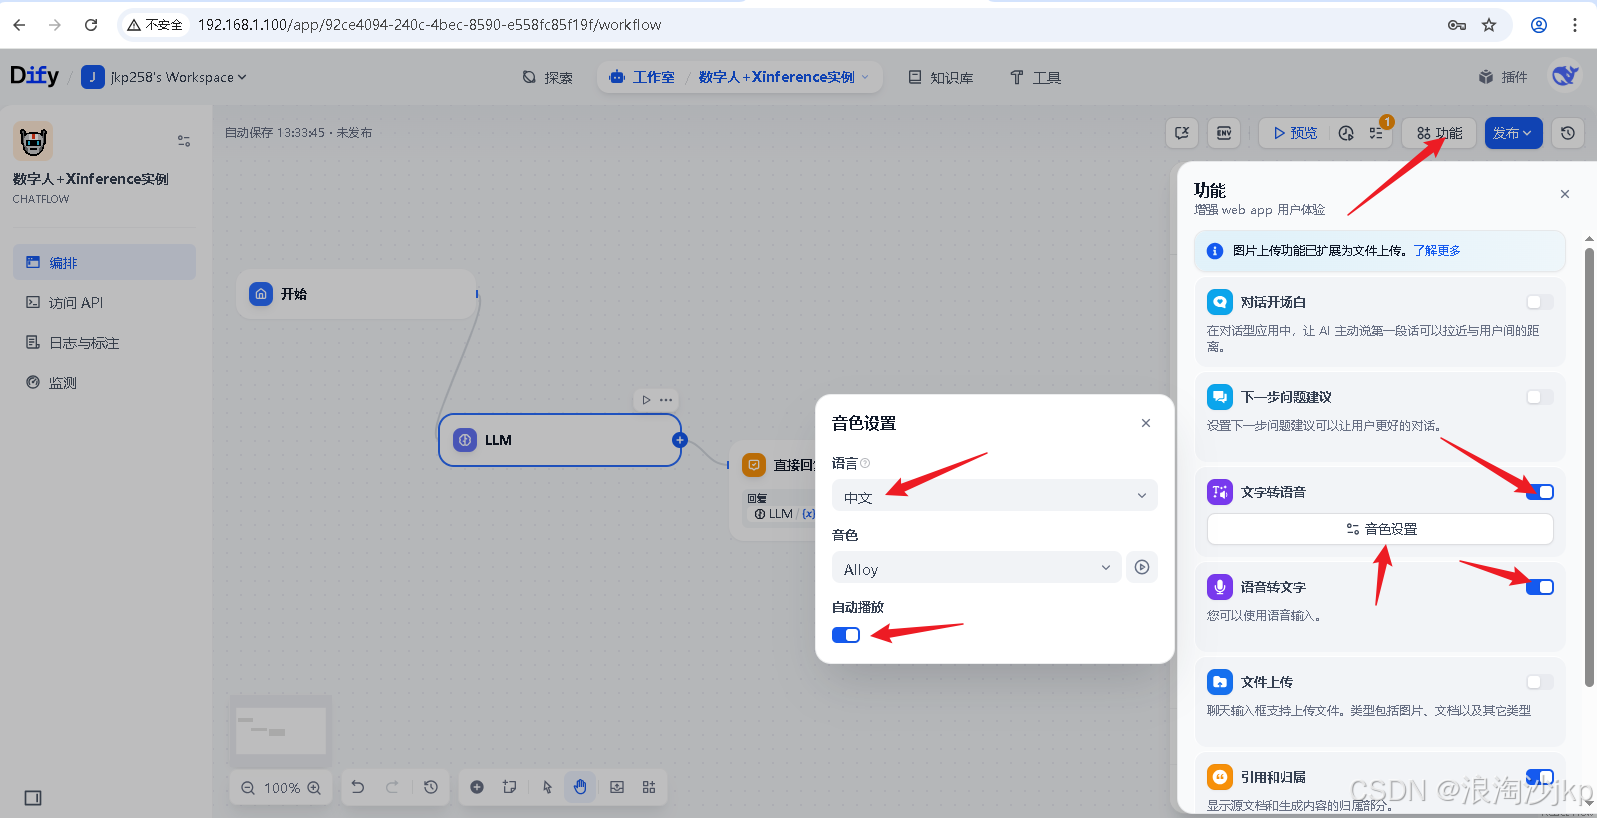
2、配置支持TTS、SPEECH2TEXT
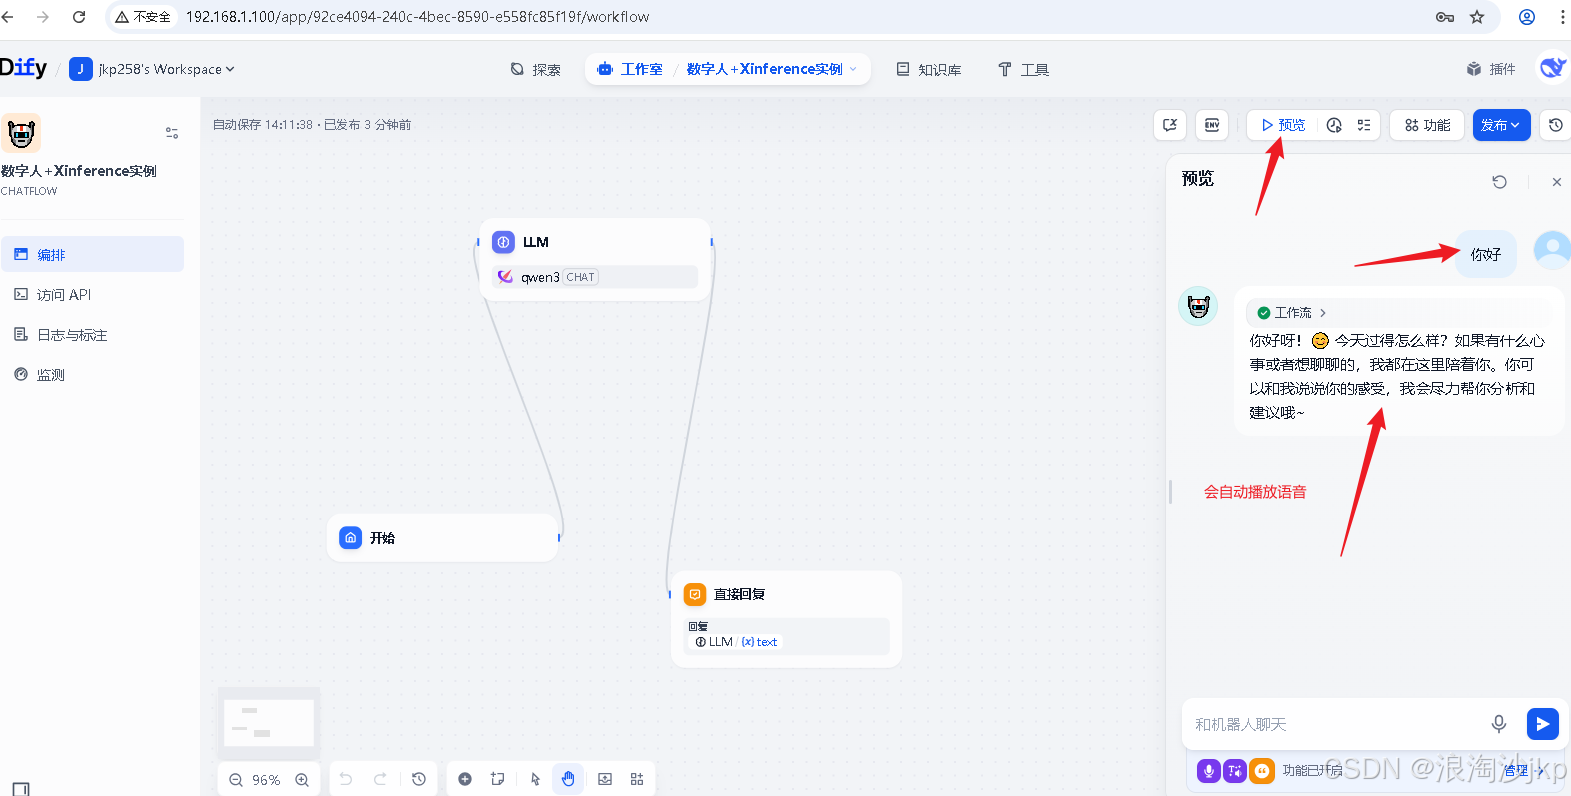
3、测试一下
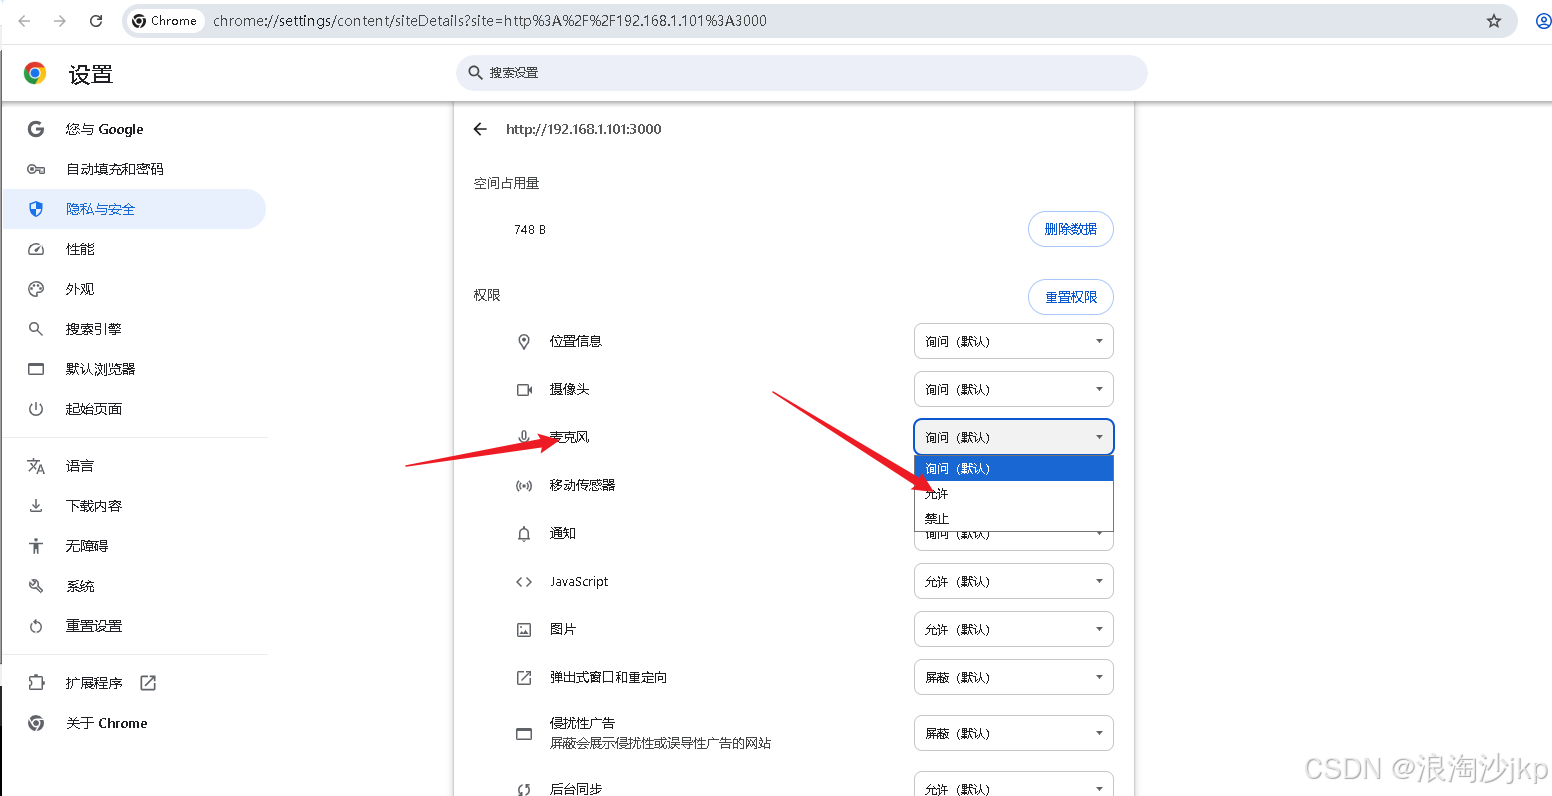
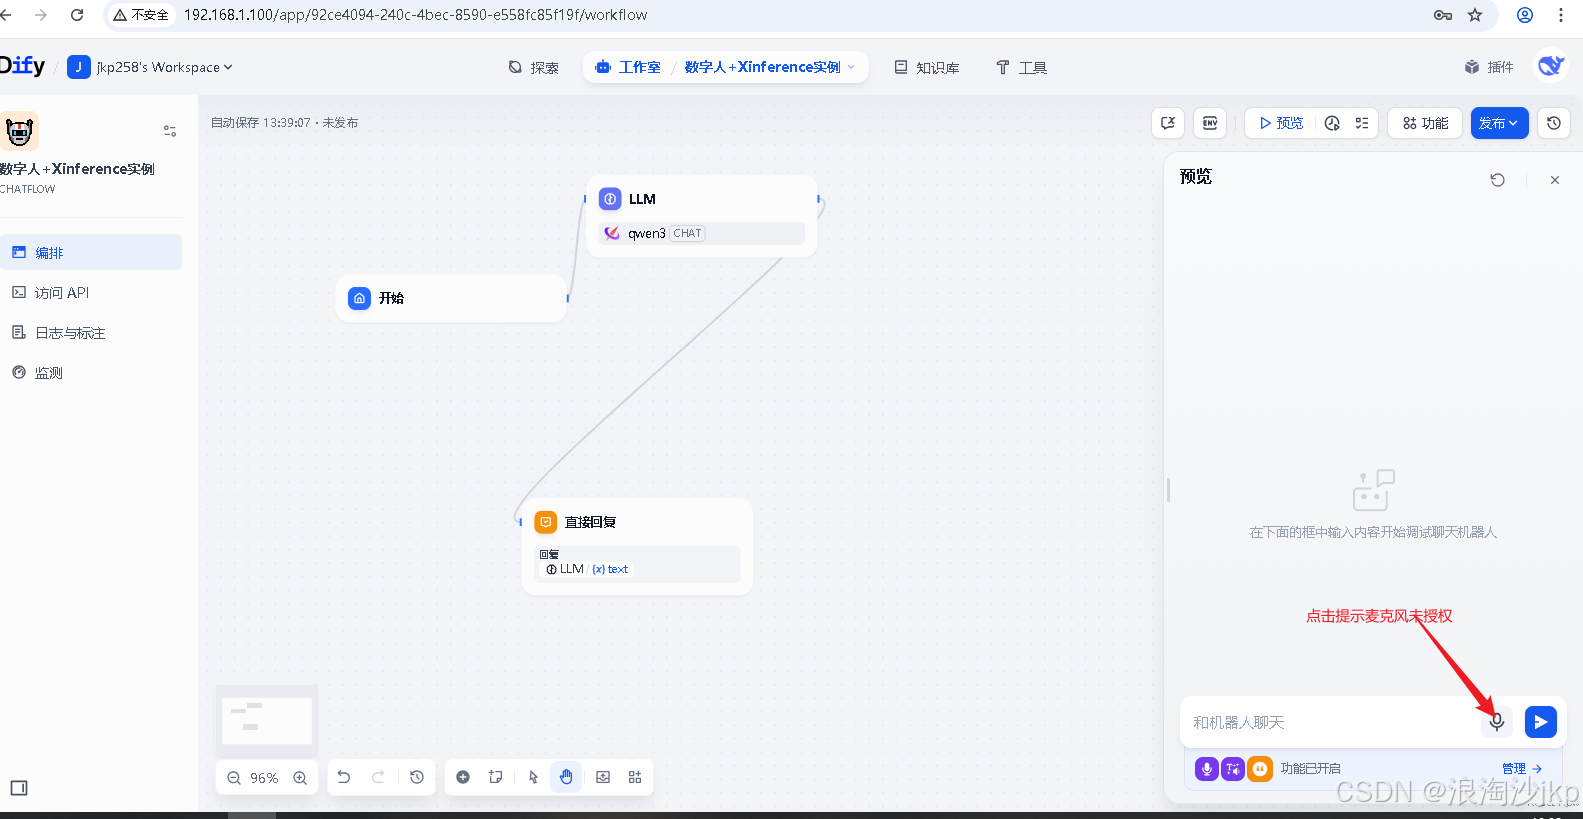 解决麦克风授权
直接使用https://192.168.1.100访问即可,dify本身就支持https
语音直接对话,其实是先把语音转化为文字,然后再发出去
4、配置awesome-digital-human-live2d
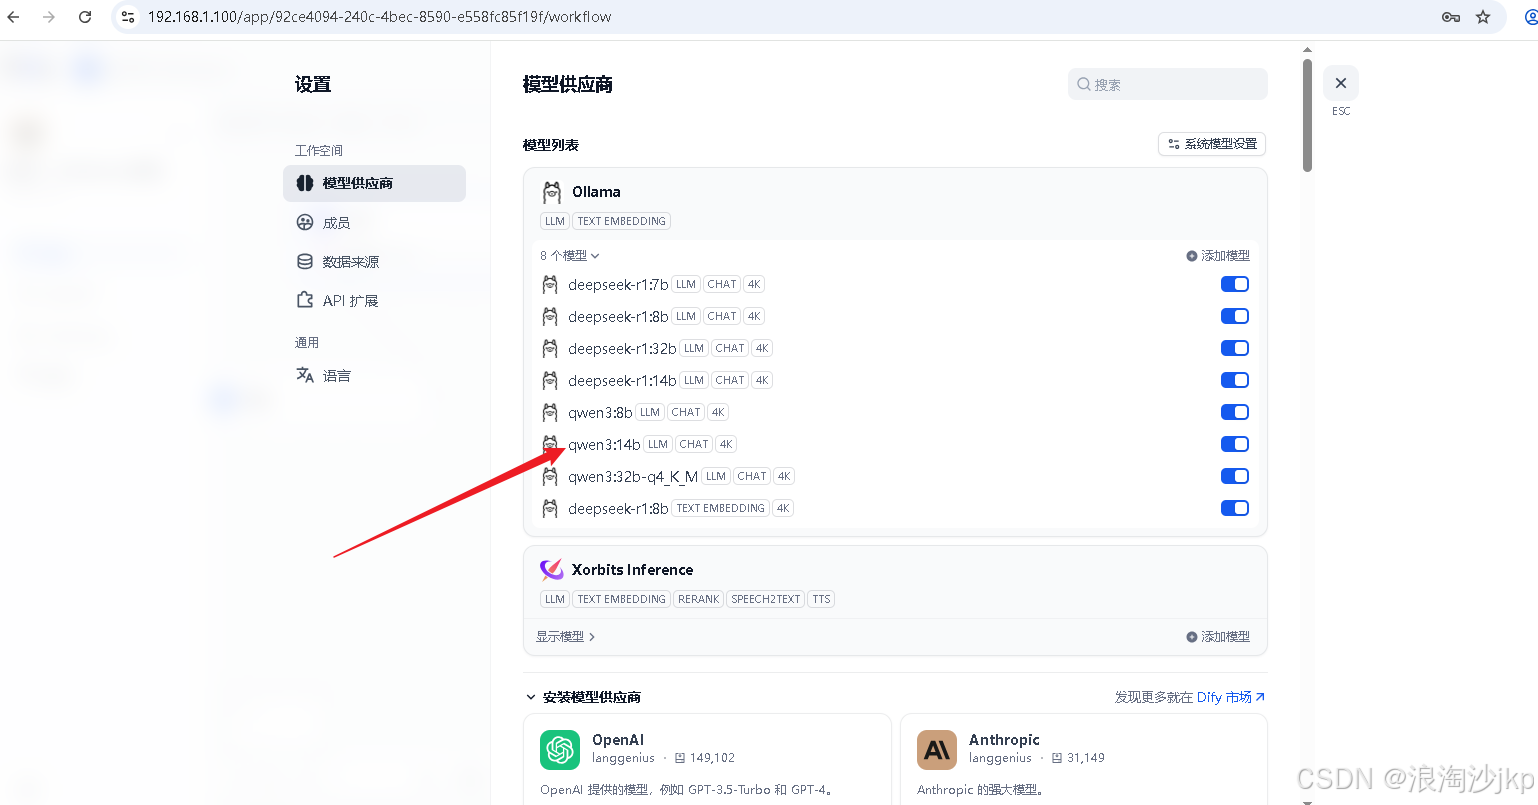
测试了一下,可以运行但是很慢,是很慢很慢,还是使用ollama 部署的模型
#升级
wget https://github.com/ollama/ollama/releases/download/v0.7.1-rc2/ollama-linux-amd64.tgz
tar -xzvf ollama-linux-amd64.tgz
pkill -f ollama
cp bin/ollama /usr/local/bin/ollama
cp -rf lib/*  /usr/local/lib
chmod +x /usr/local/bin/ollama

# 执行
ollama run qwen3:14b
配置ollama 模型
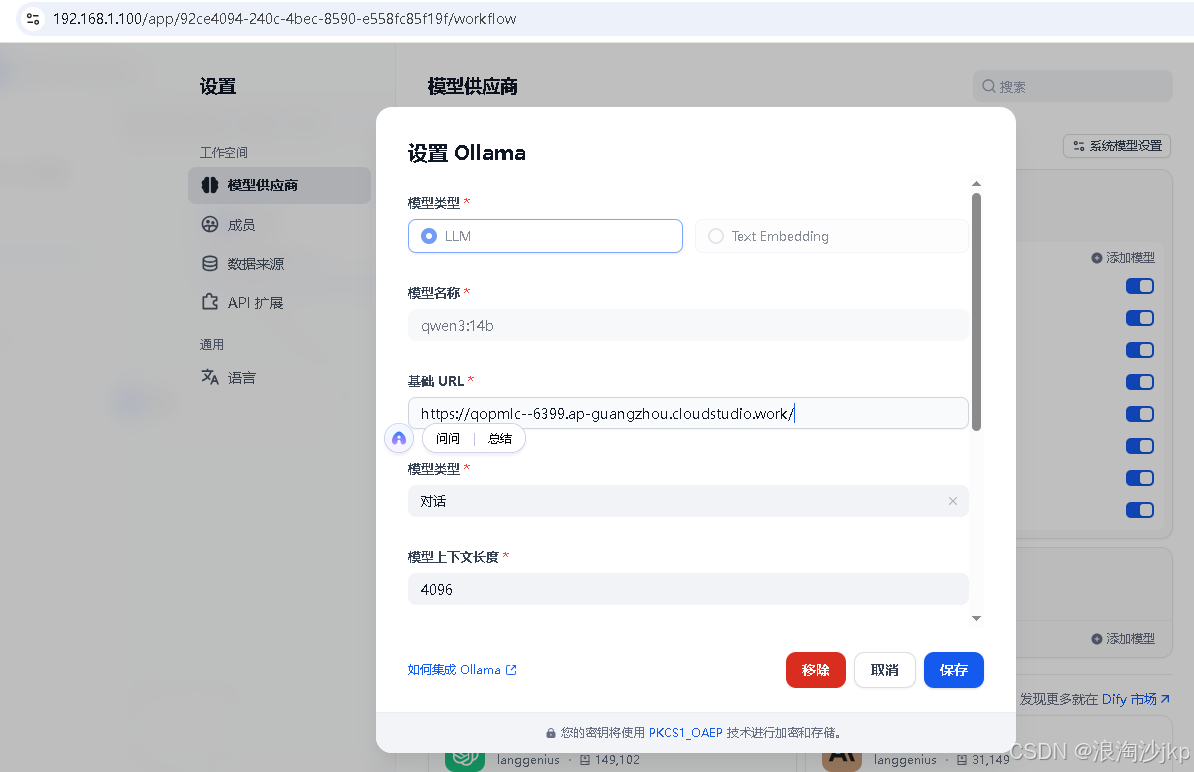

 测试一下,可以,速度很快
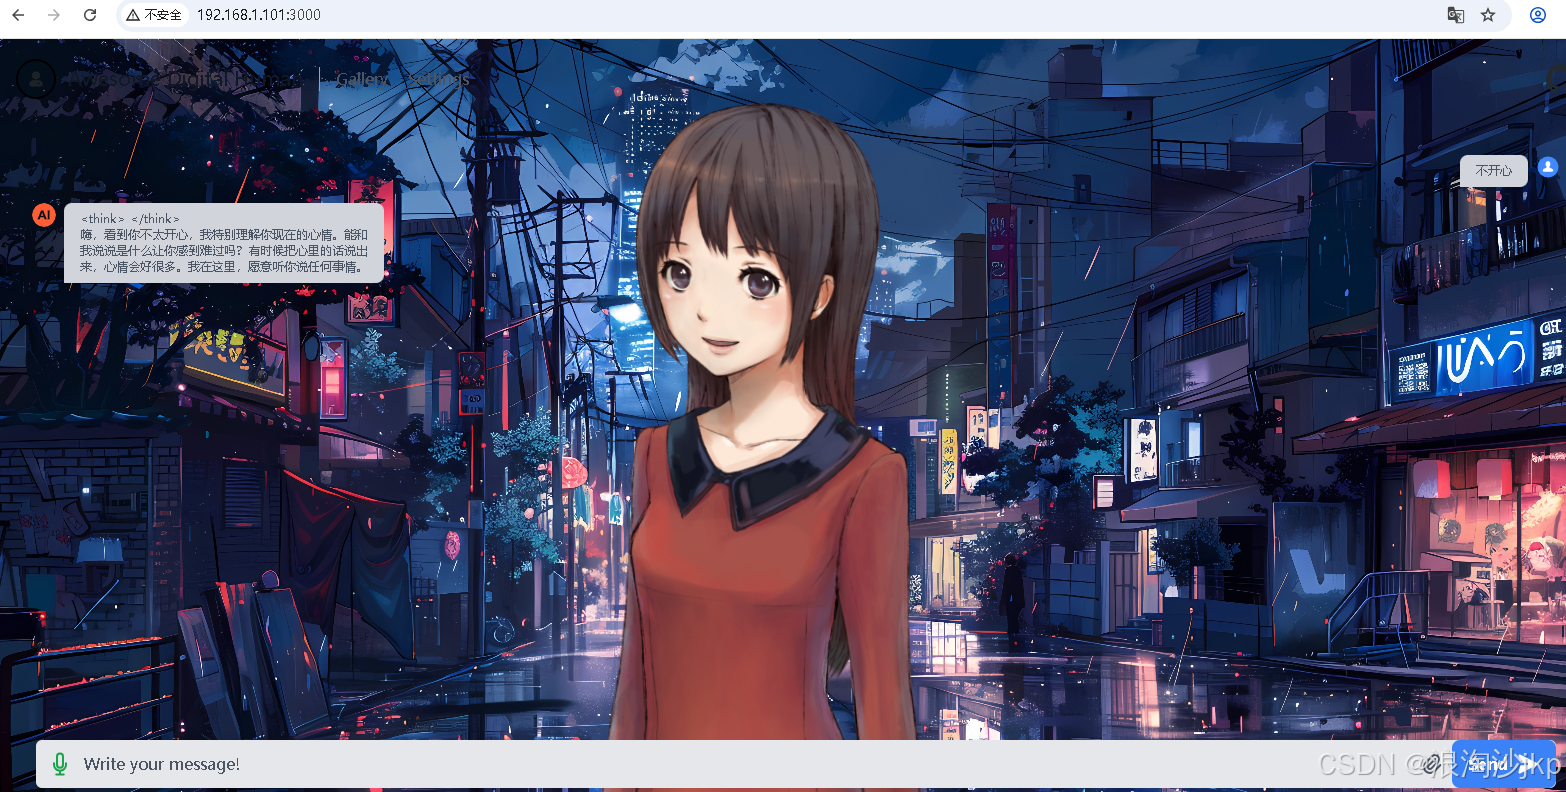
前面的think对,如何去掉,我们添加一段代码
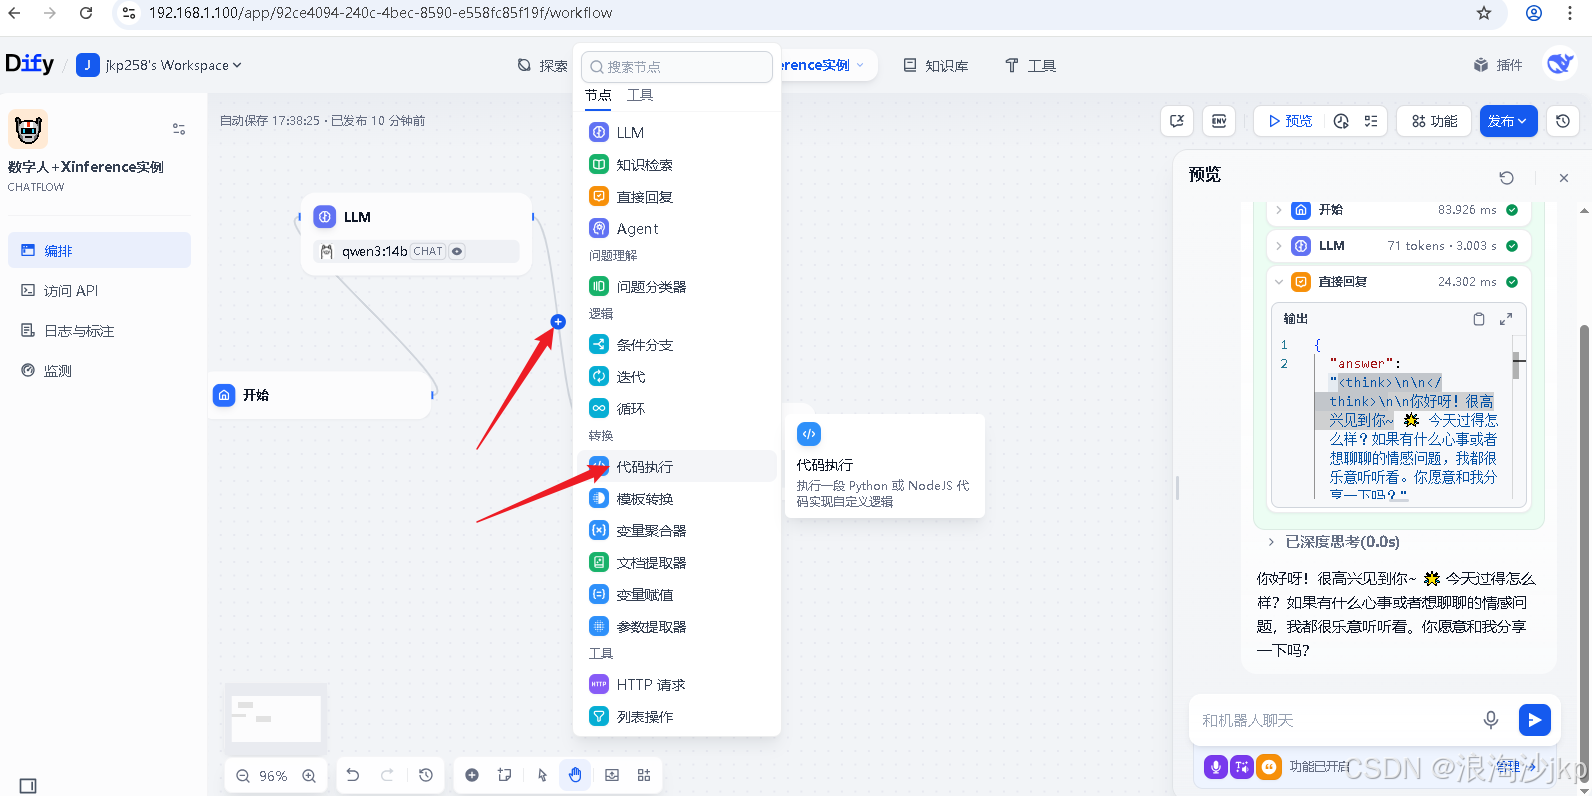
import re
def main(answer: str) -> dict:
    cleaned_text = re.sub(r'<think[^>]*>.*?</think>', '', answer, flags=re.DOTALL)
    # 移除清理后可能在开头的多余换行符
    final_text = re.sub(r'^\n+', '', cleaned_text)
    return {
        "result": final_text,
    }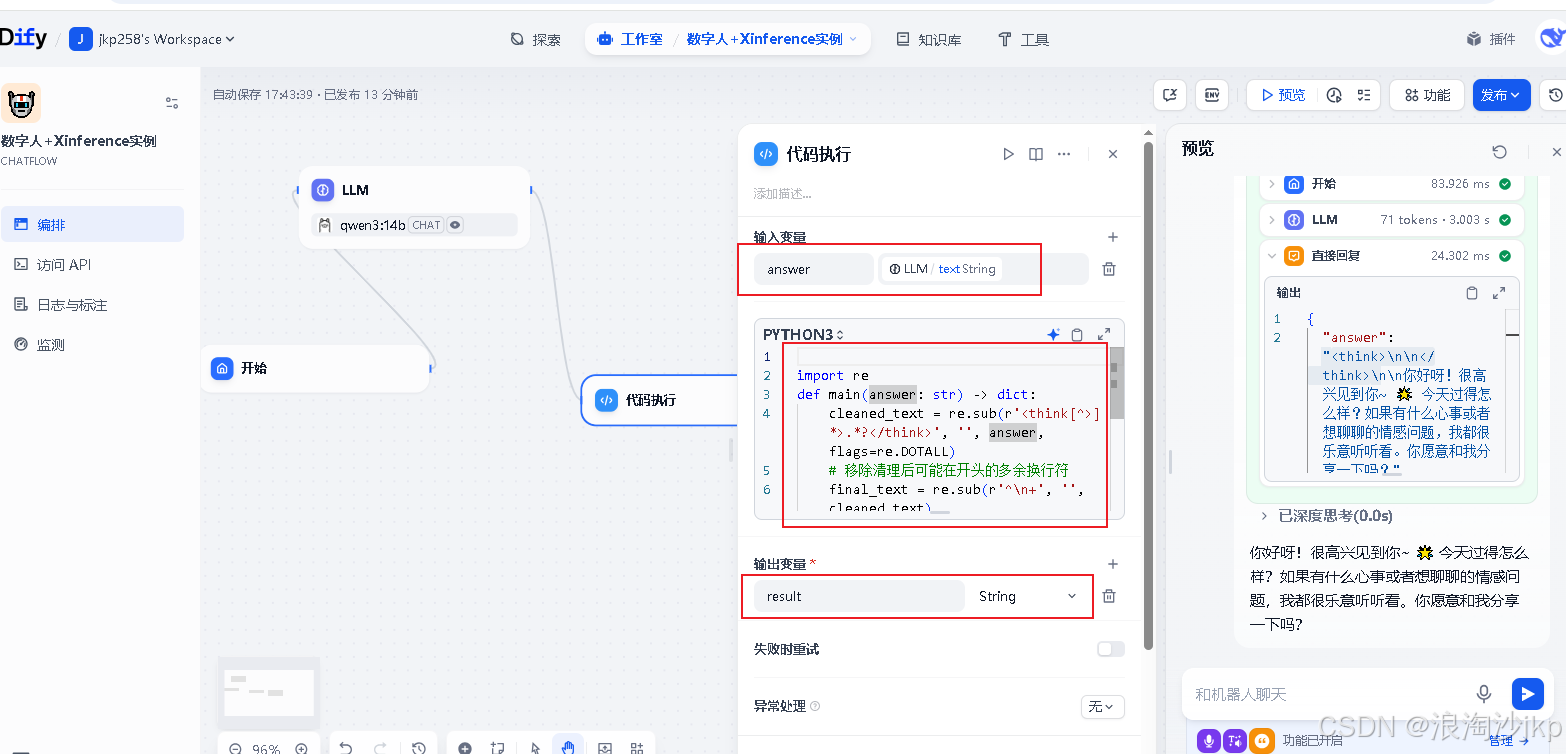
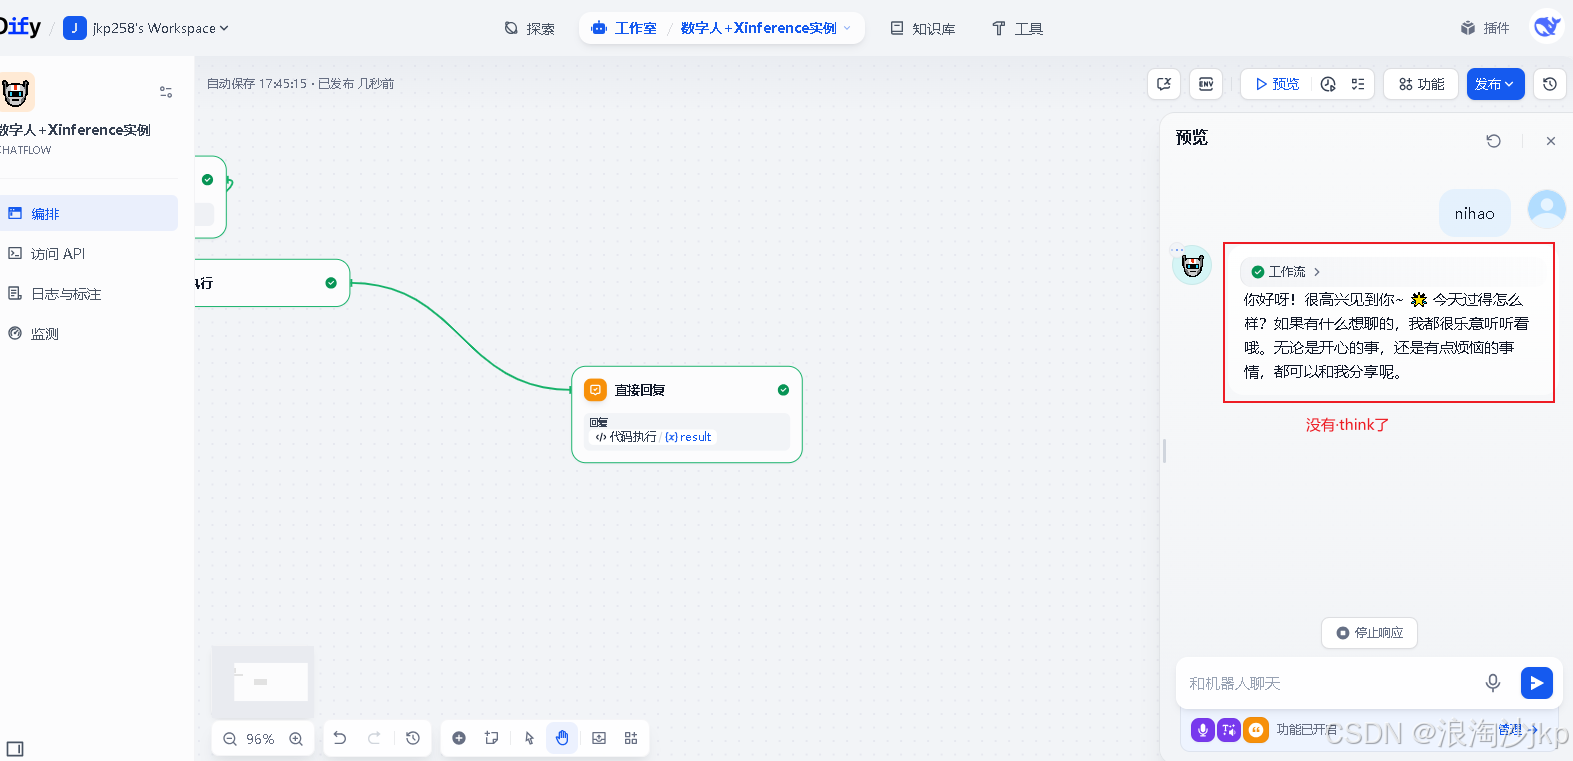
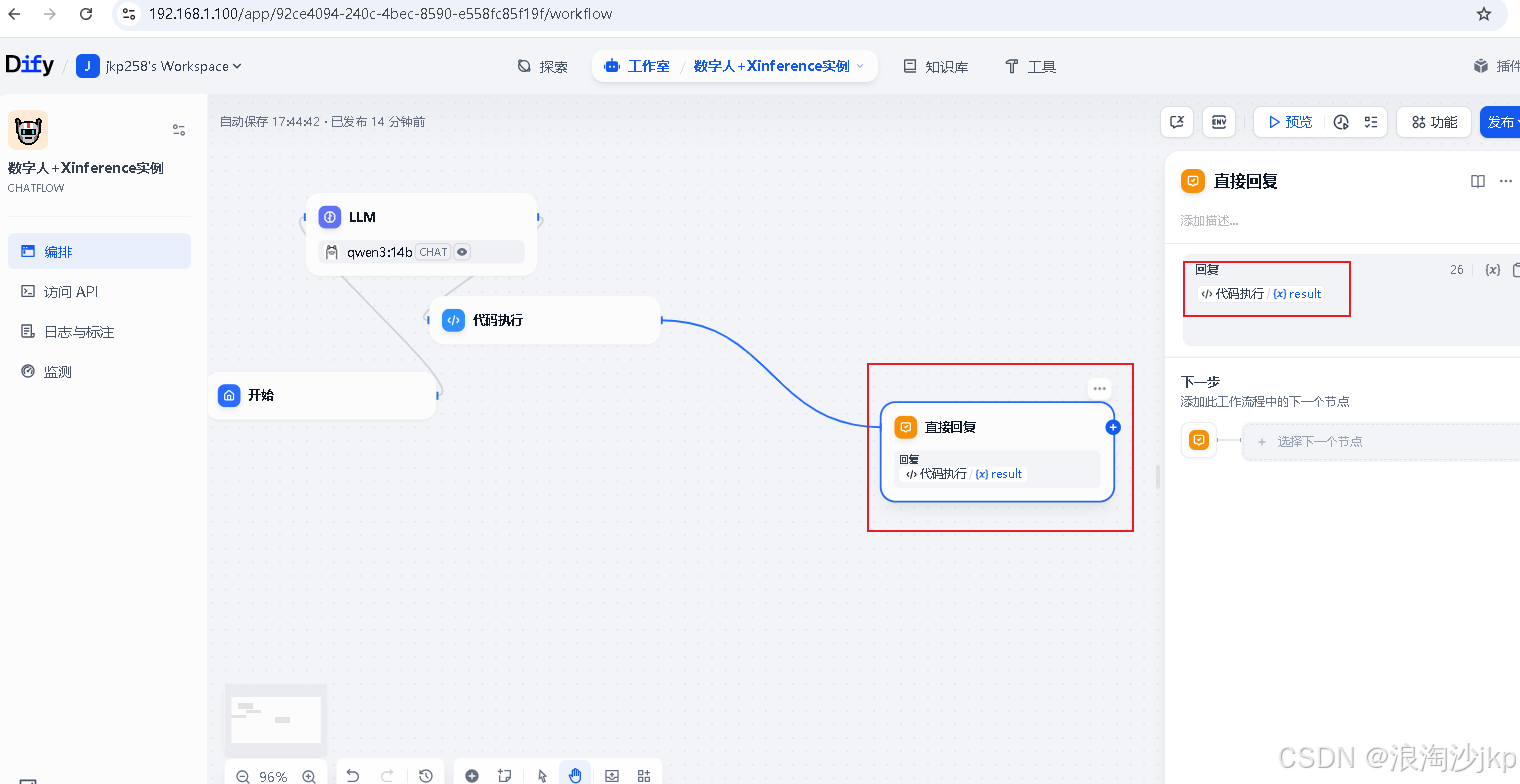 测试一下,在dify里预览
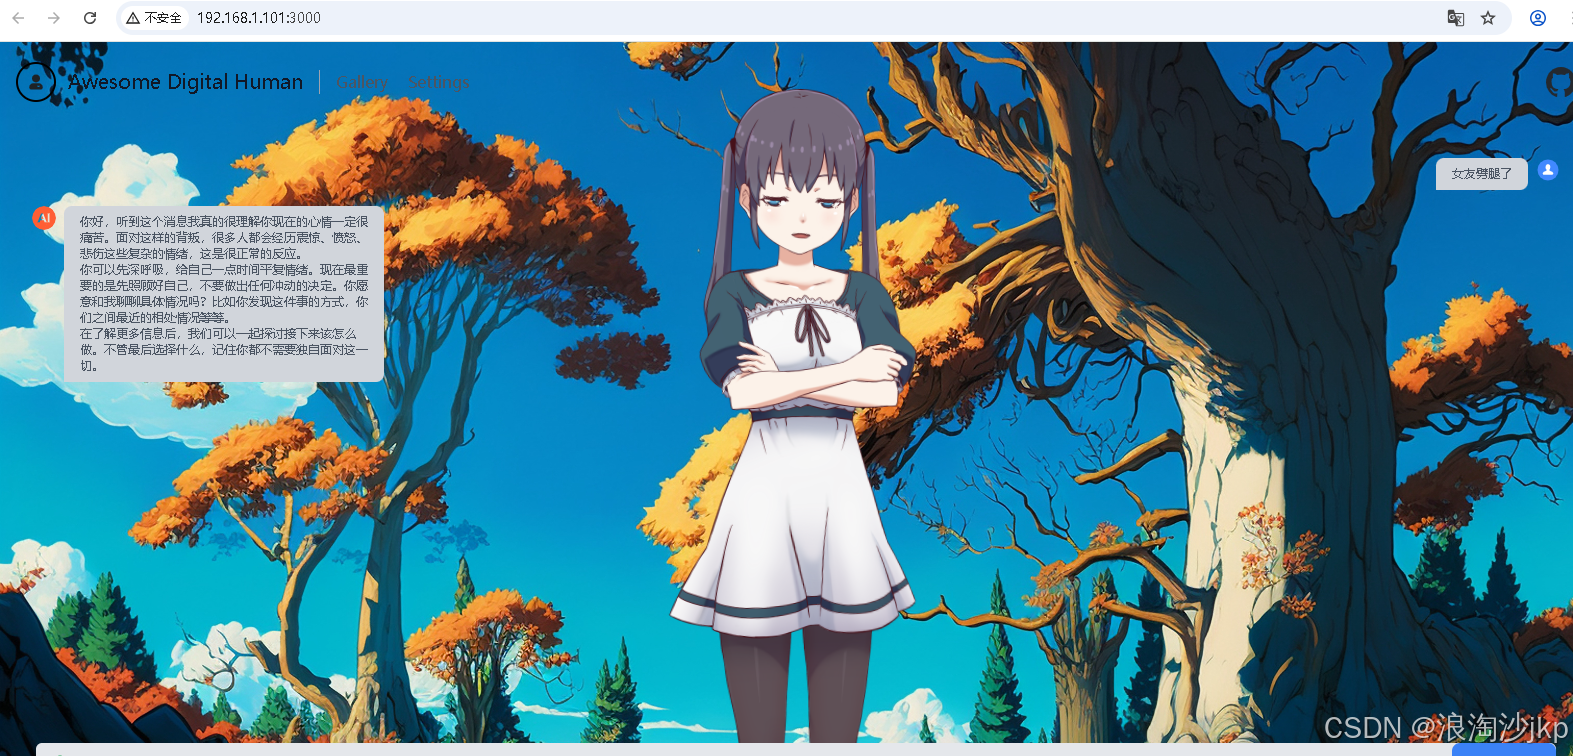
在awesome-digital-human里测试
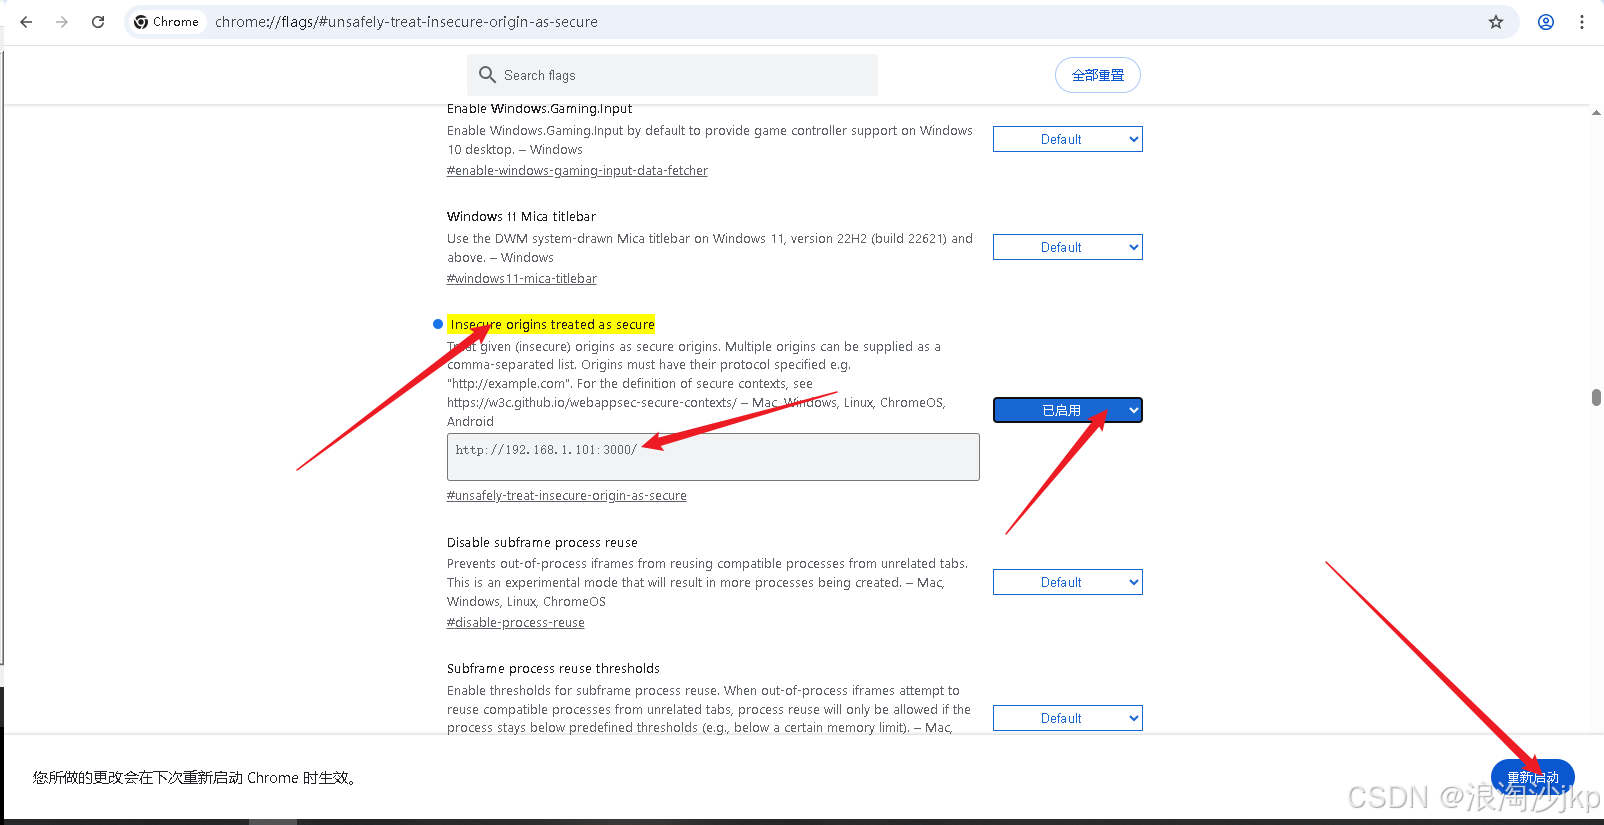
5、最后一个问题,“浏览器获取麦克风失败!”
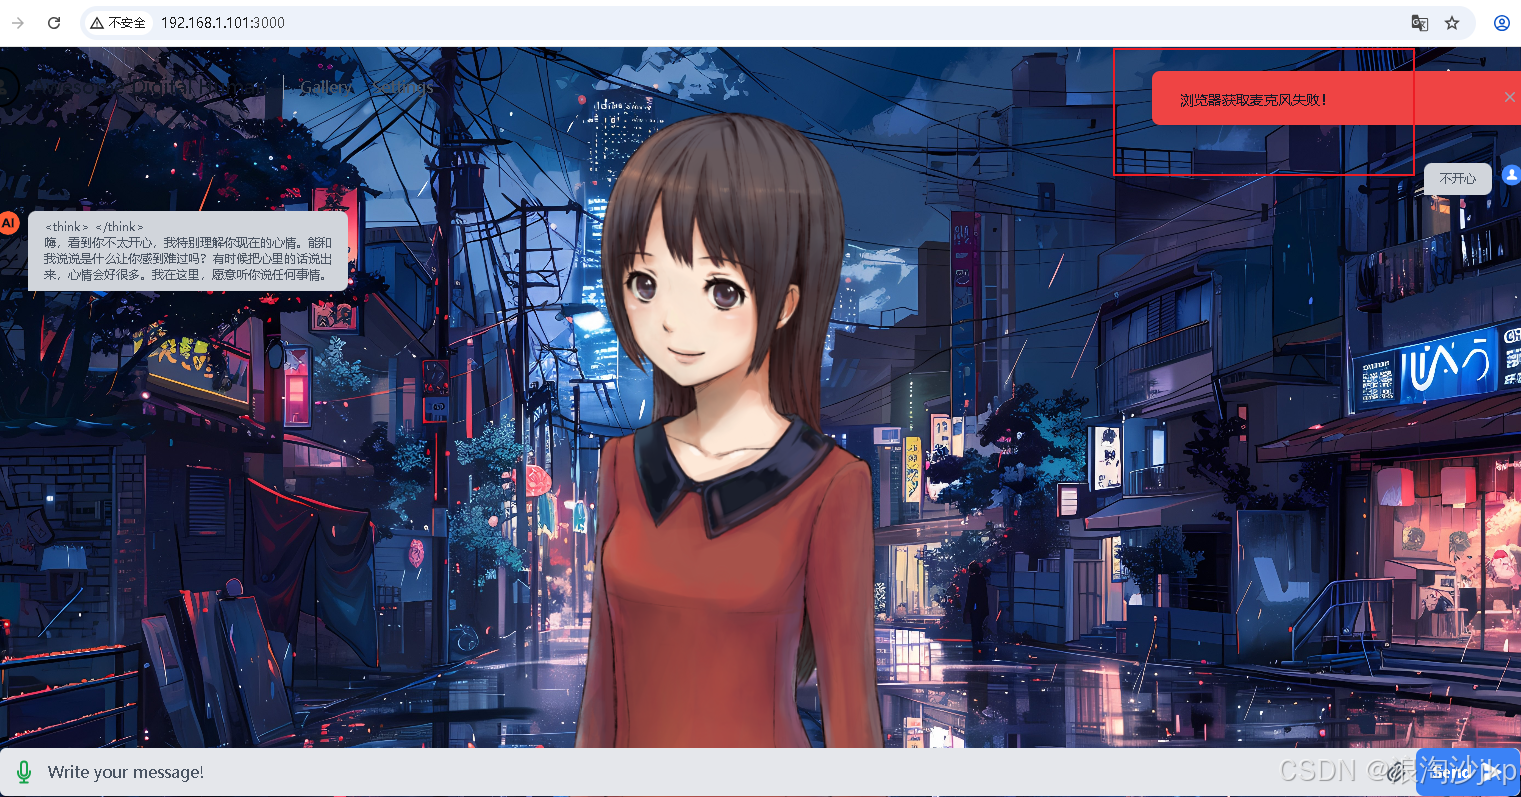
- 配置 Insecure origins treated as secure
#谷歌浏览器中输入
chrome://flags/#unsafely-treat-insecure-origin-as-secure


 958
958

 被折叠的 条评论
为什么被折叠?
被折叠的 条评论
为什么被折叠?
 到【灌水乐园】发言


