


问题理解
给定了每张图像和估计好的深度图,也给定了相机外参和内参(内参cx, cy = 325.5,253.5,fx, fy = 518.0, 519.0),首先按照相机内参将像素按照深度值投影到相机3D坐标系下,再统一所有相机的视点到世界坐标系下组成一份完整的点云
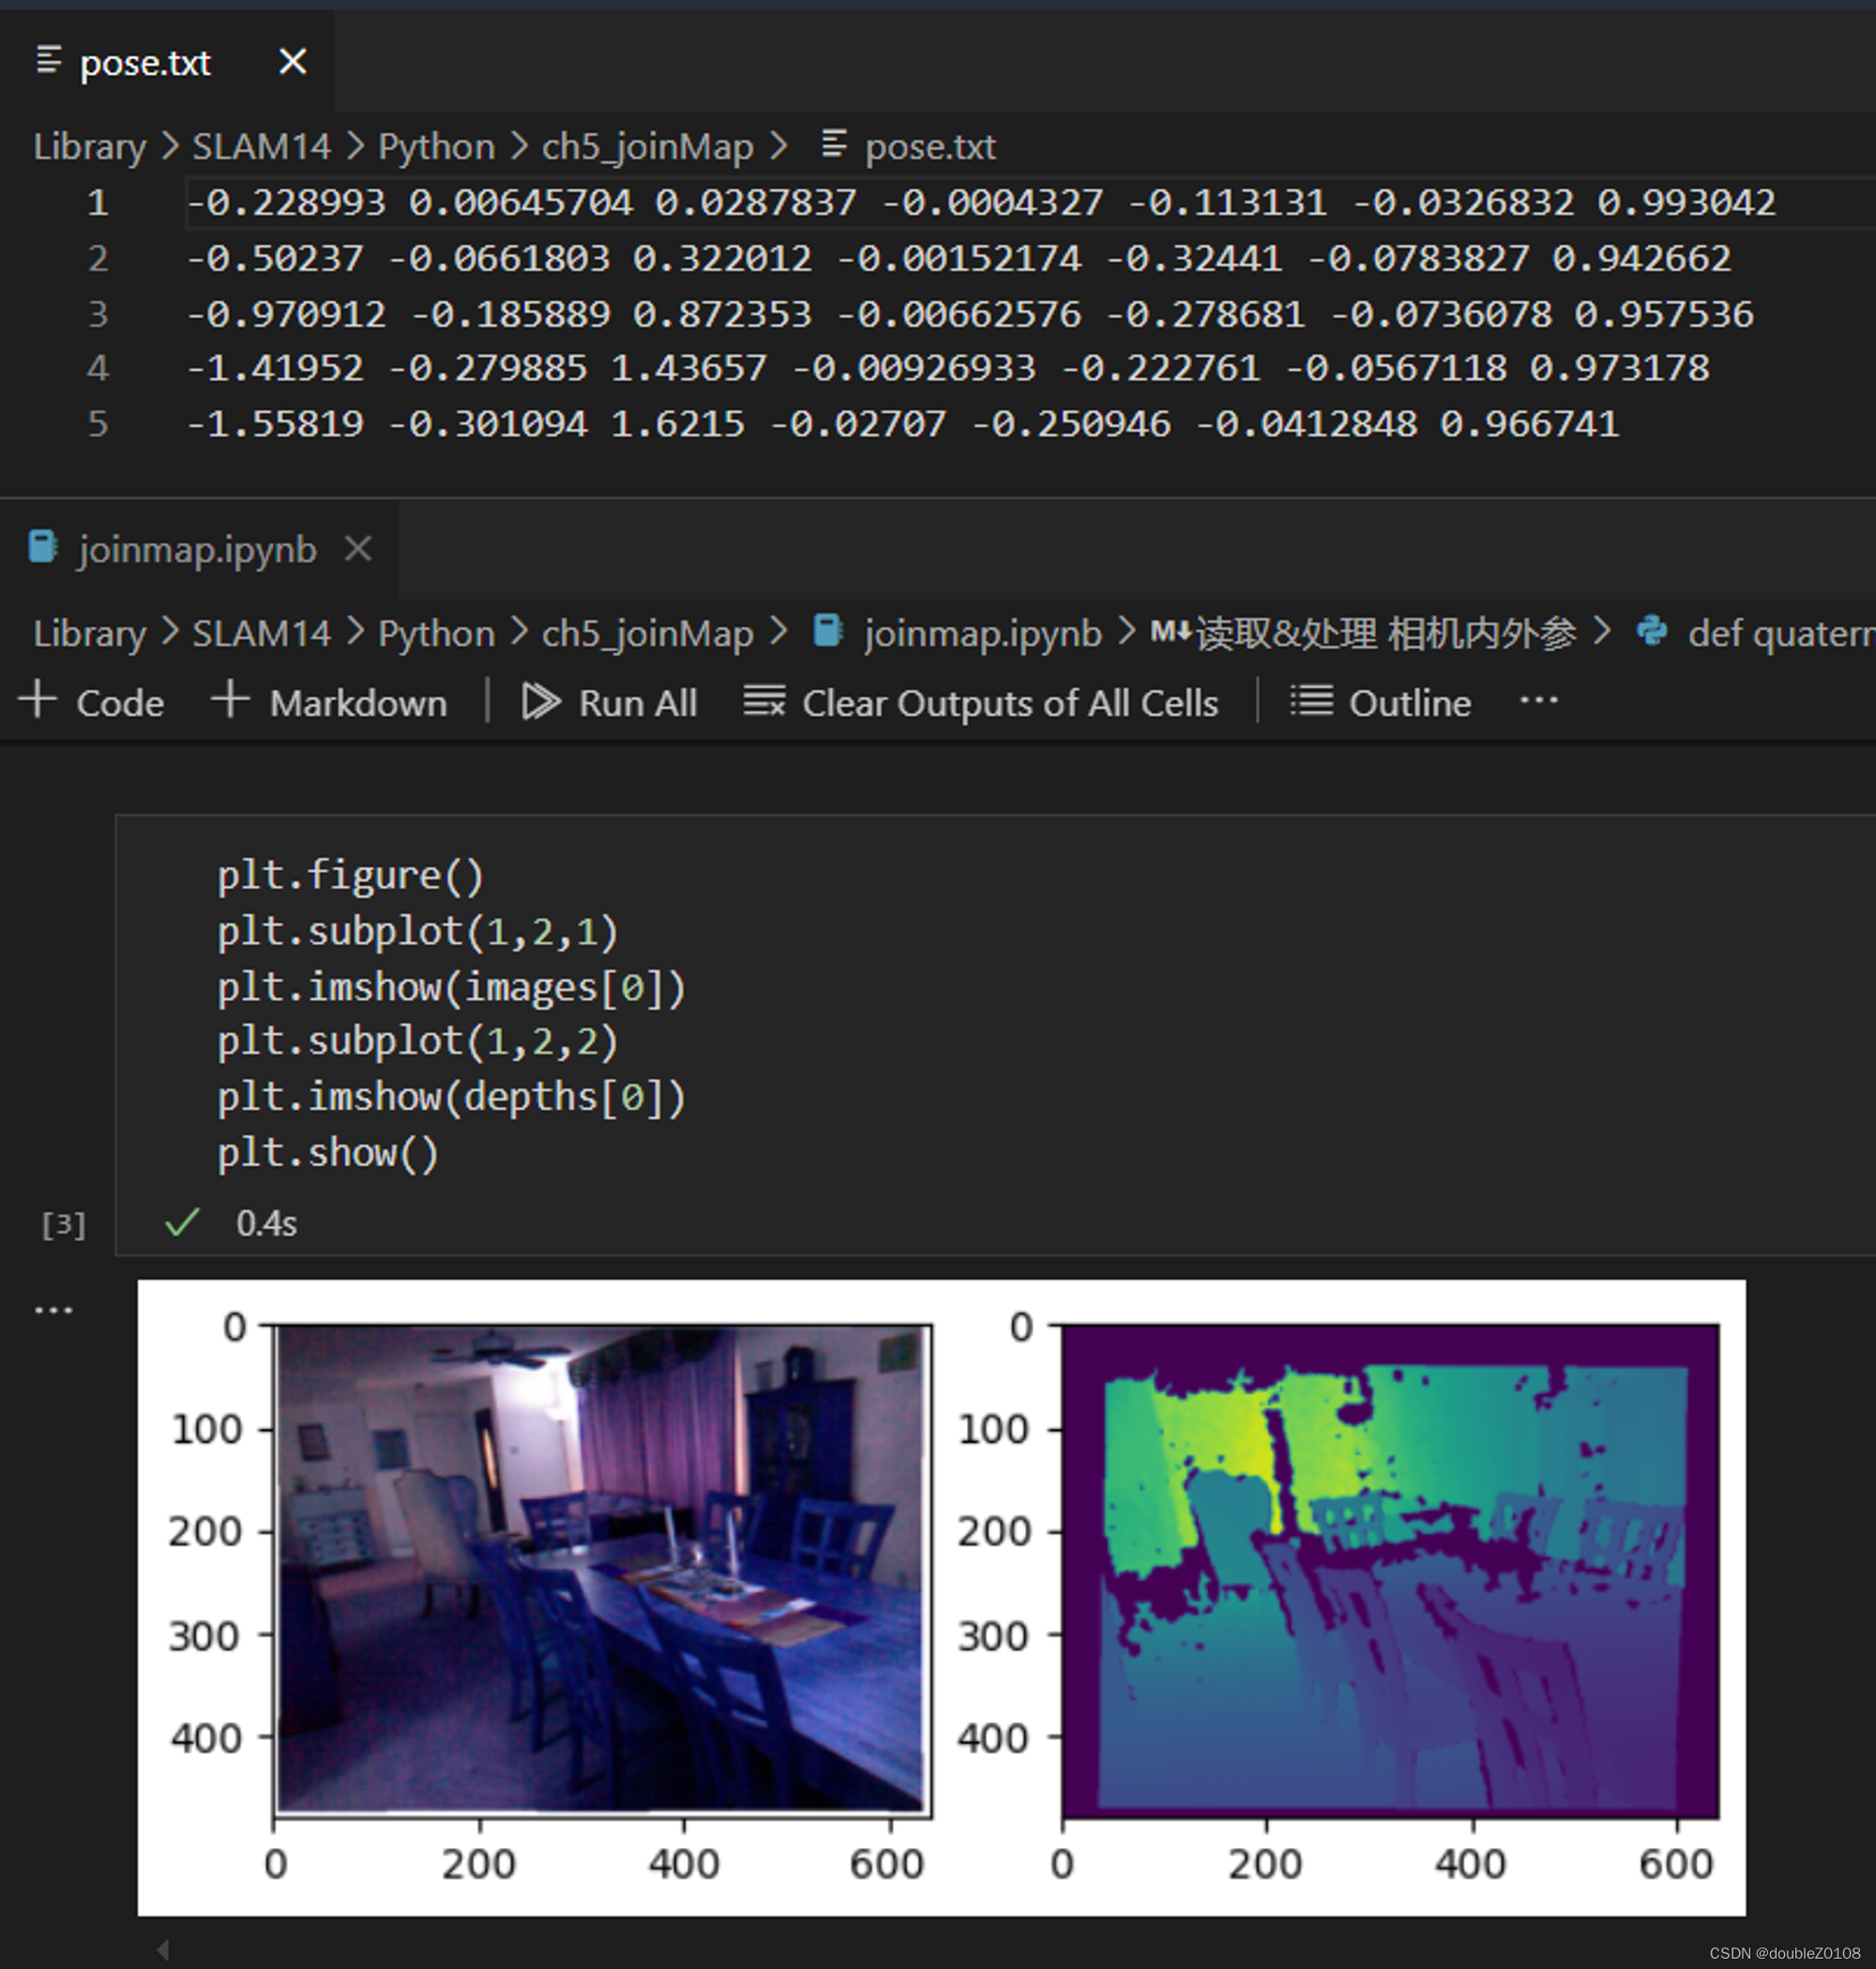
输入数据
第一步
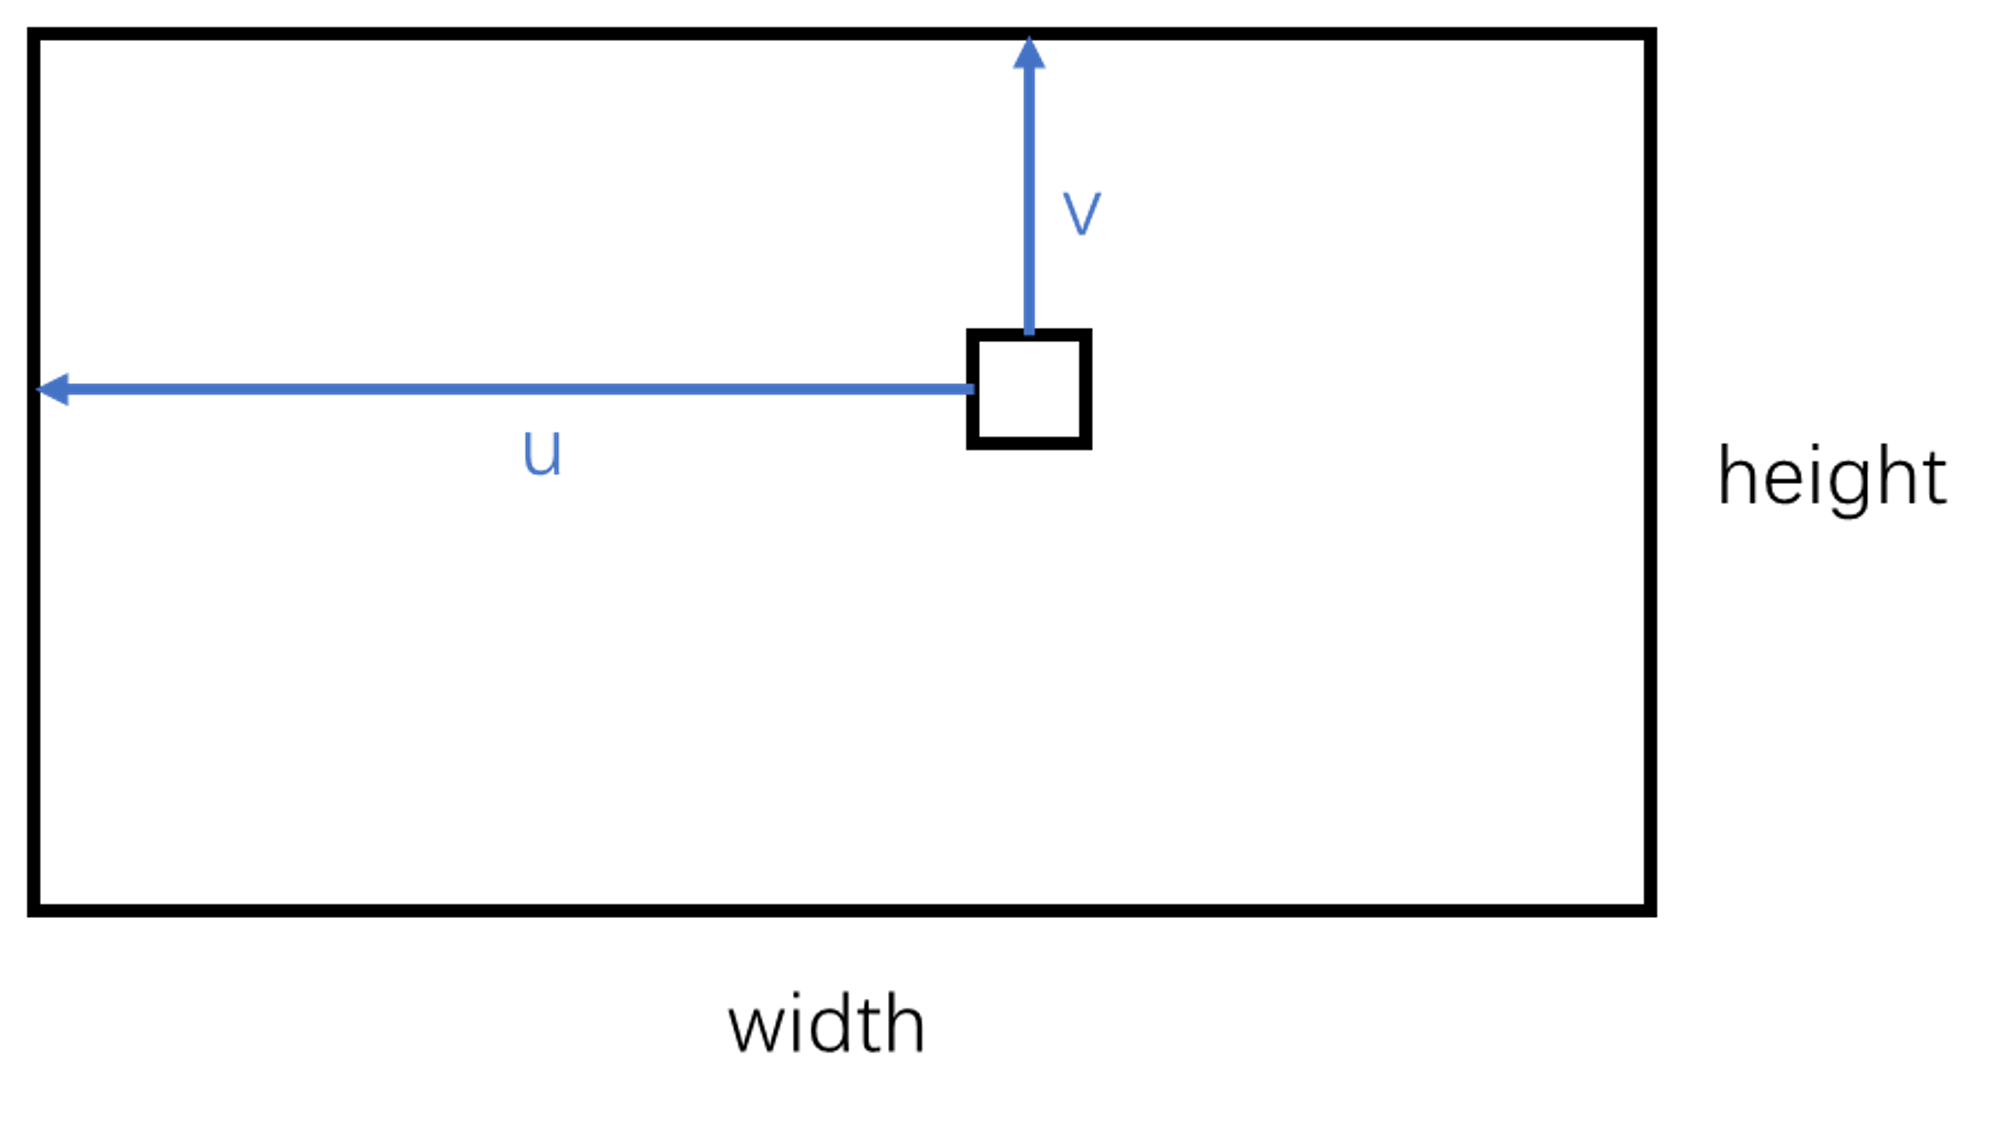
将每张图像的(u, v)坐标转换到相机的3D坐标系下,即 P u v → P c P_{uv} \rightarrow P_c Puv→Pc,我们先来看相机模型的坐标转换公式
Z ( u v 1 ) = ( f x 0 c x 0 f y c y 0 0 1 ) ( X c Y c Z c ) Z \left( \begin{matrix}u \\v\\1\end{matrix} \right) = \left( \begin{array}{ccc}f_x \ \ 0 \ \ c_x \\ 0 \ \ f_y \ \ c_y \\ 0 \ \ 0 \ \ 1\end{array} \right)\left( \begin{matrix}X_{c} \\ Y_{c} \\ Z_{c}\end{matrix} \right) Z uv1 = fx 0 cx0 fy cy0 0 1 XcYcZc
现在是已经 Z Z Z也就是深度值,那就依次遍历每个像素位置,将每个像素转换为相机坐标系下的3D点
{ X c = u − c x f x Z Y c = v − c y f y Z Z c = Z \begin{cases}X_c &=& \frac{u-c_x}{f_x}Z \\Y_c &=& \frac{v-c_y}{f_y}Z \\ Z_c &=&Z\end{cases} ⎩ ⎨ ⎧XcYcZc===fxu−cxZfyv−cyZZ
得到了相机坐标系下的3D点其实就是点云了,直接将各个深度图对应的点云保存也可以,但可以发现各个点云的坐标系不同,他们对不上
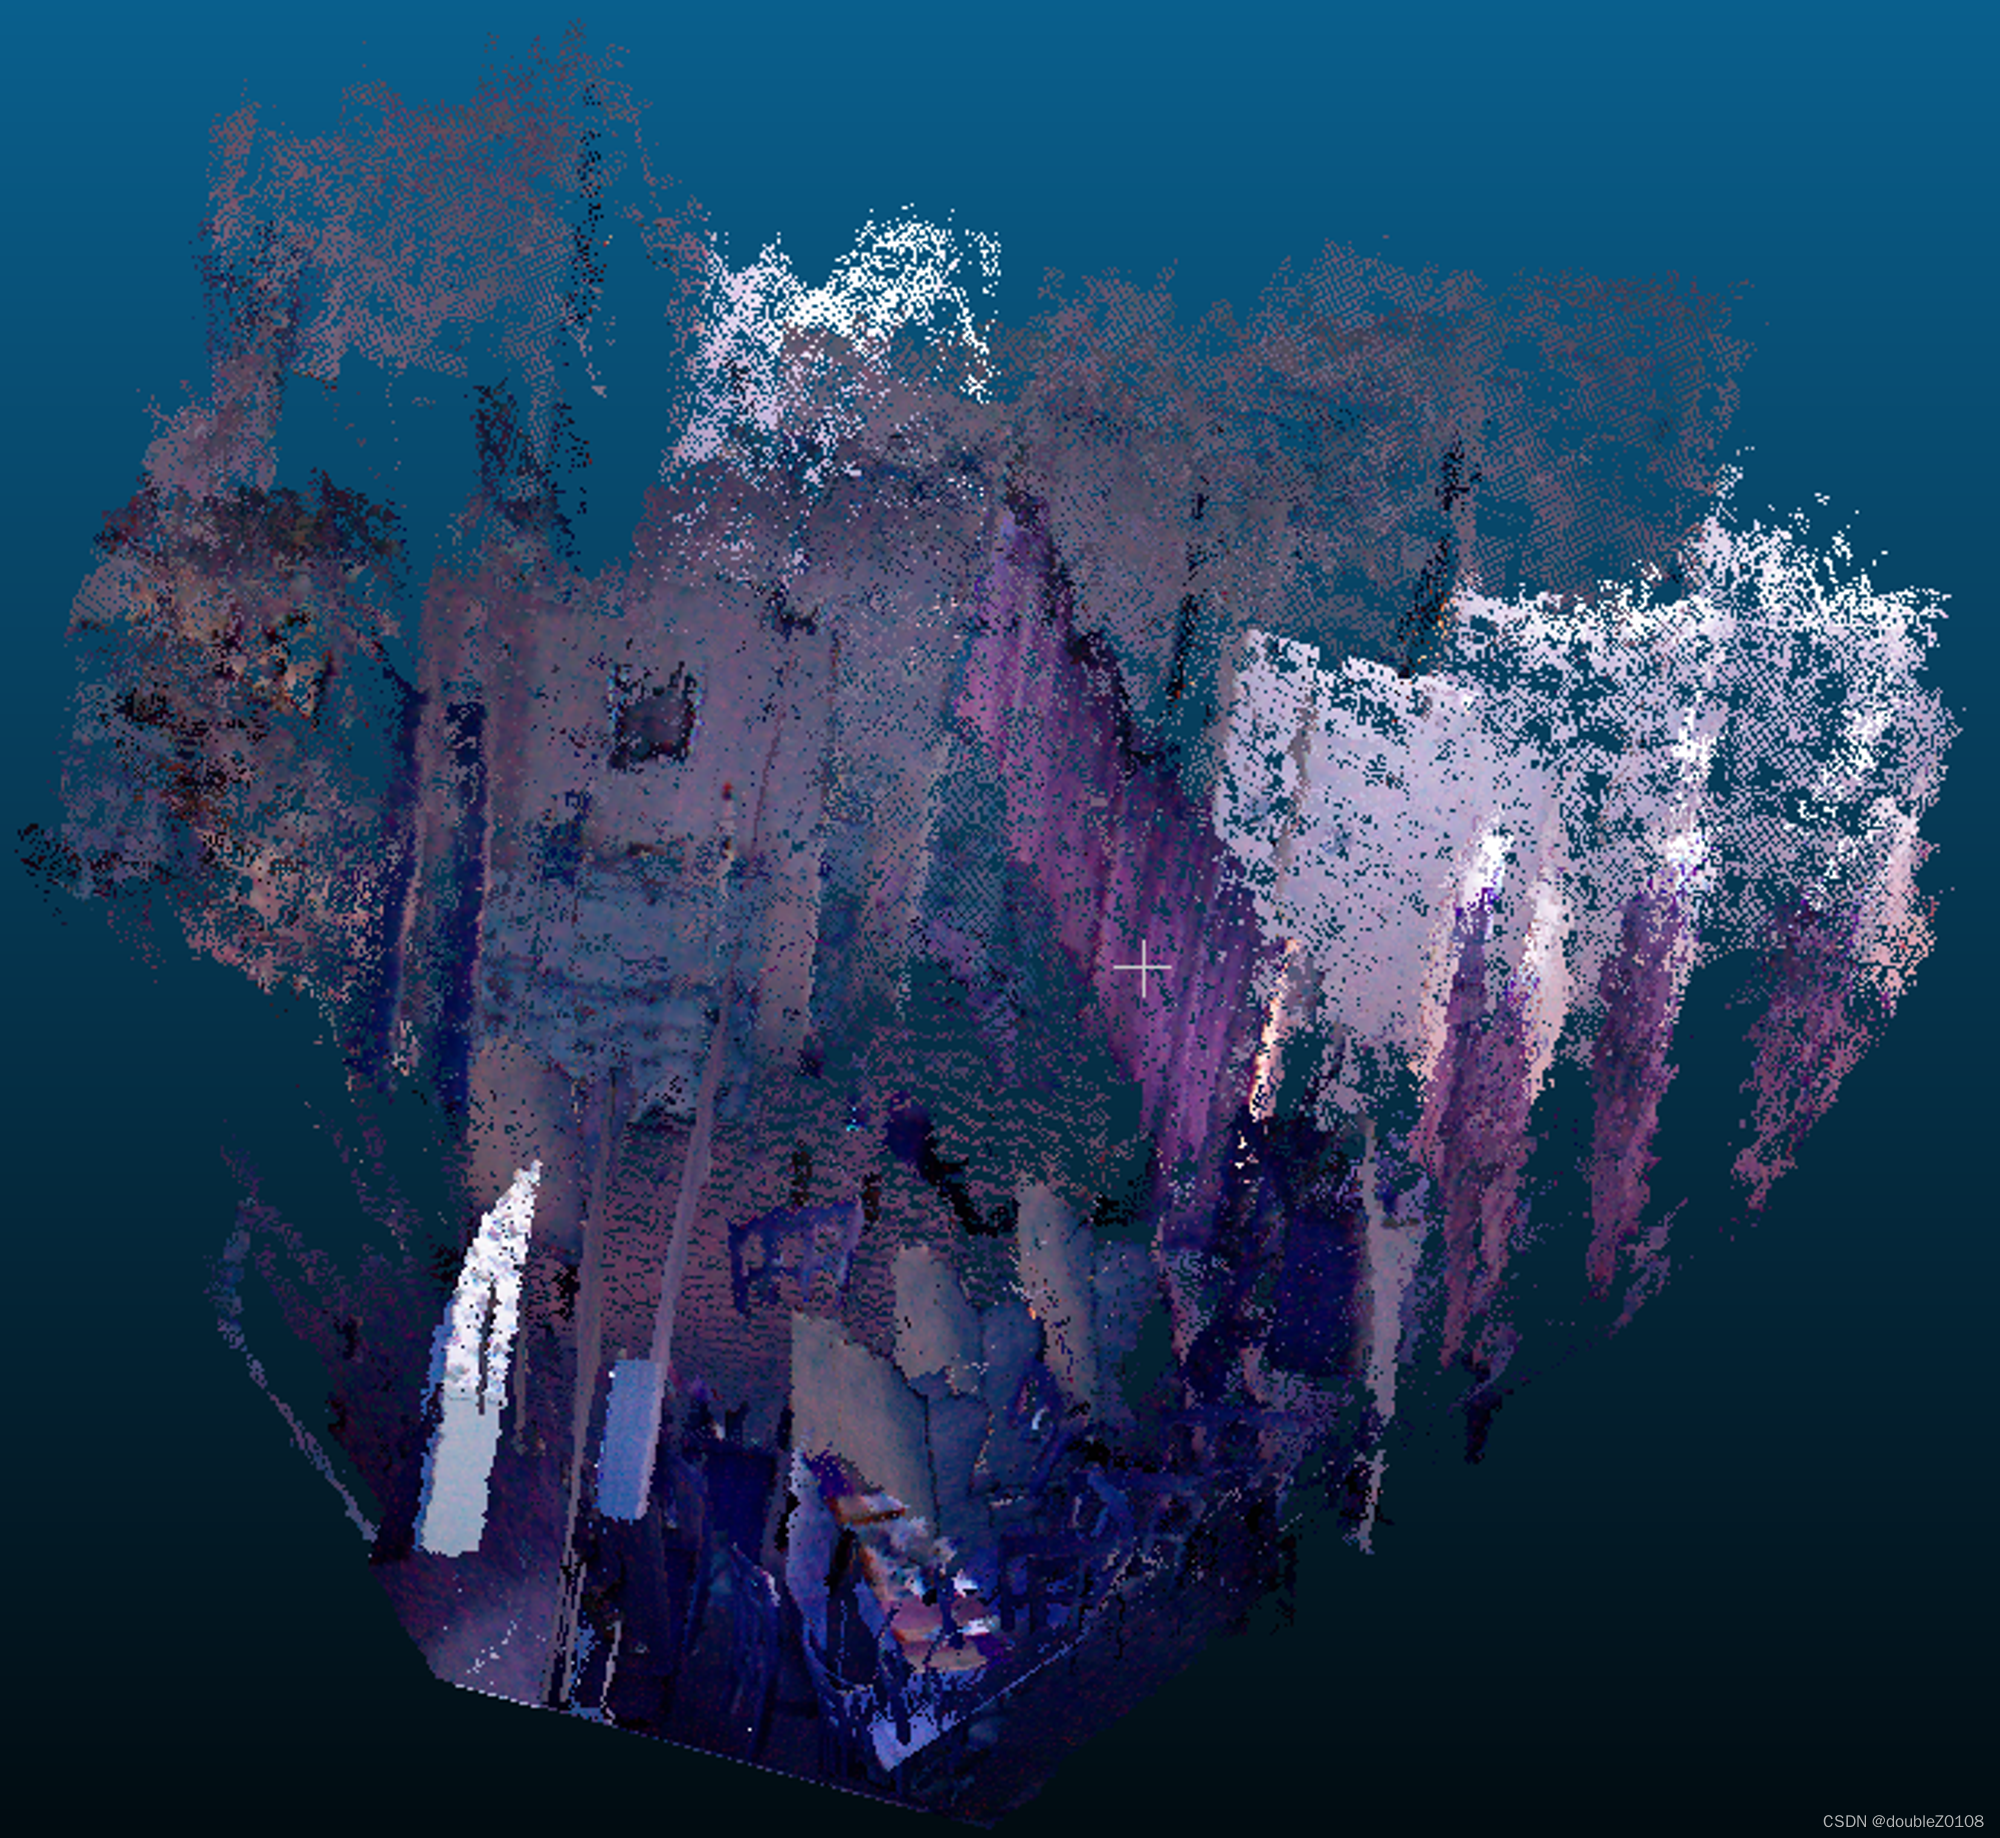
相机坐标系下的3D点,不同点云对不齐
第二步
所以下一步就是把相机坐标系转换为世界坐标系,即 P c → P w P_{c} \rightarrow P_w Pc→Pw,我们再来看相机模型的坐标系转换公式
( X c Y c Z c ) = R ( X w Y w Z w ) + t \left( \begin{matrix}X_{c} \\ Y_{c} \\ Z_{c}\end{matrix} \right) = R\left( \begin{matrix}X_{w} \\ Y_{w} \\ Z_{w}\end{matrix} \right) + t XcYcZc =R XwYwZw +t
或者将旋转矩阵 R R R和平移向量 t t t打包成 4 × 4 4 \times 4 4×4的变换矩阵 T T T,上式可以写成
( X c Y c Z c ) = T ( X w Y w Z w ) \left( \begin{matrix}X_{c} \\ Y_{c} \\ Z_{c}\end{matrix} \right) =T\left( \begin{matrix}X_{w} \\ Y_{w} \\ Z_{w}\end{matrix} \right) XcYcZc =T XwYwZw
我们现在是有了 P c P_c Pc,要求 P w P_w Pw,直接把上式左右两端乘 T − 1 T^{-1} T−1即可,或者按照上上式那样减t再左乘 R − 1 R^{-1} R−1
个人认为题目中说相机位姿是 T w c T_{wc} Twc错了,题目中的位姿给的应该是 T c 2 w T_{c2w} Tc2w,所以在实现代码中可以看到直接左乘pose即可,不用将其转为逆
最终结果为:
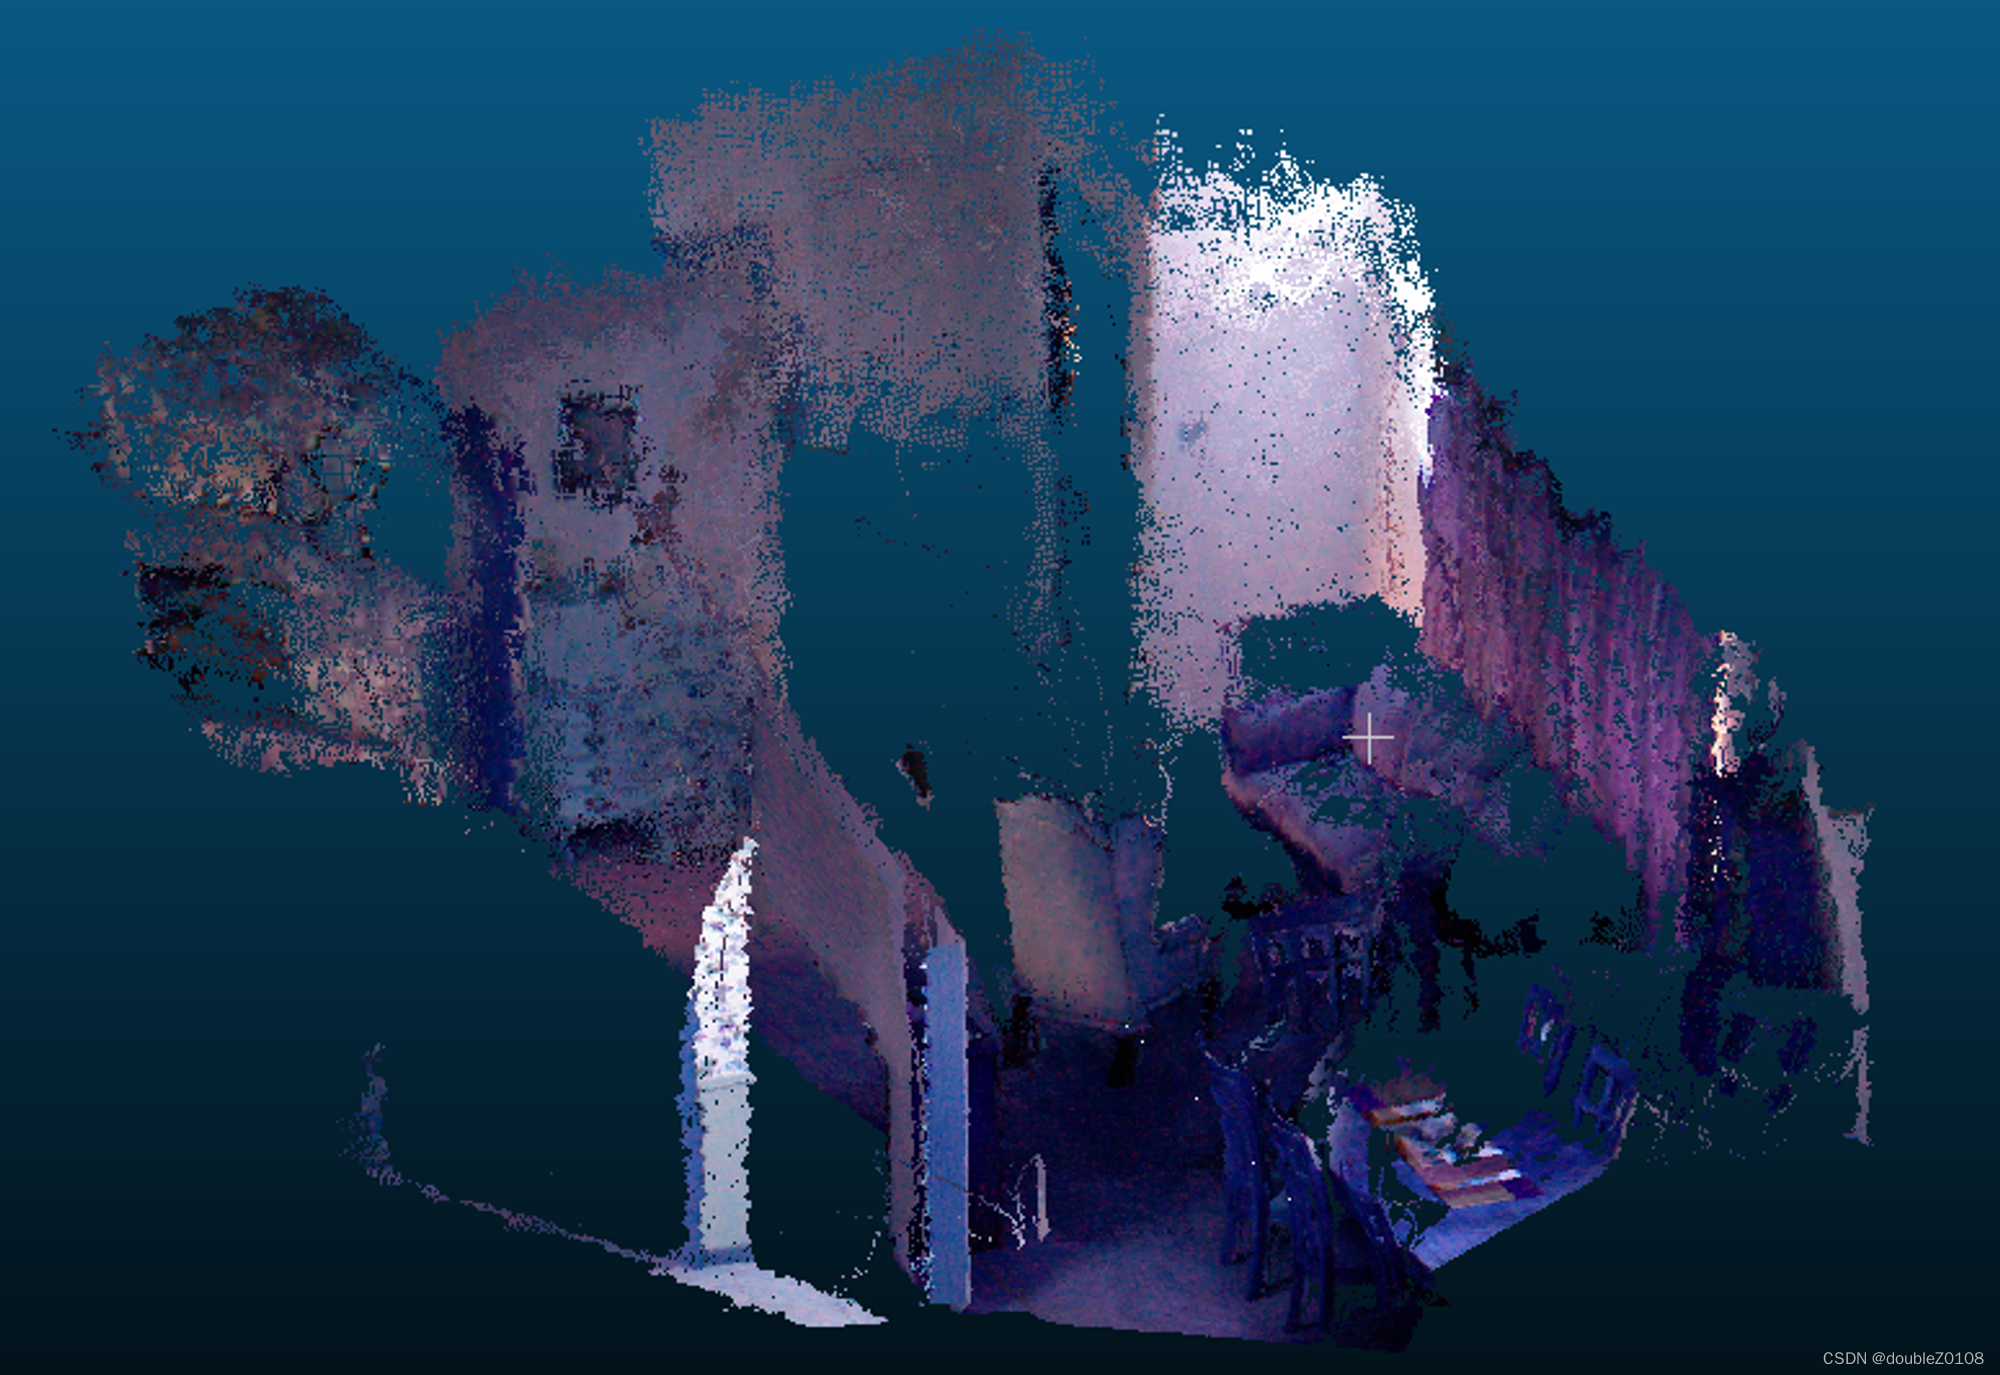
我们这么转换相当于把所有相机坐标都变成原点对应的世界坐标,还有另一种思路是我们将第一个视点作为基准,让所有人都变换到它身上,这就回到了这道题的问题上了👇,也就是先左乘自己的变换矩阵的逆再左乘第一个视点的变换矩阵(因为题目中的相机参数给反了,所以代码里这里也是反的)
https://zhuanlan.zhihu.com/p/686975855
以世界原点为基准 vs 以第一个视点为基准,可以看到是不一样的
Python代码
import os
import numpy as np
import cv2
import open3d as o3d
from scipy.spatial.transform import Rotation
import matplotlib.pyplot as plt

images, depths = [], []
total_num = 5
for i in range(1, total_num+1):
    images.append(cv2.imread(f"color/{i}.png"))
    depths.append(cv2.imread(f"depth/{i}.pgm", cv2.IMREAD_UNCHANGED))

plt.figure()
plt.subplot(1,2,1)
plt.imshow(images[0])
plt.subplot(1,2,2)
plt.imshow(depths[0])
plt.show()


def quaternion2rot(quaternion):
    r = Rotation.from_quat(quaternion)
    rot = r.as_matrix()
    return rot

poses = []
with open("pose.txt", "r") as f:
    lines = f.readlines()

for line in lines:
    data = list(map(lambda x: float(x), line.split(' ')))
    t = data[0:3]
    x, y, z, w = data[3:]
    q = np.array([x, y, z, w])

    R = quaternion2rot(q)
    T = np.eye(4)
    T[0:3,0:3] = R
    T[0:3, -1] = t

    poses.append(T)

cx, cy = 325.5,253.5
fx, fy = 518.0, 519.0
K = np.array([
    [fx, 0, cx],
    [0, fy, cy],
    [0, 0, 1],
])

depth_scale = 1000.

points = []

pose_base = poses[0]
R_base, t_base = pose_base[0:3, 0:3], pose_base[0:3, -1]

for image, depth, pose in zip(images, depths, poses):
    point = []
    height, width = image.shape[0:2]

    R, t = pose[0:3, 0:3], pose[0:3, -1]

    for v in range(height):
        for u in range(width):
            z = depth[v][u] / depth_scale
            x = (u - cx) * z / fx
            y = (v - cy) * z / fy

            Pc = np.array([x, y, z]).T

            # way1 直接根据每个视点的T_c2w,统一到原点
            Pw = pose @ np.hstack((Pc, 1))
            Pw = Pw[0:3].tolist()
            Pw.extend(image[v][u])
            point.append(Pw)


            # # way2 根据每个视点的R t展开计算,统一到原点
            # Pw = R @ Pc + t
            # Pw = Pw.tolist()
            # Pw.extend(image[v][u])
            # point.append(Pw)


            # # way3 根据每个视点的T_c2w,统一到第0个视点的pose下
            # Pw2base = np.linalg.inv(pose_base) @ pose @ np.hstack((Pc, 1))
            # Pw2base = Pw2base[0:3].tolist()
            # Pw2base.extend(image[v][u])
            # point.append(Pw2base)


            # # way4 根据每个视点的R t展开计算,统一到第0个视点的pose下
            # Pw2base = np.linalg.inv(R_base) @ (( R @ Pc + t ) - t_base)
            # Pw2base = Pw2base.tolist()
            # Pw2base.extend(image[v][u])
            # point.append(Pw2base)

    point = np.array(point)
    points.append(point)


def save_pointcloud(point, filename):
    pcd = o3d.geometry.PointCloud()
    pcd.points = o3d.utility.Vector3dVector(point[:, 0:3])
    pcd.colors = o3d.utility.Vector3dVector(point[:, 3:] / 255.)
    o3d.io.write_point_cloud(filename, pcd, write_ascii=False)

for idx, point in enumerate(points):
    save_pointcloud(point, f"result_{idx}.ply")

save_pointcloud(np.array(points).reshape(-1, 6), "result_merged.ply")
🗑坑
坑1
要注意下标问题,cv2读取的图像维度为height, width = image.shape[0:2] ,但我们一般按照先横坐标再纵坐标的方式读写二维矩阵,因此访问的时候得这样
for v in range(height):
  for u in range(width):
    image[v][u]
但你得注意,X和Y的计算还是要按照公式来,本来就是X根据u, cx, fx来算,跟你数组怎么循环没关
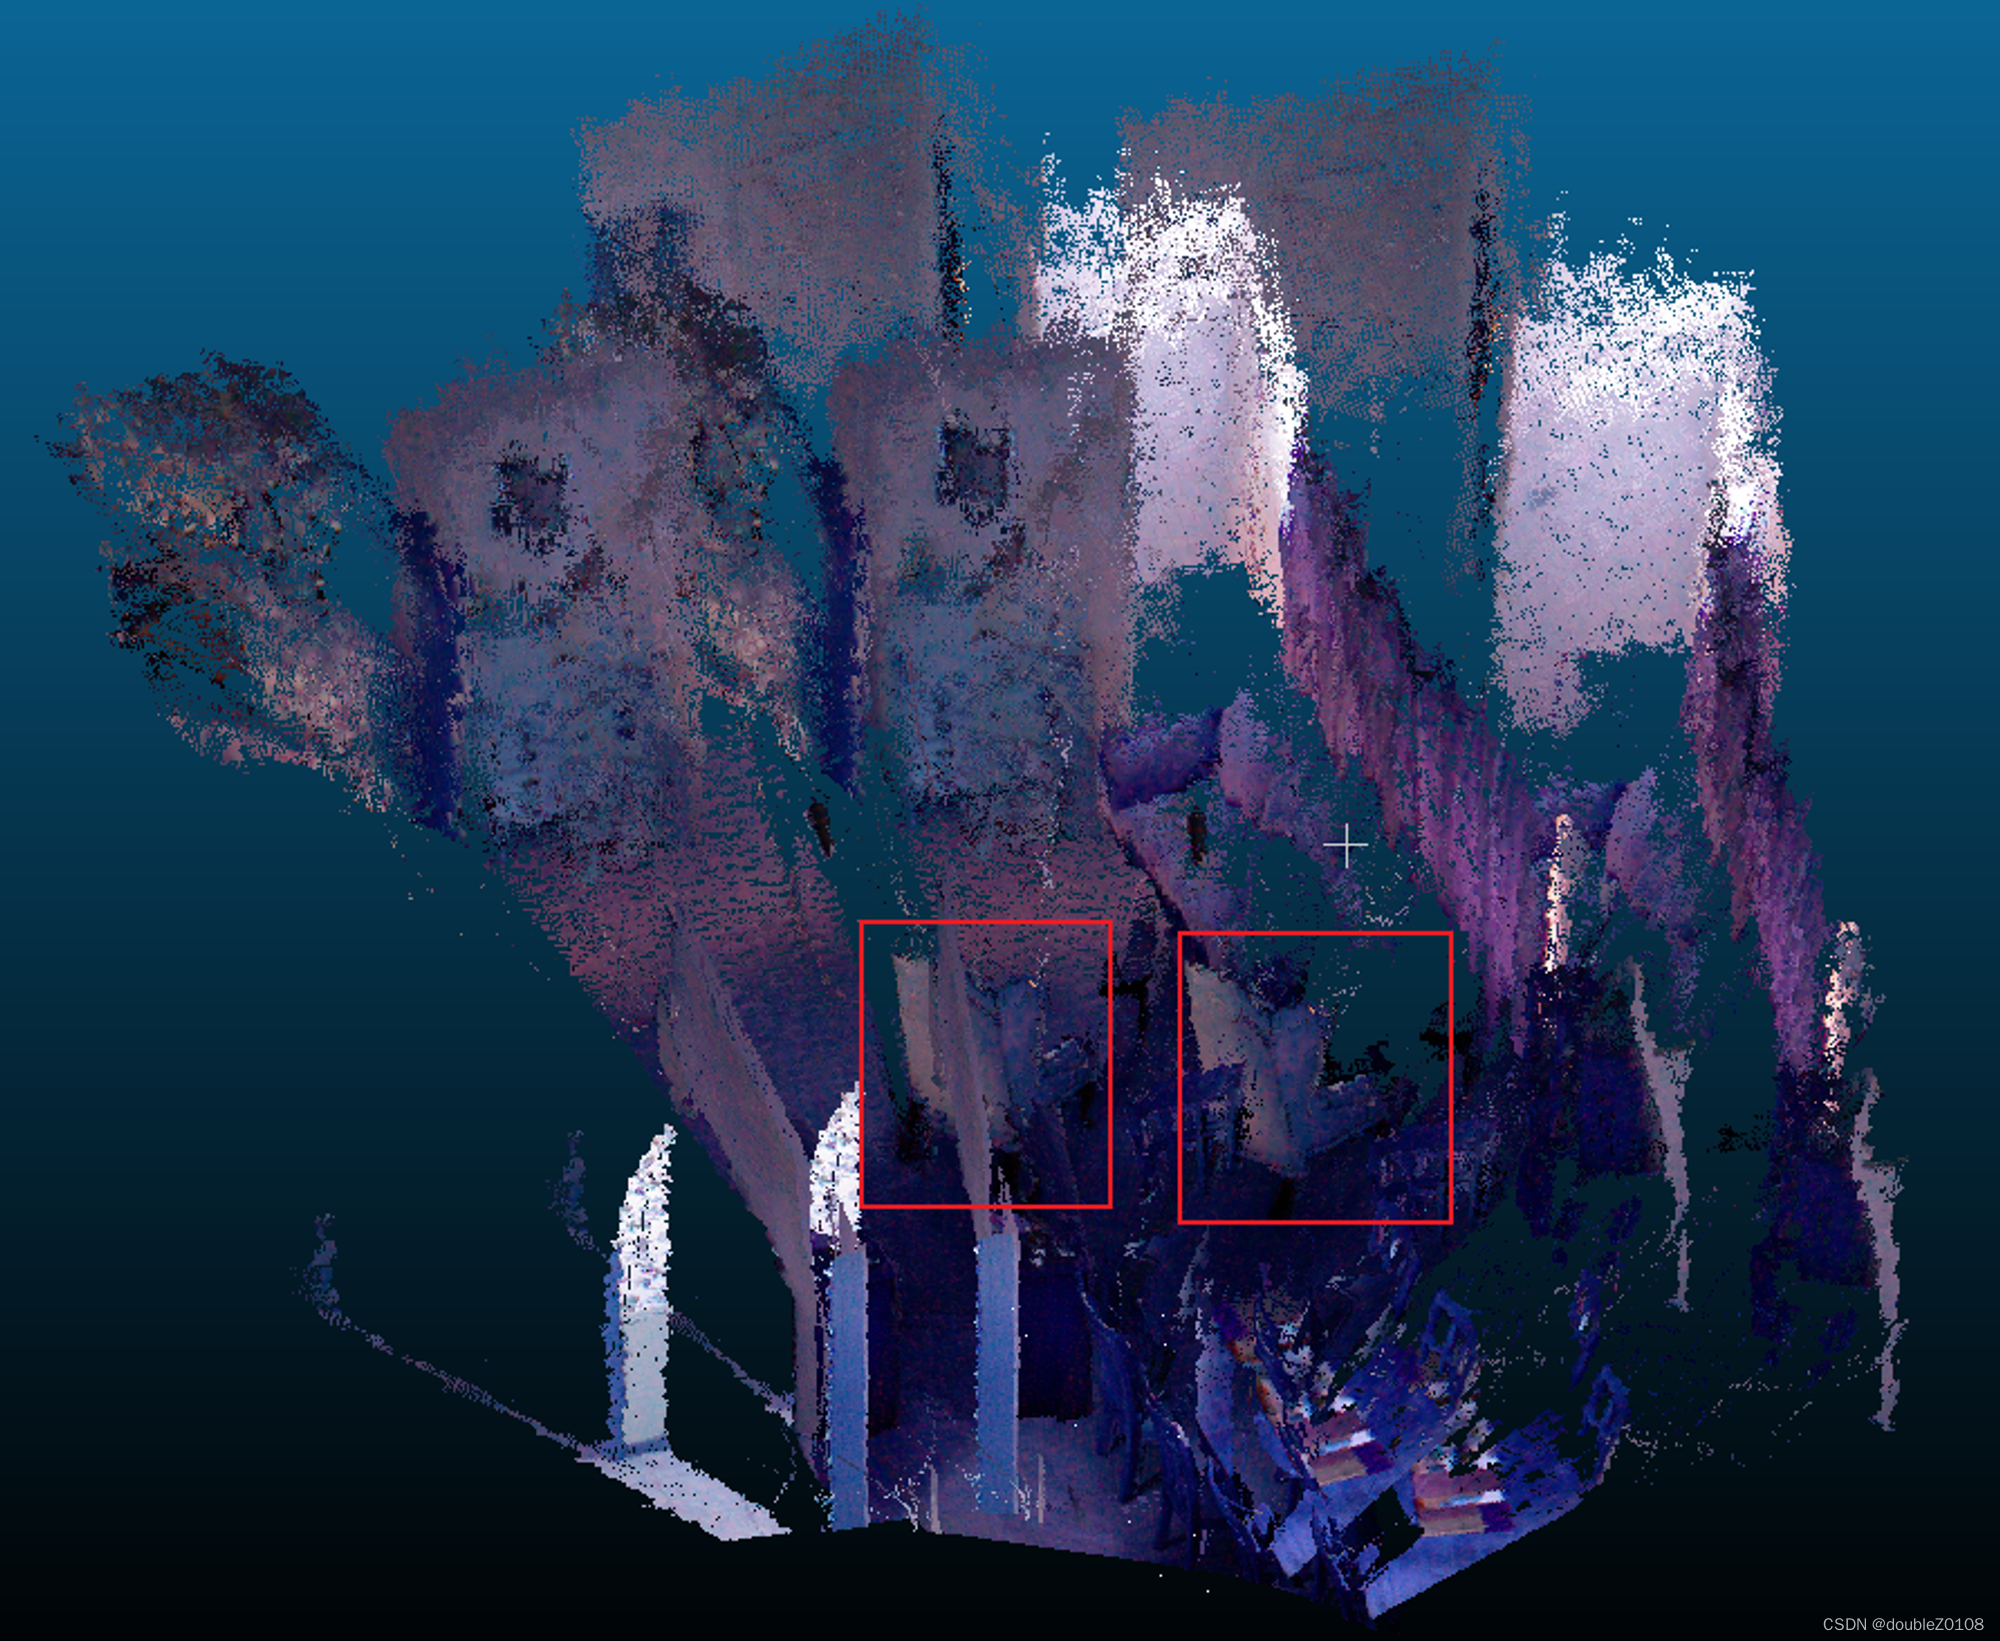
坑2
不懂为什么Z要除以depth_scale=1000,试过如果将scale设为1,则会得到这样的结果,最终还是分层的,当然如果将scale设置为其他值也不行
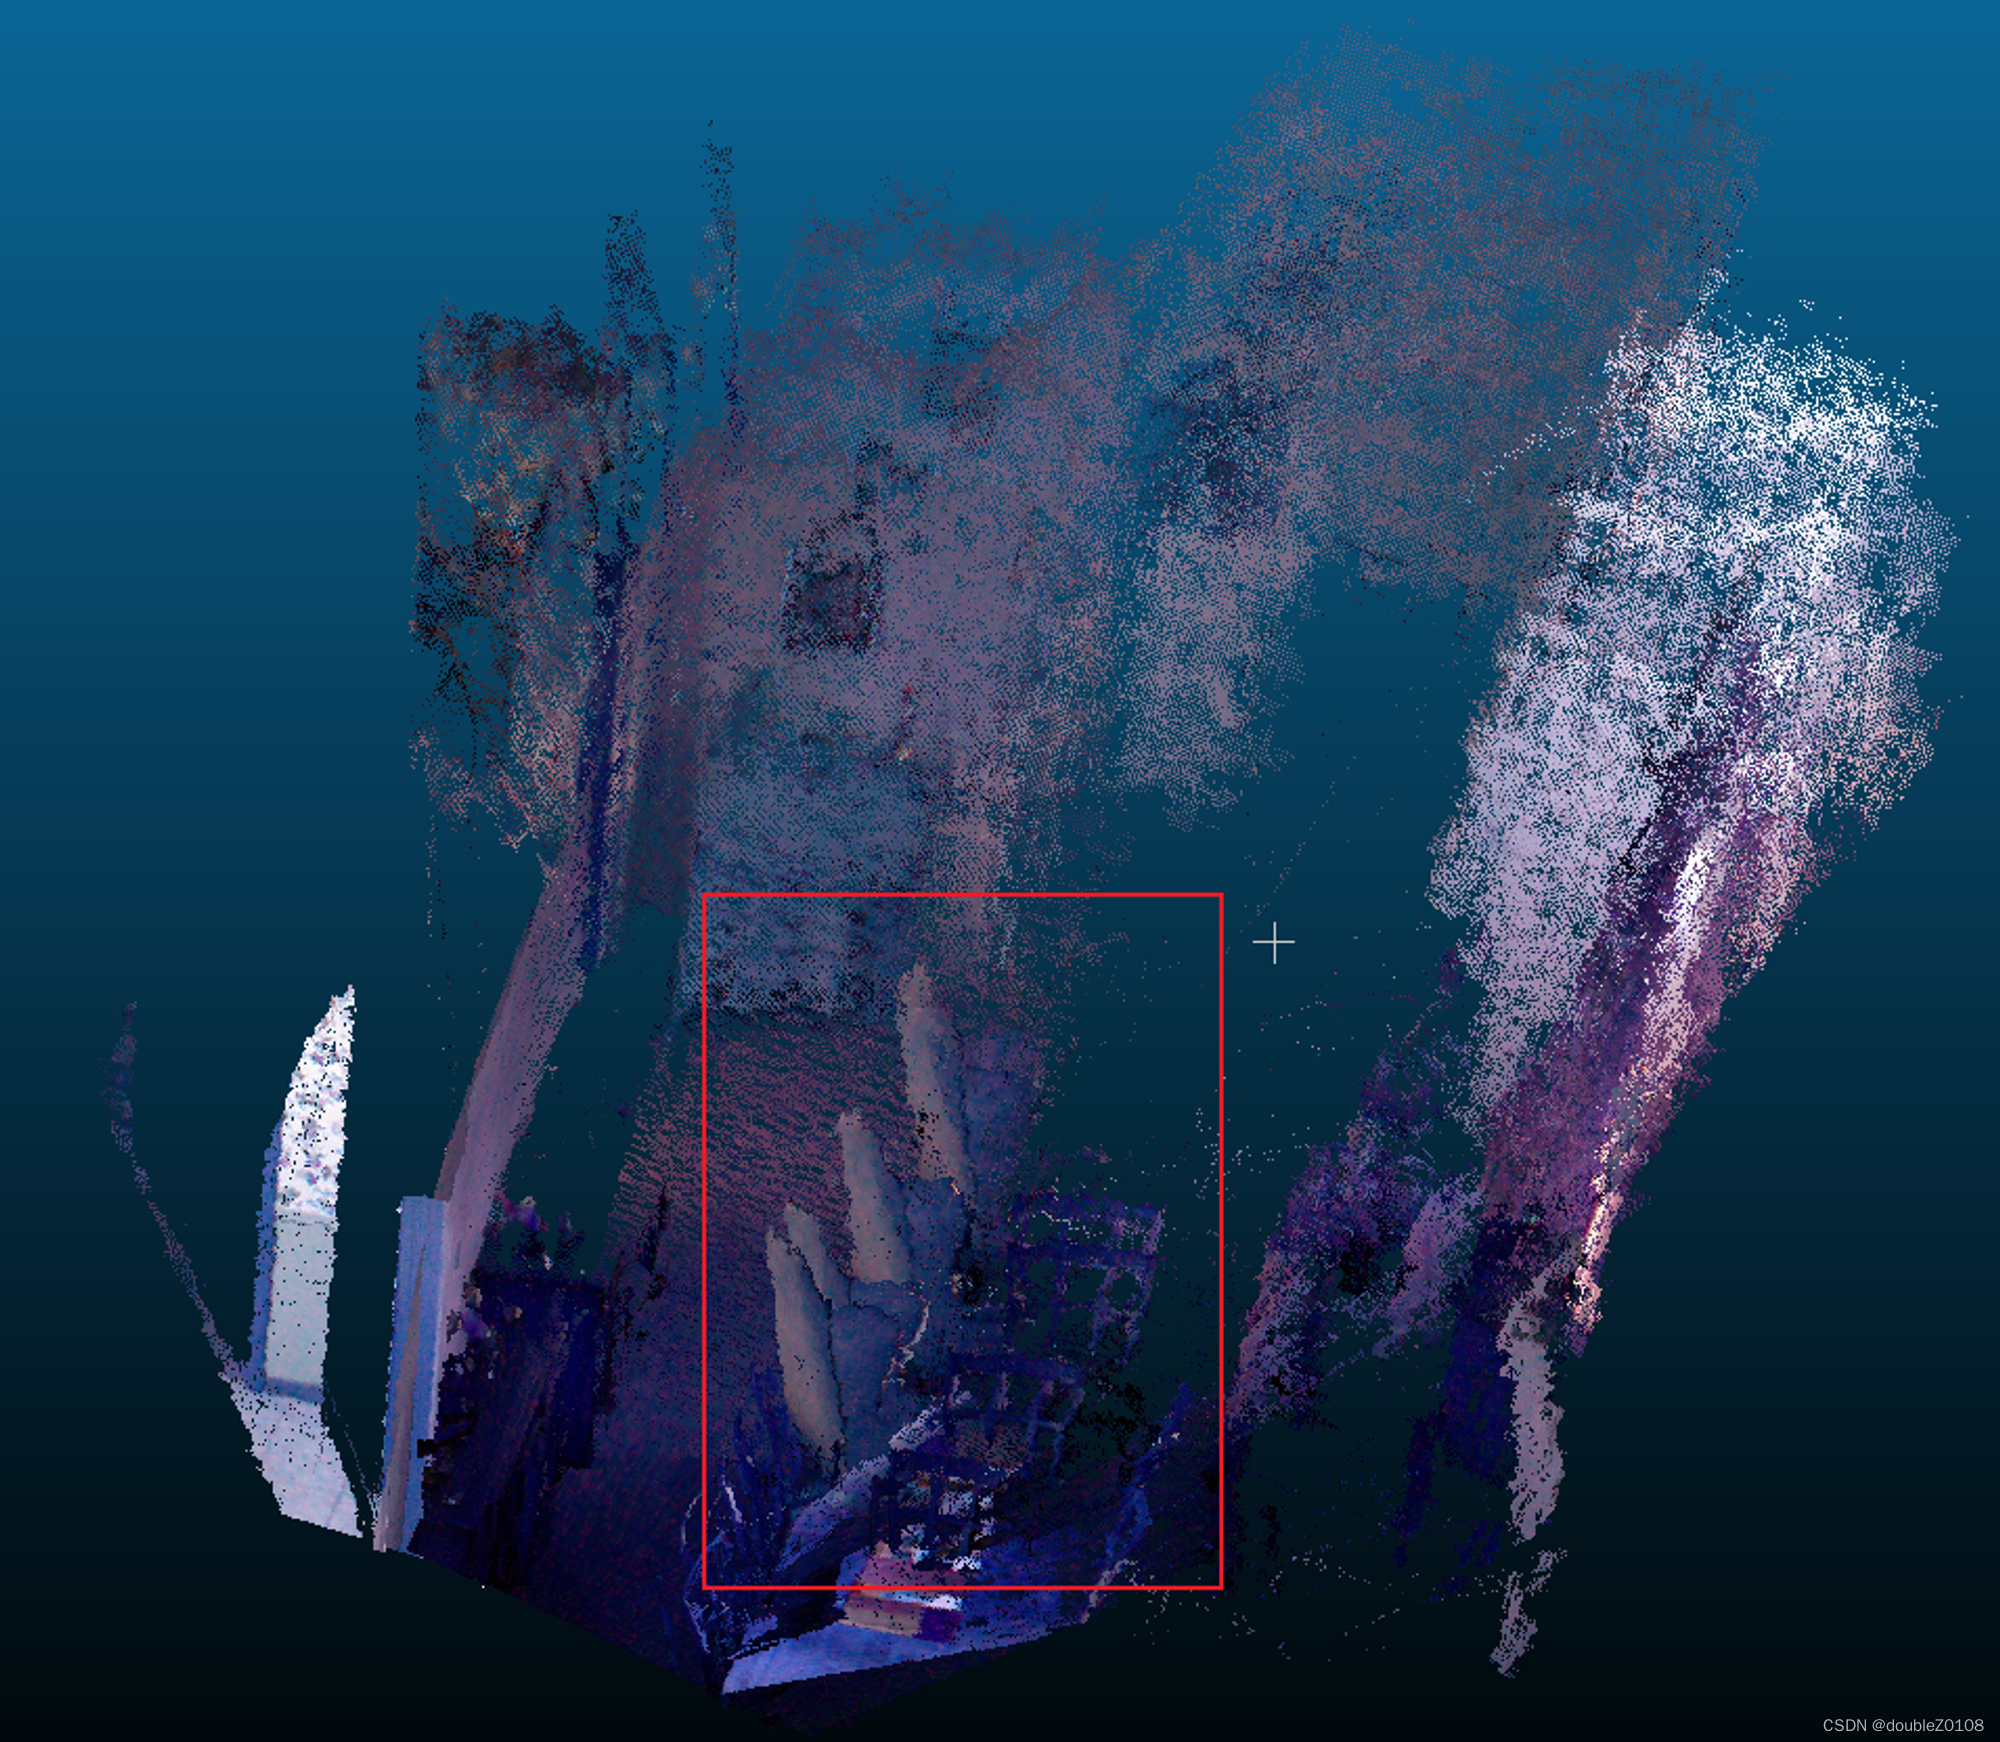
如果不除以1000的scale,点云最终还是无法对齐


 907
907

 被折叠的 条评论
为什么被折叠?
被折叠的 条评论
为什么被折叠?
 到【灌水乐园】发言


