


本人是新手,刚开始接触esp32板,希望能与大家交流。
开发板使用:正点原子ATK_DNESP32S3 V1.3
IDE: VSCODE + PLATFORMIO
摄像头模块:ov2640(非正点原子,正点原子的太贵了,买不起...)
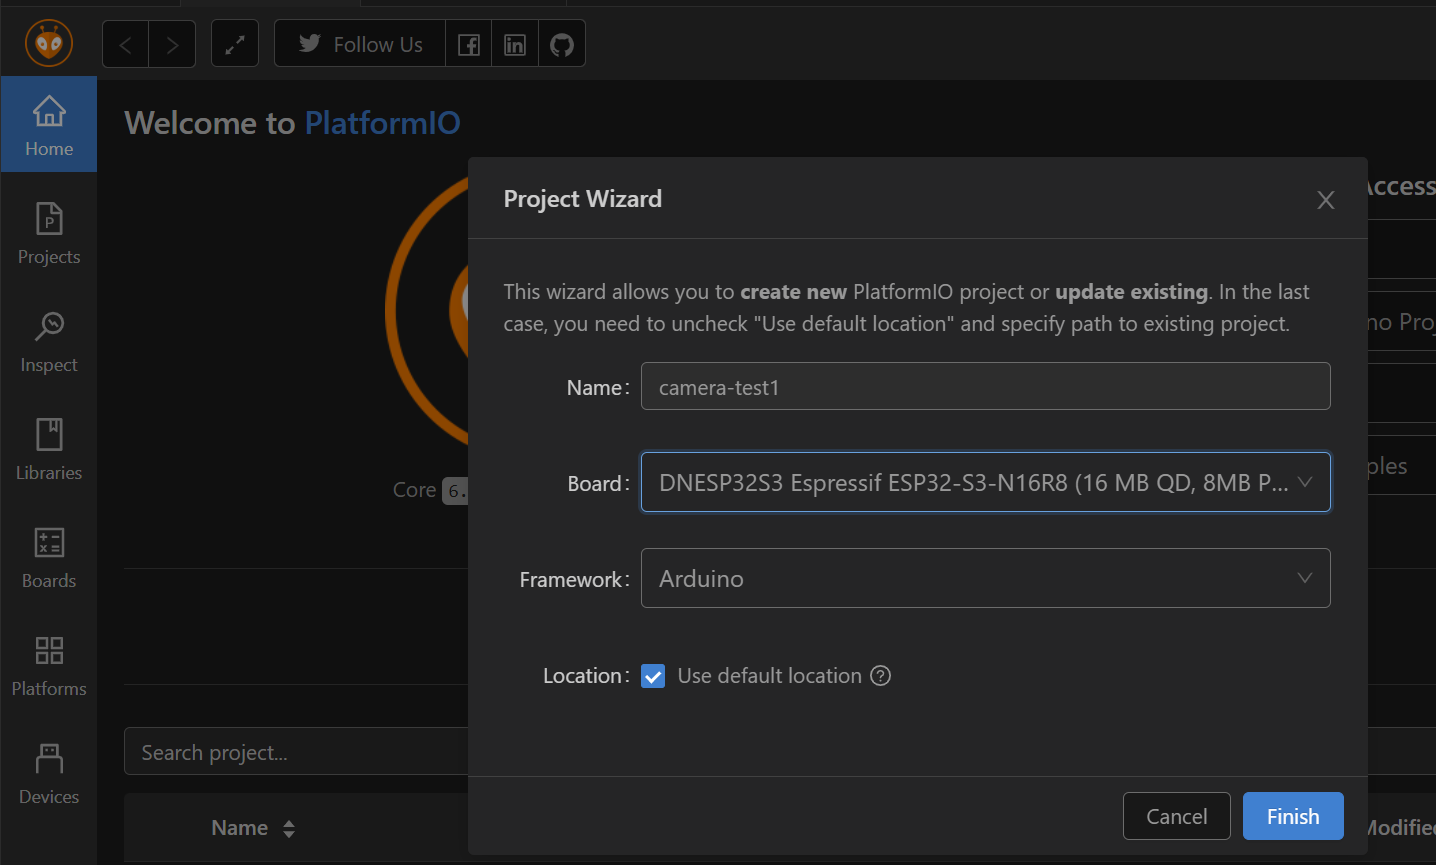
在VS Code新建工程,工程命名为:camera-test1
主板选择对应主板,这里由于没有找到正点原子对应的主板,我自已导入了一个。
实验步骤:
1. 将买的其它厂家的ov2640接入到正点原子esp32s3板上,买的这个ov2640引脚布局正好与正点原子相同。
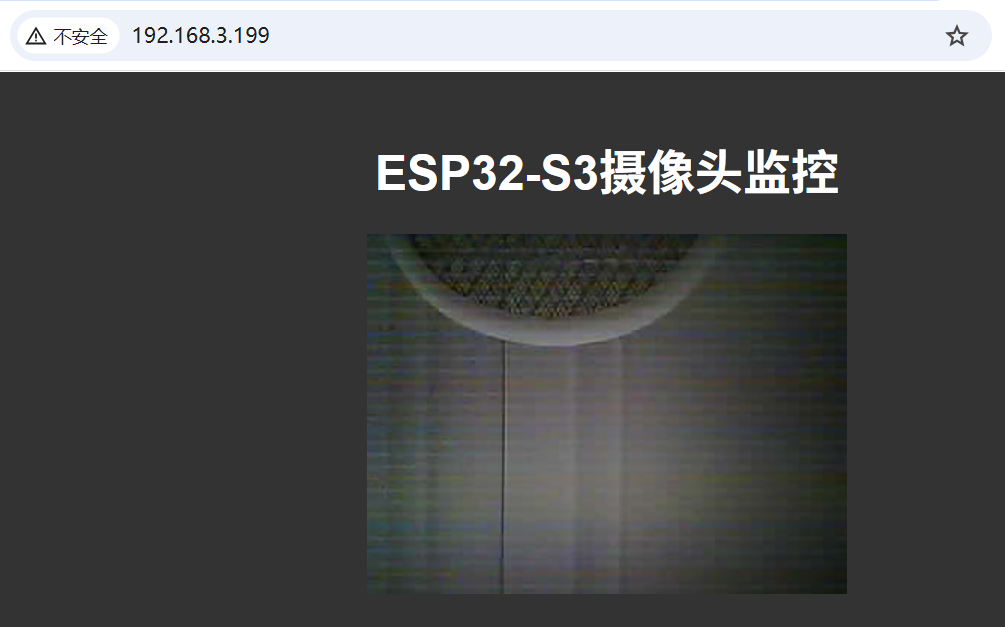
2. 当烧录好后,点击浏览器访问开发板的webserver。
实验结果:
通过不断捕获摄像头帧并将其作为JPEG图像发送到客户端来实现,当点击浏览器访问,可以在页面上实时看到监控画面。
这里吐槽一下,正点原子的摄像头模块是真的贵啊,这价格都可以买个高清摄像头了,咱只配用便宜的 !^_^
新建工程:
主板选择对应主板,这里由于没有找到正点原子对应的主板,我自已导入了一个。
代码:
#include "esp_camera.h"
#include <WiFi.h>
#include <WebServer.h>
#define OV_SCL_PIN 38
#define OV_SDA_PIN 39
#define OV_D0_PIN 4
#define OV_D1_PIN 5
#define OV_D2_PIN 6
#define OV_D3_PIN 7
#define OV_D4_PIN 15
#define OV_D5_PIN 16
#define OV_D6_PIN 17
#define OV_D7_PIN 18
#define OV_VSYNC_PIN 47
#define OV_HREF_PIN 48
#define OV_PCLK_PIN 45
#define OV_XCLK_PIN -1
#define OV_RESET_PIN -1
#define OV_PWDN_PIN -1
// WiFi配置
const char* ssid = "你家的wifi ssid"; // 替换为你的WiFi名称
const char* password = "你家wifi的密码"; // 替换为你的WiFi密码
WebServer server(80);
void startCameraServer();
void setup() {
Serial.begin(115200);
Serial.setDebugOutput(true);
Serial.println("\n启动摄像头...");
// 配置摄像头参数
camera_config_t camera_config;
camera_config.ledc_channel = LEDC_CHANNEL_0;
camera_config.ledc_timer = LEDC_TIMER_0;
camera_config.xclk_freq_hz = 20000000; // 20MHz时钟
// 数据引脚
camera_config.pin_d7 = OV_D7_PIN;
camera_config.pin_d6 = OV_D6_PIN;
camera_config.pin_d5 = OV_D5_PIN;
camera_config.pin_d4 = OV_D4_PIN;
camera_config.pin_d3 = OV_D3_PIN;
camera_config.pin_d2 = OV_D2_PIN;
camera_config.pin_d1 = OV_D1_PIN;
camera_config.pin_d0 = OV_D0_PIN;
// 控制引脚
camera_config.pin_xclk = OV_XCLK_PIN;
camera_config.pin_pclk = OV_PCLK_PIN;
camera_config.pin_vsync = OV_VSYNC_PIN;
camera_config.pin_href = OV_HREF_PIN;
// SCCB/I2C引脚
camera_config.pin_sccb_sda = OV_SDA_PIN;
camera_config.pin_sccb_scl = OV_SCL_PIN;
// 电源控制引脚
camera_config.pin_pwdn = OV_PWDN_PIN;
camera_config.pin_reset = OV_RESET_PIN;
// 图像参数
camera_config.frame_size = FRAMESIZE_QVGA; // 320x240分辨率
camera_config.pixel_format = PIXFORMAT_JPEG; // JPEG格式更适合网络传输
camera_config.grab_mode = CAMERA_GRAB_WHEN_EMPTY;
camera_config.fb_location = CAMERA_FB_IN_PSRAM; // 使用PSRAM
// 图像质量
camera_config.jpeg_quality = 12; // 0-63,数值越小质量越高
camera_config.fb_count = 1; // 帧缓冲区数量
// 初始化摄像头
esp_err_t err = esp_camera_init(&camera_config);
if (err != ESP_OK) {
Serial.printf("摄像头初始化失败: 0x%x", err);
// 尝试使用DRAM替代PSRAM
camera_config.fb_location = CAMERA_FB_IN_DRAM;
err = esp_camera_init(&camera_config);
if (err != ESP_OK) {
Serial.printf("第二次初始化尝试失败: 0x%x", err);
while(1) delay(1000);
}
}
// 连接WiFi
WiFi.begin(ssid, password);
Serial.print("连接WiFi...");
int attempts = 0;
while (WiFi.status() != WL_CONNECTED && attempts < 20) {
delay(500);
Serial.print(".");
attempts++;
}
if (WiFi.status() != WL_CONNECTED) {
Serial.println("\nWiFi连接失败! 请检查凭证");
while(1) delay(1000);
}
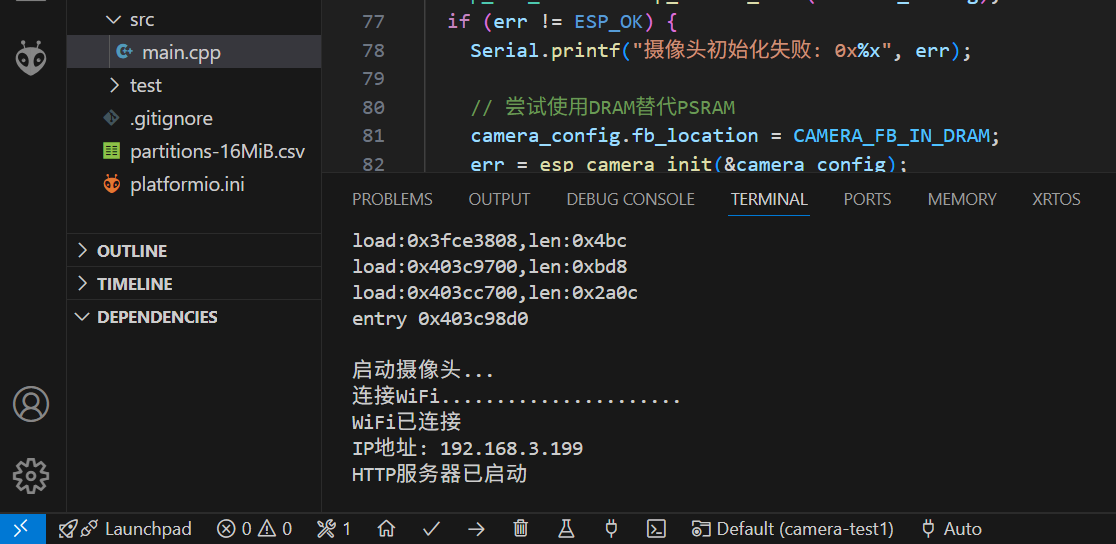
Serial.println("\nWiFi已连接");
Serial.print("IP地址: ");
Serial.println(WiFi.localIP());
// 设置网络服务器
server.on("/", HTTP_GET, []() {
server.send(200, "text/html; charset=utf-8",
"<html>"
"<head>"
"<meta charset='UTF-8'>"
"<meta name='viewport' content='width=device-width, initial-scale=1'>"
"<title>ESP32-S3摄像头</title>"
"<style>"
"body { margin: 0; background: #333; font-family: Arial, sans-serif; }"
".container { max-width: 800px; margin: 0 auto; padding: 20px; }"
"h1 { color: #fff; text-align: center; margin-bottom: 20px; }"
"img { display: block; max-width: 100%; height: auto; margin: 0 auto; }"
"</style>"
"</head>"
"<body>"
"<div class='container'>"
"<h1>ESP32-S3摄像头监控</h1>"
"<img src='/stream' alt='视频流'>"
"</div>"
"</body>"
"</html>");
});
server.on("/stream", HTTP_GET, []() {
server.sendHeader("Access-Control-Allow-Origin", "*");
server.setContentLength(CONTENT_LENGTH_UNKNOWN);
server.send(200, "multipart/x-mixed-replace; boundary=frame");
while (true) {
camera_fb_t *fb = esp_camera_fb_get();
if (!fb) {
Serial.println("获取帧失败");
delay(100);
continue;
}
server.sendContent("--frame\r\n");
server.sendContent("Content-Type: image/jpeg\r\n\r\n");
server.sendContent_P((char *)fb->buf, fb->len);
server.sendContent("\r\n");
esp_camera_fb_return(fb);
delay(10); // 控制帧率
}
});
server.begin();
Serial.println("HTTP服务器已启动");
}
void loop() {
server.handleClient();
delay(1);
}
摄像头引脚定义:
#define OV_SCL_PIN 38     // I2C时钟线(SCL)引脚
#define OV_SDA_PIN 39     // I2C数据线(SDA)引脚
#define OV_D0_PIN 4       // 摄像头数据引脚D0
#define OV_D1_PIN 5       // 摄像头数据引脚D1
#define OV_D2_PIN 6       // 摄像头数据引脚D2
#define OV_D3_PIN 7       // 摄像头数据引脚D3
#define OV_D4_PIN 15      // 摄像头数据引脚D4
#define OV_D5_PIN 16      // 摄像头数据引脚D5
#define OV_D6_PIN 17      // 摄像头数据引脚D6
#define OV_D7_PIN 18      // 摄像头数据引脚D7
#define OV_VSYNC_PIN 47   // 垂直同步信号引脚
#define OV_HREF_PIN 48    // 水平参考信号引脚
#define OV_PCLK_PIN 45    // 像素时钟引脚
#define OV_XCLK_PIN -1    // 外部时钟引脚(未使用,设为-1)
#define OV_RESET_PIN -1   // 复位引脚(未使用)
#define OV_PWDN_PIN -1    // 断电引脚(未使用)
创建一个Web服务器对象,监听80端口:
WebServer server(80);
启用调试输出:
Serial.setDebugOutput(true);
摄像头配置:
camera_config_t camera_config;  // 定义摄像头配置结构体
// 配置LEDC(用于产生XCLK时钟)
camera_config.ledc_channel = LEDC_CHANNEL_0;  // 使用LEDC通道0
camera_config.ledc_timer = LEDC_TIMER_0;      // 使用LEDC定时器0
camera_config.xclk_freq_hz = 20000000;        // 设置XCLK时钟频率为20MHz
摄像头数据引脚配置:
camera_config.pin_d7 = OV_D7_PIN;
camera_config.pin_d6 = OV_D6_PIN;
camera_config.pin_d5 = OV_D5_PIN;
camera_config.pin_d4 = OV_D4_PIN;
camera_config.pin_d3 = OV_D3_PIN;
camera_config.pin_d2 = OV_D2_PIN;
camera_config.pin_d1 = OV_D1_PIN;
camera_config.pin_d0 = OV_D0_PIN;
摄像头控制引脚配置:
  camera_config.pin_xclk = OV_XCLK_PIN;   // 外部时钟引脚(未使用)
  camera_config.pin_pclk = OV_PCLK_PIN;   // 像素时钟引脚
  camera_config.pin_vsync = OV_VSYNC_PIN; // 垂直同步引脚
  camera_config.pin_href = OV_HREF_PIN;   // 水平参考引脚
I2C引脚配置:
  camera_config.pin_sccb_sda = OV_SDA_PIN;  // I2C数据引脚
  camera_config.pin_sccb_scl = OV_SCL_PIN;  // I2C时钟引脚
图像参数配置:
  camera_config.frame_size = FRAMESIZE_QVGA;     // 设置图像分辨率为QVGA(320x240)
  camera_config.pixel_format = PIXFORMAT_JPEG;   // 设置像素格式为JPEG(适合网络传输)
  camera_config.grab_mode = CAMERA_GRAB_WHEN_EMPTY; // 设置抓取模式(当缓冲区为空时抓取)
  camera_config.fb_location = CAMERA_FB_IN_PSRAM;   // 设置帧缓冲区在PSRAM中(如果可用)
图像质量配置:
  camera_config.frame_size = FRAMESIZE_QVGA;     // 设置图像分辨率为QVGA(320x240)
  camera_config.pixel_format = PIXFORMAT_JPEG;   // 设置像素格式为JPEG(适合网络传输)
  camera_config.grab_mode = CAMERA_GRAB_WHEN_EMPTY; // 设置抓取模式(当缓冲区为空时抓取)
  camera_config.fb_location = CAMERA_FB_IN_PSRAM;   // 设置帧缓冲区在PSRAM中(如果可用)
初始化摄像头,如果摄像头初始化失败,会尝试使用DRAM替代PSRAM,如果仍然失败则停止程序:
  esp_err_t err = esp_camera_init(&camera_config);  // 初始化摄像头
  if (err != ESP_OK) {  // 如果初始化失败
    Serial.printf("摄像头初始化失败: 0x%x", err);  // 打印错误信息

    // 尝试使用DRAM替代PSRAM
    camera_config.fb_location = CAMERA_FB_IN_DRAM;  // 将帧缓冲区设置在DRAM中
    err = esp_camera_init(&camera_config);  // 再次尝试初始化
    if (err != ESP_OK) {  // 如果再次失败
      Serial.printf("第二次初始化尝试失败: 0x%x", err);  // 打印错误信息
      while(1) delay(1000);  // 进入死循环,阻止程序继续执行
    }
  }
连接wifi:
  WiFi.begin(ssid, password);  // 连接WiFi
  Serial.print("连接WiFi...");  // 打印连接信息
  int attempts = 0;  // 尝试连接计数器
  // 循环等待WiFi连接,最多尝试20次
  while (WiFi.status() != WL_CONNECTED && attempts < 20) {
    delay(500);      // 等待500ms
    Serial.print("."); // 打印进度点
    attempts++;       // 增加尝试次数
  }

  // 检查是否连接成功
  if (WiFi.status() != WL_CONNECTED) {
    Serial.println("\nWiFi连接失败! 请检查凭证"); // 打印失败信息
    while(1) delay(1000);  // 进入死循环
  }

  // 连接成功
  Serial.println("\nWiFi已连接");
  Serial.print("IP地址: ");
  Serial.println(WiFi.localIP());  // 打印获取到的IP地址
设置web服务器路由:
  // 设置根路径("/")的处理函数
  server.on("/", HTTP_GET, []() {
    // 发送一个简单的HTML页面,包含一个图像元素,其源指向视频流
    server.send(200, "text/html; charset=utf-8",
      "<html>"
        "<head>"
        "<meta charset='UTF-8'>"  // 设置字符集为UTF-8,避免中文乱码
          "<meta name='viewport' content='width=device-width, initial-scale=1'>"
          "<title>ESP32-S3摄像头</title>"
          "<style>"
            "body { margin: 0; background: #333; font-family: Arial, sans-serif; }"
            ".container { max-width: 800px; margin: 0 auto; padding: 20px; }"
            "h1 { color: #fff; text-align: center; margin-bottom: 20px; }"
            "img { display: block; max-width: 100%; height: auto; margin: 0 auto; }"
          "</style>"
        "</head>"
        "<body>"
          "<div class='container'>"
            "<h1>ESP32-S3摄像头监控</h1>"
            "<img src='/stream' alt='视频流'>"
          "</div>"
        "</body>"
      "</html>");
  });
设置视频路由,以MJPEG(Motion JPEG)格式发送实时视频流:
  server.on("/stream", HTTP_GET, []() {
    // 设置响应头,允许跨域请求(*表示任何来源)
    server.sendHeader("Access-Control-Allow-Origin", "*");
    // 设置内容长度为未知(因为视频流是连续的)
    server.setContentLength(CONTENT_LENGTH_UNKNOWN);
    // 发送响应状态码200和内容类型(多部分混合替换,边界为frame)
    server.send(200, "multipart/x-mixed-replace; boundary=frame");

    // 循环发送视频帧
    while (true) {
      camera_fb_t *fb = esp_camera_fb_get();  // 获取一帧图像
      if (!fb) {  // 如果获取失败
        Serial.println("获取帧失败");
        delay(100);
        continue;  // 继续尝试
      }

      // 发送帧边界和内容类型
      server.sendContent("--frame\r\n");
      server.sendContent("Content-Type: image/jpeg\r\n\r\n");
      // 发送图像数据(使用sendContent_P将数据从程序存储器发送)
      server.sendContent_P((char *)fb->buf, fb->len);
      server.sendContent("\r\n");  // 发送换行

      esp_camera_fb_return(fb);  // 释放帧缓冲区
      delay(10); // 控制帧率(通过延迟控制每帧之间的时间)
    }
  });
启动web服务器:
  server.begin();  // 启动Web服务器
  Serial.println("HTTP服务器已启动");
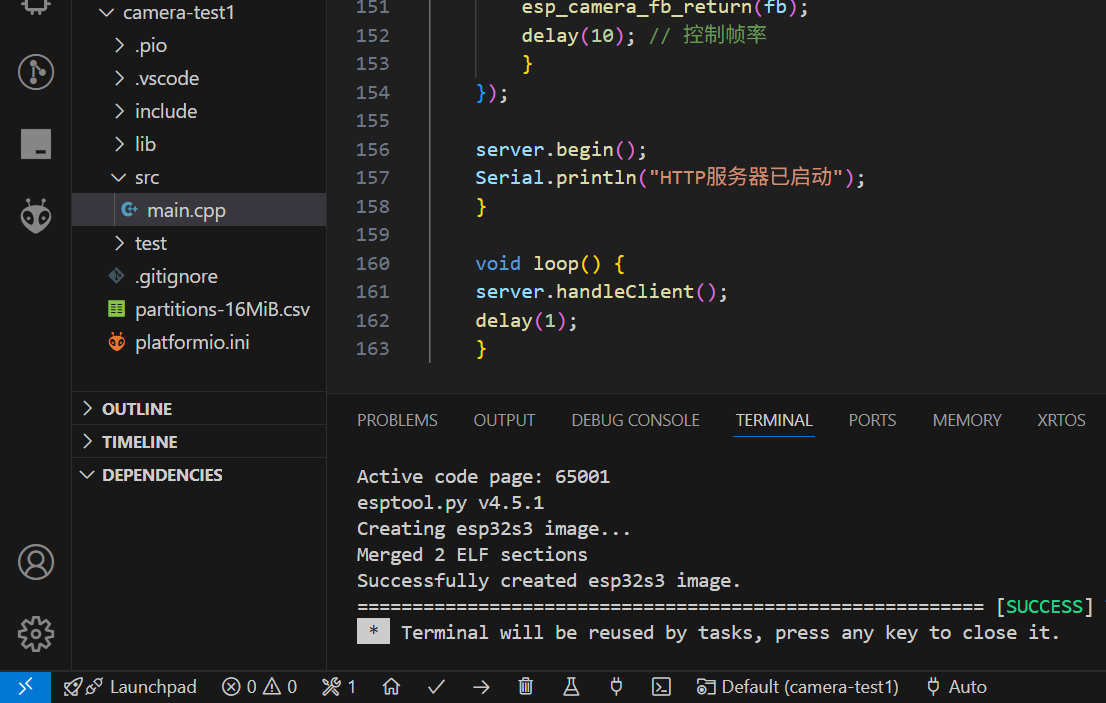
编译:
烧录:
通过浏览器访问:

可能的改进点
-
增加帧率控制:当前使用固定的10ms延迟,可以改为根据实际帧率动态调整
-
添加更多控制功能:如分辨率切换、亮度调整等
-
改进错误处理:添加更多错误信息,帮助诊断问题
-
添加身份验证:保护视频流访问
-
优化HTML界面:添加更多信息和控件,如帧率显示、快照功能等


 5647
5647

 被折叠的 条评论
为什么被折叠?
被折叠的 条评论
为什么被折叠?
 到【灌水乐园】发言


