文章的目的为了记录使用Objective-C 进行IOS app 开发学习的经历。本职为嵌入式软件开发,公司安排开发app,临时学习,完成app的开发。开发流程和要点有些记忆模糊,赶紧记录,防止忘记。
相关链接:
开源 Objective-C IOS 应用开发(一)macOS 的使用
开源 Objective-C IOS 应用开发(二)Xcode安装
开源 Objective-C IOS 应用开发(三)第一个iPhone的APP
开源 Objective-C IOS 应用开发(四)Xcode工程文件结构
开源 Objective-C IOS 应用开发(五)iOS操作(action)和输出口(Outlet)
开源 Objective-C IOS 应用开发(六)Objective-C 和 C语言
开源 Objective-C IOS 应用开发(七)Objective-C核心代码示例
开源 Objective-C IOS 应用开发(八)常见控件UI
开源 Objective-C IOS 应用开发(九)复杂控件-tableview
开源 Objective-C IOS 应用开发(十)数据持久化--文件
开源 Objective-C IOS 应用开发(十一)数据持久化--sqlite
开源 Objective-C IOS 应用开发(十二)通讯--ble
开源 Objective-C IOS 应用开发(十三)通讯--Http访问
开源 Objective-C IOS 应用开发(十四)传感器--陀螺仪和gps
开源 Objective-C IOS 应用开发(十五)通讯--蓝牙ble扫描
开源 Objective-C IOS 应用开发(十六)Storyboard模式下的纯代码界面
开源 Objective-C IOS 应用开发(十七)CAF音频的录制
开源 Objective-C IOS 应用开发(十八)音频的播放
开源 Objective-C IOS 应用开发(十九)视频的播放
开源 Objective-C IOS 应用开发(二十)多线程处理
开源 Objective-C IOS 应用开发(二十一)自定义控件--示波器
开源 Objective-C IOS 应用开发(二十二)自定义控件--车速仪表盘
推荐链接:
开源 Arkts 鸿蒙应用 开发(一)工程文件分析-优快云博客
开源 Arkts 鸿蒙应用 开发(二)封装库.har制作和应用-优快云博客
开源 Arkts 鸿蒙应用 开发(三)Arkts的介绍-优快云博客
开源 Arkts 鸿蒙应用 开发(四)布局和常用控件-优快云博客
开源 Arkts 鸿蒙应用 开发(五)控件组成和复杂控件-优快云博客
开源 Arkts 鸿蒙应用 开发(六)数据持久--文件和首选项存储-优快云博客
开源 Arkts 鸿蒙应用 开发(七)数据持久--sqlite关系数据库-优快云博客
开源 Arkts 鸿蒙应用 开发(八)多媒体--相册和相机-优快云博客
开源 Arkts 鸿蒙应用 开发(九)通讯--tcp客户端-优快云博客
开源 Arkts 鸿蒙应用 开发(十)通讯--Http-优快云博客
开源 Arkts 鸿蒙应用 开发(十一)证书和包名修改-优快云博客
开源 Arkts 鸿蒙应用 开发(十二)传感器的使用-优快云博客
开源 Arkts 鸿蒙应用 开发(十三)音频--MP3播放_arkts avplayer播放音频 mp3-优快云博客
开源 Arkts 鸿蒙应用 开发(十四)线程--任务池(taskpool)-优快云博客
开源 Arkts 鸿蒙应用 开发(十五)自定义绘图控件--仪表盘-优快云博客
开源 Arkts 鸿蒙应用 开发(十六)自定义绘图控件--波形图-优快云博客
开源 Arkts 鸿蒙应用 开发(十七)通讯--http多文件下载-优快云博客
开源 Arkts 鸿蒙应用 开发(十八)通讯--Ble低功耗蓝牙服务器-优快云博客
推荐链接:
开源 java android app 开发(一)开发环境的搭建-优快云博客
开源 java android app 开发(二)工程文件结构-优快云博客
开源 java android app 开发(三)GUI界面布局和常用组件-优快云博客
开源 java android app 开发(四)GUI界面重要组件-优快云博客
开源 java android app 开发(五)文件和数据库存储-优快云博客
开源 java android app 开发(六)多媒体使用-优快云博客
开源 java android app 开发(七)通讯之Tcp和Http-优快云博客
开源 java android app 开发(八)通讯之Mqtt和Ble-优快云博客
开源 java android app 开发(九)后台之线程和服务-优快云博客
开源 java android app 开发(十)广播机制-优快云博客
开源 java android app 开发(十一)调试、发布-优快云博客
开源 java android app 开发(十二)封库.aar-优快云博客
本章内容主要介绍在storyboard模式下使用objective-c创建界面的方法,纯代码编写需要做很多关于storyboard窗口的配置,一不小心就出错,这里做个记录,方便以后简单处理。
目录:
1.手机演示
2.所有源码
3.源码分析
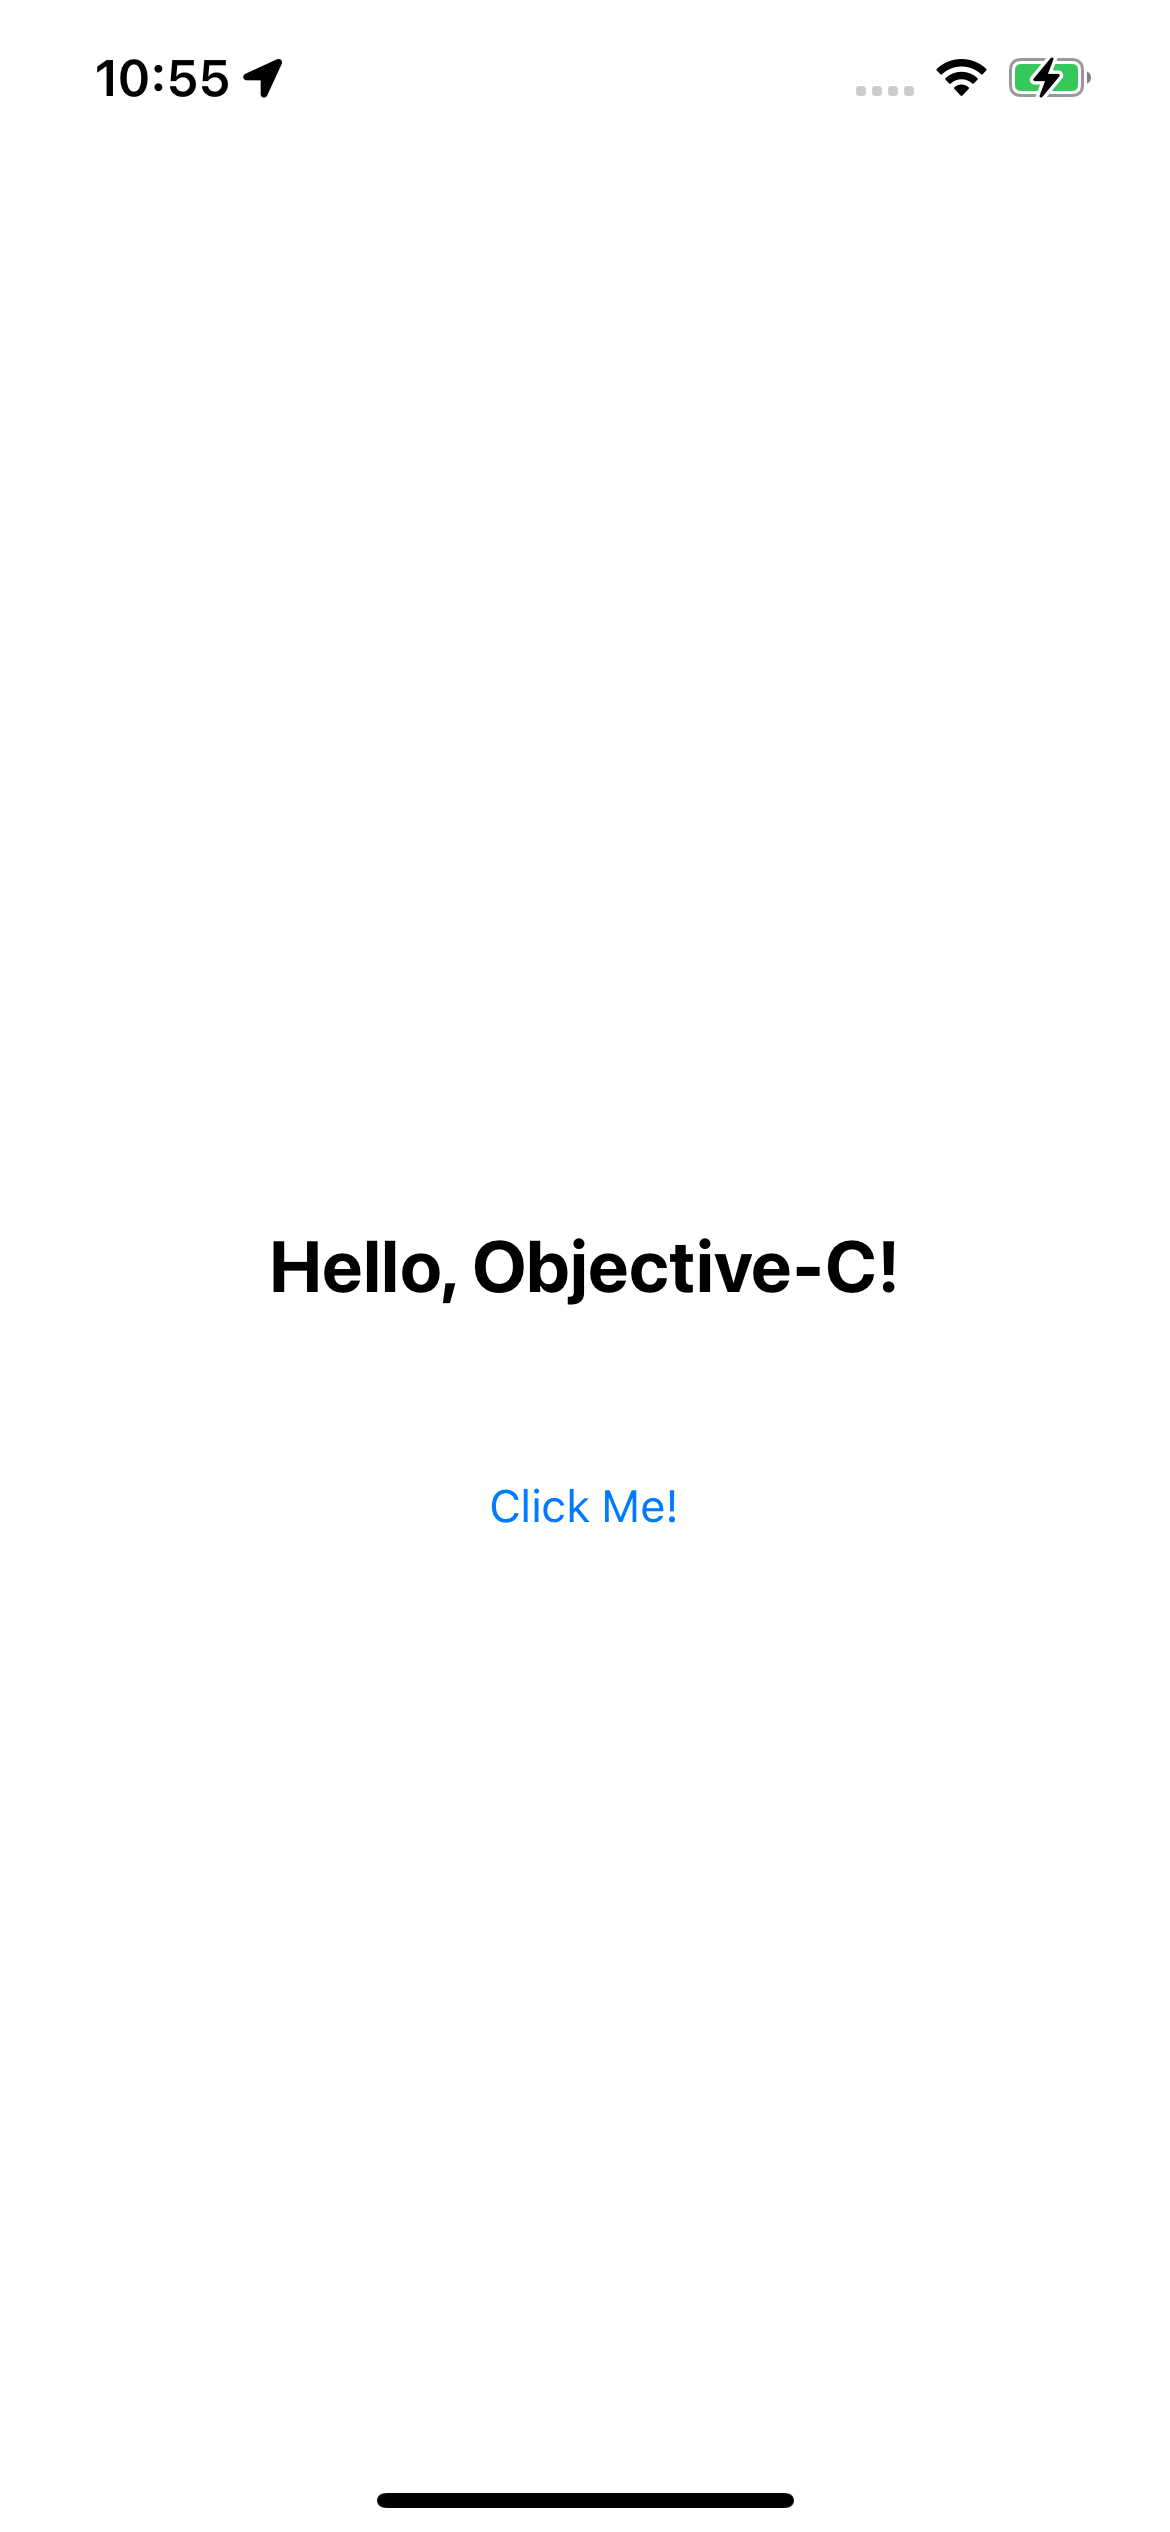
一、手机演示

二、所有源码
#import <UIKit/UIKit.h>

@interface AppDelegate : UIResponder <UIApplicationDelegate>

@property (strong, nonatomic) UIWindow *window;

@end
#import "AppDelegate.h"
#import "YourViewController.h" // 记得导入头文件

@interface AppDelegate ()

@end

@implementation AppDelegate

- (BOOL)application:(UIApplication *)application didFinishLaunchingWithOptions:(NSDictionary *)launchOptions {
    self.window = [[UIWindow alloc] initWithFrame:[UIScreen mainScreen].bounds];

    // 创建你的根视图控制器
    YourViewController *rootVC = [[YourViewController alloc] init];
    self.window.rootViewController = rootVC;

    [self.window makeKeyAndVisible];
    return YES;
}

// ... 其他 AppDelegate 方法保持不变
@end
#import <UIKit/UIKit.h>

@interface YourViewController : UIViewController

@end
#import "YourViewController.h"

@interface YourViewController ()

@end

@implementation YourViewController

- (void)viewDidLoad {
    [super viewDidLoad];

    // 设置背景颜色
    self.view.backgroundColor = [UIColor whiteColor];

    // 创建一个测试标签
    UILabel *testLabel = [[UILabel alloc] initWithFrame:CGRectMake(0, 0, 300, 50)];
    testLabel.center = self.view.center;
    testLabel.text = @"Hello, Objective-C!";
    testLabel.textAlignment = NSTextAlignmentCenter;
    testLabel.textColor = [UIColor blackColor];
    testLabel.font = [UIFont systemFontOfSize:24 weight:UIFontWeightBold];

    [self.view addSubview:testLabel];

    // 创建一个按钮
    UIButton *testButton = [UIButton buttonWithType:UIButtonTypeSystem];
    testButton.frame = CGRectMake(0, 0, 200, 50);
    testButton.center = CGPointMake(self.view.center.x, self.view.center.y + 80);
    [testButton setTitle:@"Click Me!" forState:UIControlStateNormal];
    [testButton addTarget:self action:@selector(buttonTapped) forControlEvents:UIControlEventTouchUpInside];

    [self.view addSubview:testButton];
}

- (void)buttonTapped {
    UIAlertController *alert = [UIAlertController alertControllerWithTitle:@"Hello!"
                                                                   message:@"Button clicked successfully!"
                                                            preferredStyle:UIAlertControllerStyleAlert];

    UIAlertAction *okAction = [UIAlertAction actionWithTitle:@"OK"
                                                     style:UIAlertActionStyleDefault
                                                   handler:nil];
    [alert addAction:okAction];

    [self presentViewController:alert animated:YES completion:nil];
}

@end
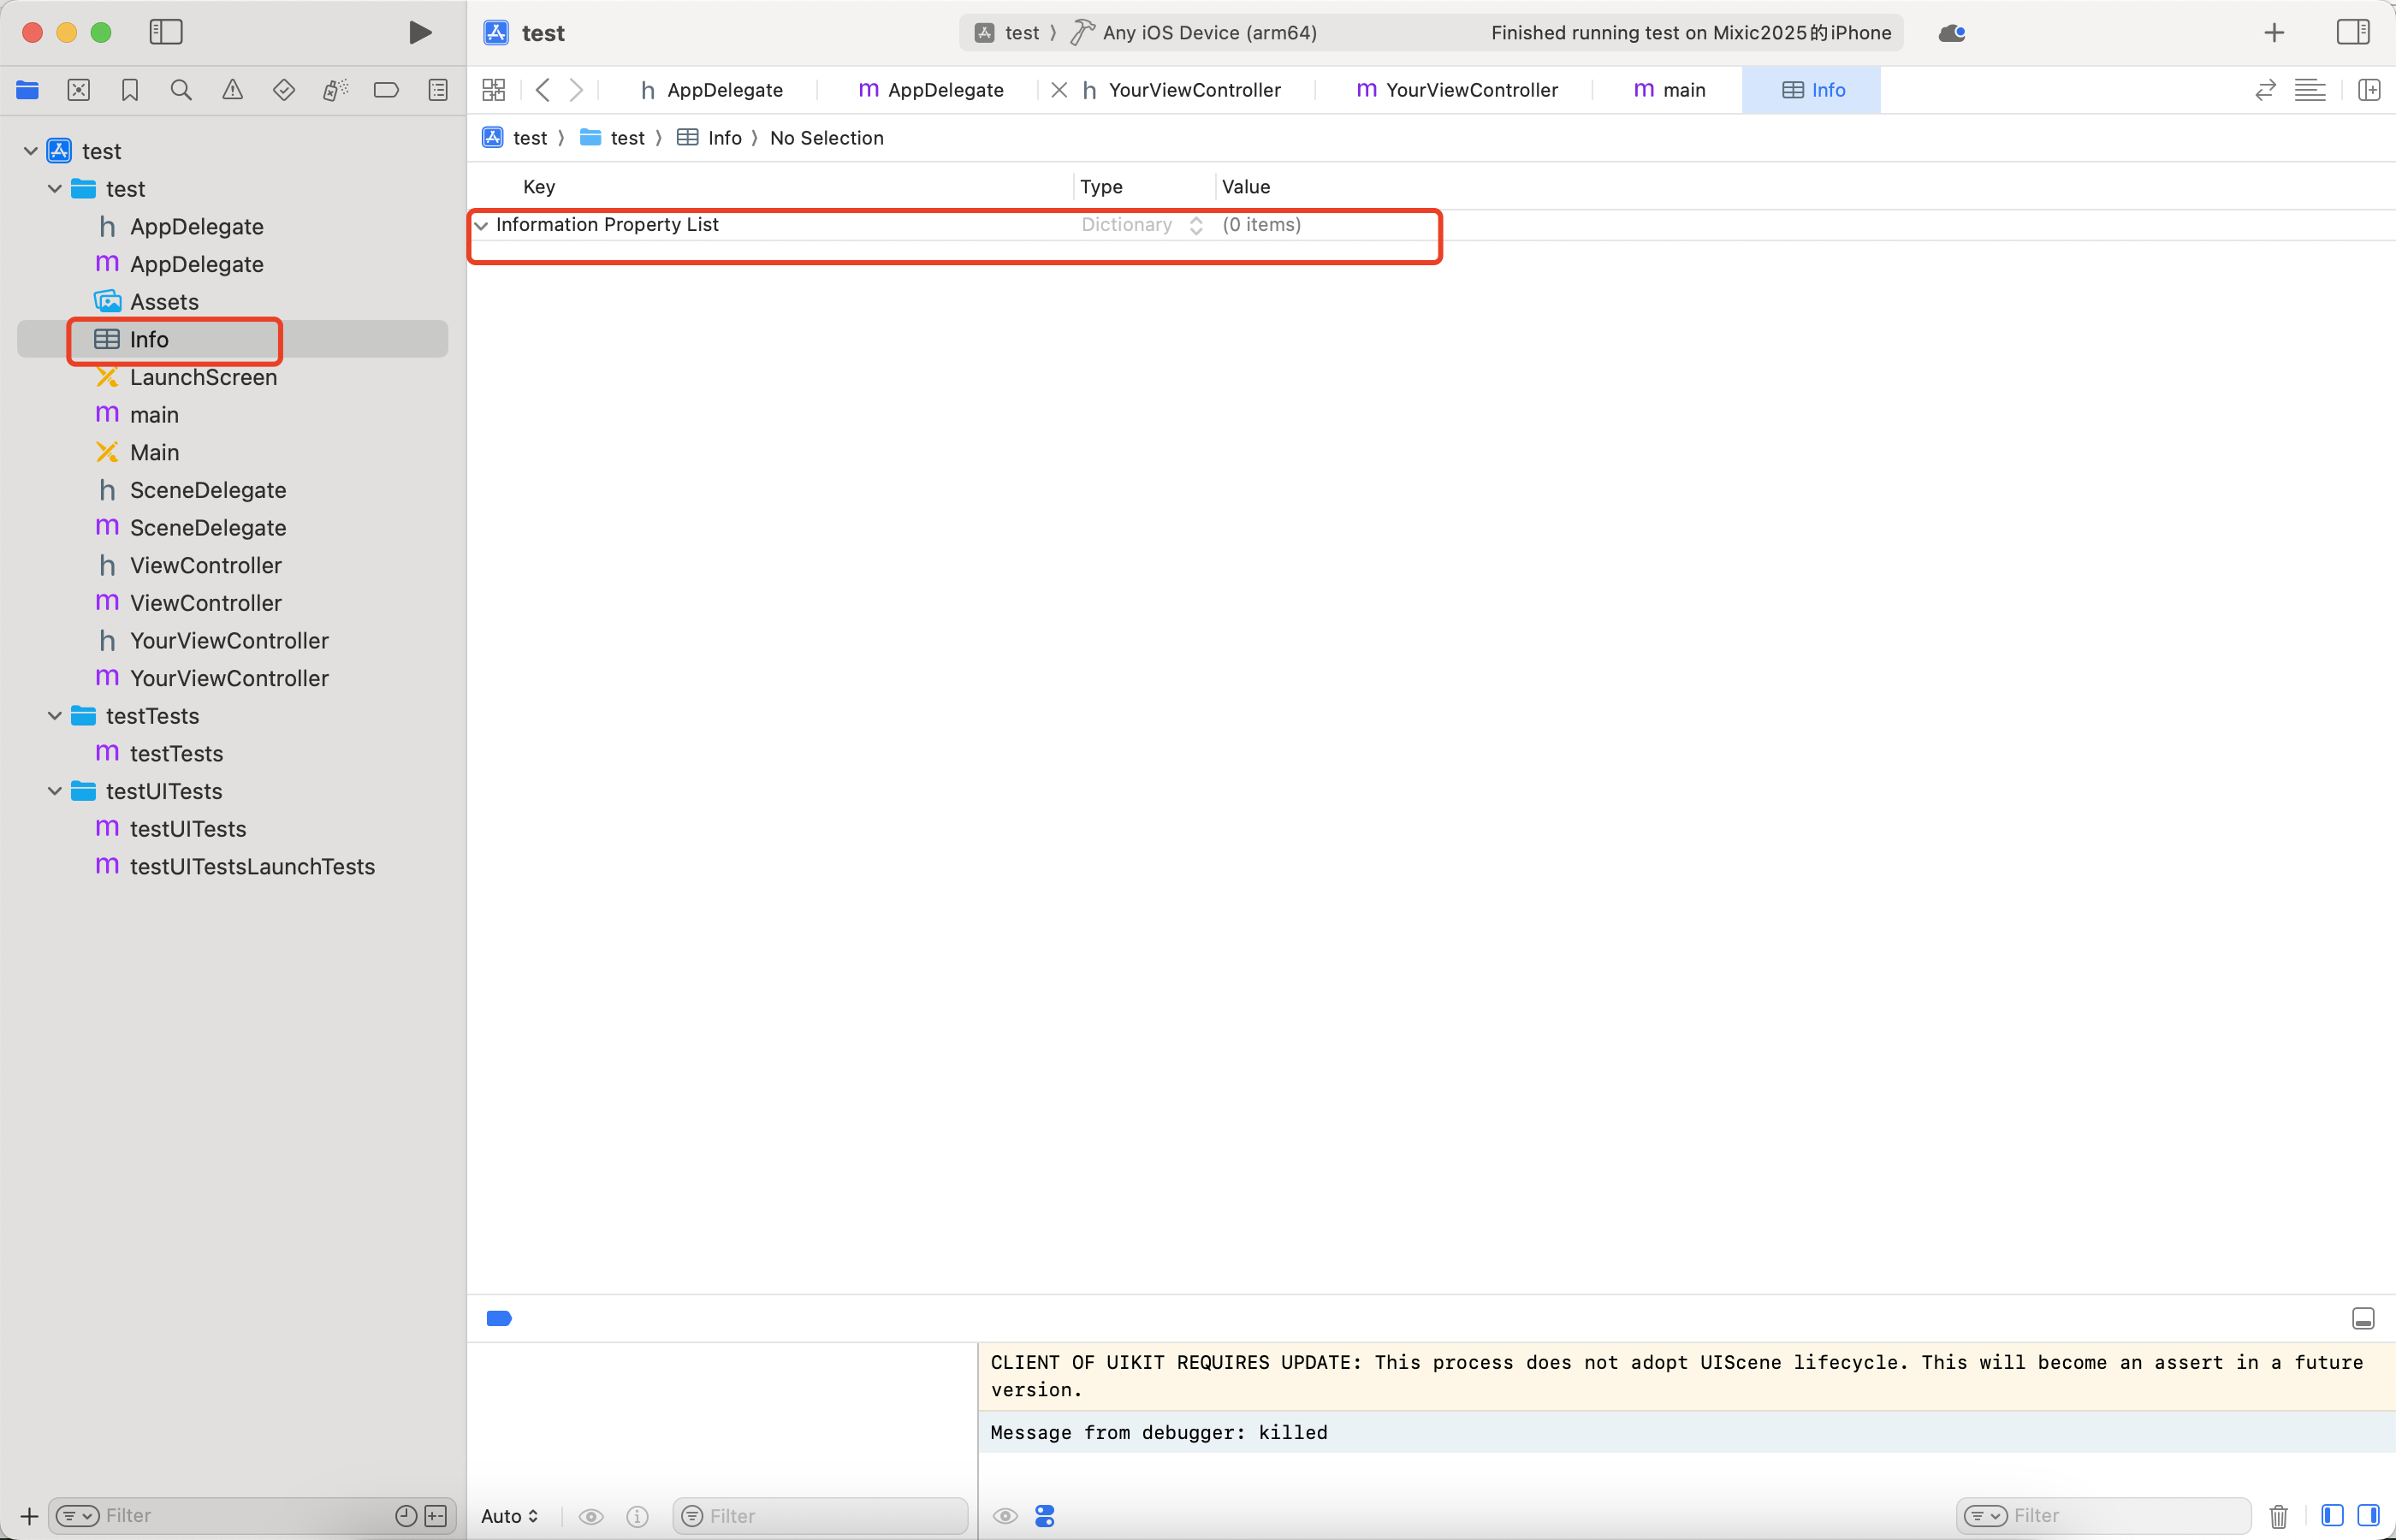
info.plist需要删除默认配置的窗口

三、源码分析
1. AppDelegate.h
@interface AppDelegate : UIResponder <UIApplicationDelegate>
@property (strong, nonatomic) UIWindow *window;
@end-
声明了
UIWindow属性,这是应用的顶级窗口容器
2. AppDelegate.m - 核心配置
- (BOOL)application:(UIApplication *)application didFinishLaunchingWithOptions:(NSDictionary *)launchOptions {
    // 1. 创建窗口
    self.window = [[UIWindow alloc] initWithFrame:[UIScreen mainScreen].bounds];

    // 2. 创建根视图控制器
    YourViewController *rootVC = [[YourViewController alloc] init];
    self.window.rootViewController = rootVC;

    // 3. 显示窗口
    [self.window makeKeyAndVisible];
    return YES;
}
关键步骤解析:
-
initWithFrame:[UIScreen mainScreen].bounds- 创建与屏幕尺寸相同的窗口 -
设置
rootViewController- 指定应用的根视图控制器 -
makeKeyAndVisible- 使窗口成为主窗口并显示
3. YourViewController - 自定义界面
- (void)viewDidLoad {
    [super viewDidLoad];

    // 设置背景
    self.view.backgroundColor = [UIColor whiteColor];

    // 创建并配置 UILabel
    UILabel *testLabel = [[UILabel alloc] initWithFrame:CGRectMake(0, 0, 300, 50)];
    testLabel.center = self.view.center;
    testLabel.text = @"Hello, Objective-C!";

    // 创建并配置 UIButton
    UIButton *testButton = [UIButton buttonWithType:UIButtonTypeSystem];
    [testButton addTarget:self action:@selector(buttonTapped) forControlEvents:UIControlEventTouchUpInside];
}
推荐的最佳实践
使用 viewDidLoad 的情况:
-
创建和添加子视图
-
设置初始的静态内容
-
配置导航栏、工具栏
-
注册通知、KVO
使用 viewWillAppear: 的情况:
-
更新动态显示的数据
-
开始/停止动画
-
显示/隐藏界面元素
-
刷新表格、集合视图
使用 viewDidLayoutSubviews 的情况:
-
基于自动布局后的最终frame进行调整
-
复杂的自定义布局计算
完整示例:分散配置
@implementation YourViewController {
    UILabel *_staticLabel;
    UILabel *_dynamicLabel;
}

- (void)viewDidLoad {
    [super viewDidLoad];

    // 创建静态标签
    _staticLabel = [[UILabel alloc] initWithFrame:CGRectMake(20, 100, 200, 30)];
    _staticLabel.text = @"这是静态内容";
    [self.view addSubview:_staticLabel];

    // 创建动态标签(先不设置内容)
    _dynamicLabel = [[UILabel alloc] initWithFrame:CGRectMake(20, 150, 200, 30)];
    [self.view addSubview:_dynamicLabel];
}

- (void)viewWillAppear:(BOOL)animated {
    [super viewWillAppear:animated];

    // 更新动态内容
    _dynamicLabel.text = [NSString stringWithFormat:@"当前时间: %@", [NSDate date]];
}

@end


 503
503

 被折叠的 条评论
为什么被折叠?


