


 该博客聚焦CSharp进阶知识点学习,涵盖简单数据结构类、泛型、常用泛型数据结构类等内容,介绍了ArrayList、Stack、Queue等多种数据结构,还涉及委托和事件、List排序、协变逆变、多线程等知识,最后提及排序进阶及后续学习计划。
CSharp进阶知识点学习
知识点汇总
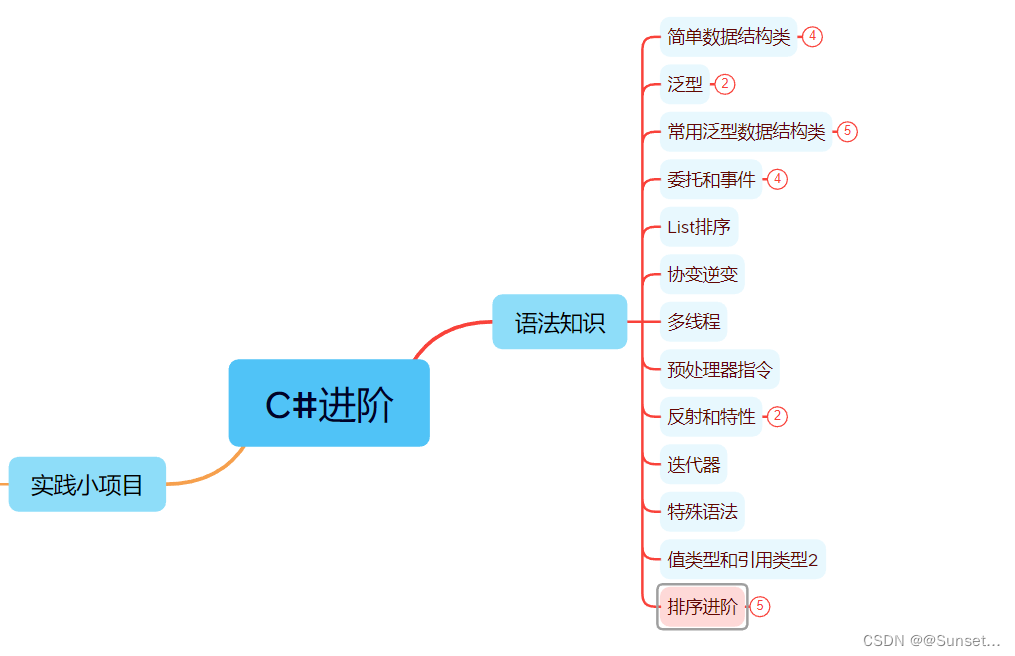
简单数据结构类:
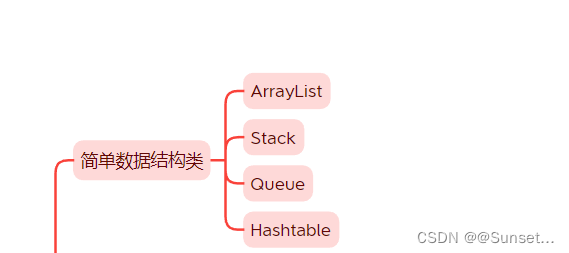
Lesson1:ArrayList
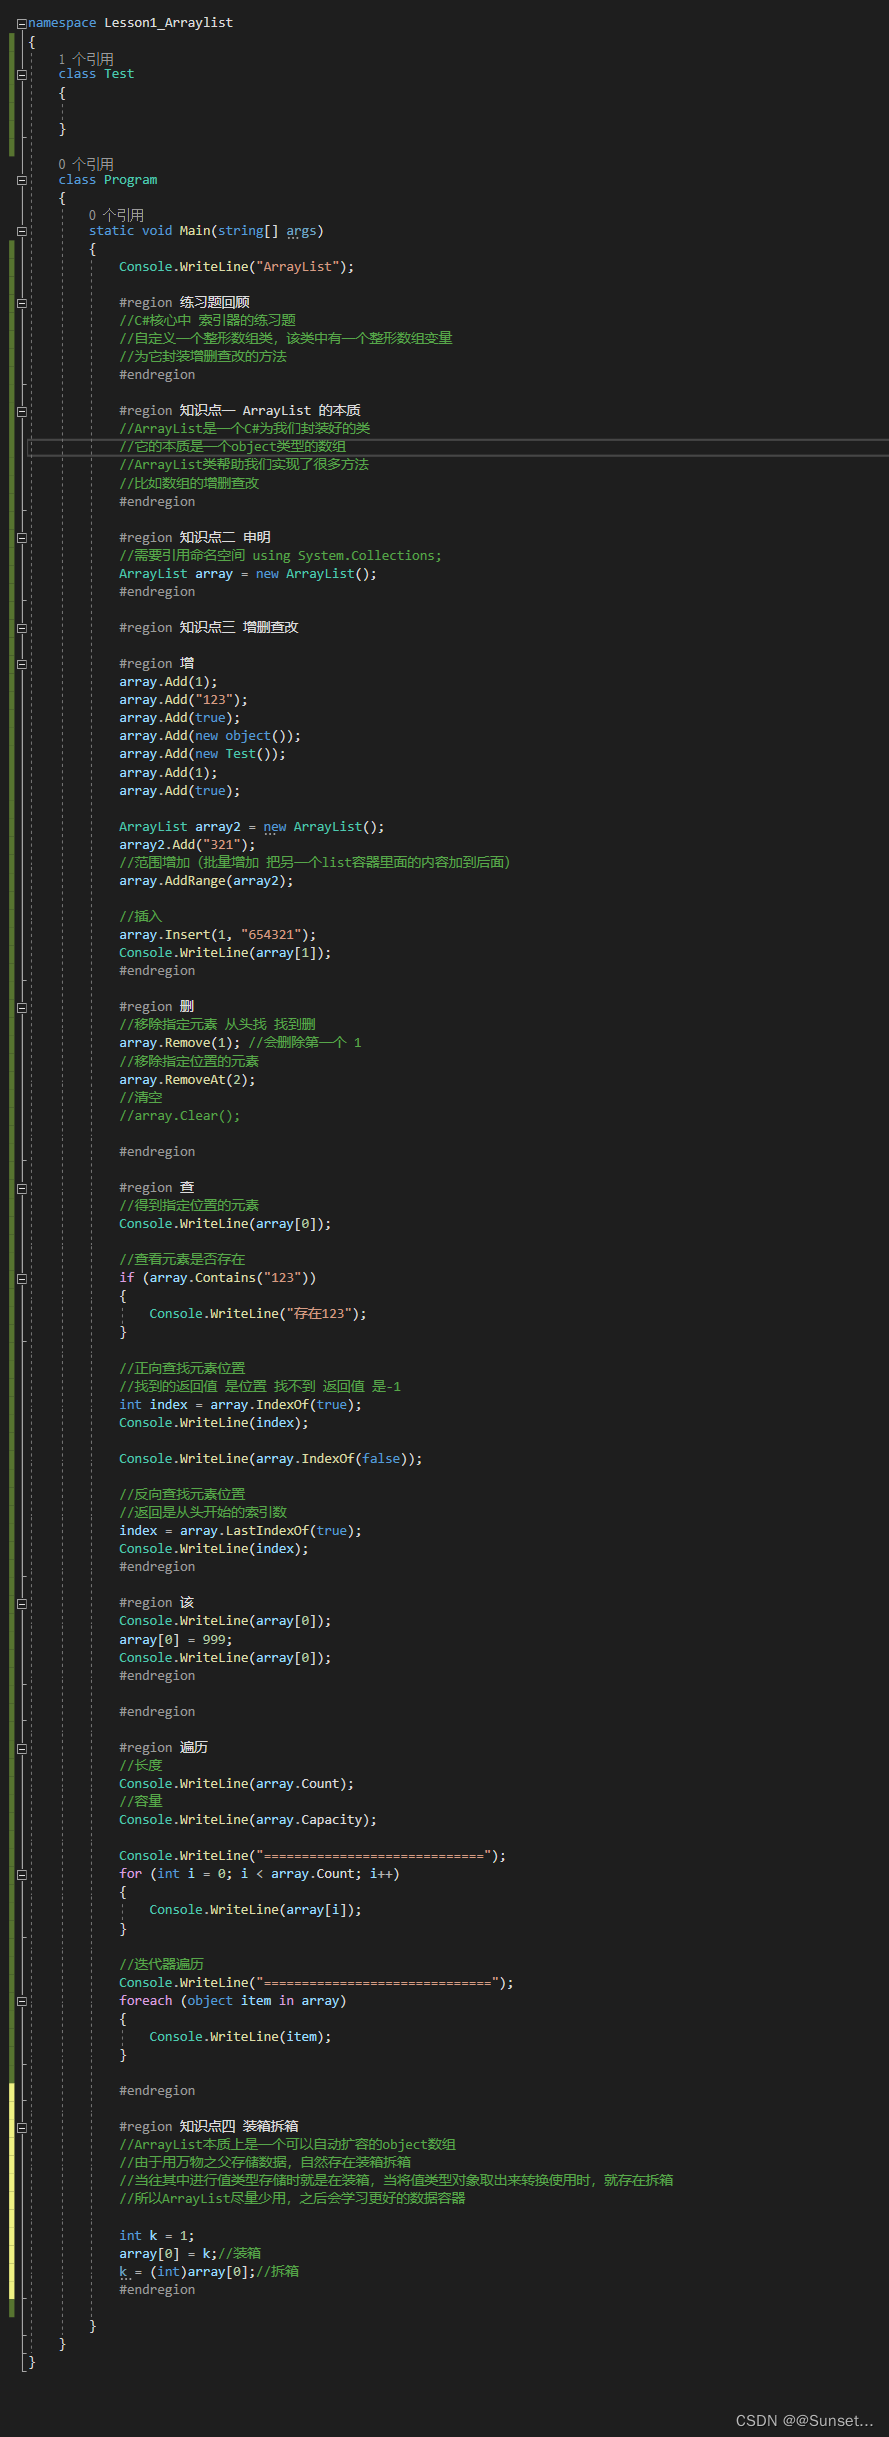
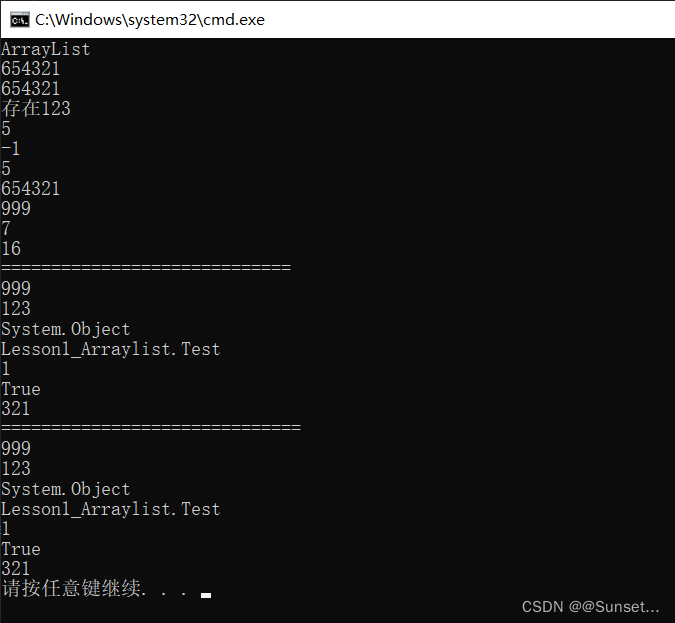
练习:
using System;
using System.Collections;
using System.Collections.Generic;
using System.Linq;
using System.Text;
using System.Threading.Tasks;
namespace Lesson1_练习
{
#region 练习一
//请简述ArrayList 和 数组的区别
//1.ArrayList本质上是一个object数组的封装
//2.数组可以指定存储类型,ArrayList默认为object类型
//3.数组的增删查改需要我们自己去实现,ArrayList帮我们封装好了方便的API来使用
//4.ArrayList使用时可能存在装箱拆箱,数组使用时只要不是object数组就不存在这个问题
//5.数组长度用Length,ArrayList长度用Count
#endregion
#region 练习二
//创建一个背包管理类,使用ArrayList存储物品
//实现购买物品,卖出物品,显示物品的功能,购买与卖出物品会导致金钱变化
class BagMgr
{
//背包中的物品
private ArrayList items;
private int money;
public BagMgr(int money)
{
this.money = money;
items = new ArrayList();
}
//买物品
public void BuyItem(Item item)
{
//避免乱传
if (item.num <= 0 || item.money < 0)
{
Console.WriteLine("请传入正确的物品信息。");
return;
}
if (money < item.money * item.num)
{
Console.WriteLine("买不起,钱不够。");
return;
}
//若是钱够就减钱
money -= item.money * item.num;
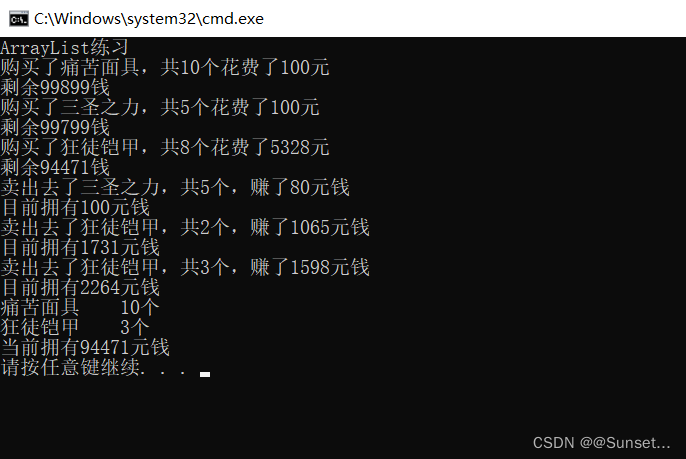
Console.WriteLine("购买了{0},共{1}个花费了{2}元",item.name, item.num, item.money*item.num);
Console.WriteLine("剩余{0}钱",money);
//如果想要叠加物品 可以在前面先判断 是否有这个物品 然后加数量
for (int i = 0; i < items.Count; i++)
{
if ((items[i] as Item).id == item.id)
{
(items[i] as Item).num += item.num;
return;
}
}
//把一组物品加到 list中
items.Add(item);
}
//卖出物品
public void SellItem(Item item)
{
for (int i = 0; i < items.Count; i++)
{
//如何判断 卖的东西背包里有没有
//这是在判断 两个引用地址 指向的是不是同一个房间地址
//所以我们要判断 卖的物品 一般不这样判断
//if ((items[i] as Item) == item)
//{
//}
if ((items[i] as Item).id == item.id)
{
//两种情况
int num = 0;
string name = (items[i] as Item).name;
int money = (items[i] as Item).money;
if ((items[i] as Item).num > item.num)
{
//1.比我身上的少
num = item.num;
(items[i] as Item).num -= num;
}
else
{
//2.大于等于我身上的东西数量
num = (items[i] as Item).num;
//卖完了就移除
items.RemoveAt(i);
}
int sellMoney = (int)(num * money * 0.8f);
money += sellMoney;
Console.WriteLine("卖出去了{0},共{1}个,赚了{2}元钱", name, num, sellMoney);
Console.WriteLine("目前拥有{0}元钱",money);
return;
}
}
}
public void SellItem(int id, int num)
{
//调用一下上面的方法
Item item = new Item(id, num);
SellItem(item);
}
public void SellItem(string name)
{
}
//显示物品
public void ShowItem()
{
Item item;
for (int i = 0; i < items.Count; i++)
{
item = items[i] as Item;
Console.WriteLine("{0} {1}个", item.name, item.num);
}
Console.WriteLine("当前拥有{0}元钱", money);
}
}
class Item
{
//物品唯一ID 来区分物品的种类
public int id;
//物品值多少钱(表示单价)
public int money;
//物品名字
public string name;
//物品数量
public int num;
public Item(int id, int num)
{
this.id = id;
this.num = num;
}
public Item(int id, int money, string name, int num)
{
this.id = id;
this.money = money;
this.name = name;
this.num = num;
}
}
#endregion
class Program
{
static void Main(string[] args)
{
Console.WriteLine("ArrayList练习");
BagMgr bag = new BagMgr(99999);
Item i1 = new Item(1, 10, "痛苦面具", 10);
Item i2 = new Item(2, 20, "三圣之力", 5);
Item i3 = new Item(3, 666, "狂徒铠甲", 8);
bag.BuyItem(i1);
bag.BuyItem(i2);
bag.BuyItem(i3);
bag.SellItem(i2);
bag.SellItem(3, 2);
bag.SellItem(3, 3);
bag.ShowItem();
}
}
}
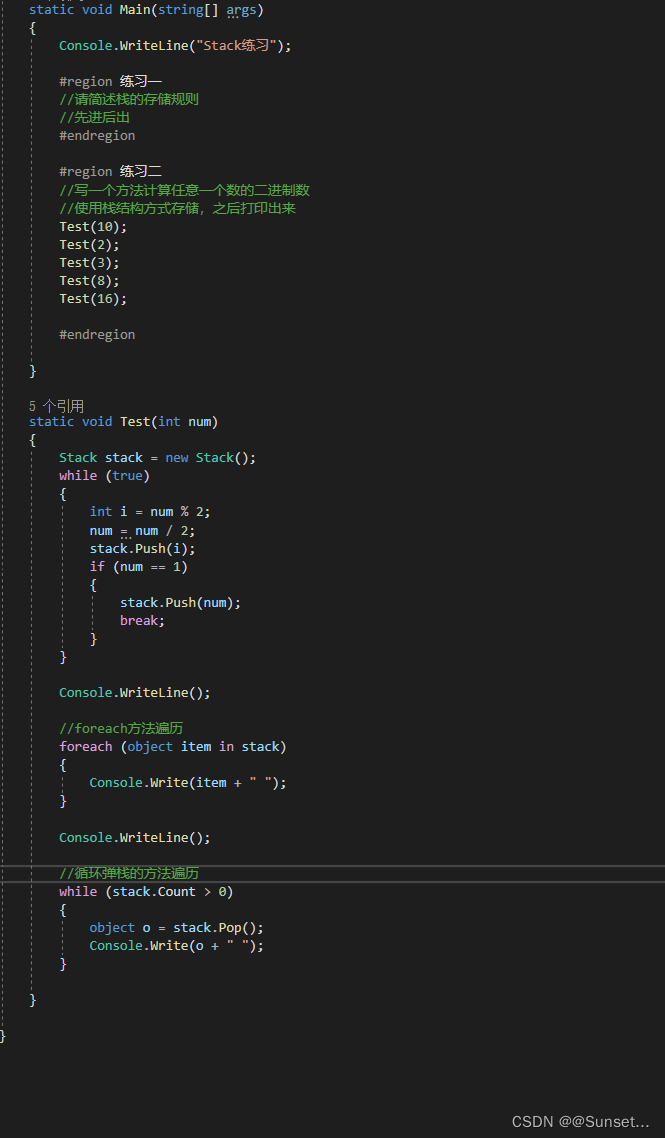
Lesson2:Stack


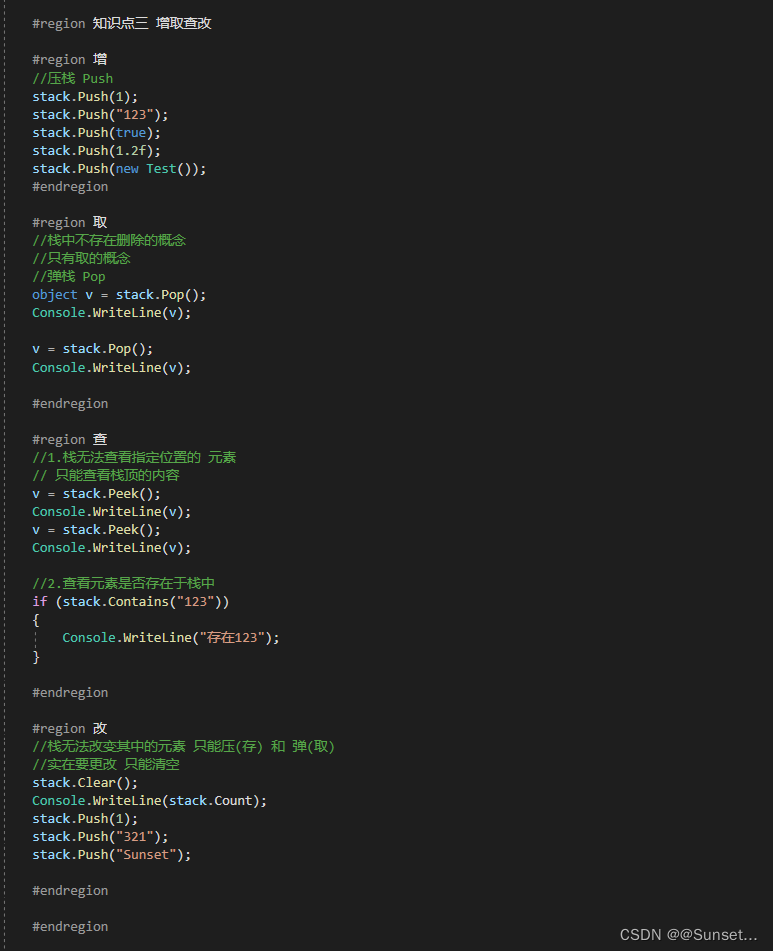
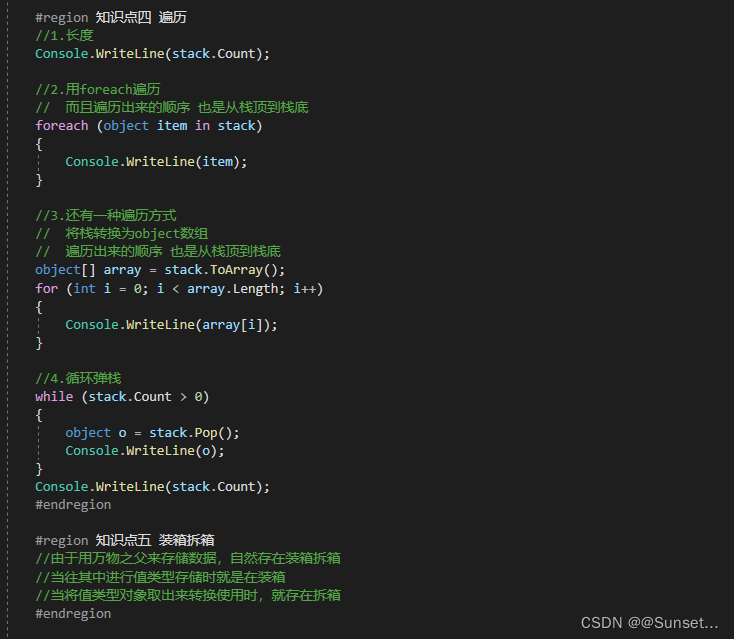

练习:

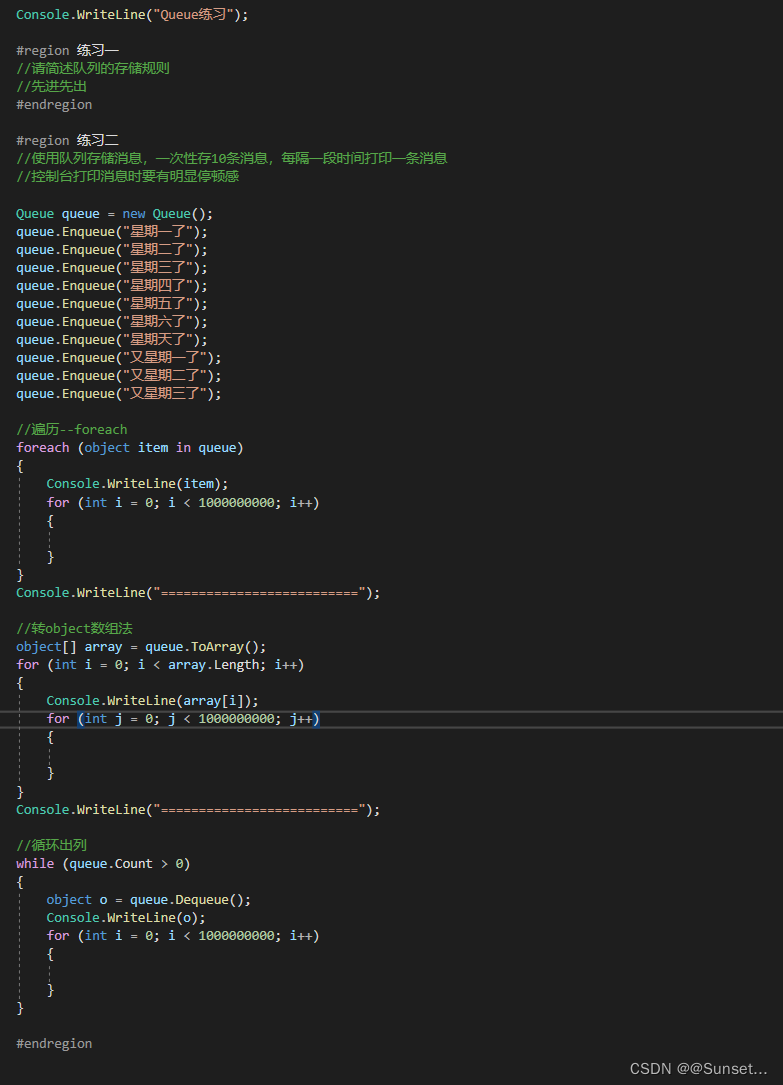
Lesson3:Queue(队列)
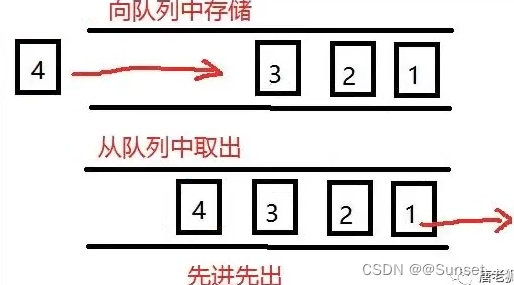
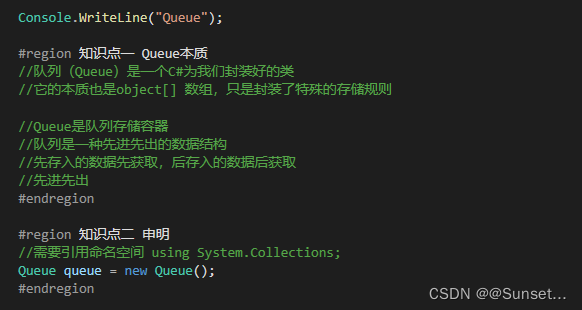
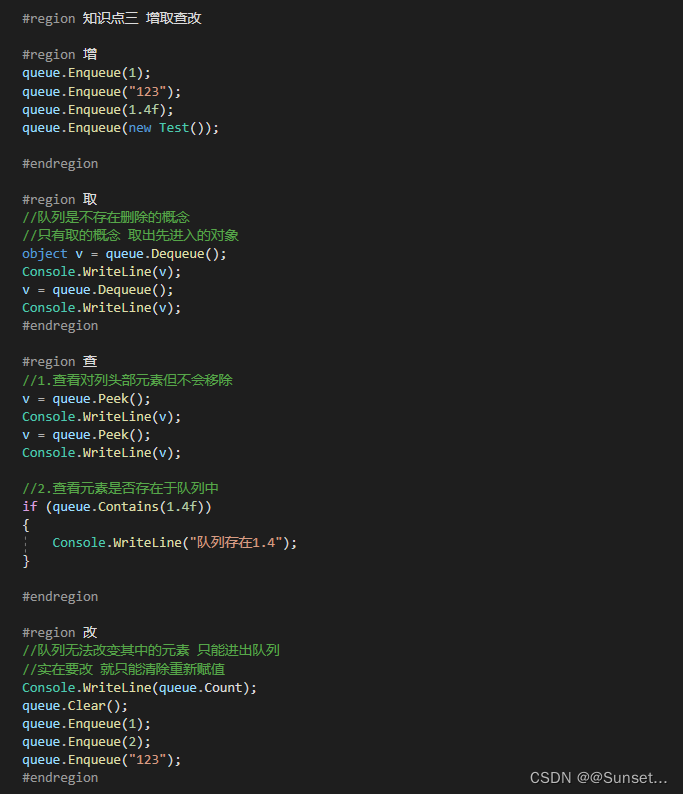
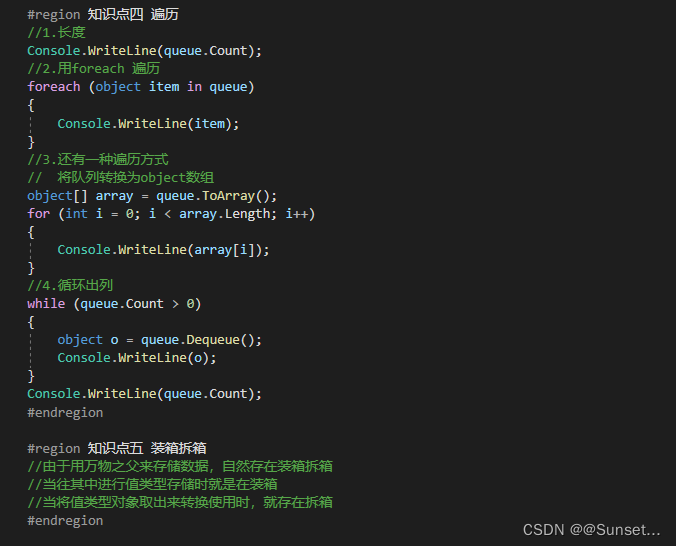
练习:
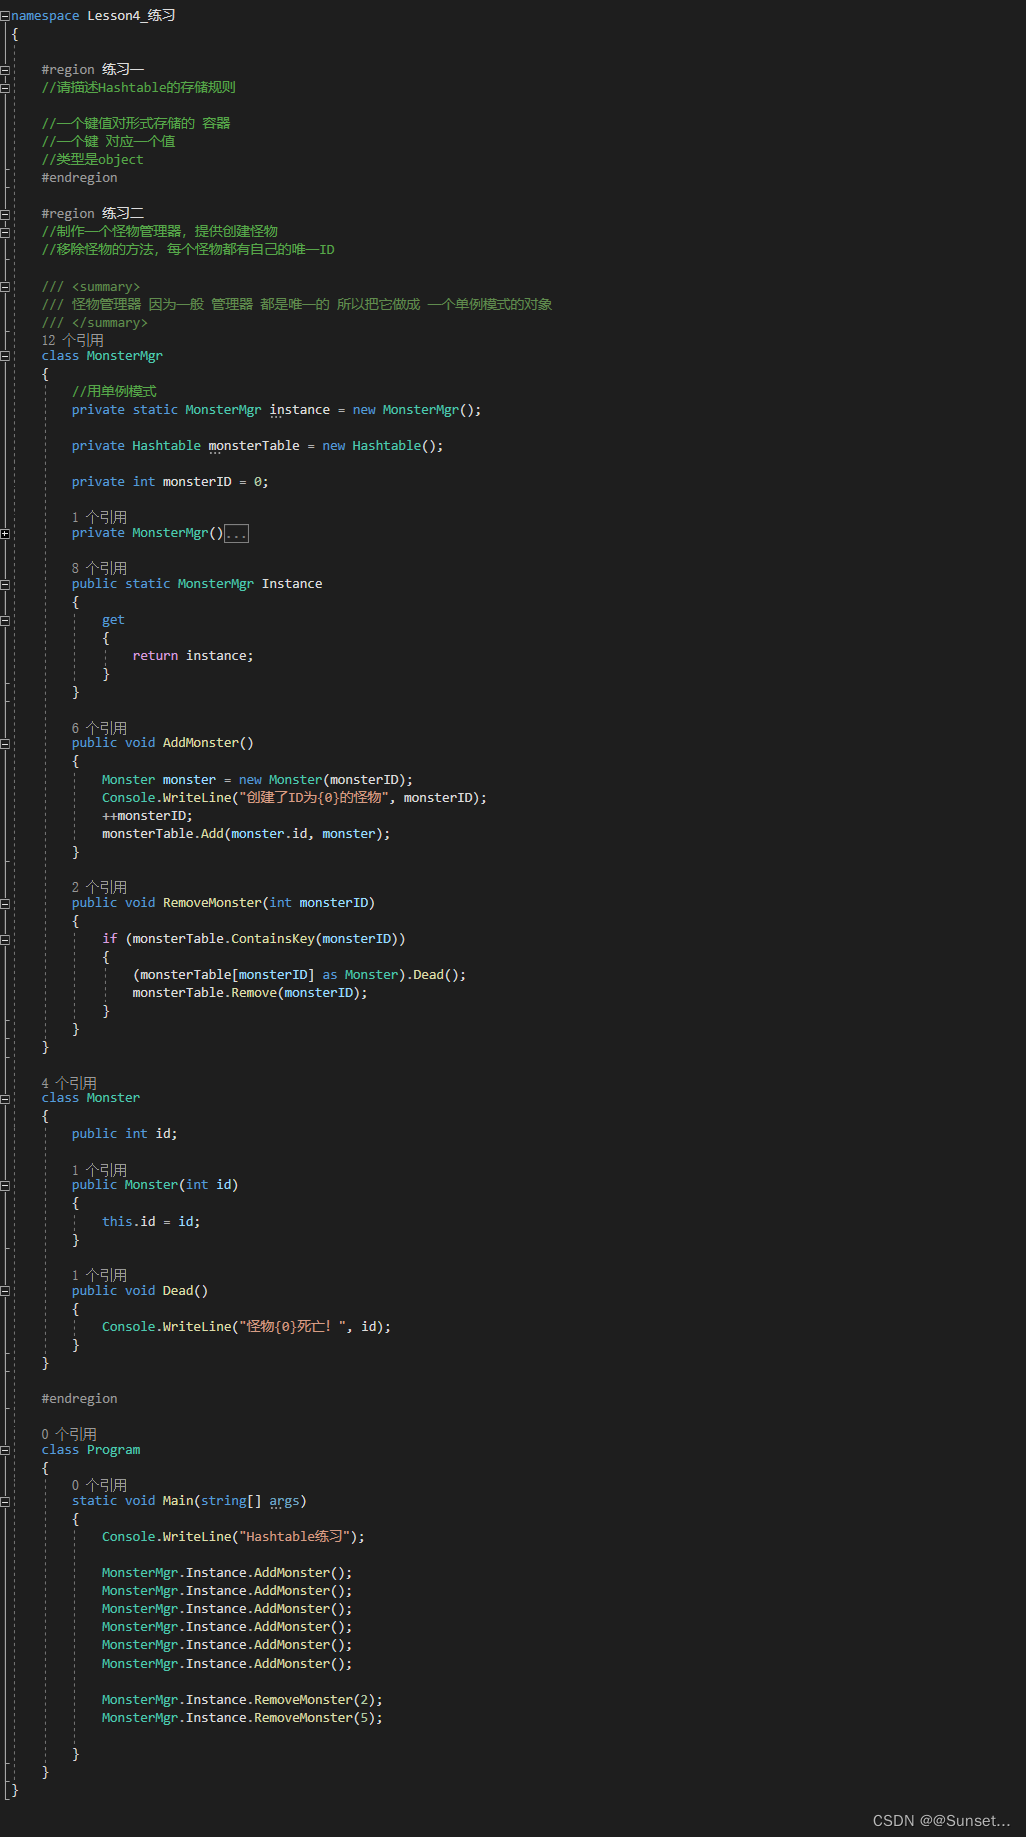
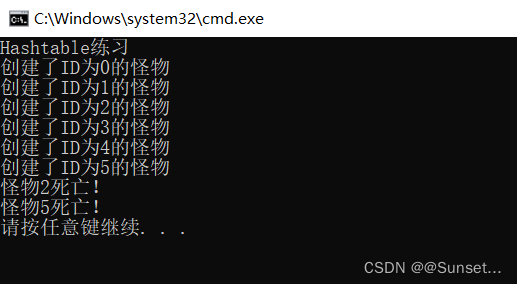
Lesson4:Hashtable
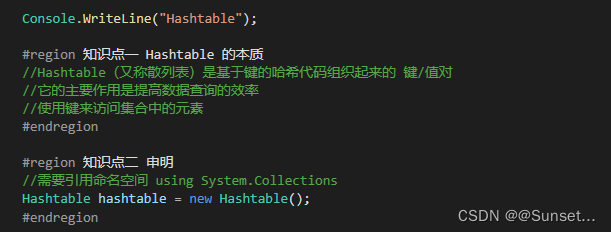


练习:
用到了单例模式
泛型:
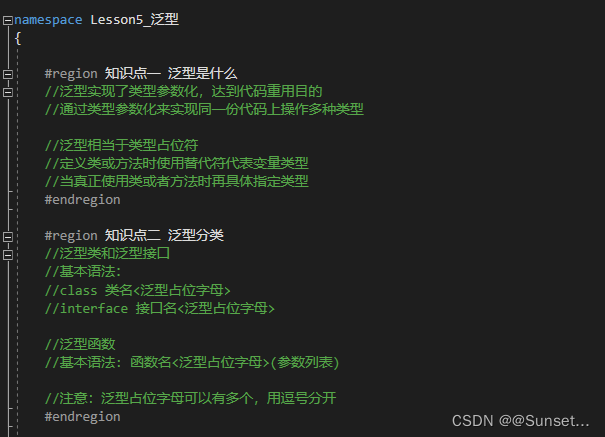
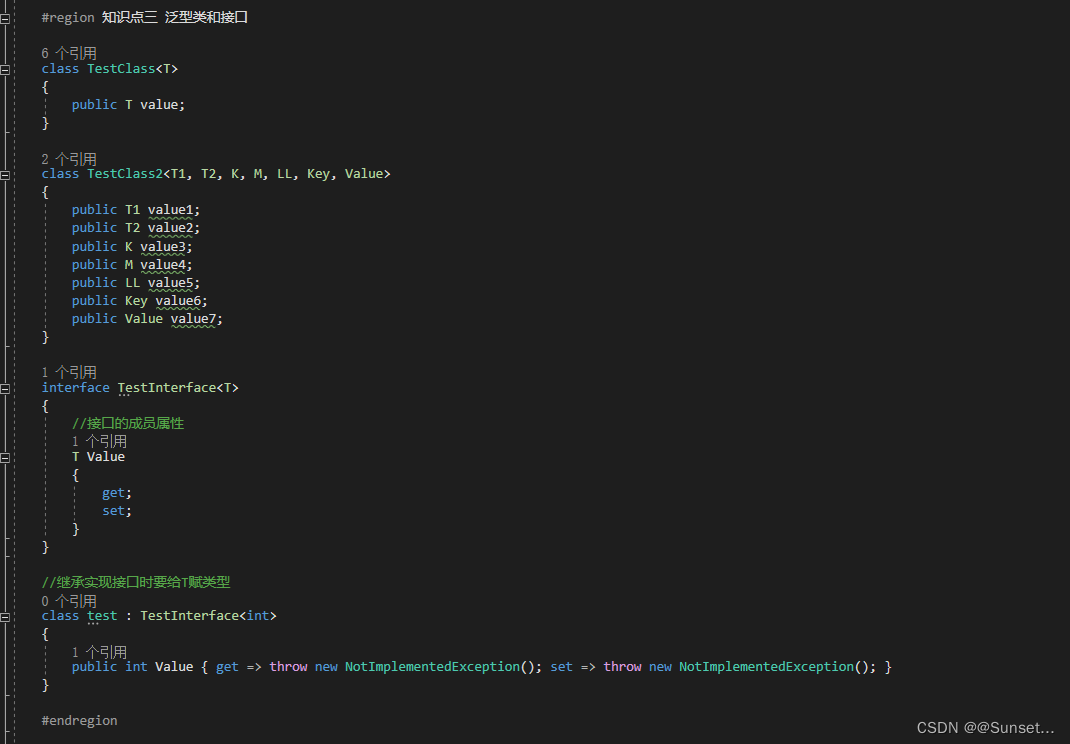
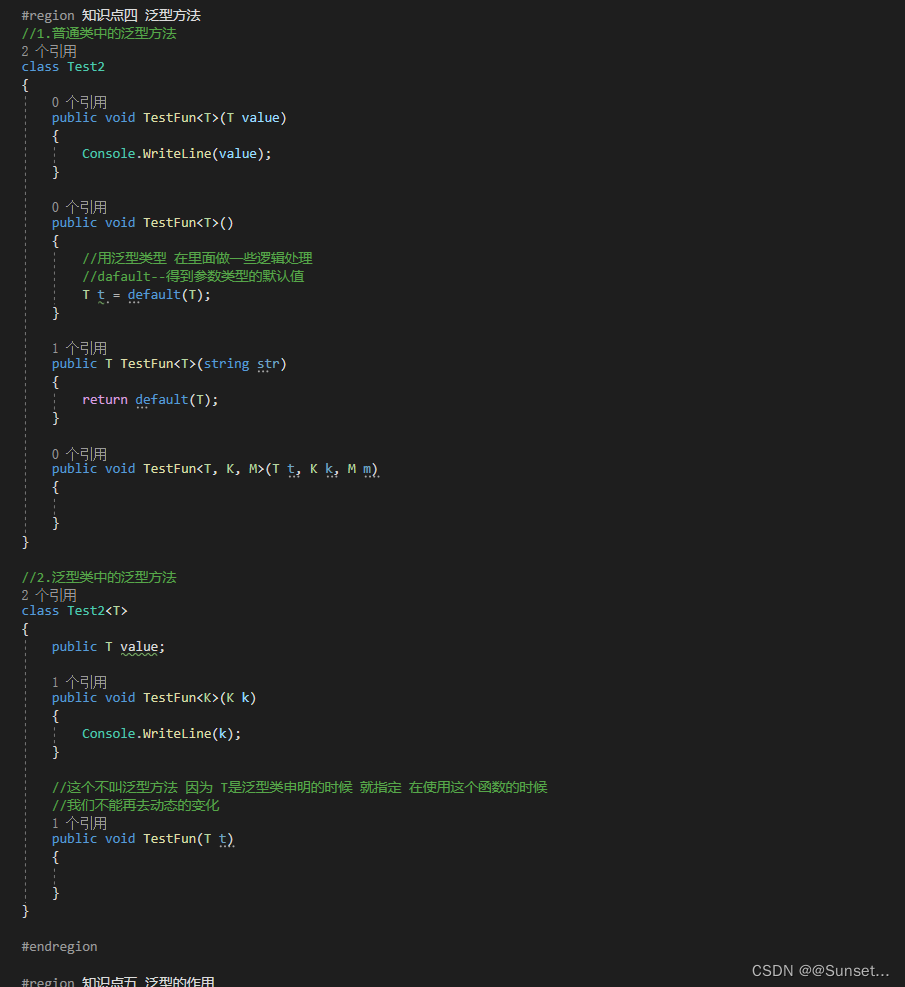
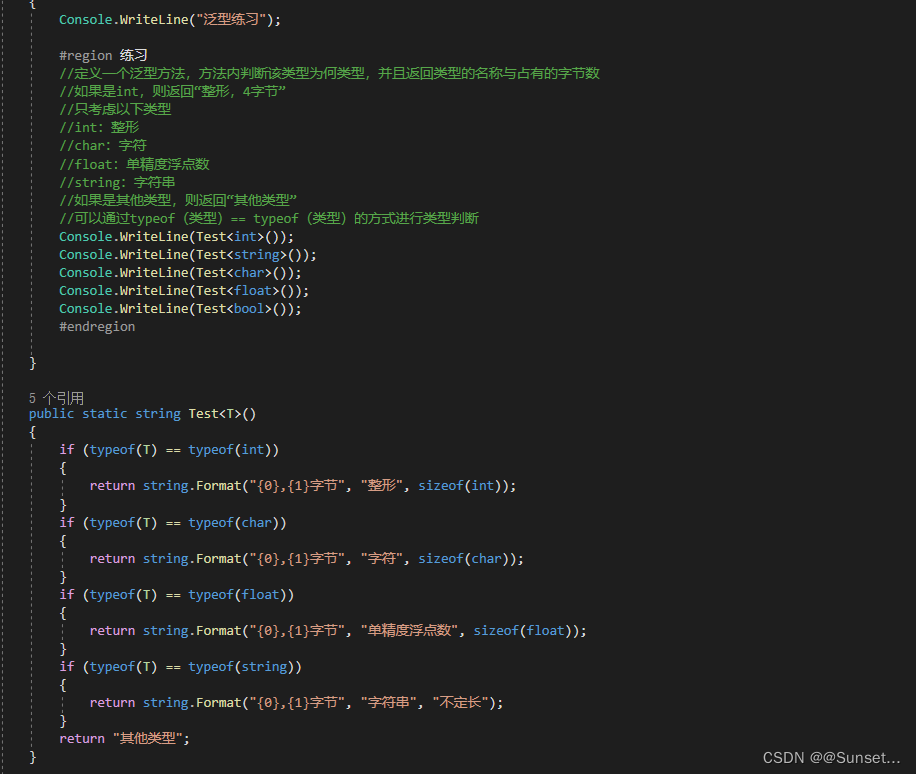
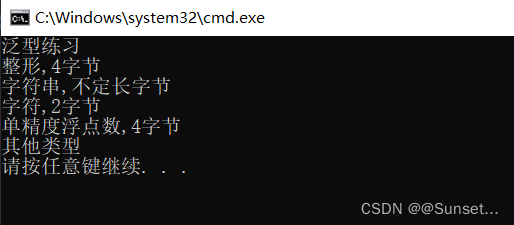
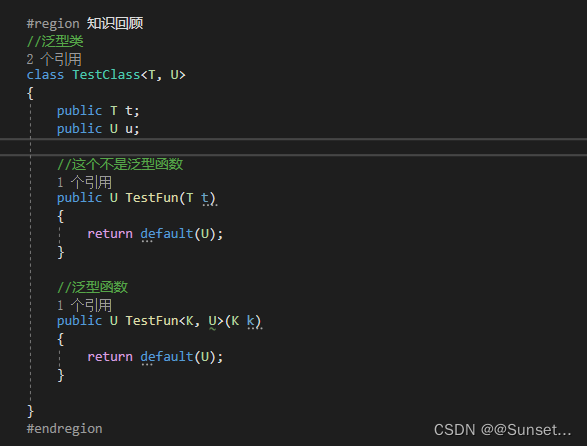
Lesson5:泛型
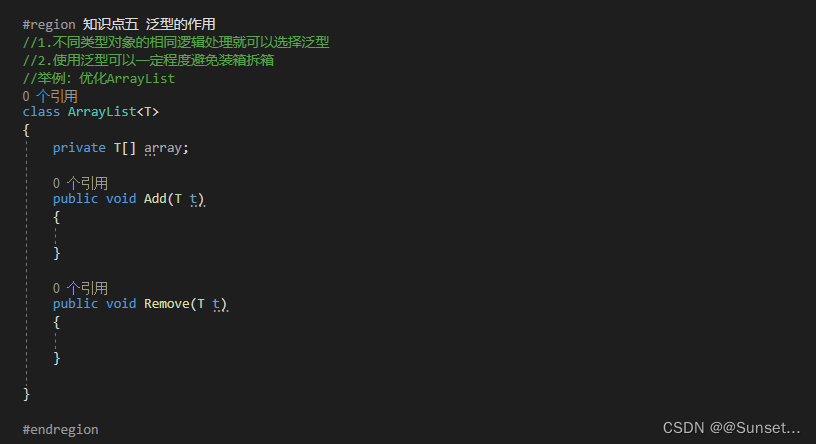
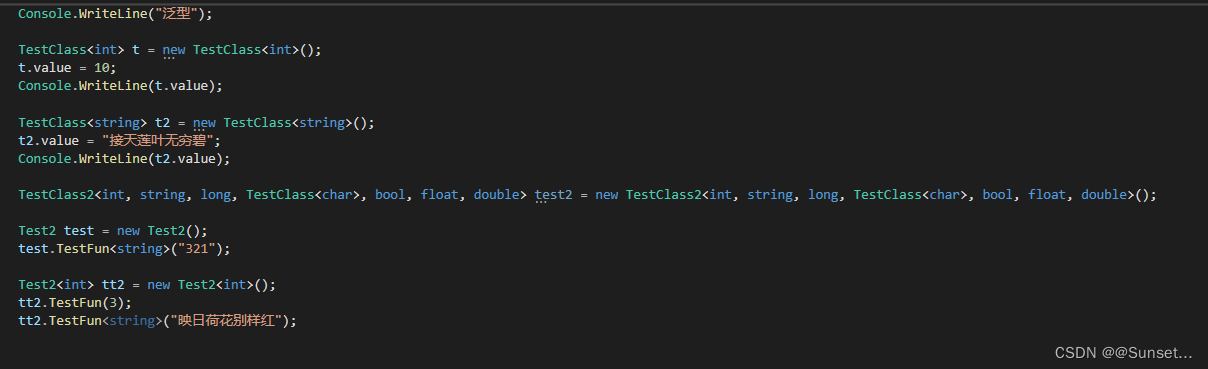
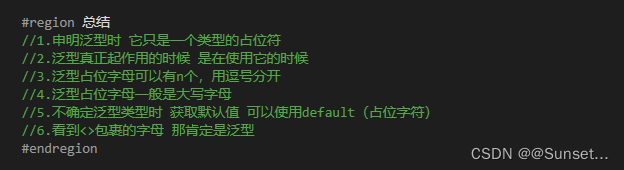
练习:
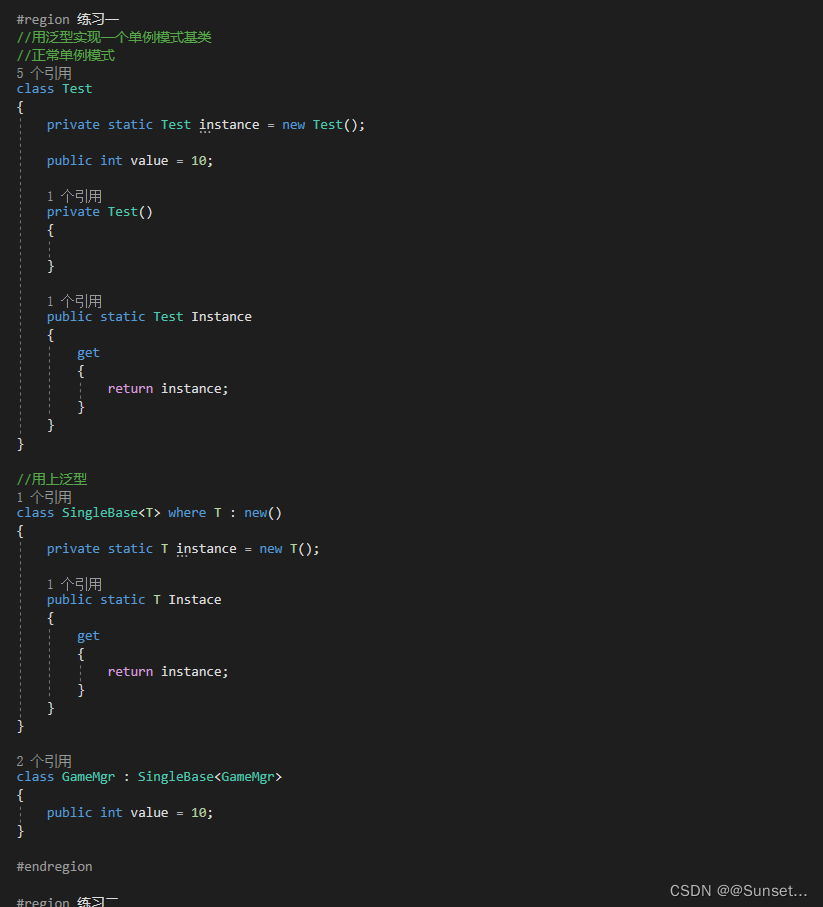
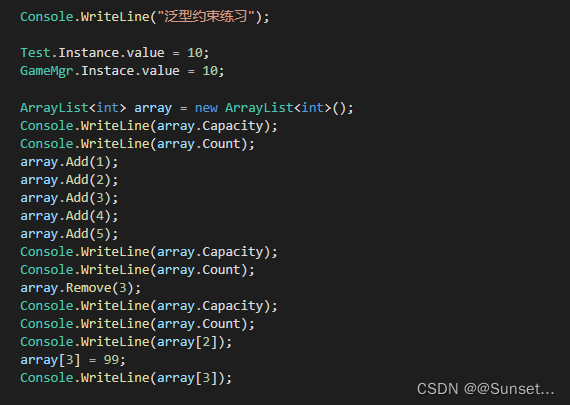
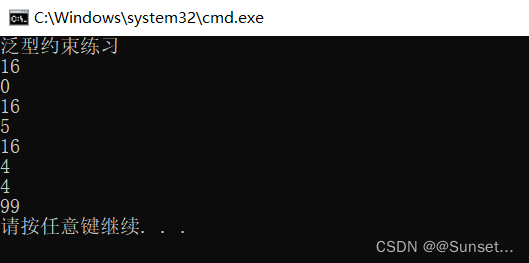
Lesson6:泛型约束
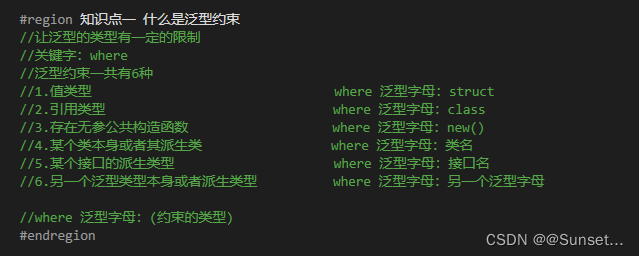
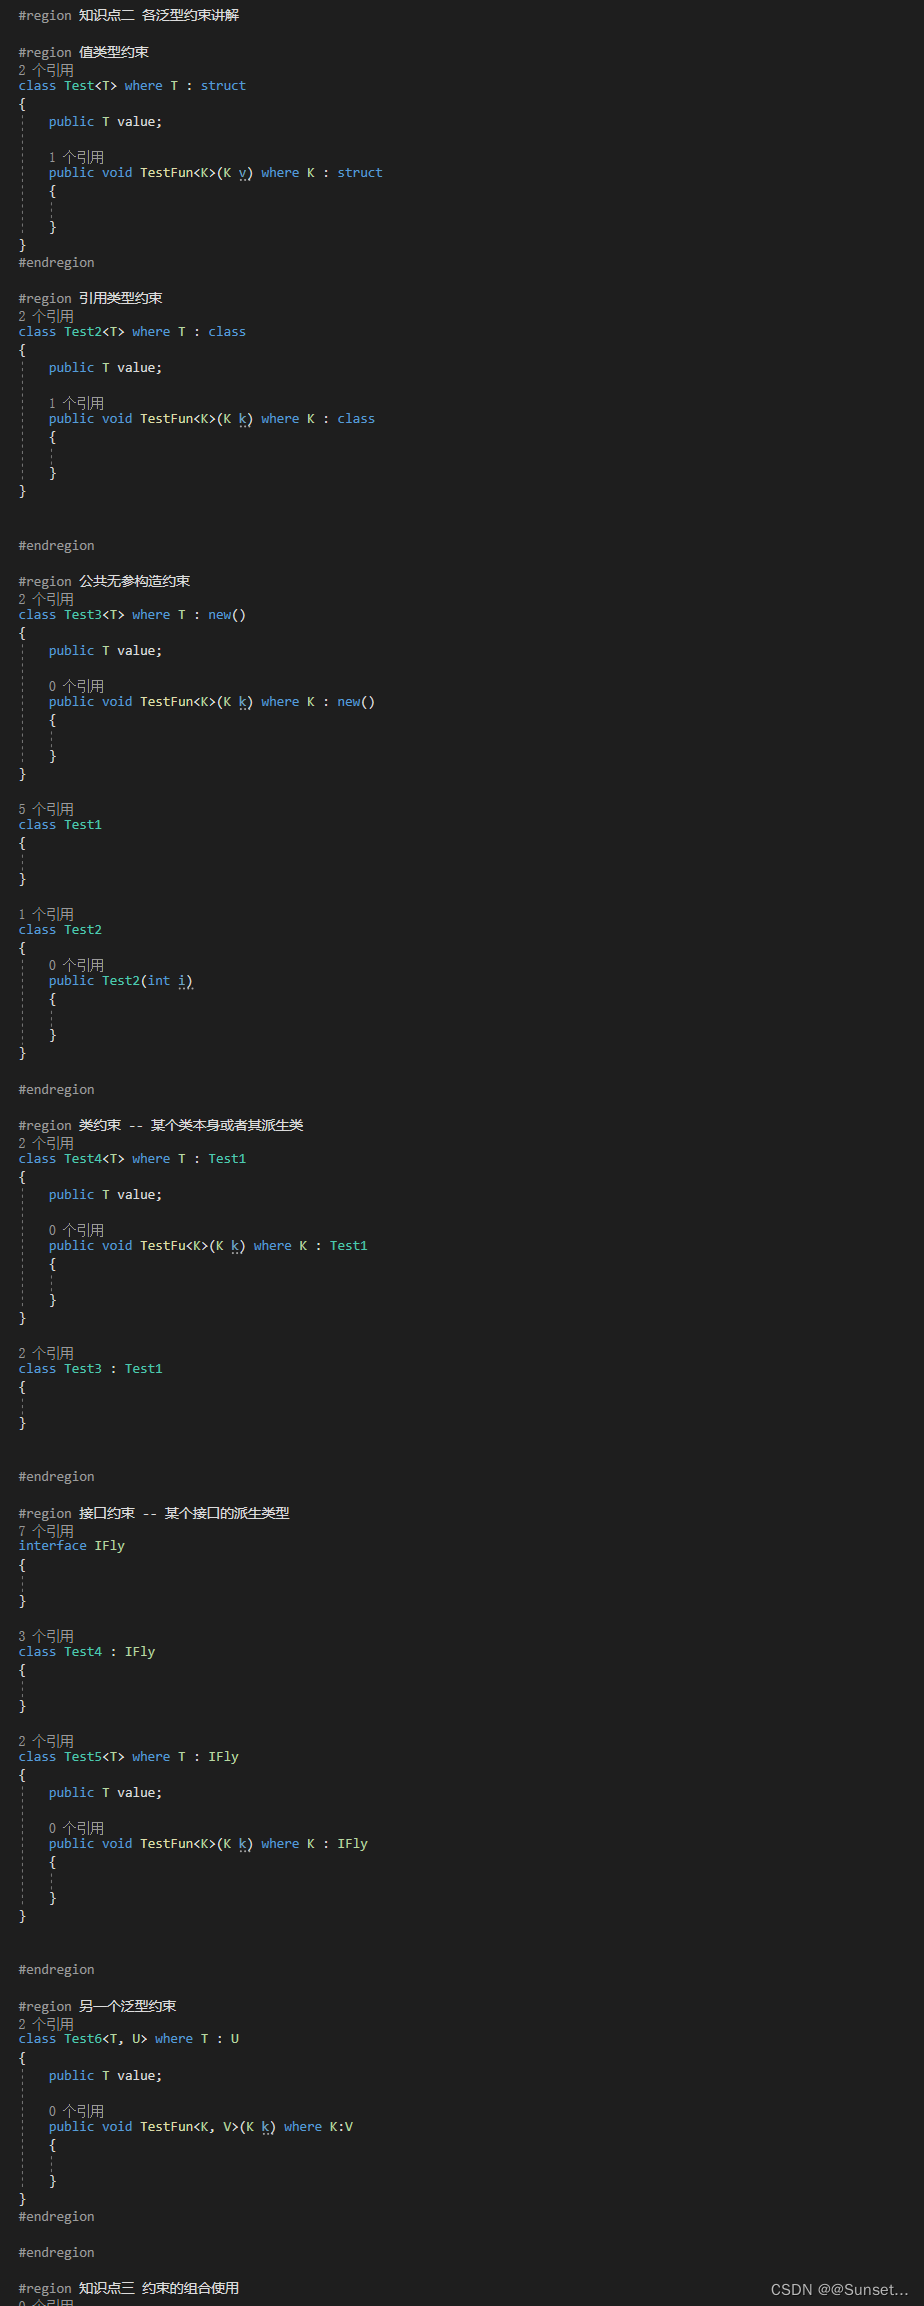

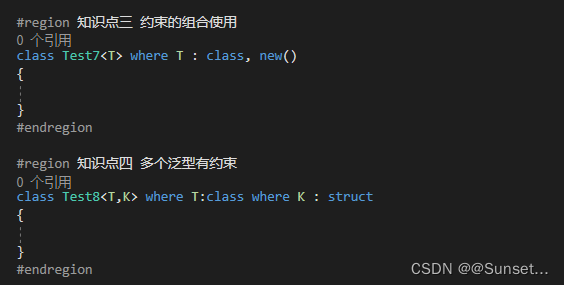
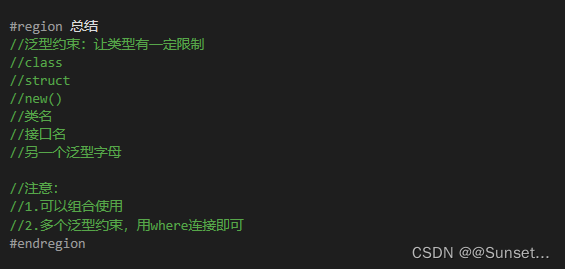
练习:
常用泛型数据结构类
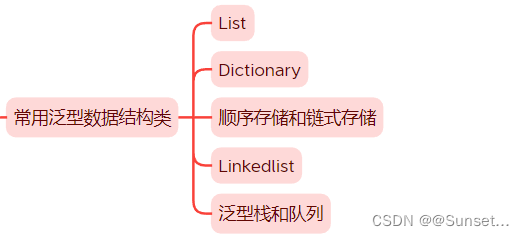
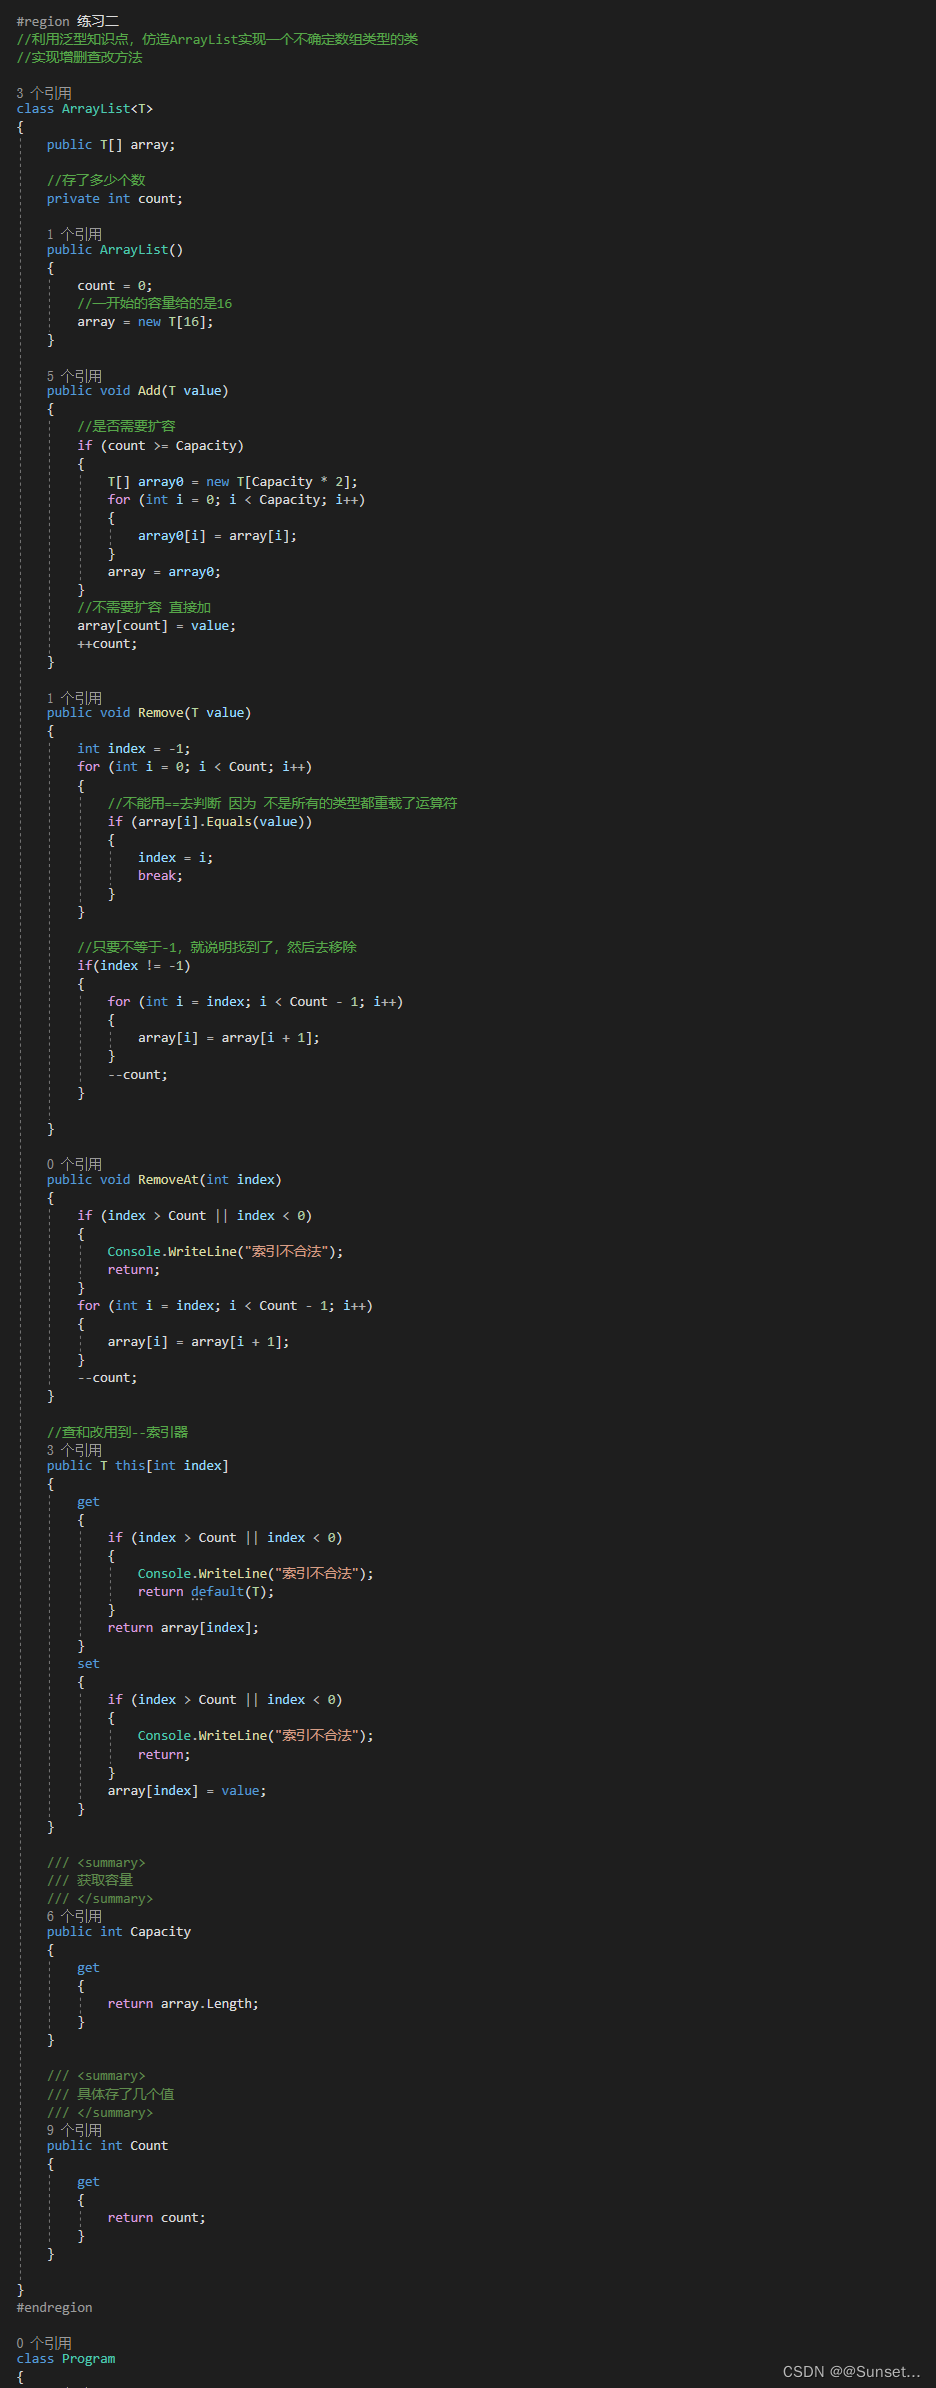
Lesson7:List

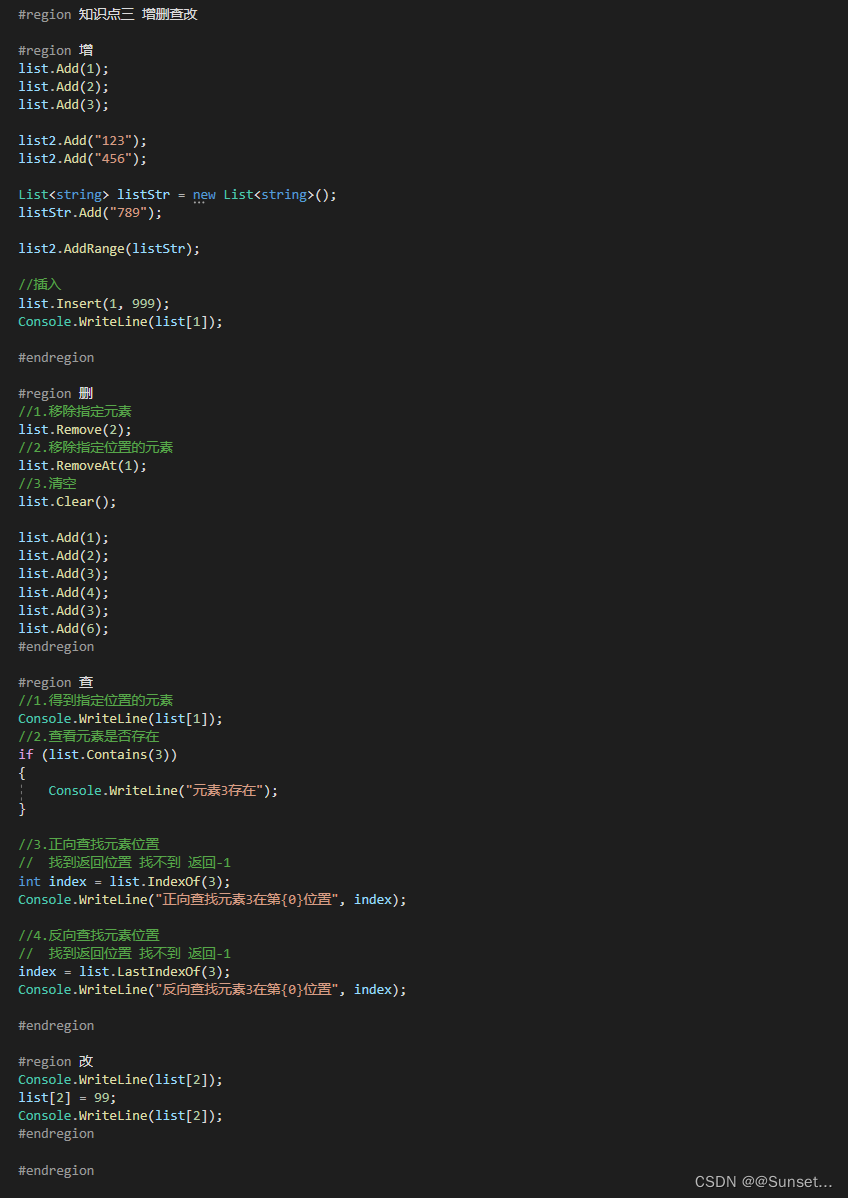
练习:
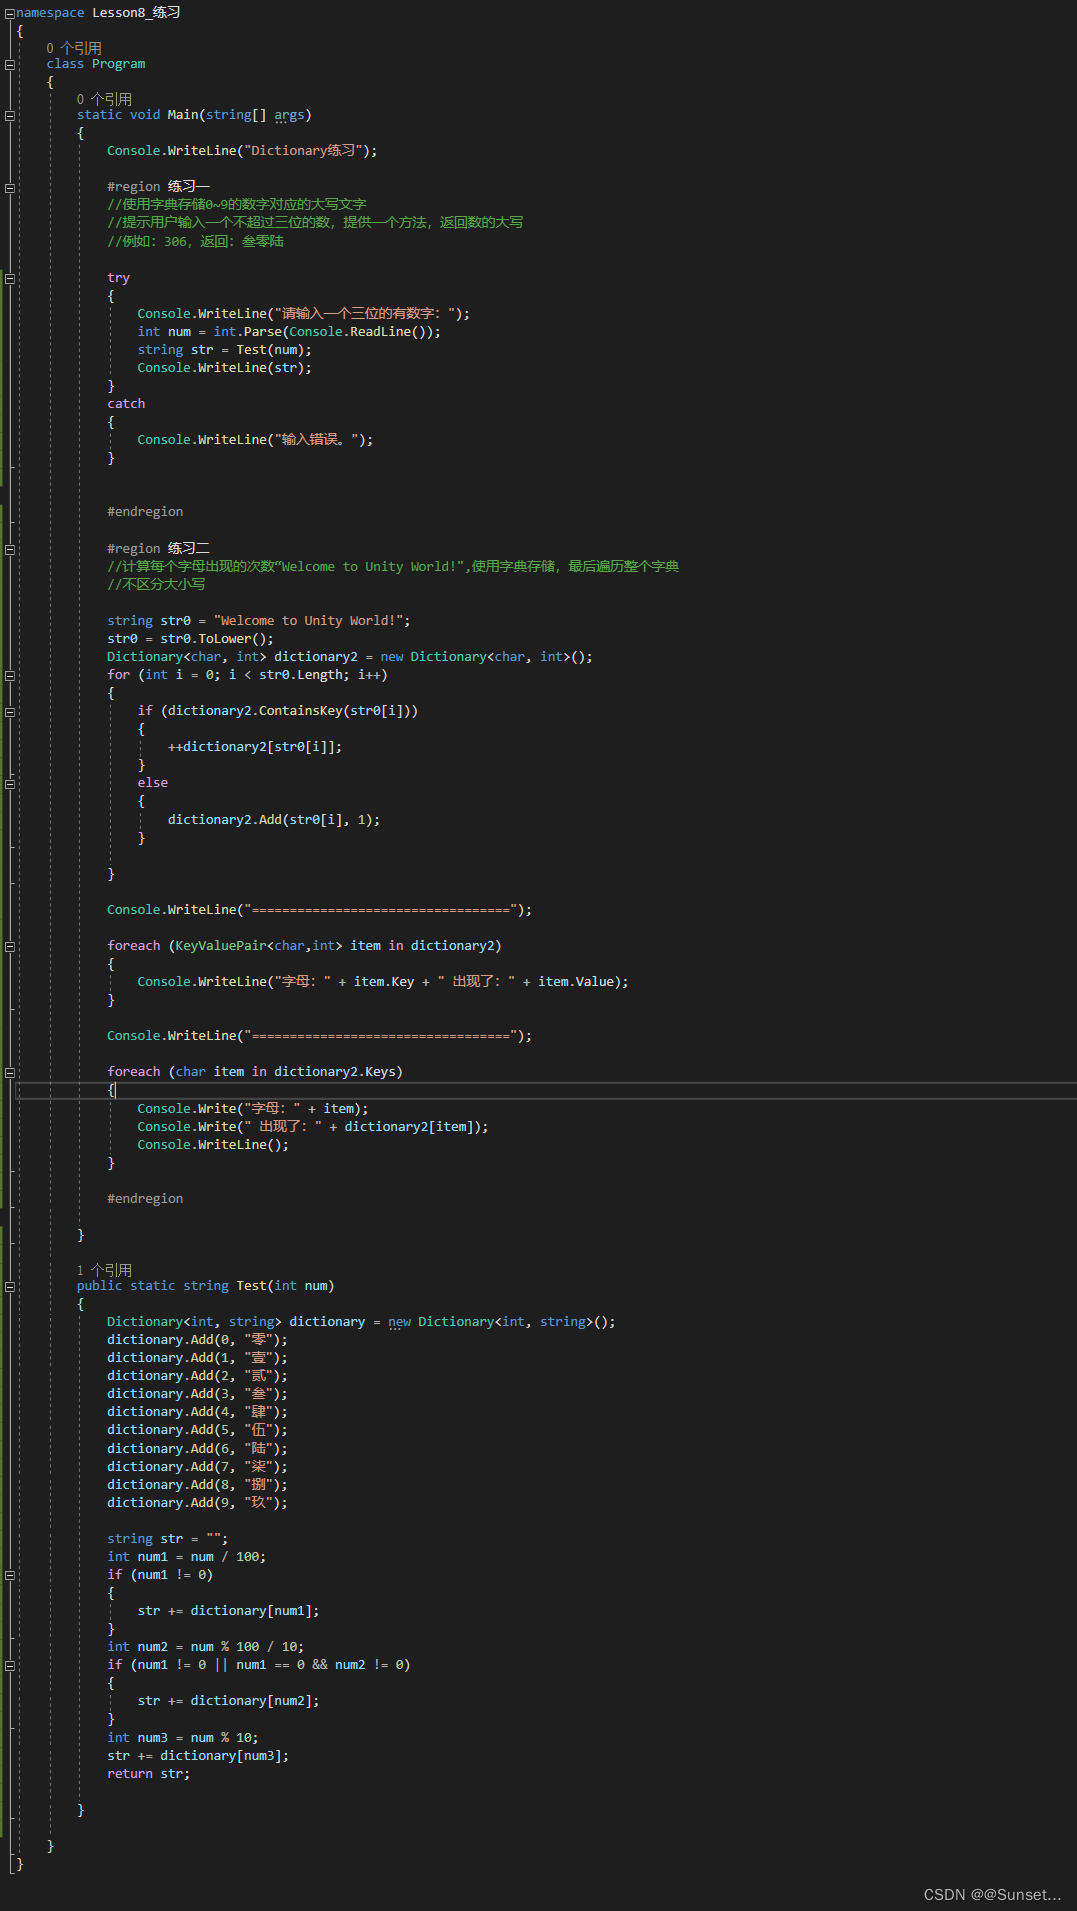
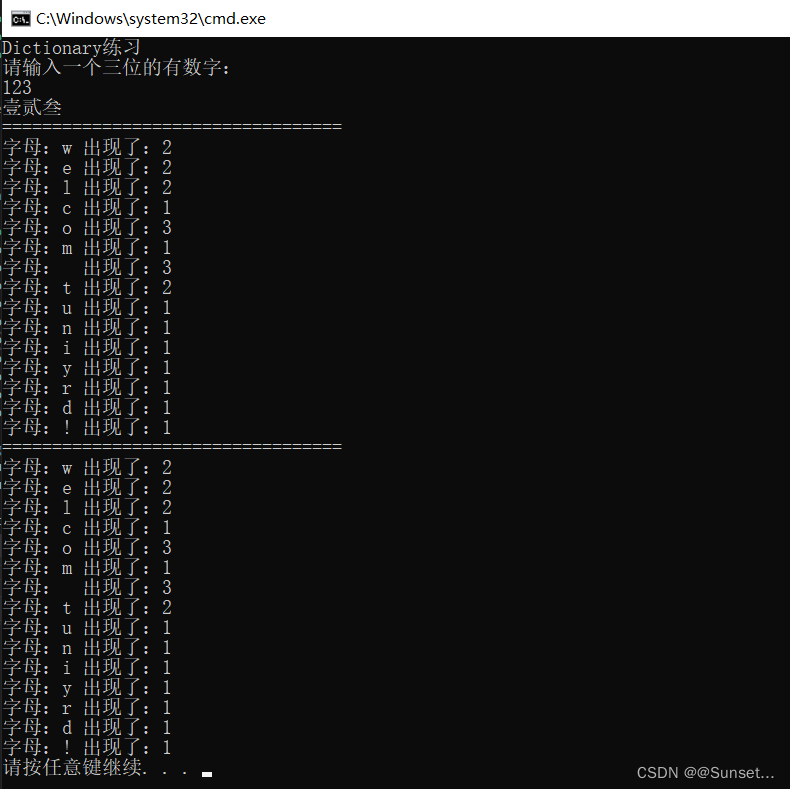
Lesson8:Dictionary

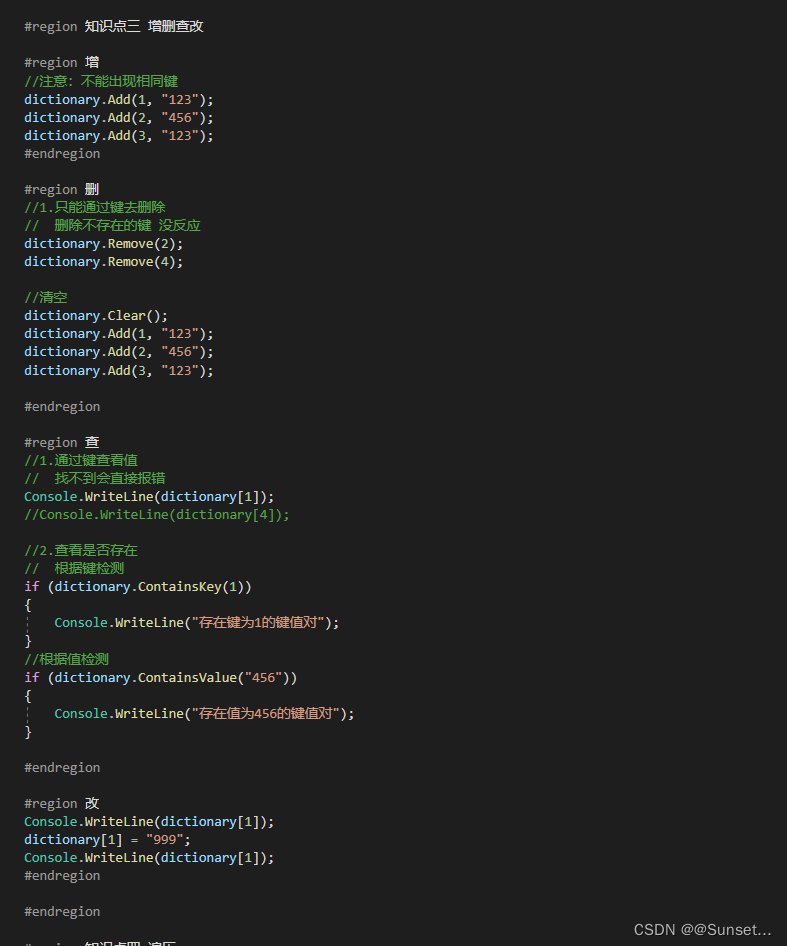
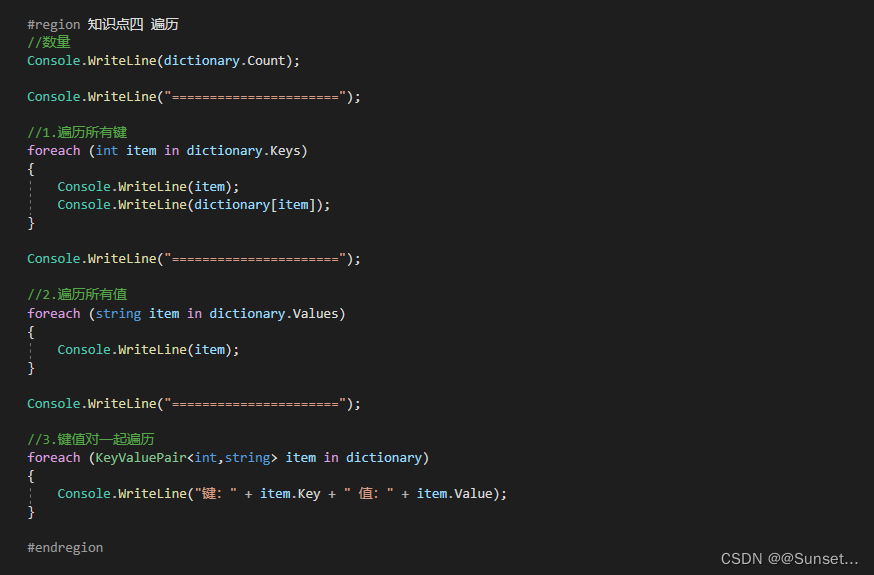
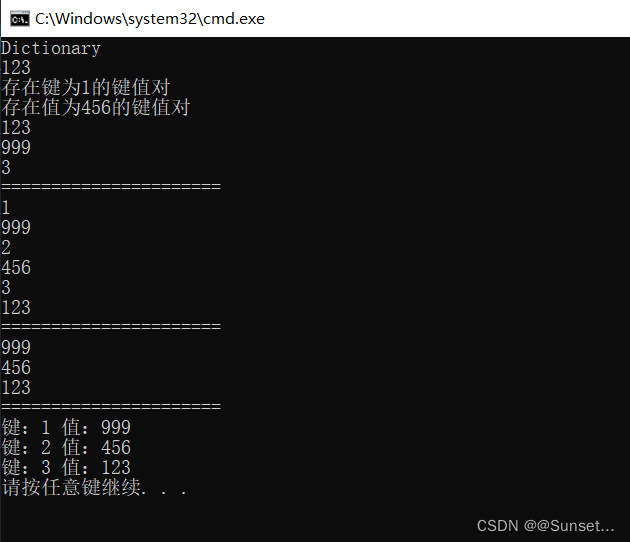
练习:
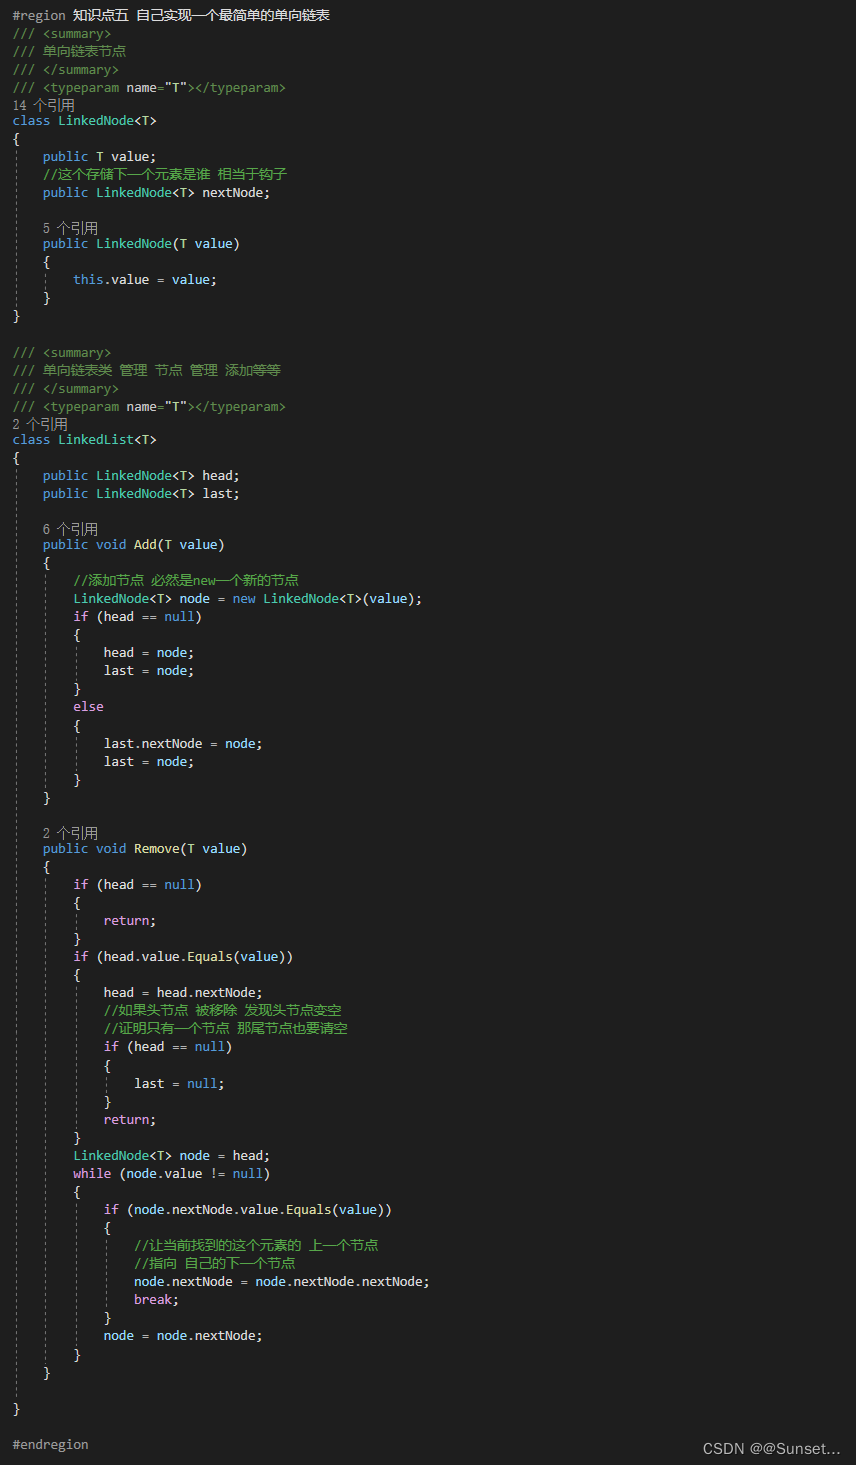
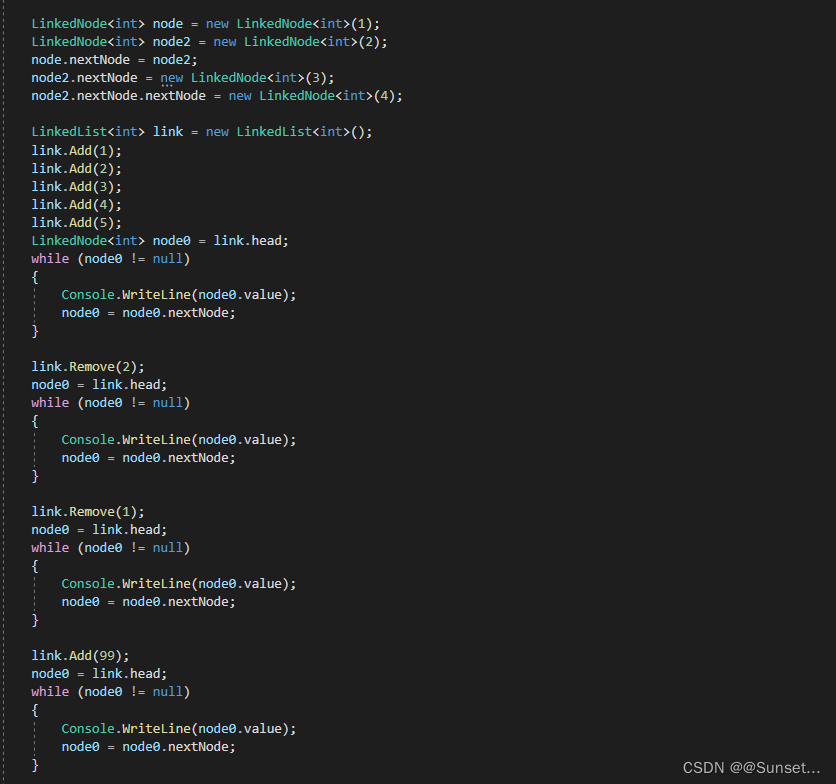
Lesson9:顺序存储和链式存储
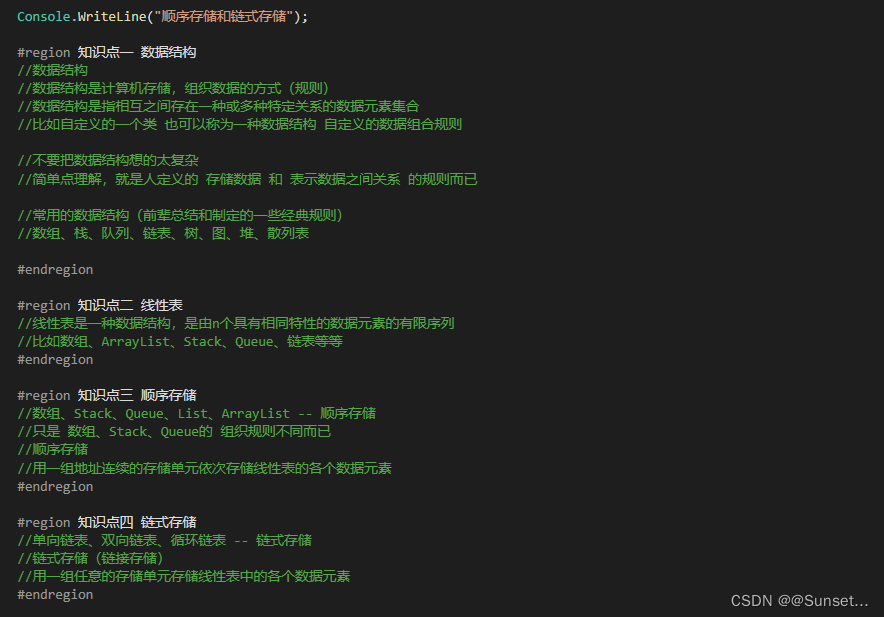
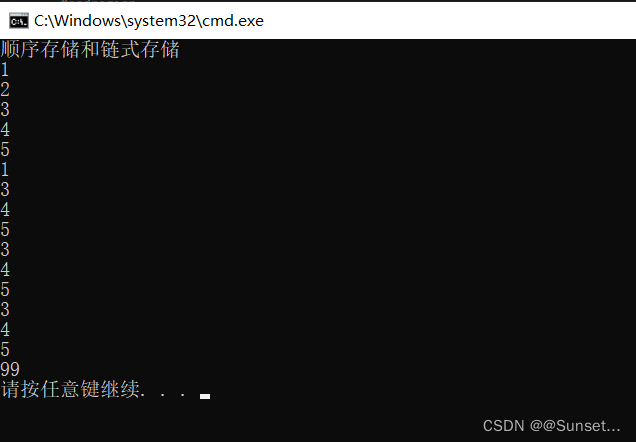
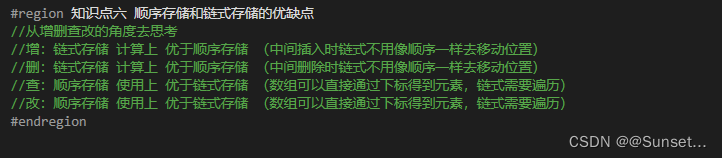
知识点六 顺序存储和链式存储的优缺点
练习:
using System;
using System.Collections.Generic;
using System.Linq;
using System.Text;
using System.Threading.Tasks;
namespace Lesson9_练习
{
class Program
{
static void Main(string[] args)
{
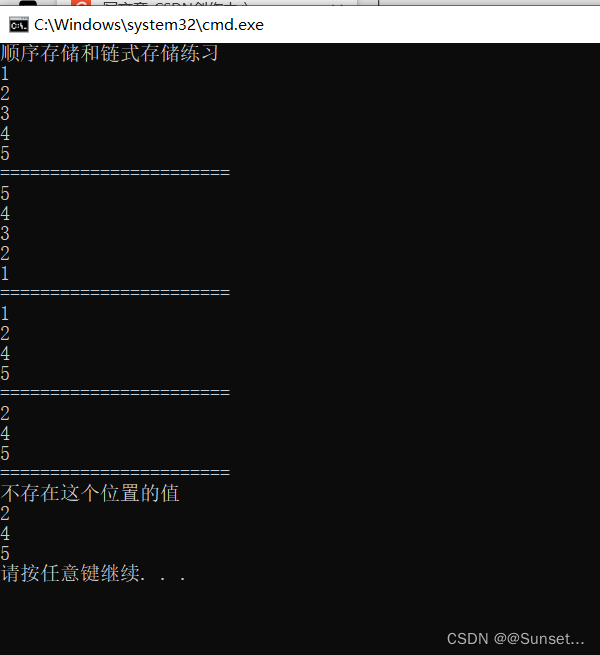
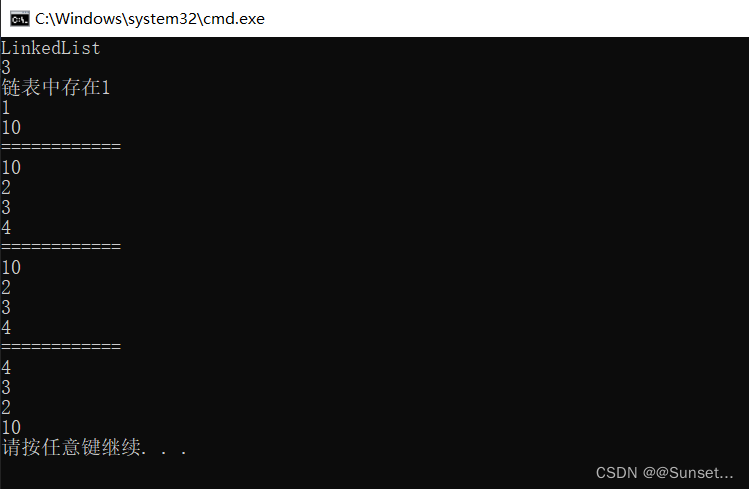
Console.WriteLine("顺序存储和链式存储练习");
#region 练习一
//请说出常用的数据结构有哪些
//数组、栈、队列、树、链表、散列表、堆、图
#endregion
#region 练习二
//请描述顺序存储和链式存储的区别
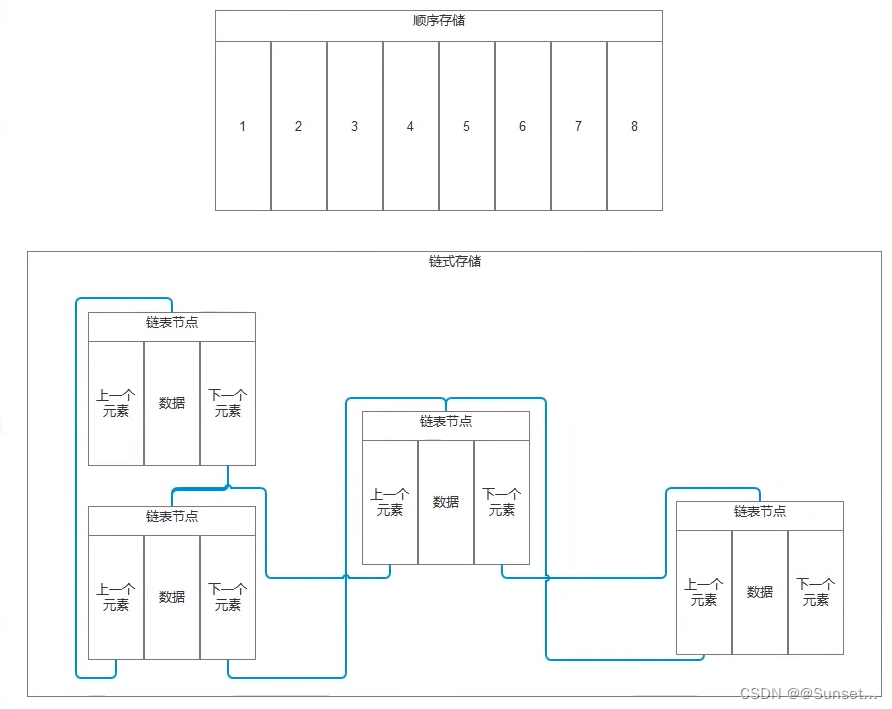
//顺序存储:内存中用一组地址连续的存储单元存储线性表(连续地址存储)
//链式存储:内存中用一组任意的存储单元存储线性表(任意地址存储)
#endregion
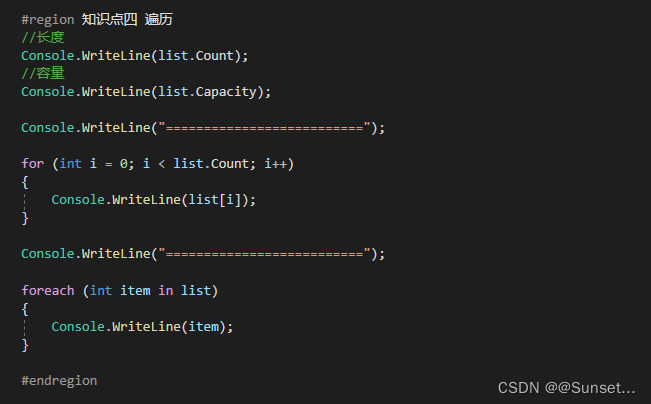
#region 练习三
//请尝试自己实现一个双向链表
//并提供以下方法和属性
//数据的个数,头节点,尾节点
//增加数据到链表最后
//删除指定位置节点
LinkedList<int> list = new LinkedList<int>();
list.Add(1);
list.Add(2);
list.Add(3);
list.Add(4);
list.Add(5);
//从头遍历
LinkedNode<int> node = list.Head;
for (int i = 0; i < list.Num; i++)
{
Console.WriteLine(node.value);
node = node.nextNode;
}
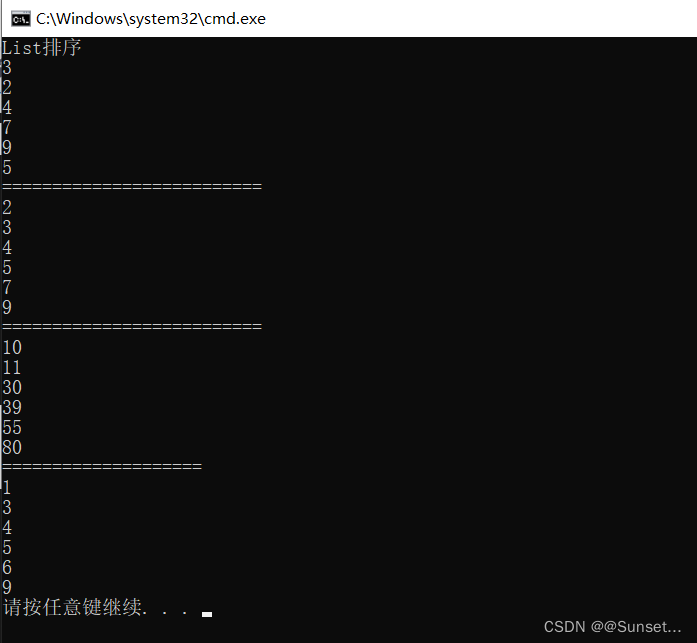
Console.WriteLine("=======================");
//从尾遍历
node = list.Last;
for (int i = 0; i < list.Num; i++)
{
Console.WriteLine(node.value);
node = node.frontNode;
}
Console.WriteLine("=======================");
list.Remove(2);
node = list.Head;
for (int i = 0; i < list.Num; i++)
{
Console.WriteLine(node.value);
node = node.nextNode;
}
Console.WriteLine("=======================");
list.Remove(0);
node = list.Head;
for (int i = 0; i < list.Num; i++)
{
Console.WriteLine(node.value);
node = node.nextNode;
}
Console.WriteLine("=======================");
list.Remove(3);
node = list.Head;
for (int i = 0; i < list.Num; i++)
{
Console.WriteLine(node.value);
node = node.nextNode;
}
#endregion
}
}
/// <summary>
/// 双向列表节点
/// </summary>
/// <typeparam name="T"></typeparam>
class LinkedNode<T>
{
public T value;
//存储上一个是谁
public LinkedNode<T> frontNode;
//存储下一个是谁
public LinkedNode<T> nextNode;
public LinkedNode(T value)
{
this.value = value;
}
}
/// <summary>
/// 双向链表类 管理节点 管理添加
/// </summary>
/// <typeparam name="T"></typeparam>
class LinkedList<T>
{
private int num = 0;
private LinkedNode<T> head;
private LinkedNode<T> last;
public int Num
{
get
{
return num;
}
}
public LinkedNode<T> Head
{
get
{
return head;
}
}
public LinkedNode<T> Last
{
get
{
return last;
}
}
public void Add(T value)
{
LinkedNode<T> node = new LinkedNode<T>(value);
if (head == null)
{
head = node;
last = node;
}
else
{
//添加到尾部
last.nextNode = node;
//尾部添加记入上一个节点是谁
node.frontNode = last;
//让当前添加的变成最后一个节点
last = node;
}
++num;
}
public void Remove(int num)
{
//首先判断有没有越界
if (this.num - 1 < num || num < 0)
{
Console.WriteLine("不存在这个位置的值");
return;
}
int temp = 0;
LinkedNode<T> tempNode = head;
while (true)
{
if (temp == num)
{
//找到了,移除即可
//当前要移除的节点的上一个节点 指向自己的下一个节点
if (tempNode.frontNode != null)
{
tempNode.frontNode.nextNode = tempNode.nextNode;
}
if (tempNode.nextNode != null)
{
tempNode.nextNode.frontNode = tempNode.frontNode;
}
//如果是头节点需要改变头节点的指向
if (num == 0)
{
//如果头结点被移除 那头节点就变成了头节点的下一个
head = tempNode.nextNode;
}
else if(num == this.num - 1)
{
//如果尾节点被移除了,那么尾节点就变成了尾节点的上一个
last = last.frontNode;
}
--this.num;
break;
}
++temp;
tempNode = tempNode.nextNode;
}
}
}
}
Lesson10:LinkedList
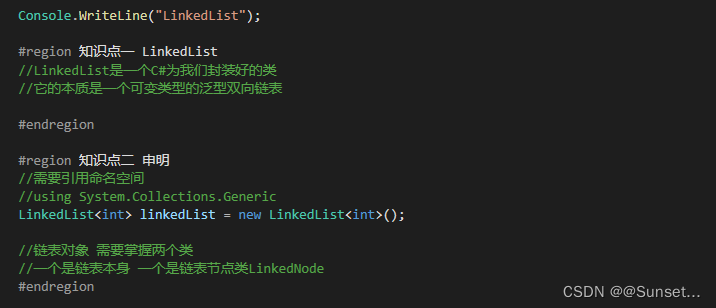


练习:
重点:


Lesson11:泛型栈和队列
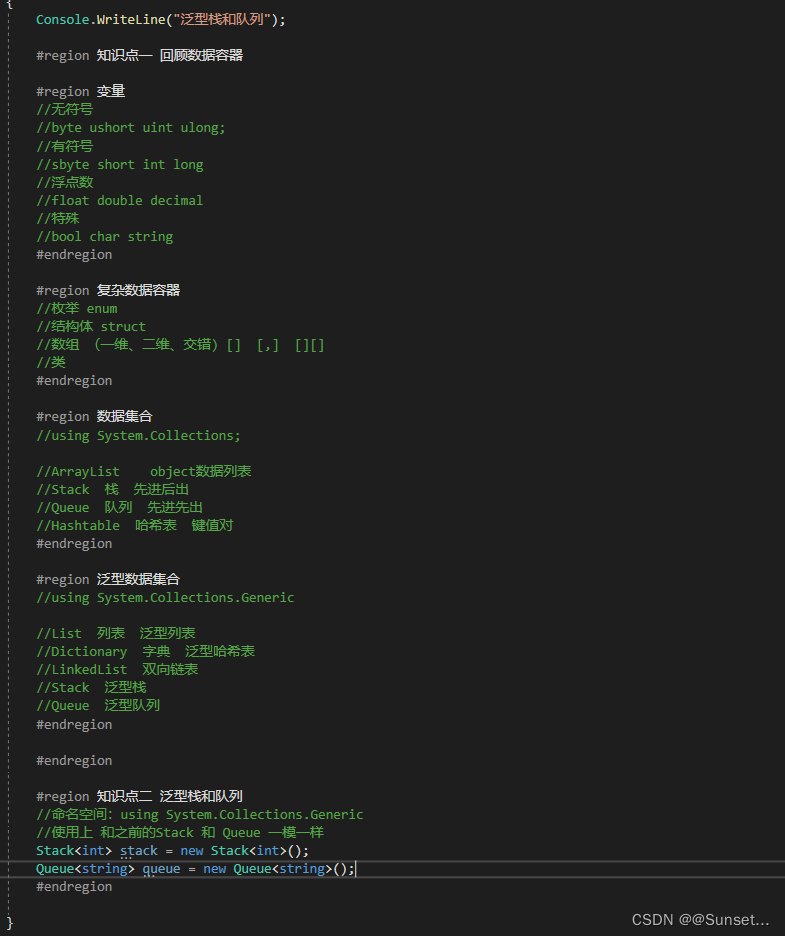
练习:
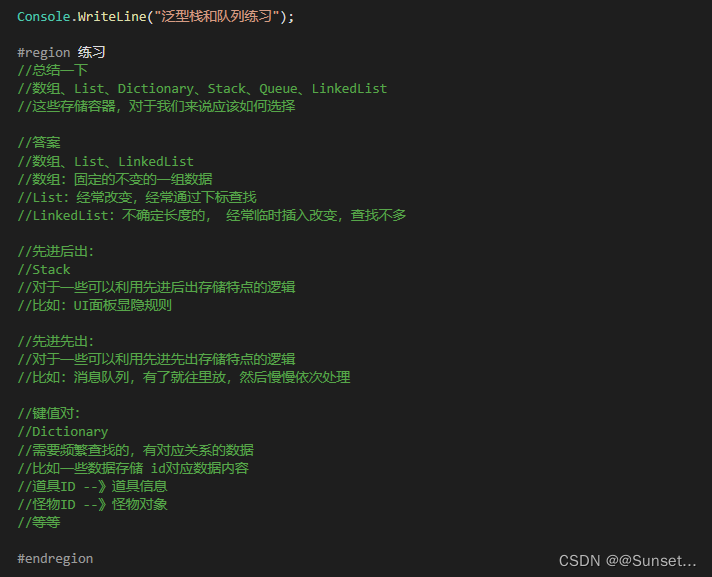
数组、List、Dictionary、Stack、Queue、LinkedList
这些存储容器,对于我们来说应该如何选择?
委托和事件
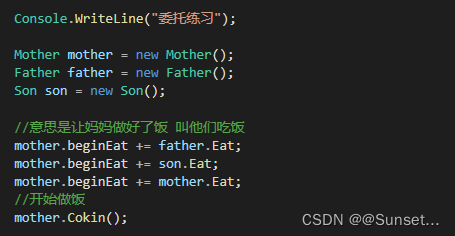
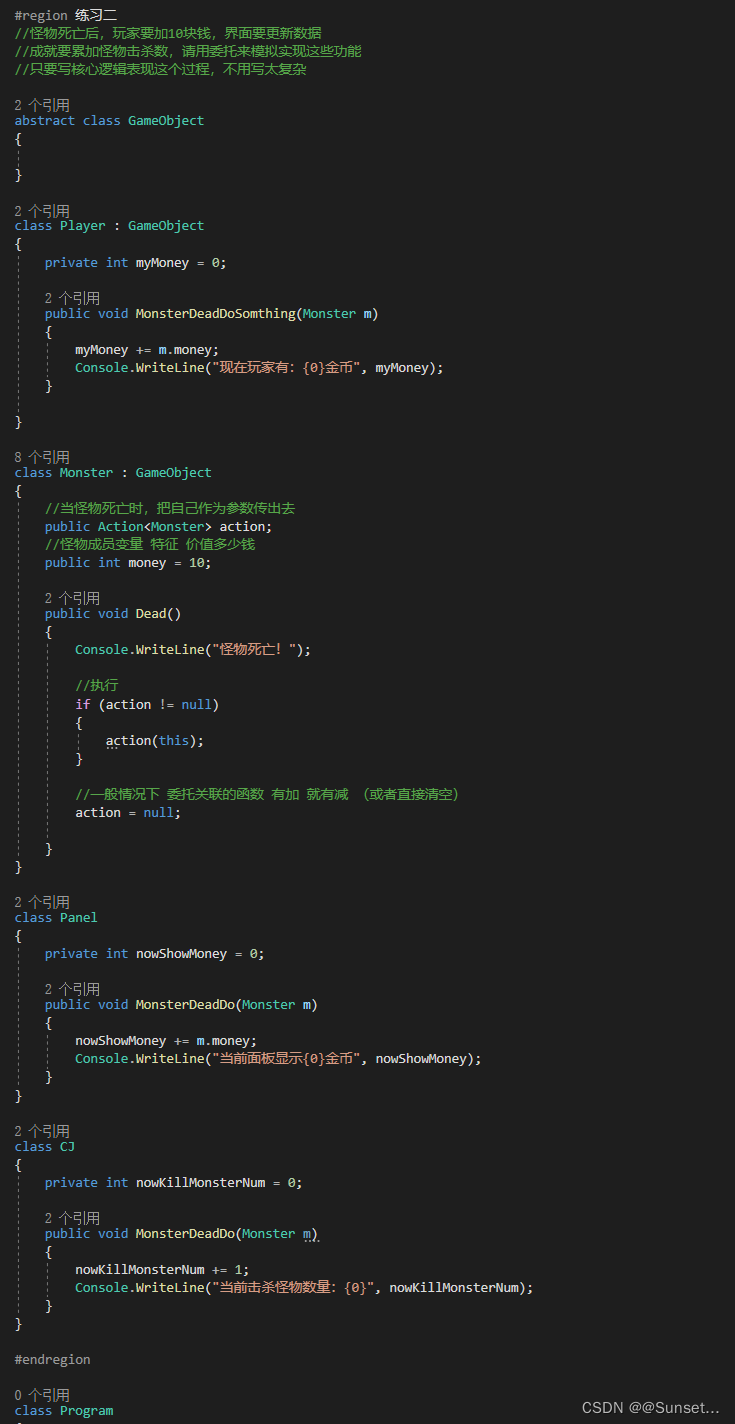
Lesson12:委托
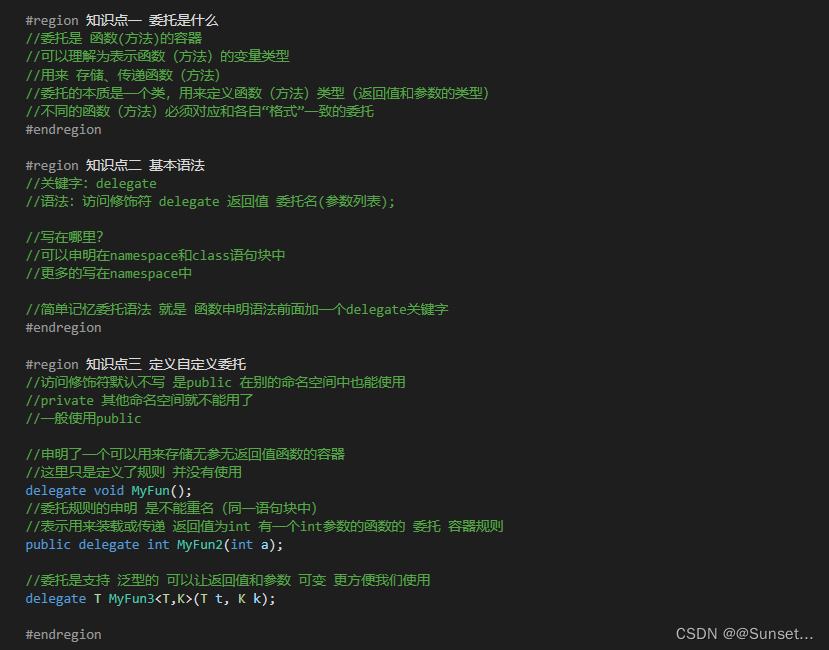

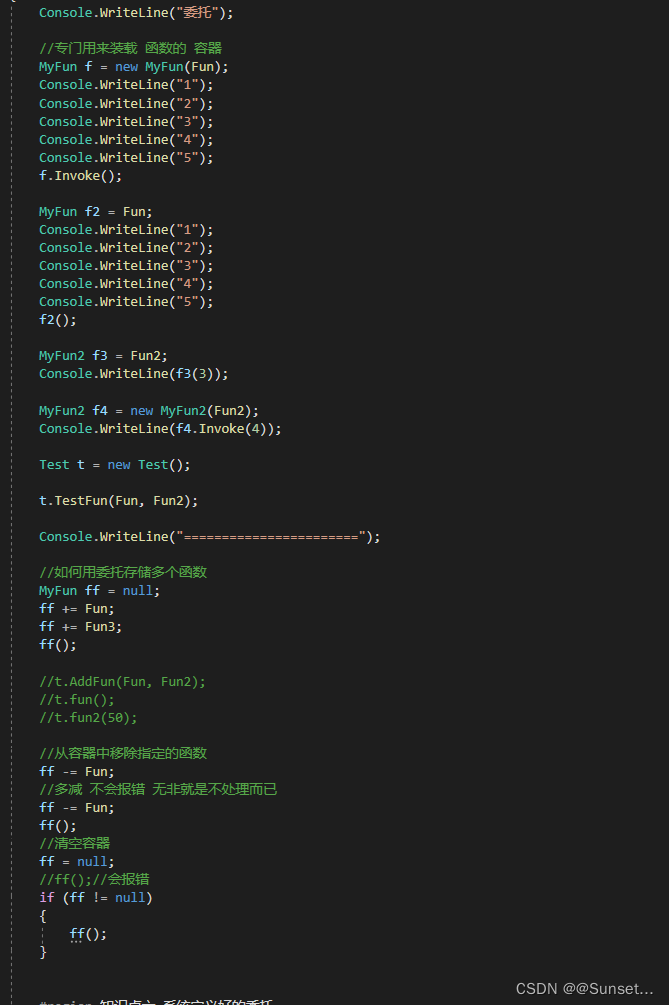

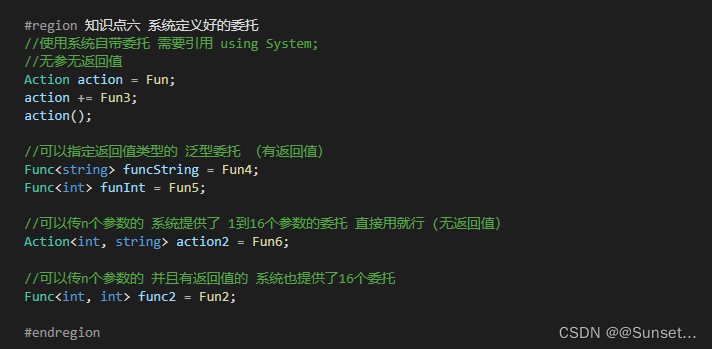
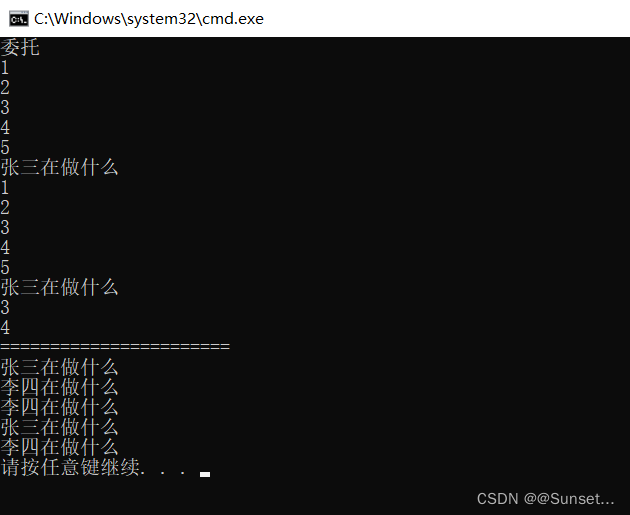
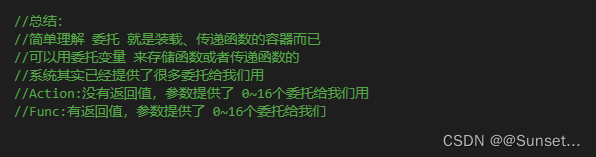
练习: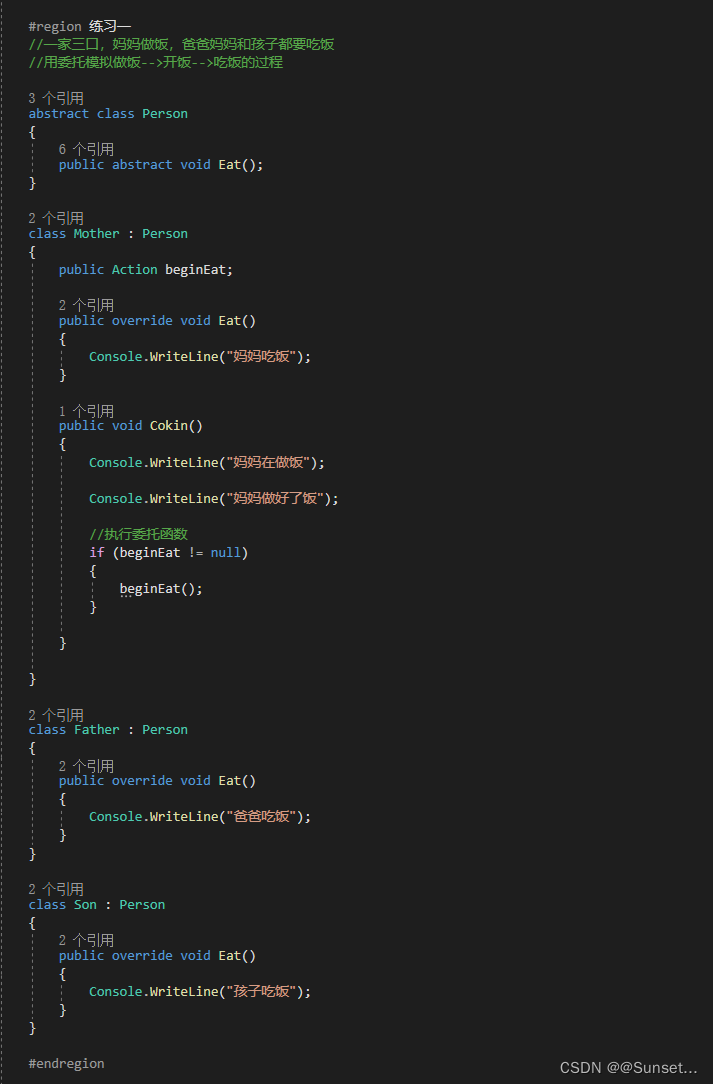
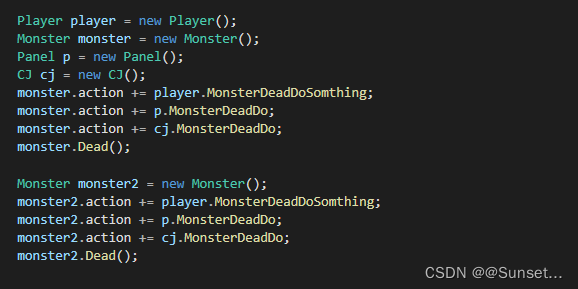

Lesson13:事件
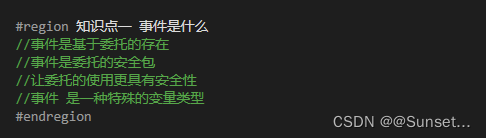
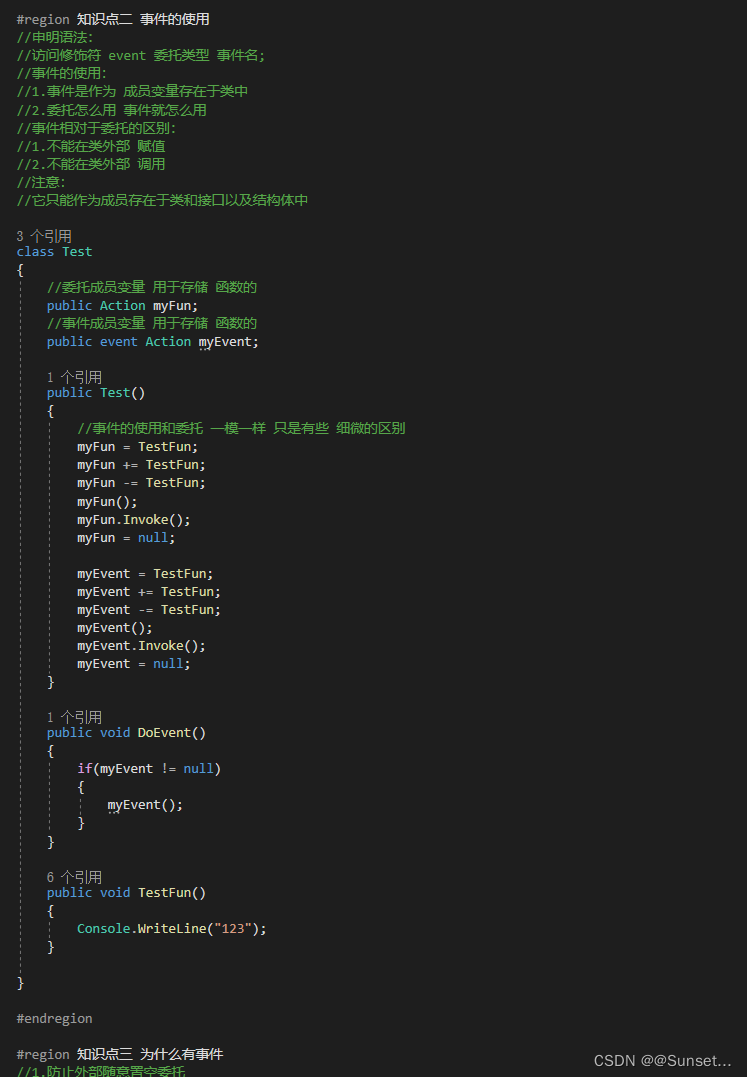
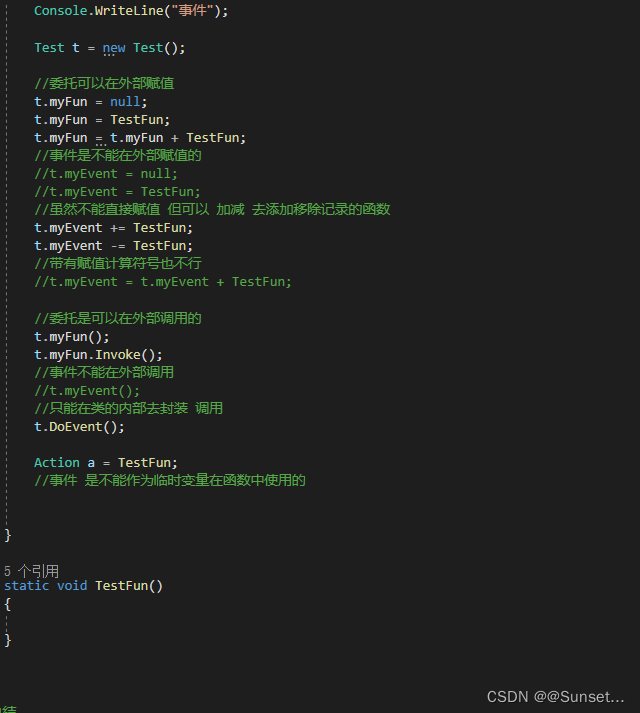


事件和委托的区别

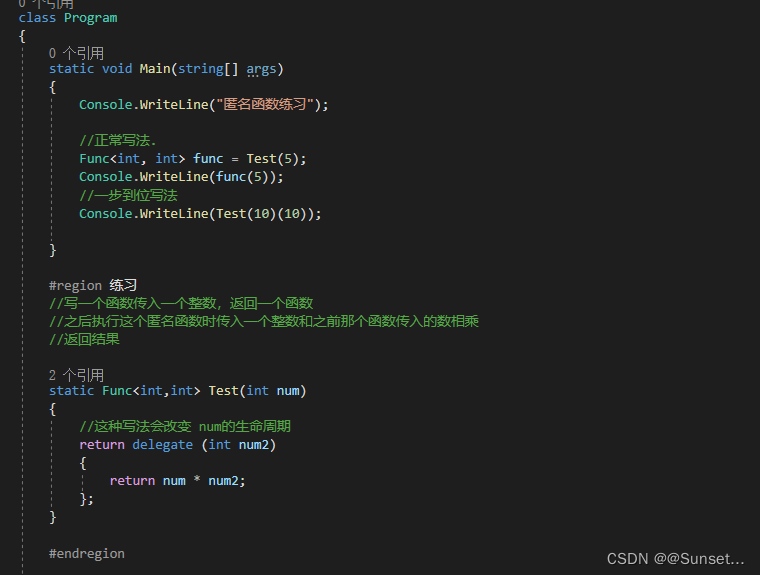
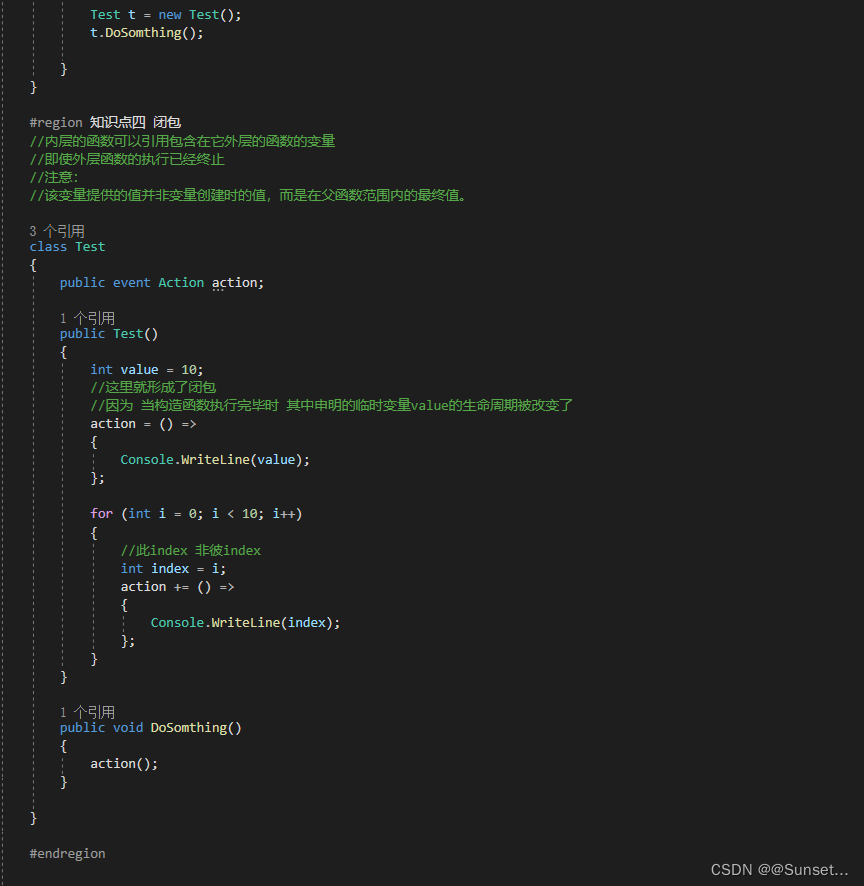
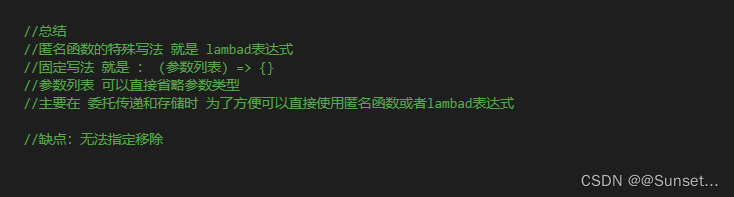
Lesson14:匿名函数
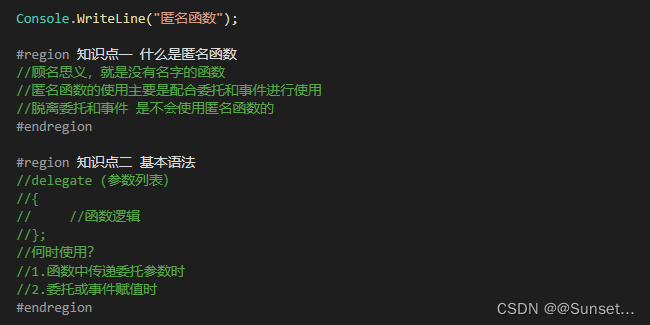
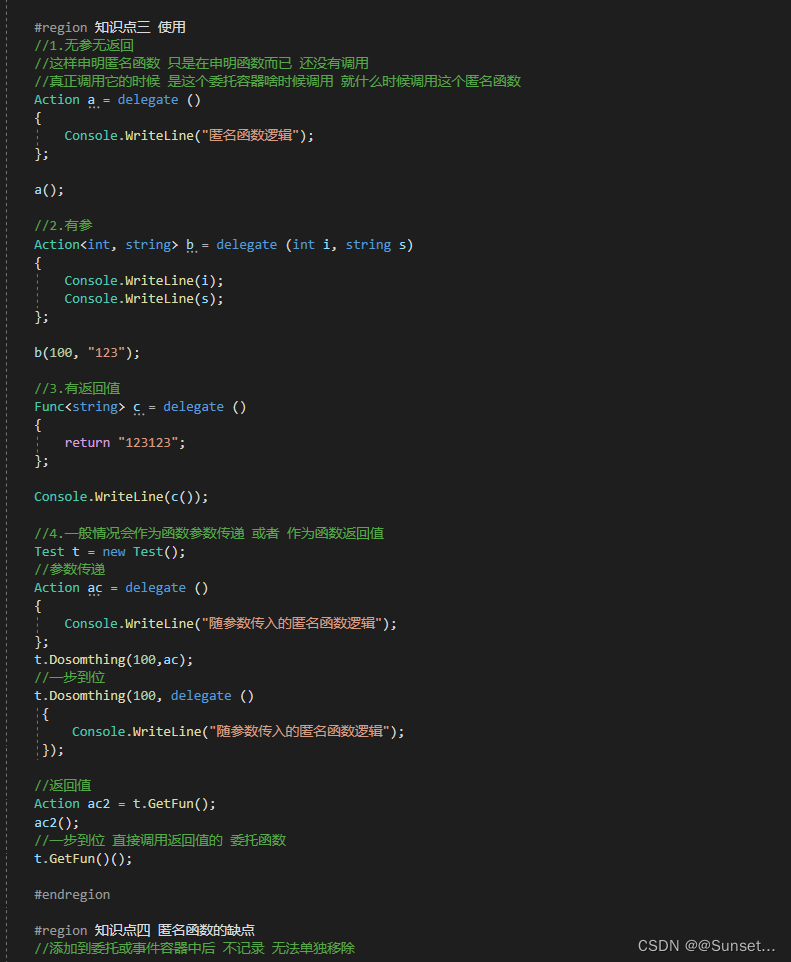
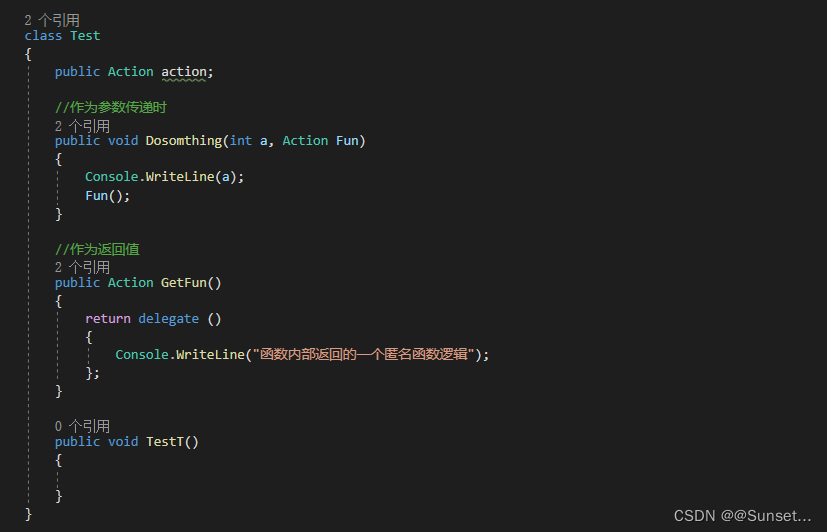
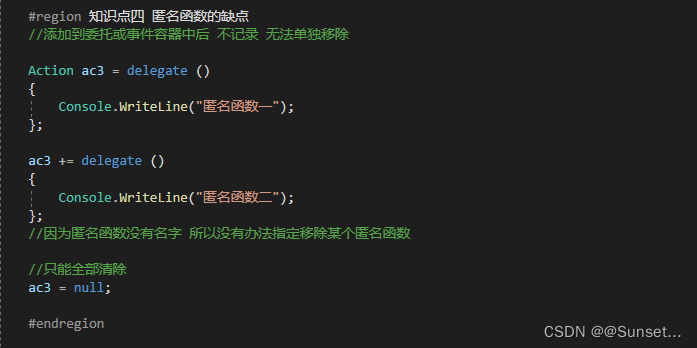
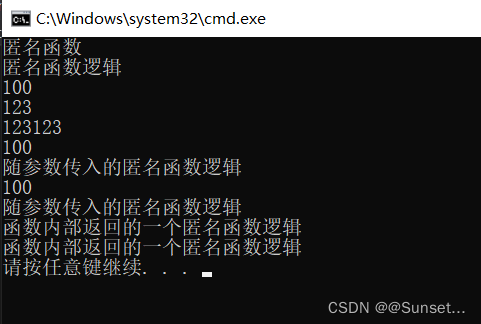
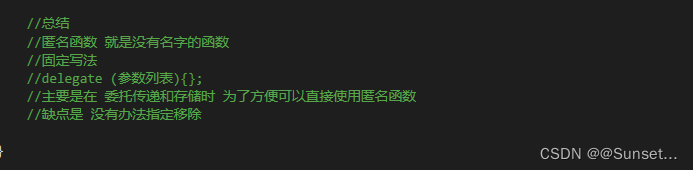
练习:
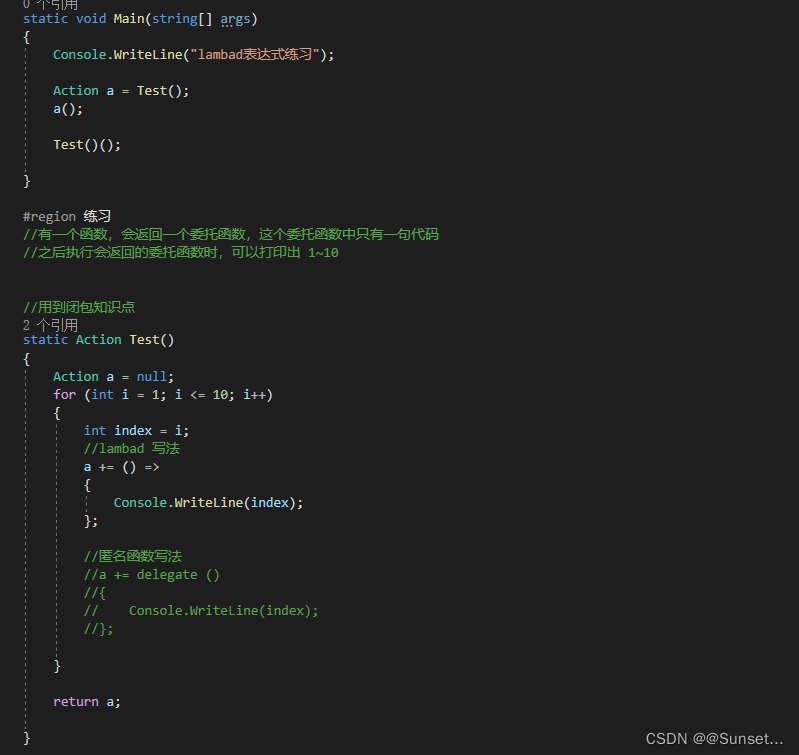
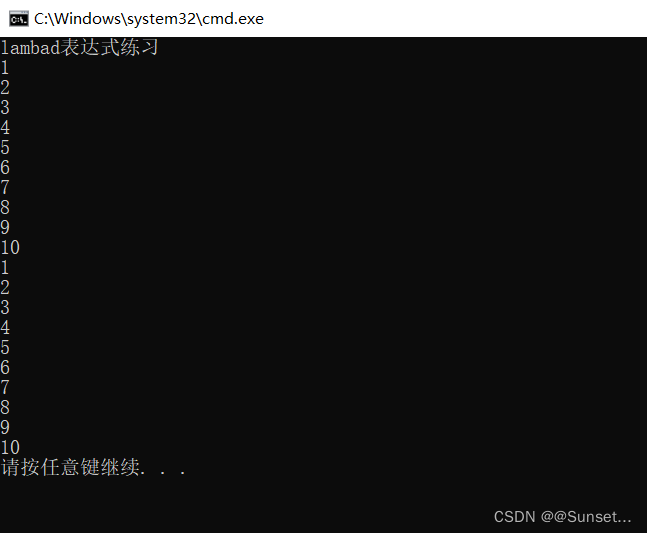
Lesson15:Lambad表达式
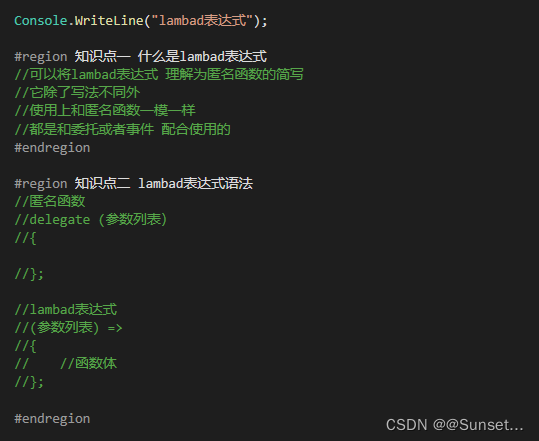

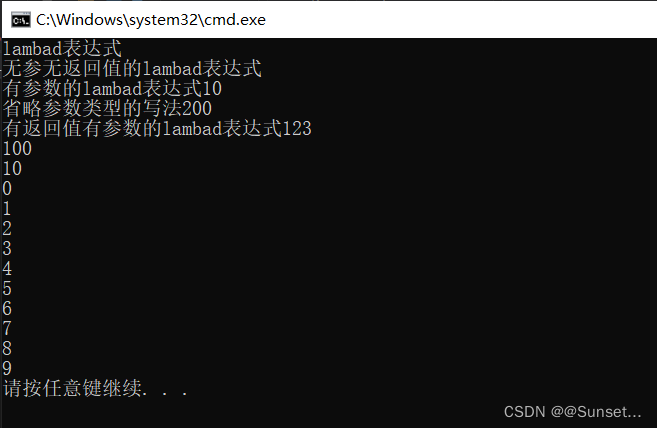
补充知识点:
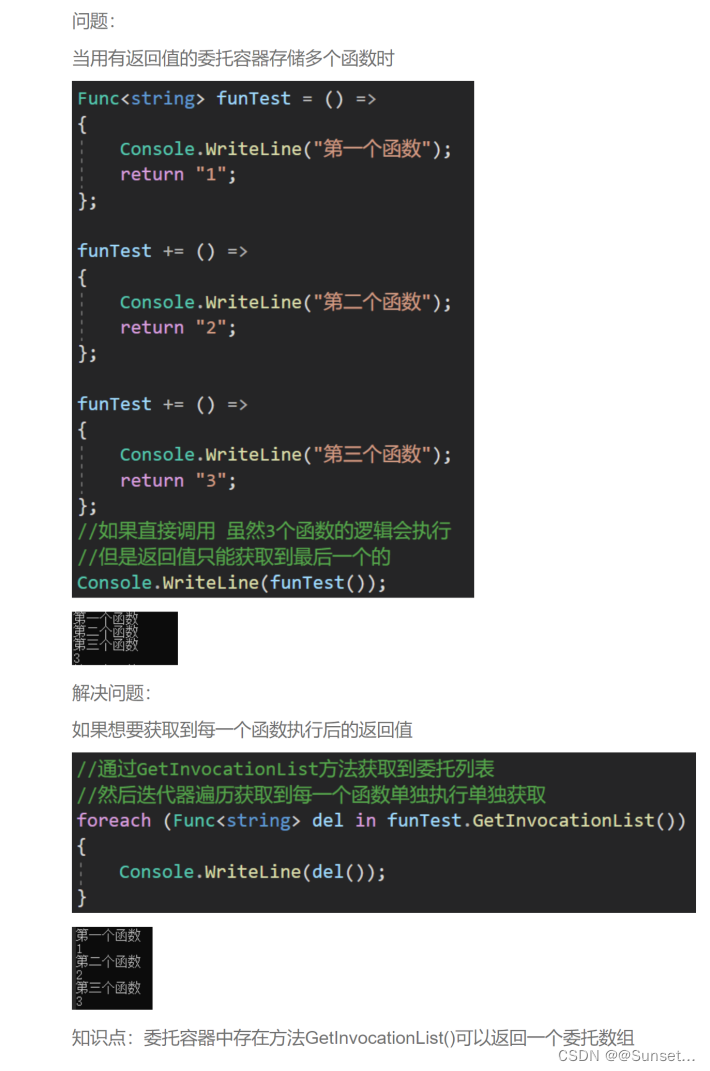
练习:
List排序
Lesson16:List排序
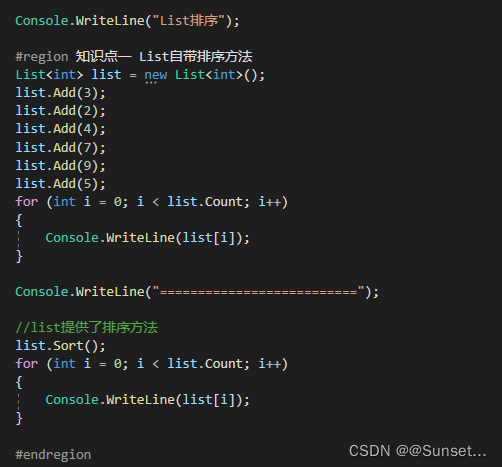
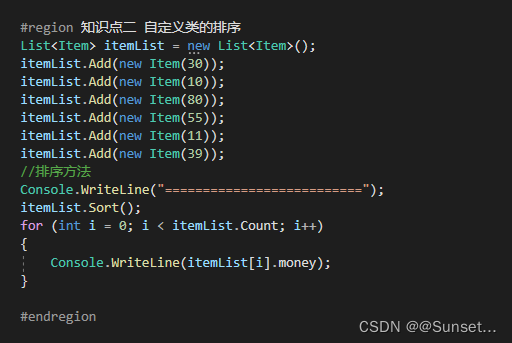
练习:
using System;
using System.Collections.Generic;
using System.Linq;
using System.Text;
using System.Threading.Tasks;
namespace Lesson16_练习
{
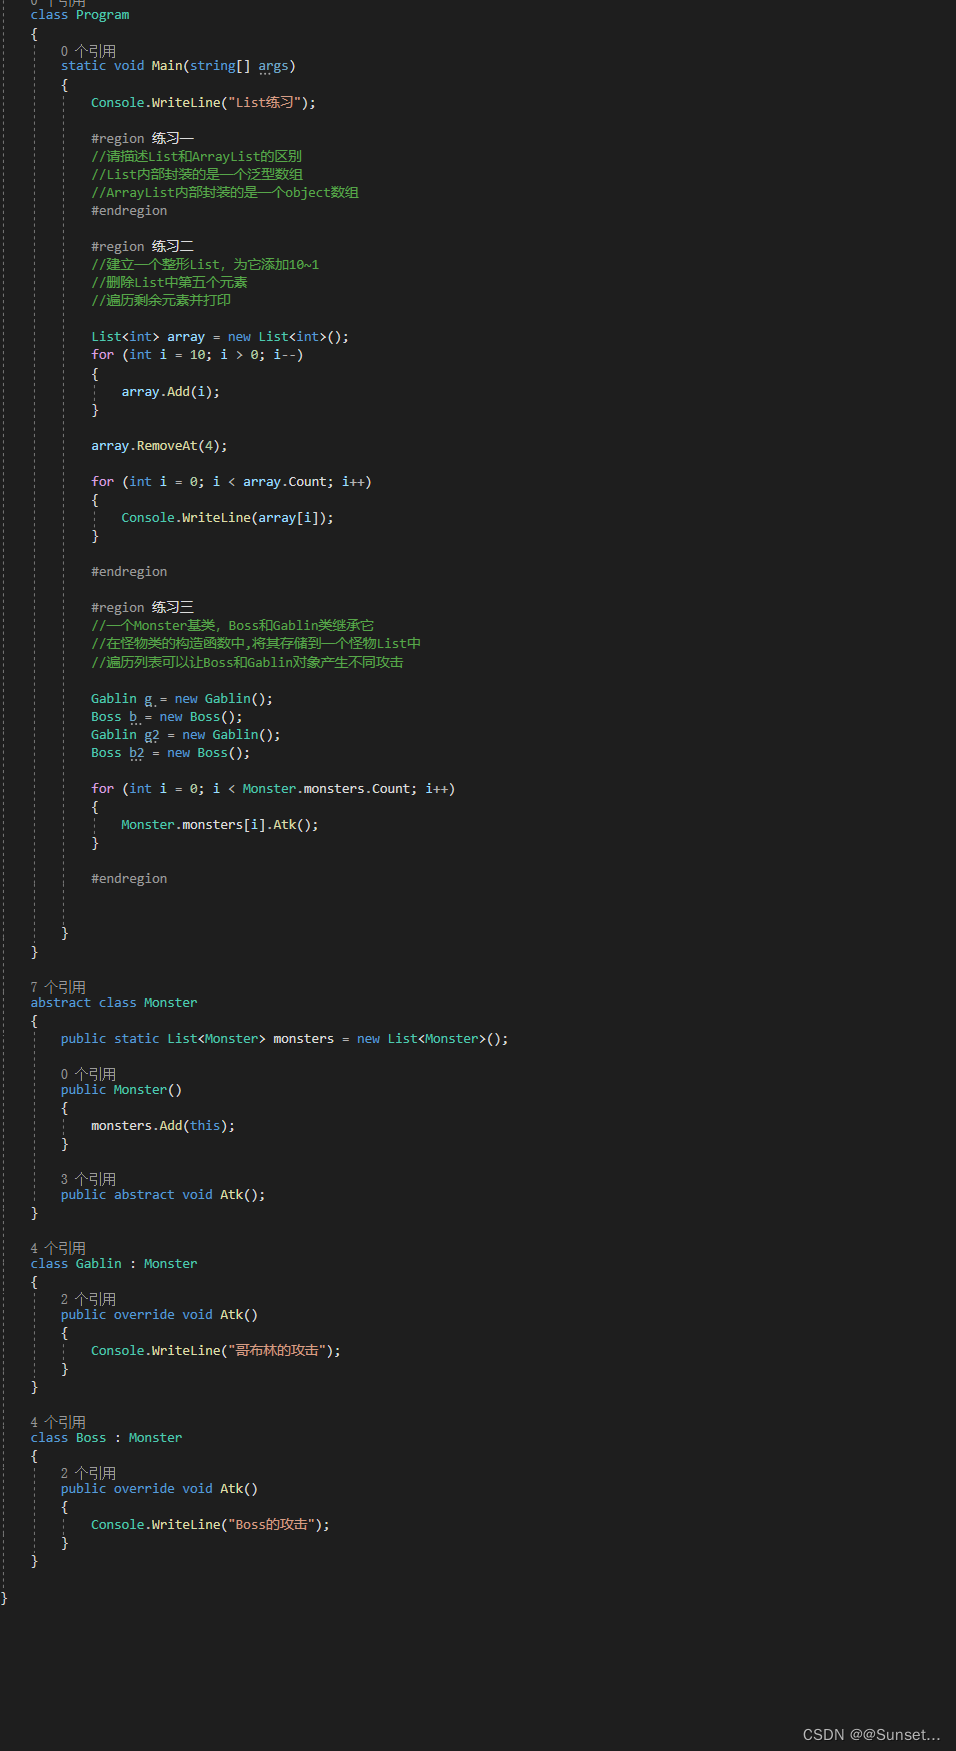
#region 练习一
//写一个怪物类,创建10个怪物将其添加到List中
//对List列表进行排序,根据用户输入数字进行排序
//1.攻击排序
//2.防御排序
//3.血量排序
//4.反转
class Monster : IComparable<Monster>
{
public int atk;
public int enk;
public int hp;
public int id;
public Monster(int atk, int enk, int hp, int id)
{
this.atk = atk;
this.enk = enk;
this.hp = hp;
this.id = id;
}
//继承接口的排序方法
public int CompareTo(Monster other)
{
//升序
if (this.atk > other.atk)
{
return 1;
}
else
{
return -1;
}
}
}
#endregion
#region 练习二
//写一个物品类(类型、名字、品质),创建10个物品
//添加到List中
//同时使用类型、品质、名字长度进行比较
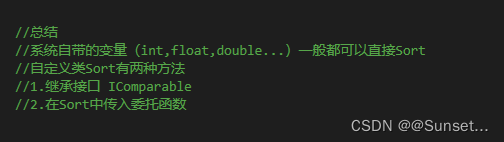
//排序的权重是:类型>品质>名字长度
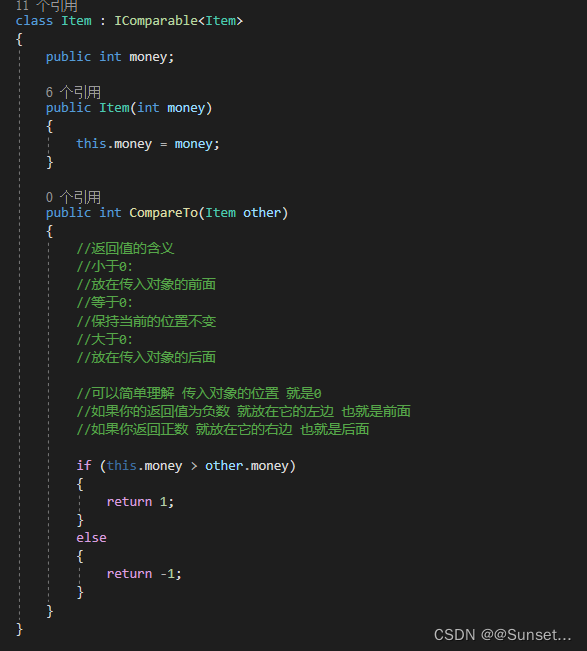
class Item
{
public int type;
public string name;
public int quality;
public Item(int type, string name, int quality)
{
this.type = type;
this.name = name;
this.quality = quality;
}
public override string ToString()
{
return string.Format("道具信息:类型:{0},名字:{1},品质:{2}", type, name, quality);
}
}
#endregion
#region 练习三
//涉及到 : linq SQL
//尝试利用List排序方式对Dictionary中的内容排序
//提示:得到Dictionary的所有键值对信息存入List中
#endregion
class Program
{
static void Main(string[] args)
{
Console.WriteLine("List排序练习");
#region 练习一
Console.WriteLine("================ 练习一 ===================");
List<Monster> m = new List<Monster>();
m.Add(new Monster(5, 1, 9, 1));
m.Add(new Monster(4, 2, 8, 2));
m.Add(new Monster(3, 1, 7, 3));
m.Add(new Monster(2, 4, 3, 4));
m.Add(new Monster(3, 8, 3, 5));
m.Add(new Monster(8, 7, 5, 6));
m.Add(new Monster(4, 1, 7, 7));
m.Add(new Monster(7, 2, 6, 8));
m.Add(new Monster(2, 9, 6, 9));
m.Add(new Monster(6, 4, 7, 10));
Console.WriteLine("请输入1~3:");
int num = int.Parse(Console.ReadLine());
try
{
if (num == 1)
{
//继承接口的方式
m.Sort();
Console.WriteLine("攻击力升序排序:");
for (int i = 0; i < m.Count; i++)
{
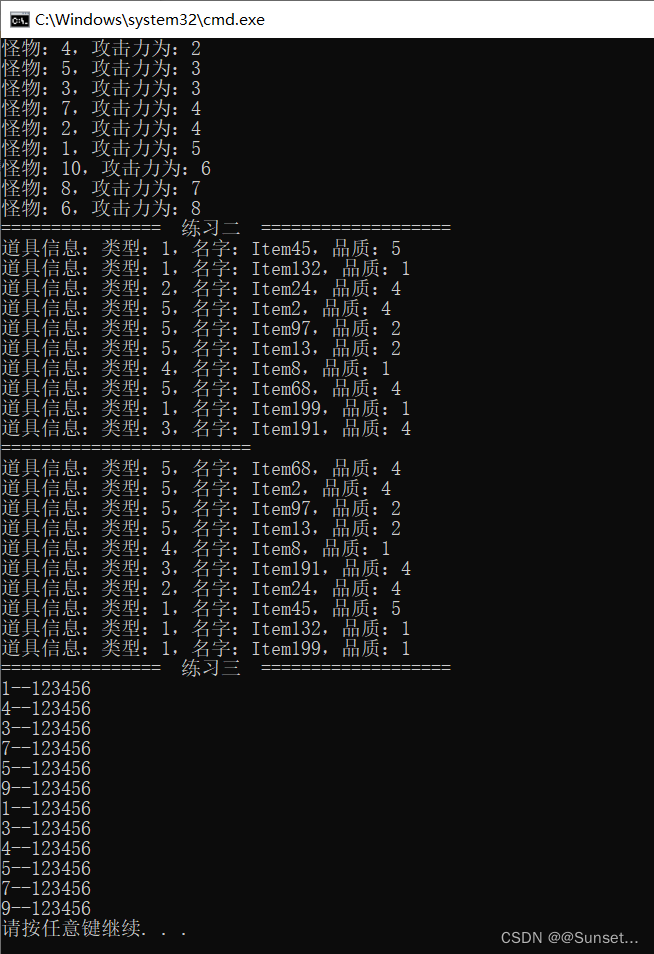
Console.WriteLine("怪物:{0},攻击力为:{1}", m[i].id, m[i].atk);
}
}
else if (num == 2)
{
//调用方法--泛型的方式
m.Sort(Test);
Console.WriteLine("防御力降序排序:");
for (int i = 0; i < m.Count; i++)
{
Console.WriteLine("怪物:{0},防御力为:{1}", m[i].id, m[i].enk);
}
}
else if (num == 3)
{
//匿名函数的方法 升序
//m.Sort(delegate (Monster m1, Monster m2)
//{
// return m1.hp > m2.hp ? 1 : -1;
//});
//lambad 降序
m.Sort((m1, m2) => { return m1.hp > m2.hp ? -1 : 1; });
Console.WriteLine("血量升序排序:");
for (int i = 0; i < m.Count; i++)
{
Console.WriteLine("怪物:{0},血量为:{1}", m[i].id, m[i].hp);
}
}
else if (num == 4)
{
m.Reverse();
Console.WriteLine("反转打印");
for (int i = 0; i < m.Count; i++)
{
Console.WriteLine("怪物:{0}", m[i].id);
}
}
}
catch
{
Console.WriteLine("请输入数字!");
}
#endregion
#region 练习二
Console.WriteLine("================ 练习二 ===================");
List<Item> itemList = new List<Item>();
Random r = new Random();
for (int i = 0; i < 10; i++)
{
itemList.Add(new Item(r.Next(1, 6), "Item" + r.Next(1, 201), r.Next(1, 6)));
Console.WriteLine(itemList[i]);
}
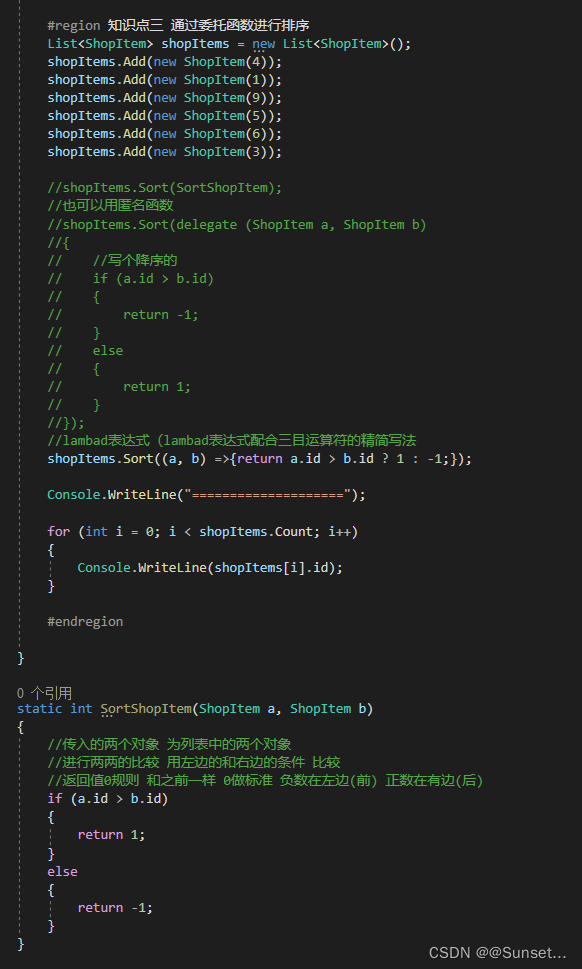
itemList.Sort((a, b) =>
{
//类型不同 按类型比
if (a.type != b.type)
{
return a.type > b.type ? -1 : 1;
}
//品质不同 按品质比
else if (a.quality != b.quality)
{
return a.quality > b.quality ? -1 : 1;
}
//否则就直接按名字长度比
else
{
return a.name.Length > b.name.Length ? -1 : 1;
}
});
Console.WriteLine("=========================");
for (int i = 0; i < 10; i++)
{
Console.WriteLine(itemList[i]);
}
#endregion
#region 练习三
Console.WriteLine("================ 练习三 ===================");
Dictionary<int, string> dic = new Dictionary<int, string>();
dic.Add(1, "123456");
dic.Add(4, "123456");
dic.Add(3, "123456");
dic.Add(7, "123456");
dic.Add(5, "123456");
dic.Add(9, "123456");
List<KeyValuePair<int, string>> list = new List<KeyValuePair<int, string>>();
foreach (KeyValuePair<int, string> item in dic)
{
list.Add(item);
Console.WriteLine(item.Key + "--" + item.Value);
}
list.Sort((a, b) =>
{
return a.Key > b.Key ? 1 : -1;
});
for (int i = 0; i < list.Count; i++)
{
Console.WriteLine(list[i].Key + "--" + list[i].Value);
}
#endregion
}
static int Test(Monster m1, Monster m2)
{
//降序
if (m1.enk > m2.enk)
{
return -1;
}
else
{
return 1;
}
}
}
}
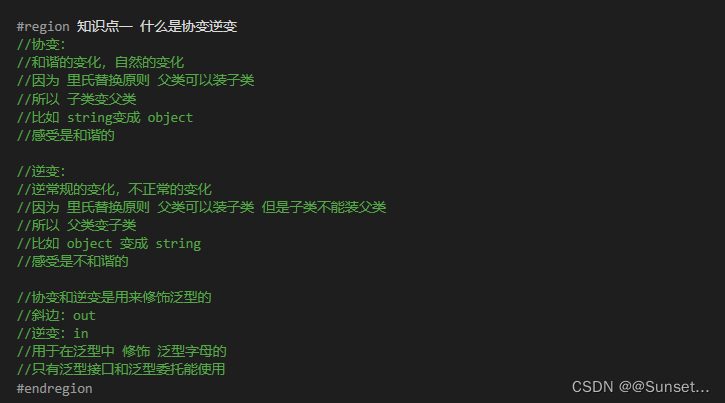
协变逆变
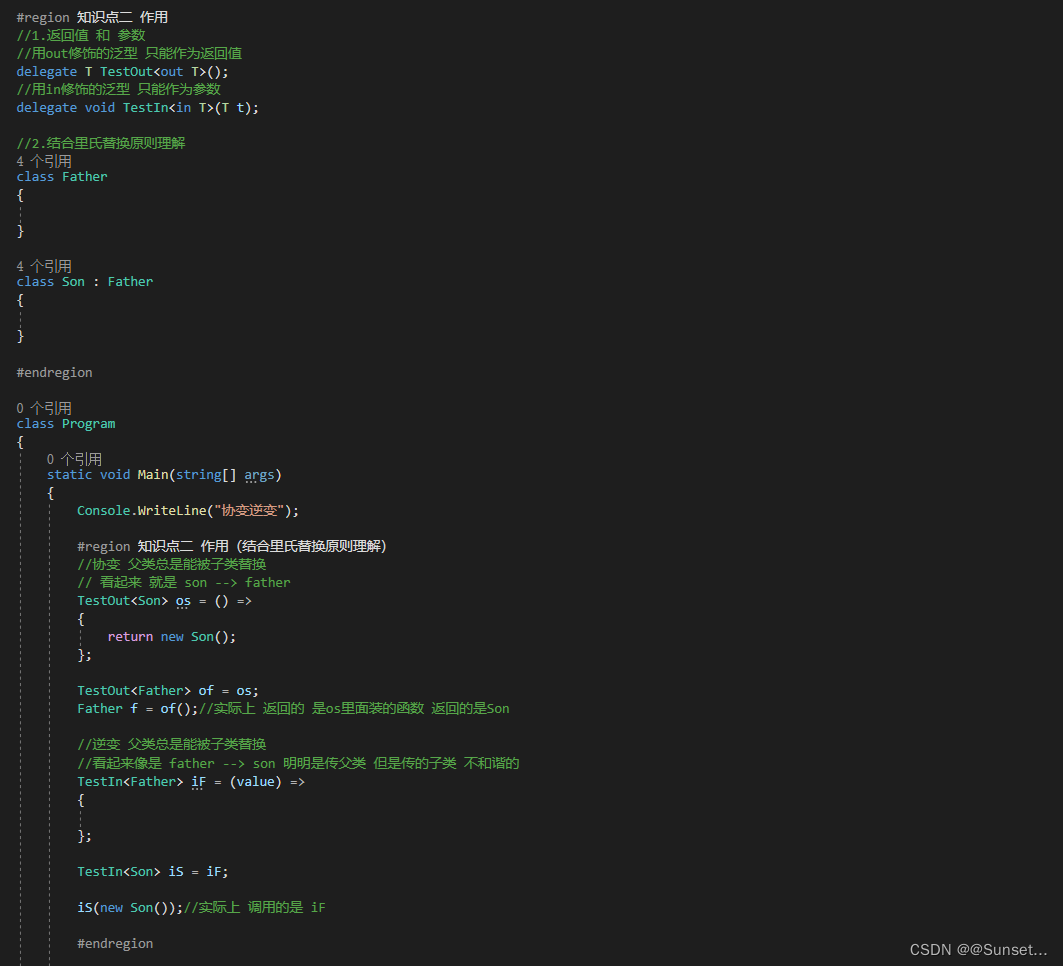
Lesson17:协变和逆变
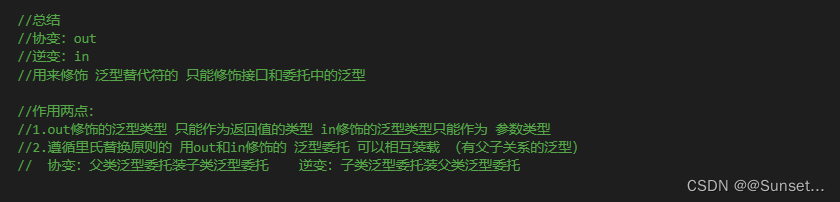
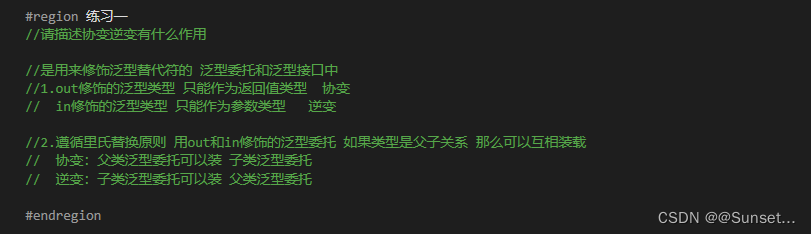
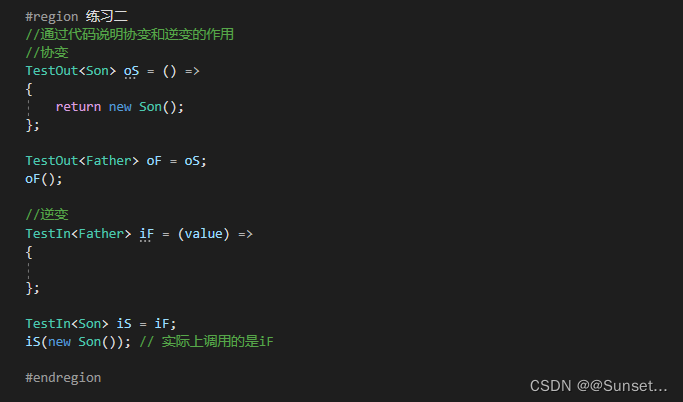
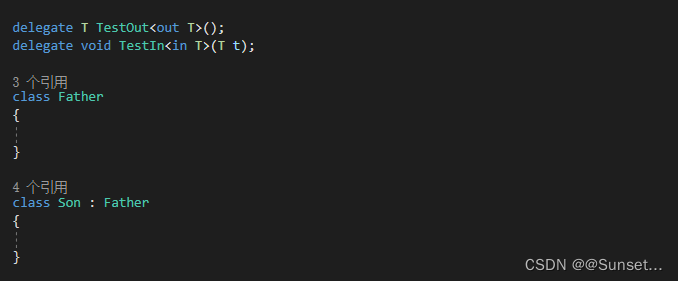
练习:
请描述协变逆变有什么作用
多线程
Lesson18:多线程
using System;
using System.Collections.Generic;
using System.Linq;
using System.Text;
using System.Threading;
using System.Threading.Tasks;

namespace Lesson18_多线程
{
    class Program
    {

        static bool isRuning = true;

        static object obj = new object();

        static void Main(string[] args)
        {
            Console.WriteLine("多线程");

            #region 知识点一 了解线程前先了解进程
            //进程(Process)是计算机中的程序关于某数据集合上的一次运行活动
            //是系统进行资源分配和调度的基本单位,是操作系统结构的基础
            //说人话:打开一个应用程序就是在操作系统上开启了一个进程
            //进程之间可以相互独立运行,互不干扰
            //进程之间也可以相互访问、操作
            #endregion

            #region 知识点二 什么是线程
            //操作系统能够进行运算调度的最小单位
            //它被包含在进程之中,是进程中的实际运作单位
            //一条线程指的是进程中一个单一顺序的控制流,一个进程中可以并发多个线程
            //我们目前写的程序 都在主线程中

            //简单理解线程:
            //就是代码从上到下运行的一条“管道"
            #endregion

            #region 知识点三 什么是多线程
            //我们可以通过代码 开启新的线程
            //可以同时运行代码的多条“管道”就叫多线程
            #endregion

            #region 知识点四 语法相关
            //线程类 Thread
            //需要引用命名空间 using System.Threading;
            //1.申明一个新的线程
            //  注意 线程执行的代码 需要封装到一个函数中
            //  新线程 将要执行的代码逻辑 被封装到了一个函数语句块中
            Thread t = new Thread(NewThreadLogic);

            //2.启动线程
            t.Start();

            //3.设置为后台线程
            //当前台线程都结束的时候,整个程序也就结束了,即使还有后台线程正在运行
            //后台线程不会防止应用程序的进程被终止掉
            //如果不设置为后台线程 可能导致进程无法正常关闭
            t.IsBackground = true;

            //4.关闭释放一个线程
            //如果开启的线程中不是死循环 是能够结束的逻辑 那么 不用刻意的去关闭它
            //如果是死循环 想要终止这个线程 有两种方式
            //4.1--死循环中bool标识
            //Console.ReadKey();

            //isRuning = false;

            //Console.ReadKey();

            //4.2--通过线程提供的方法(注意在.Net core版本中无法中止 会报错)
            //try
            //{
            //    //终止线程
            //    t.Abort();
            //    t = null;
            //}
            //catch
            //{

            //}

            //5.线程休眠
            //让线程休眠多少毫秒  1s = 1000毫秒
            //在哪个线程里执行 就休眠哪个线程
            //Thread.Sleep(1000);

            #endregion

            #region 知识点五 线程之间共享数据
            //多个线程使用的内存是共享的,都属于该应用程序(进程)
            //所以要注意 当多线程 同时操作同一片内存区域时可能会出现问题
            //可以通过加锁的形式避免问题

            //lock
            //当我们在多个线程当中想要访问同样的东西 进行逻辑处理时
            //为避免不必要的逻辑顺序执行的查错
            //lock(引用类型对象)

            while (true)
            {
                lock (obj)
                {
                    Console.SetCursorPosition(0, 0);
                    Console.ForegroundColor = ConsoleColor.Red;
                    Console.Write("●");
                }

            }

            #endregion

            #region 知识点六 多线程对于我们的意义
            //可以用多线程专门处理一些复杂耗时的逻辑
            //比如 寻路、网络通信等等
            #endregion

        }

        static void NewThreadLogic()
        {
            //新开线程 执行的代码逻辑 在该函数语句块中
            while (isRuning)
            {
                //Thread.Sleep(1000);
                //Console.WriteLine("新开线程代码逻辑。");

                lock (obj)
                {
                    Console.SetCursorPosition(10, 5);
                    Console.ForegroundColor = ConsoleColor.Yellow;
                    Console.Write("■");
                }

            }

        }


        //总结
        //多线程是多个可以同时执行代码逻辑的“管道”
        //可以通过代码开启多线程,用多线程处理一些复杂的可能影响主线程流畅度的逻辑
        //关键字: Thread

    }
}

练习:

预处理器指令
Lesson19:预处理器指令
//定义一个符号
#define Unity4
#define Unity5
//#define Unity2017
#define Unity2019
//取消定义一个符号
#undef Unity4

#define IOS
#define Android
#define PC

using System;
using System.Collections.Generic;
using System.Linq;
using System.Text;
using System.Threading.Tasks;

namespace Lesson19_预处理器指令
{
    class Program
    {
        static void Main(string[] args)
        {
            Console.WriteLine("预处理器指令");

            #region 知识点一 什么是编译器
            //编译器是一种翻译程序
            //它用于将源语言程序翻译为目标语言程序

            //源语言程序:某种程序设计语言写成的,比如C#、C、C++、Java等语言写的程序
            //目标语言程序:二进制数表示的伪机器代码写的程序
            #endregion

            #region 知识点二 什么是预处理器指令
            //预处理器指令 指导编译器 在实际编译开始前对信息进行预处理
            //预处理器指令 都是以# 开始
            //预处理器指令不是语句,所以它们不以分号 ; 结束
            //目前我们经常用到 折叠代码块 就是预处理器指令
            #endregion

            #region 知识点三 常见的预处理器指令
            //1
            //#define
            //定义一个符号,类似一个没有值的变量
            //#undef
            //取消define定义的符号,让其失效
            //两者都是写在脚本文件最前面
            //一般配合 if指令使用 或配合特征

            //2
            //#if
            //#elif
            //#else
            //#endif
            //和if语句规则一样,一般配合#define定义的符号使用
            //用于告诉编译器进行编译代码的流程控制

            //如果发现有Unity4这个符号 那么其中包含的代码 就会被编译器翻译
            //可以通过 逻辑或 和 逻辑与 进行多种符号的组合判断
#if Unity4
            Console.WriteLine("版本为Unity4");
#elif Unity2017 || IOS
            Console.WriteLine("版本为Unity2017");
            //#warning 这个版本 不合法
            //#error 这个版本不支持执行
#else
            Console.WriteLine("其他版本");
#endif

            //3
            //#warning
            //#error
            //告诉编译器
            //是警报还是报错误
            //一般还是配合if使用

            #endregion


            //总结
            //预处理器指令
            //可以让代码还没有编译之前就可以进行一些预处理判断
            //在Unity中会用来进行一些平台或者版本的判断
            //决定不同的版本或者不同的平台使用不同的代码逻辑

        }
    }
}
练习:
#define Unity5
#define Unity2017
#define Unity2020
#undef Unity2017
#undef Unity5

using System;
using System.Collections.Generic;
using System.Linq;
using System.Text;
using System.Threading.Tasks;

namespace Lesson19_练习
{
    class Program
    {
        static void Main(string[] args)
        {
            Console.WriteLine("预处理器指令练习");

            #region 练习一
            //请说出至少4种预处理器指令
            //1.#define  定义一个符号 (没有值的变量)
            //  #undef   取消定义一个符号

            //2.#if
            //  #elif
            //  #else
            //  #endif

            //3.#warning
            //  #error

            #endregion

            #region 练习二
            //请使用预处理器指令实现
            //写一个函数计算两个数
            //当是Unity5版本时算加法
            //当是Unity2017版本时算乘法
            //当是Unity2020版本是算减法
            //都不是返回0

            Console.WriteLine(Test(10,20));


            #endregion

        }

        static int Test(int x, int y)
        {
#if Unity5
            int sam = x + y;
            return sam;
#elif Unity2017
            int sam = x * y;
            return sam;
#elif Unity2020
            int sam = x - y;
            return sam;
#else
            return 0;

#endif
        }

    }
}
反射和特性
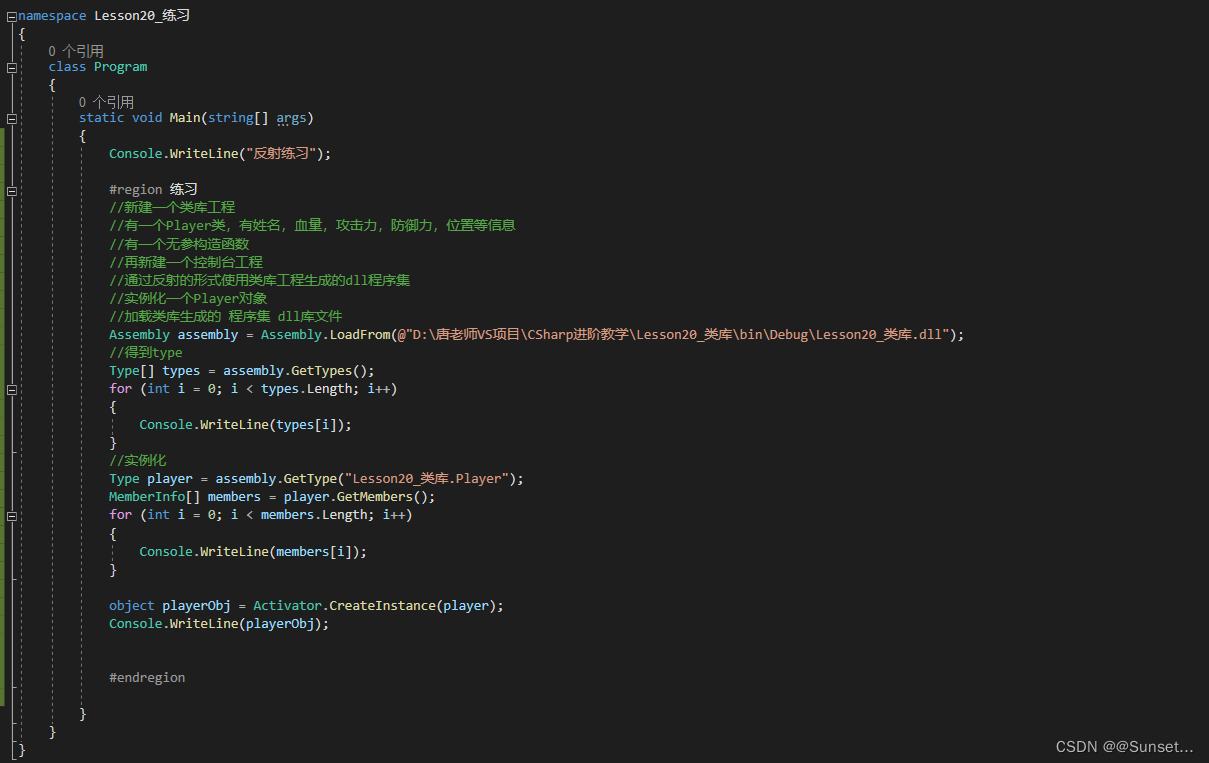
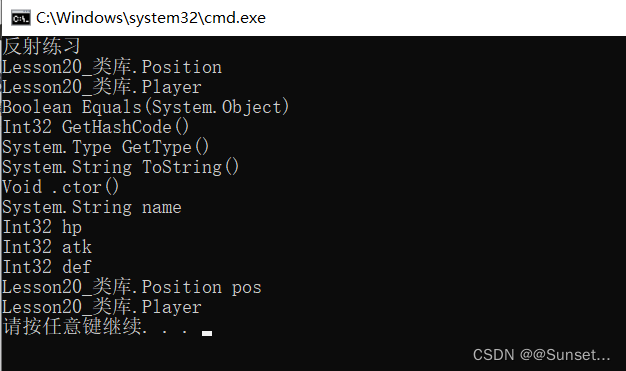
Lesson20:反射

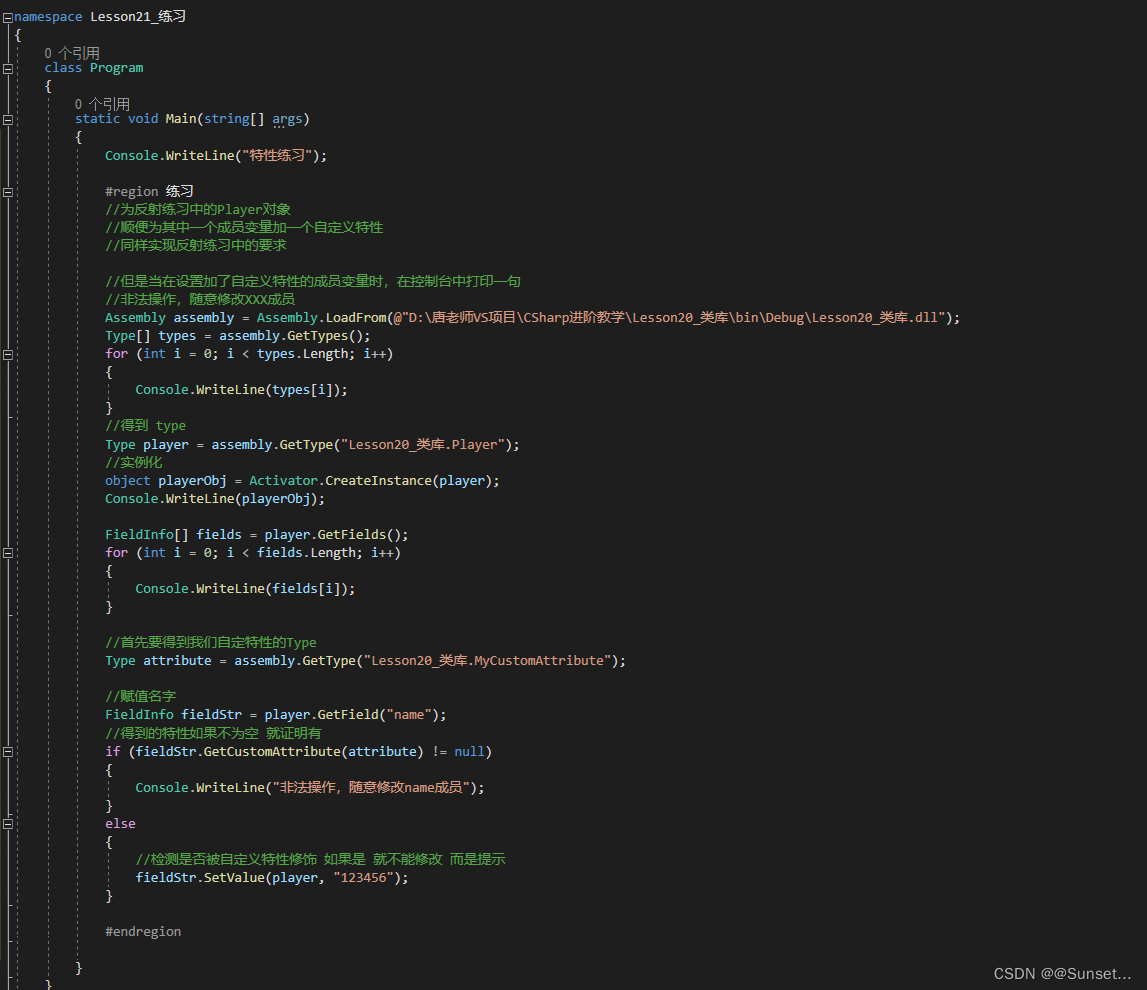
练习:
注意:路径最后加上后缀,不然会报错,暂时我也不知道为什么不加会报错
Lesson21:特性
#define Fun
using System;
using System.Collections.Generic;
using System.Diagnostics;
using System.Linq;
using System.Runtime.CompilerServices;
using System.Runtime.InteropServices;
using System.Text;
using System.Threading.Tasks;
namespace Lesson21_特性
{
#region 知识点一 特性是什么
//特性是一种允许我们向程序的程序集添加元数据的语言结构
//它是用于保持程序结构信息的某种特殊类型的类
//特性提供功能强大的方法以将申明信息与 C# 代码(类型、方法、属性等)相关联。
//特性与程序实体关联后,即可在运行时使用反射查询特性信息
//特性的目的是告诉编译器把程序结构的某组元数据嵌入程序集中
//它可以放置在几乎所有的申明中(类、变量、函数等等申明)
//说人话:
//特性本质是个类
//我们可以利用特性类为元数据添加额外信息
//比如一个类、成员变量、成员方法等等为它们添加更多的额外信息
//之后可以通过反射来获取这些额外信息
#endregion
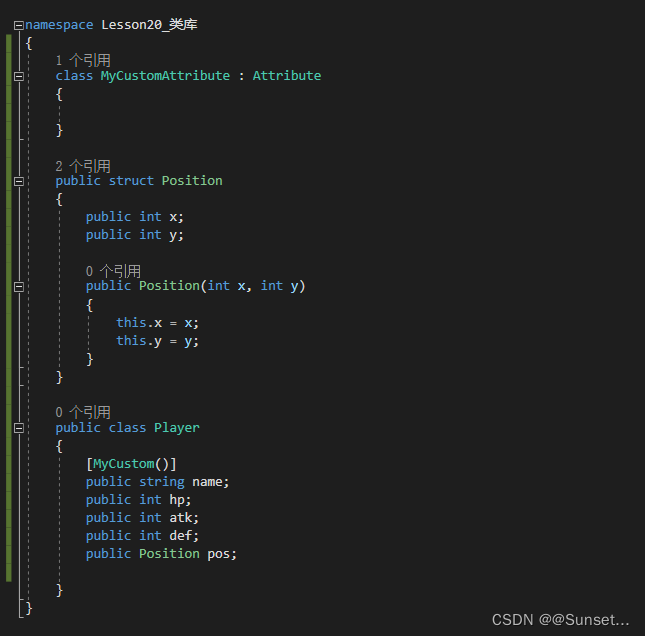
#region 知识点二 自定义特性
//继承特性基类 Attribute
[AttributeUsage(AttributeTargets.Class | AttributeTargets.Field, AllowMultiple = true, Inherited = false)]
class MyCustomAttribute : Attribute
{
//特性中的成员 一般根据需求来写
public string info;
public MyCustomAttribute(string info)
{
this.info = info;
}
public void TestFun()
{
Console.WriteLine("特性的方法");
}
}
#endregion
#region 知识点三 特性的使用
//基本语法:
//[特性名(参数列表)]
//本质上 就是在调用特性的构造函数
//写在哪里?
//类、函数、变量上一行,表示他们具有该特性信息
[MyCustom("这个是自己写的一个用于计算的类")]
[MyCustom("这个是自己写的一个用于计算的类")]
class MyClass
{
[MyCustom("这是一个成员变量")]
public int value;
//[MyCustom("这是一个用于计算加法的函数")]
//public void TestFun([MyCustom("函数参数")]int a)
//{
//}
public void TestFun(int a)
{
}
}
#endregion
#region 知识点四 限制自定义特性的使用范围
//通过为特性类 加特性 限制其使用范围
[AttributeUsage(AttributeTargets.Class | AttributeTargets.Struct, AllowMultiple = true, Inherited = true)]
//参数一:AttributeTargets -- 特性能够用在哪些地方
//参数二:AllowMultiple -- 是否允许多个特性实例用在同一个目标上
//参数三:Inherited -- 特性是否能被派生类和重写成员继承
public class MyCustom2Attribute : Attribute
{
}
#endregion
#region 知识点五 系统自带特性--过时特性
//过时特性
//Obsolete
//用于提示用户 使用的方法等成员已经过时 建议使用新方法
//一般加在函数前的特性
class TestClass
{
//参数一:调用过时方法时 提示的内容
//参数二:true--使用该方法时会报错 false--使用该方法时直接警告
[Obsolete("OldSpeak方法已经过时了,请使用Speak方法", false)]
public void OldSpeak(string str)
{
Console.WriteLine(str);
}
public void Speak()
{
}
public void SpeakCaller(string str, [CallerFilePath]string fileName = "",
[CallerLineNumber]int line = 0, [CallerMemberName]string target = "")
{
Console.WriteLine(str);
Console.WriteLine(fileName);
Console.WriteLine(line);
Console.WriteLine(target);
}
}
#endregion
#region 知识点六 系统自带特征 -- 调用者信息特征
//哪个文件调用?
//CallerFilePath特性
//哪一行调用
//CallerLineNumber特性
//哪个函数调用?
//CallerMemberName特性
//需要引用命名空间 using System.Runtime.CompilerServices;
//一般作为函数参数的特性
#endregion
#region 知识点七 系统自带特性 -- 条件编译特性
//条件编译特性
//Conditional
//它会和预处理指令 #define配合使用
//需要引用命名空间using System.Diagnostics;
//主要可以用在一些调试代码上
//有时想执行有时不想执行的代码
#endregion
#region 知识点八 系统自带特性--外部Dll包函数特性
//DllImport
//用来标记非.Net(C#)的函数,表明该函数在一个外部的DLL中定义
//一般用来调用 C 或者 C++ 的DLL包写好的方法
//需要引用命名空间 using System.Runtime.InteropServices
#endregion
class Program
{
[DllImport("Test.dll")]
public static extern int Add(int a, int b);
[Conditional("Fun")]
static void Fun()
{
Console.WriteLine("Fun执行");
}
static void Main(string[] args)
{
Console.WriteLine("特性");
#region 特性的使用
MyClass mc = new MyClass();
Type t = mc.GetType();
//t = typeof(MyClass);
//t = Type.GetType("Lesson21_特性.MyClass");
//判断是否使用了某个特性
//参数一:特性的类型
//参数二:代表是否搜索继续
if (t.IsDefined(typeof(MyCustomAttribute), false))
{
Console.WriteLine("该类型应用了MyCustom特性");
}
//获取Type元数据中的所有特性
object[] array = t.GetCustomAttributes(true);
for (int i = 0; i < array.Length; i++)
{
if (array[i] is MyCustomAttribute)
{
Console.WriteLine((array[i] as MyCustomAttribute).info);
(array[i] as MyCustomAttribute).TestFun();
}
}
TestClass tc = new TestClass();
tc.OldSpeak("123");
tc.Speak();
tc.SpeakCaller("123456");
Fun();
#endregion
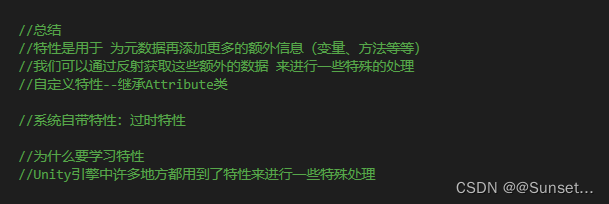
//总结
//特性是用于 为元数据再添加更多的额外信息(变量、方法等等)
//我们可以通过反射获取这些额外的数据 来进行一些特殊的处理
//自定义特性--继承Attribute类
//系统自带特性:过时特性
//为什么要学习特性
//Unity引擎中许多地方都用到了特性来进行一些特殊处理
}
}
}
练习:
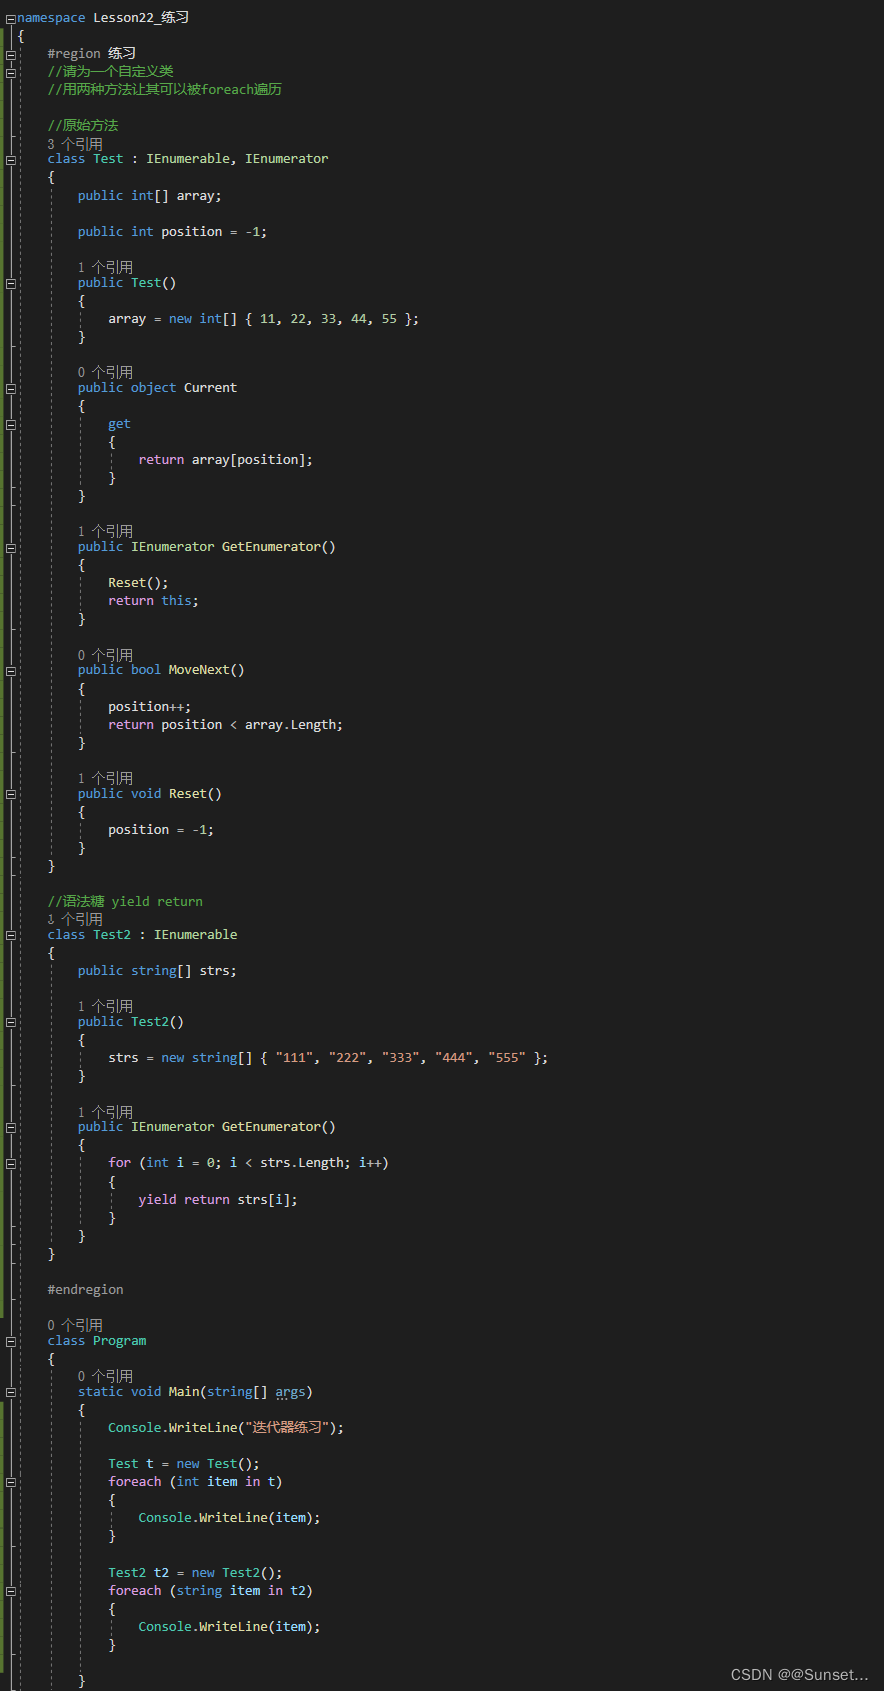
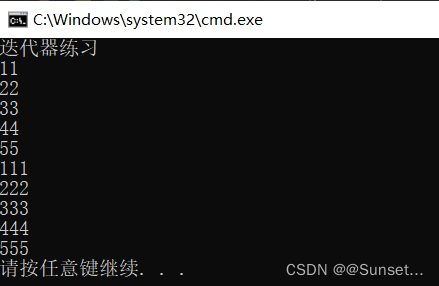
Lesson22:迭代器

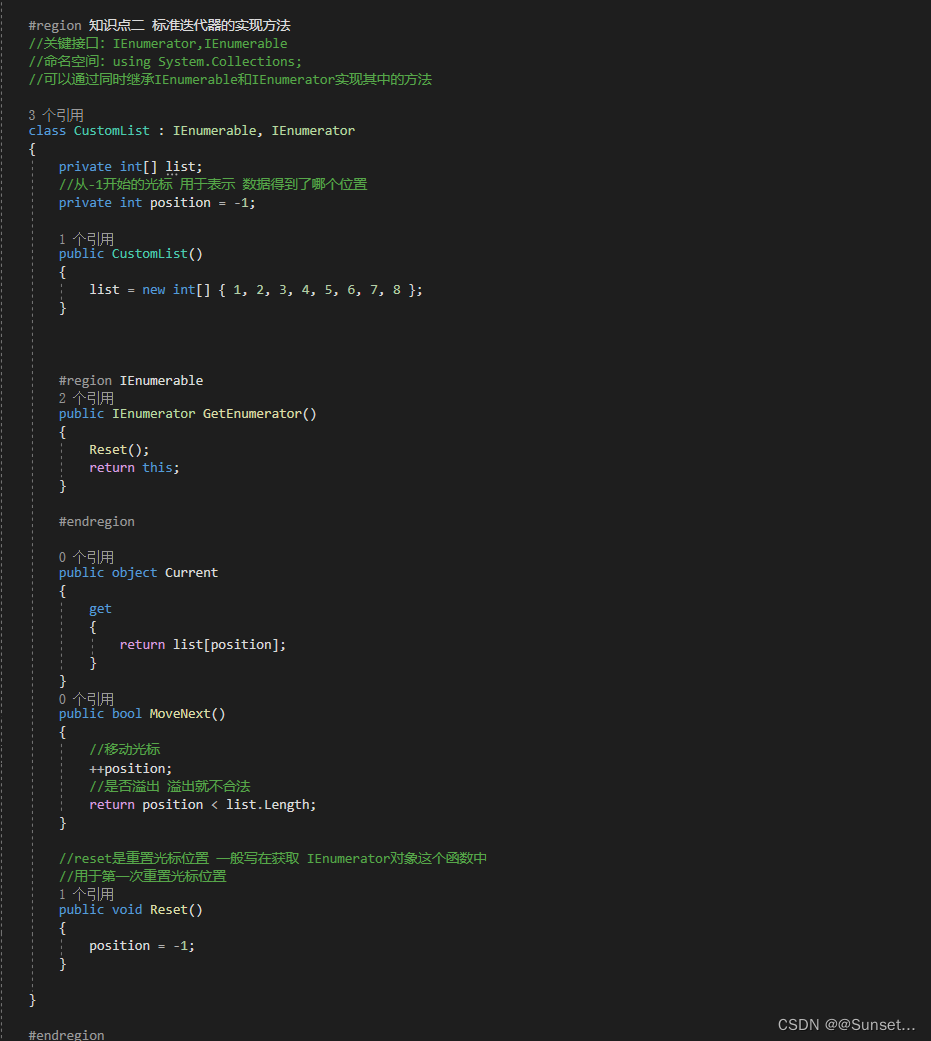
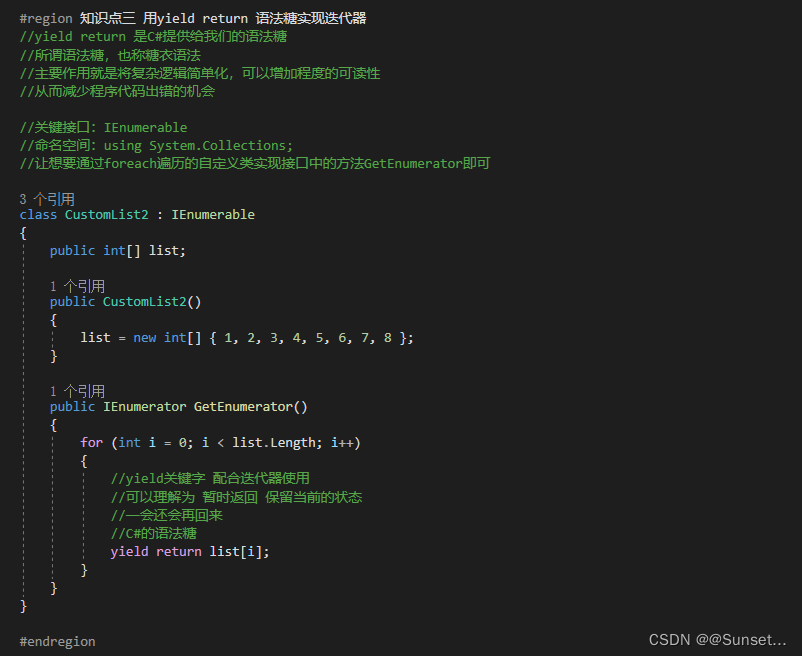
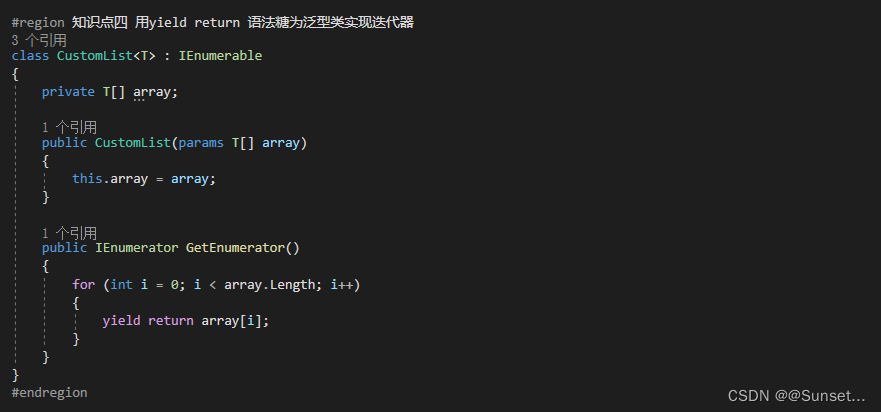
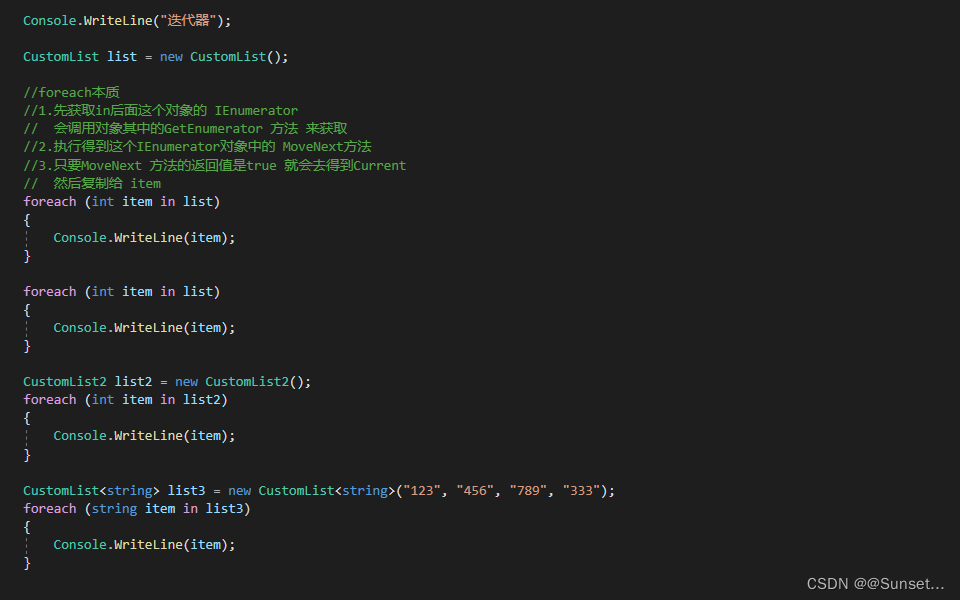
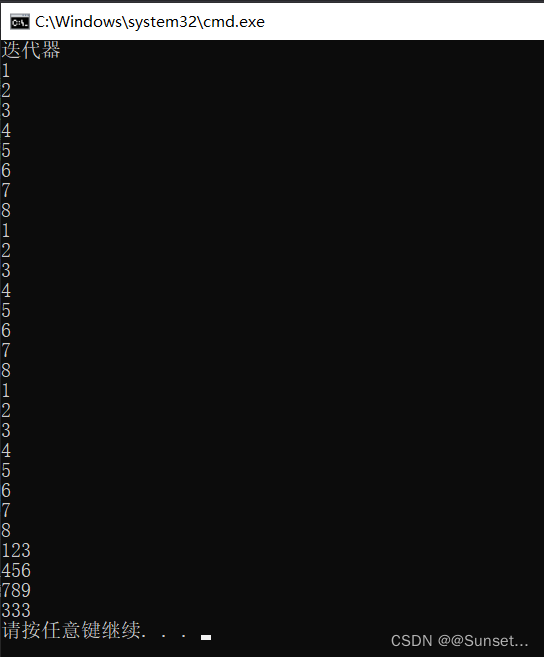

练习:
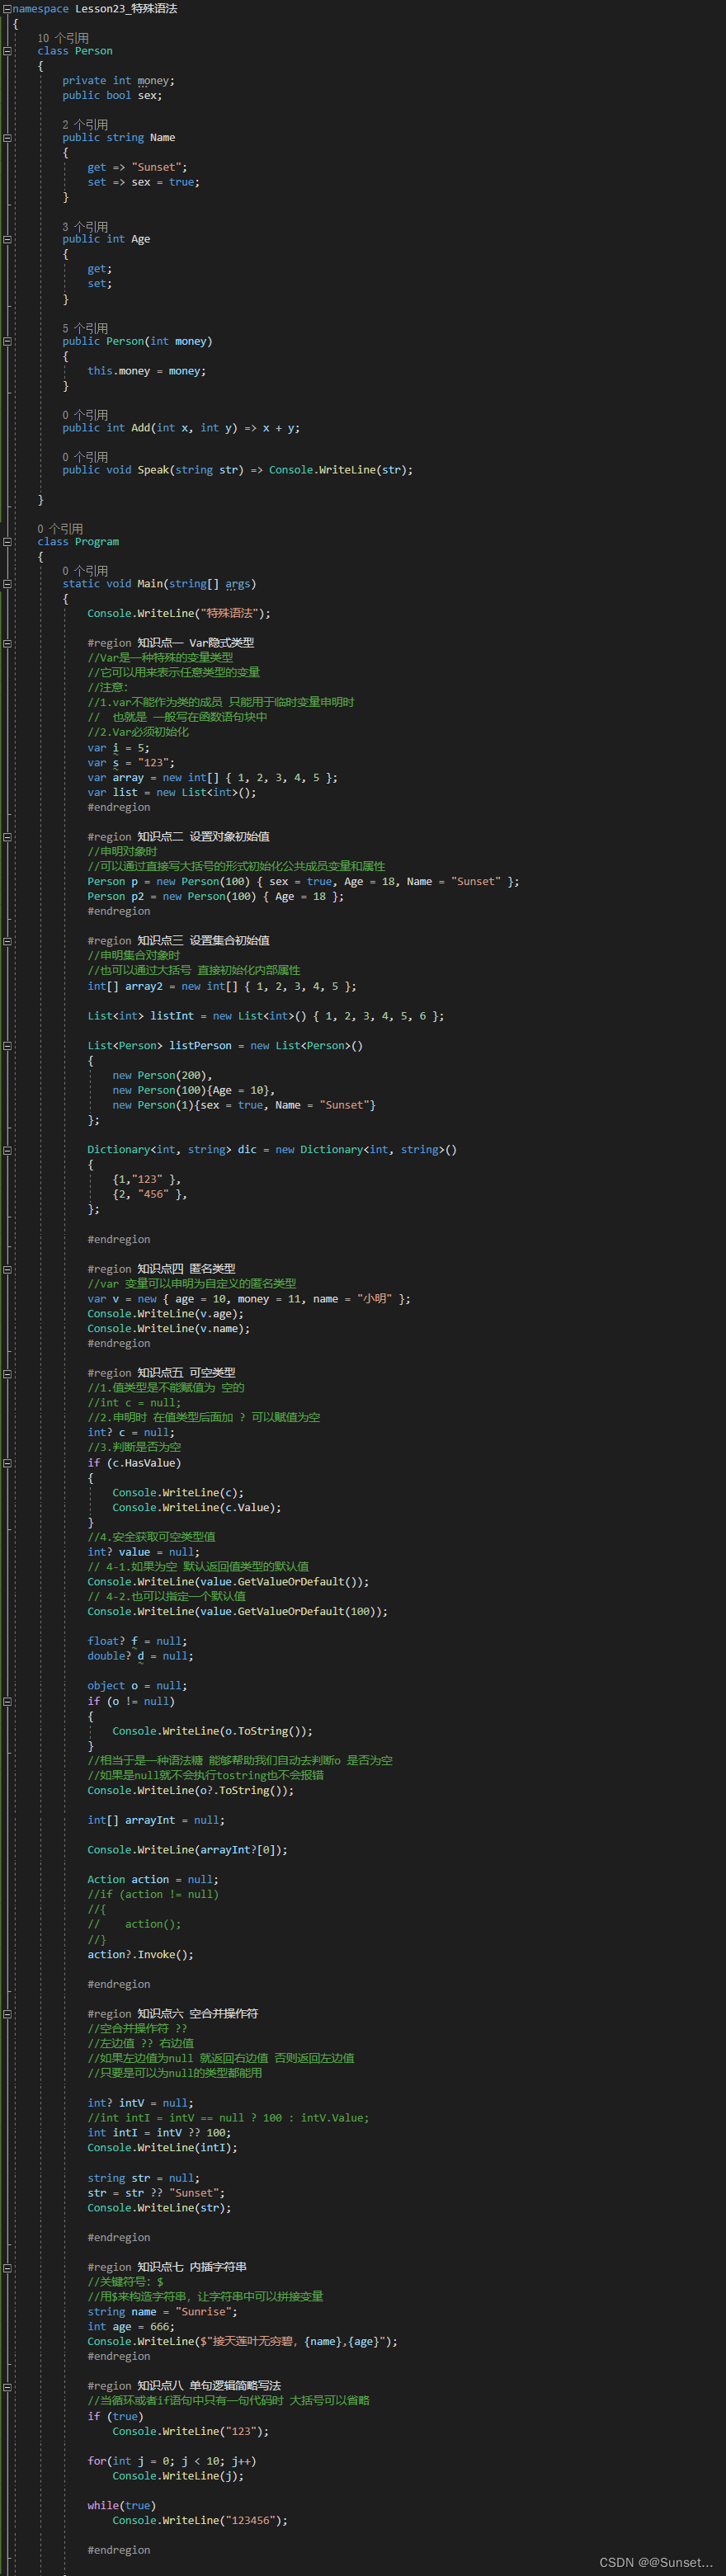
Lesson23:特殊语法
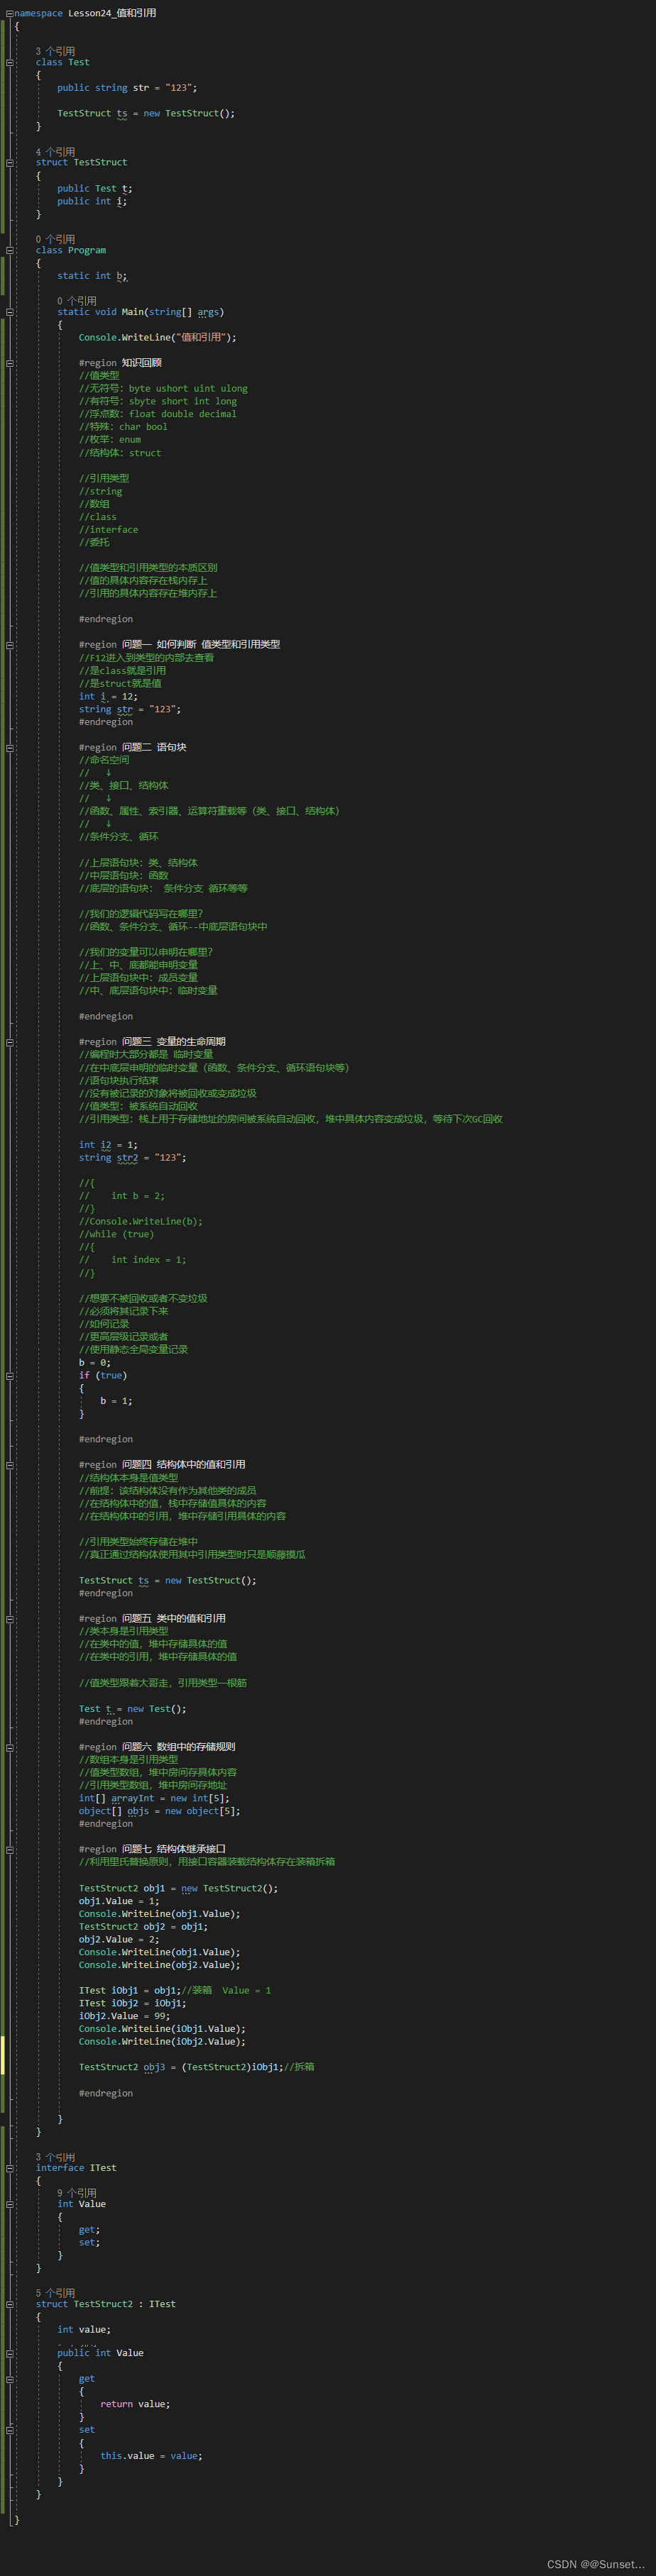
Lesson24:值和引用
排序进阶
面试时会考,但后面开发不常用
建议面试时突击复习下就可以!
(要面试啦!回来补上后面的内容!)

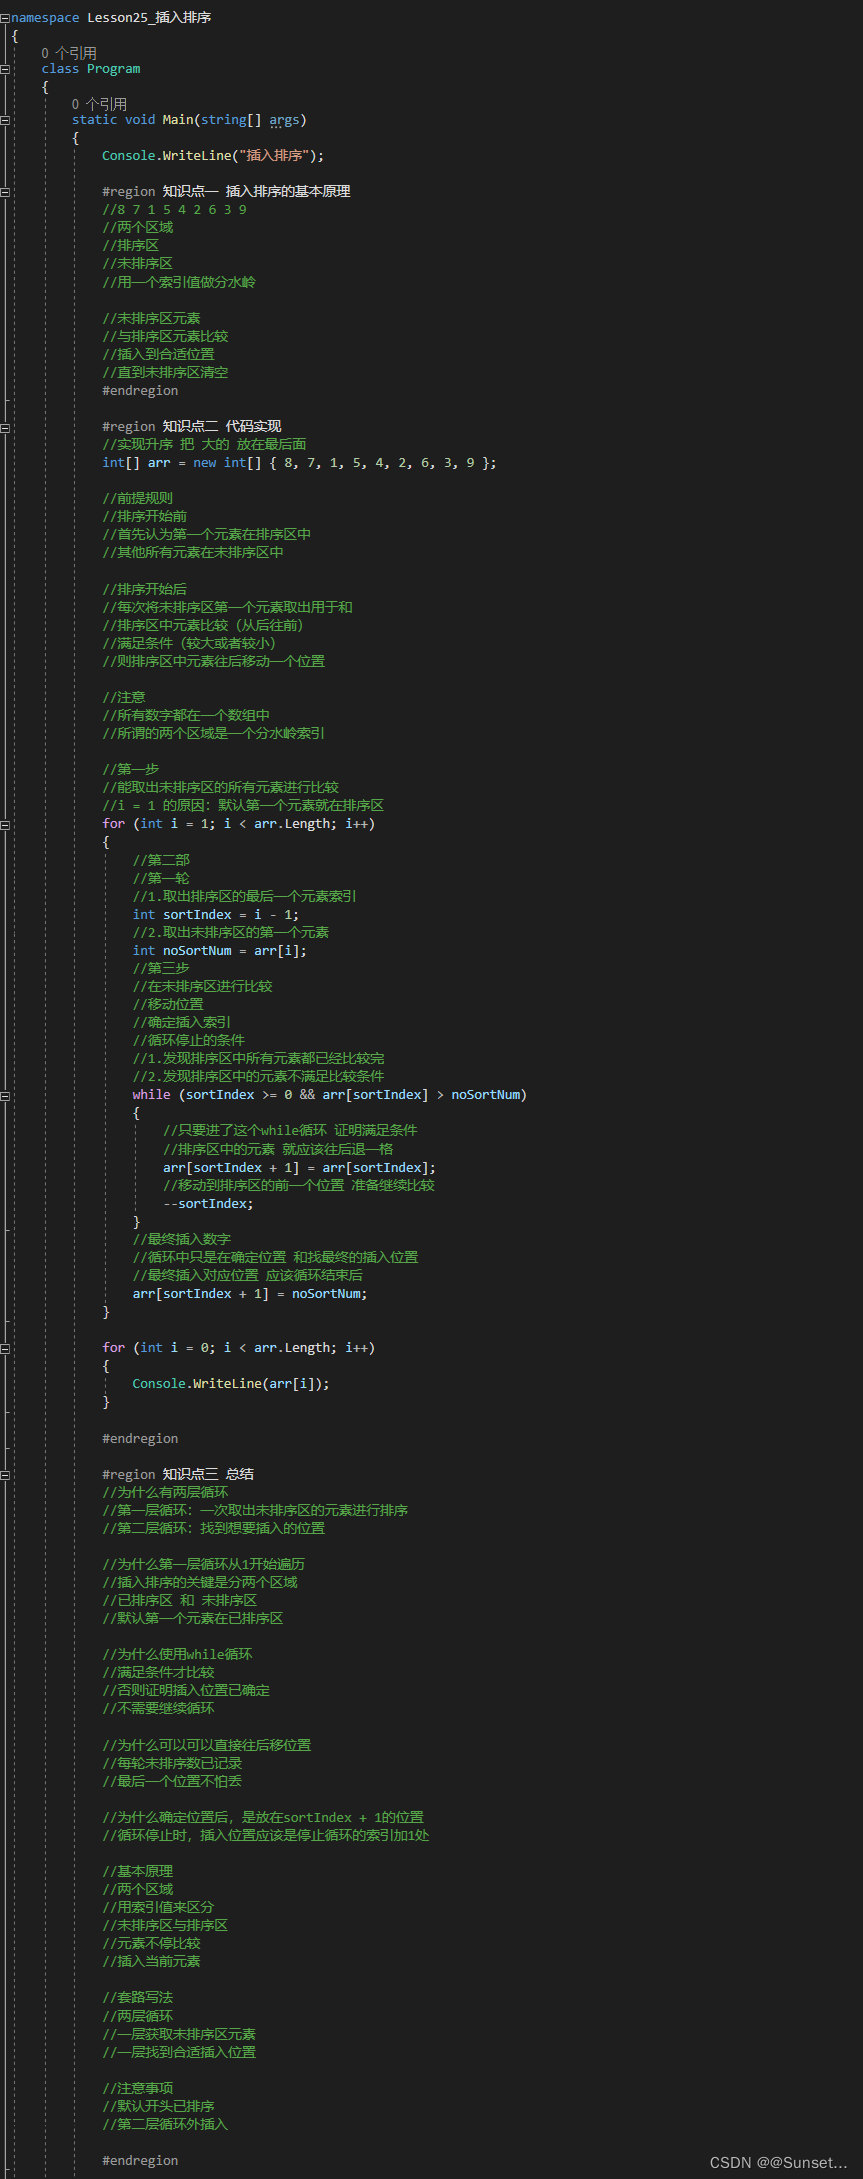
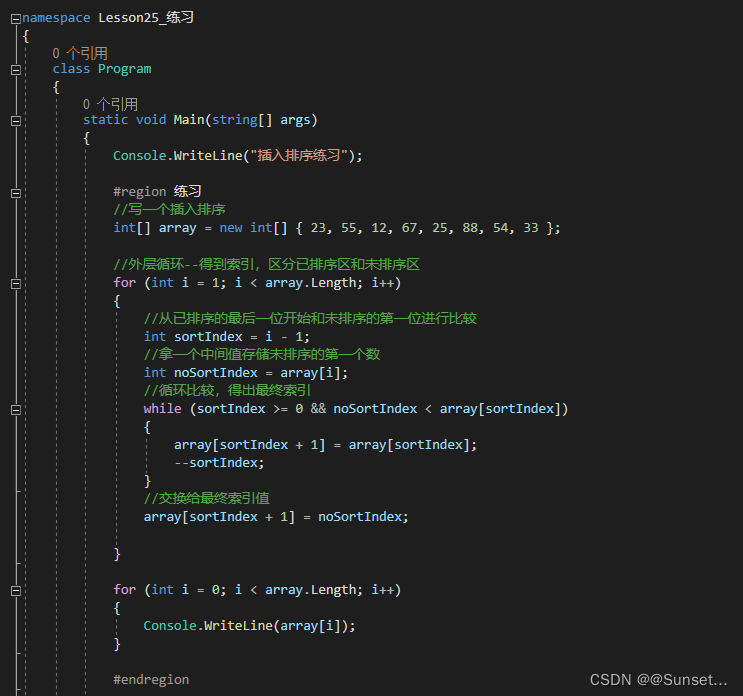
Lesson25:插入排序
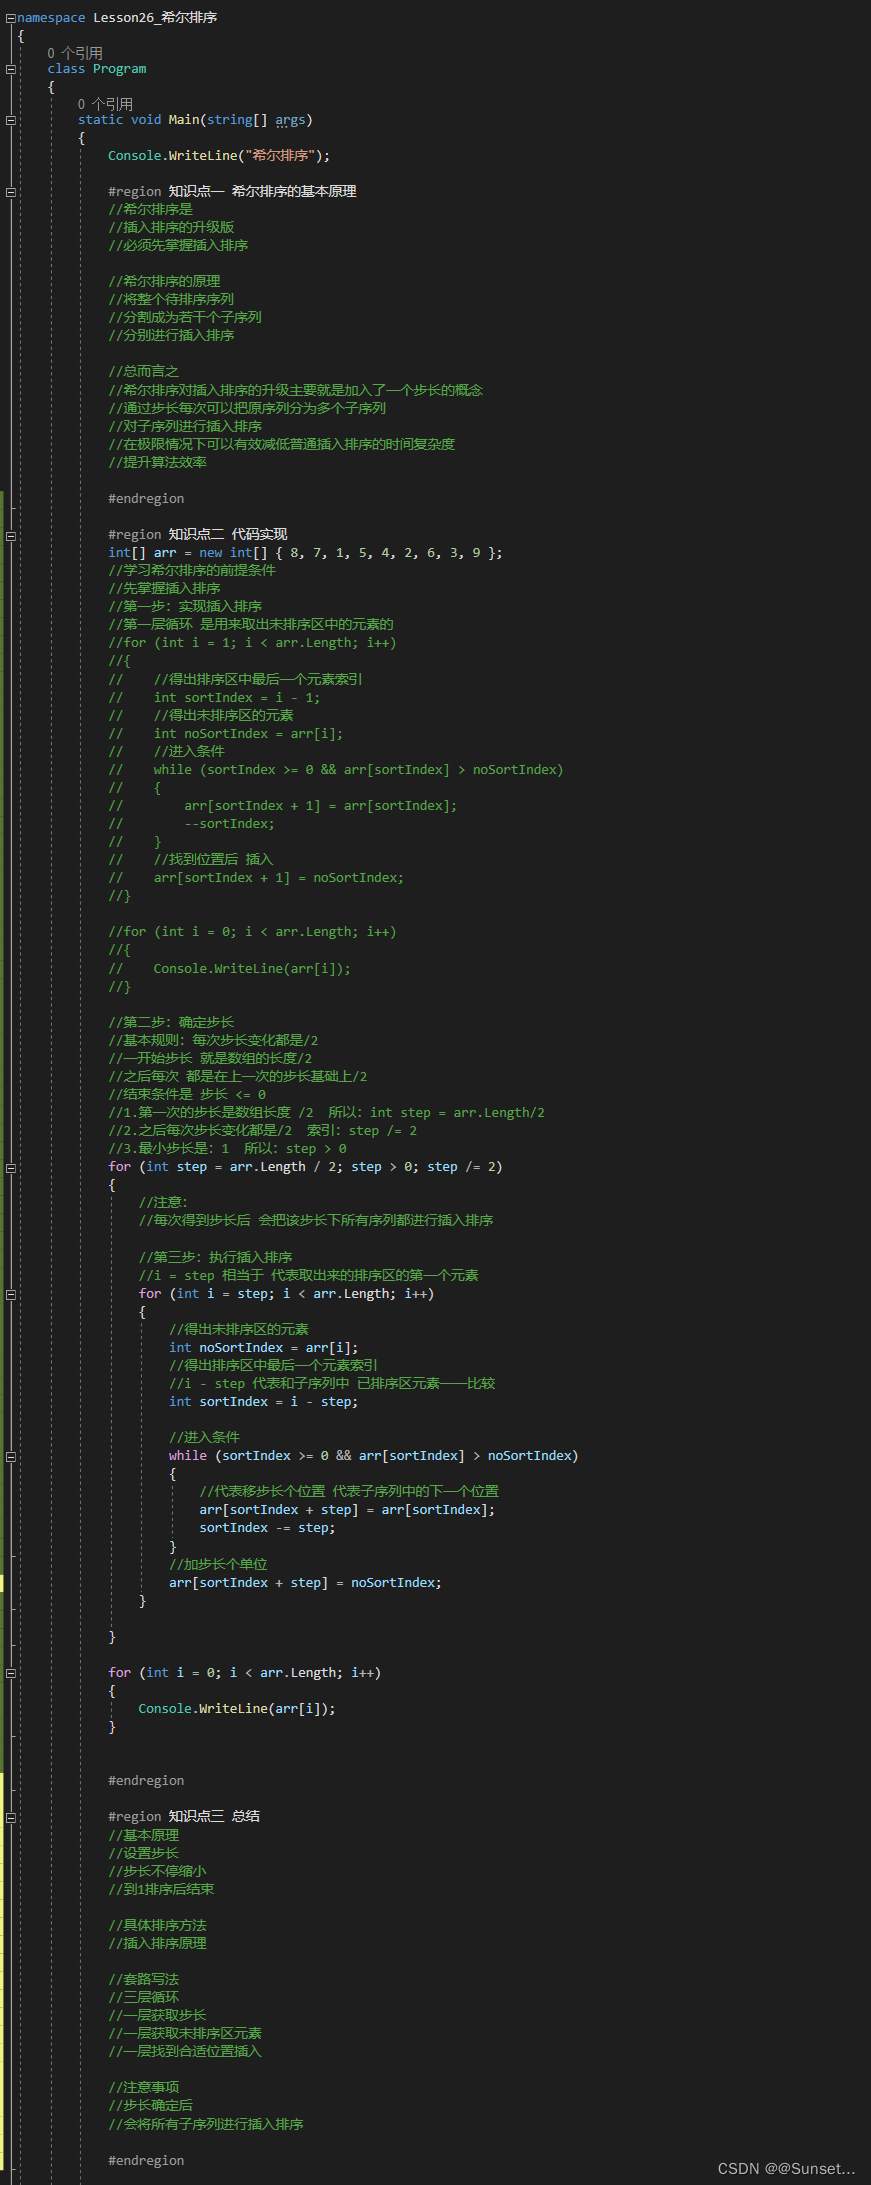
Lesson26:希尔排序
Lesson27:归并排序
using System;
using System.Collections.Generic;
using System.Linq;
using System.Text;
using System.Threading.Tasks;
namespace Lesson27_归并排序
{
class Program
{
static void Main(string[] args)
{
Console.WriteLine("归并排序");
int[] arr = new int[] { 8, 7, 1, 5, 4, 2, 6, 3, 9 };
arr = Merge(arr);
foreach(int num in arr)
{
Console.WriteLine(num);
}
}
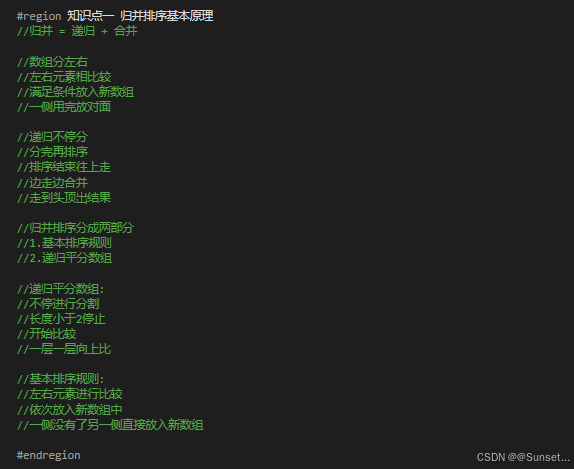
#region 知识点一 归并排序基本原理
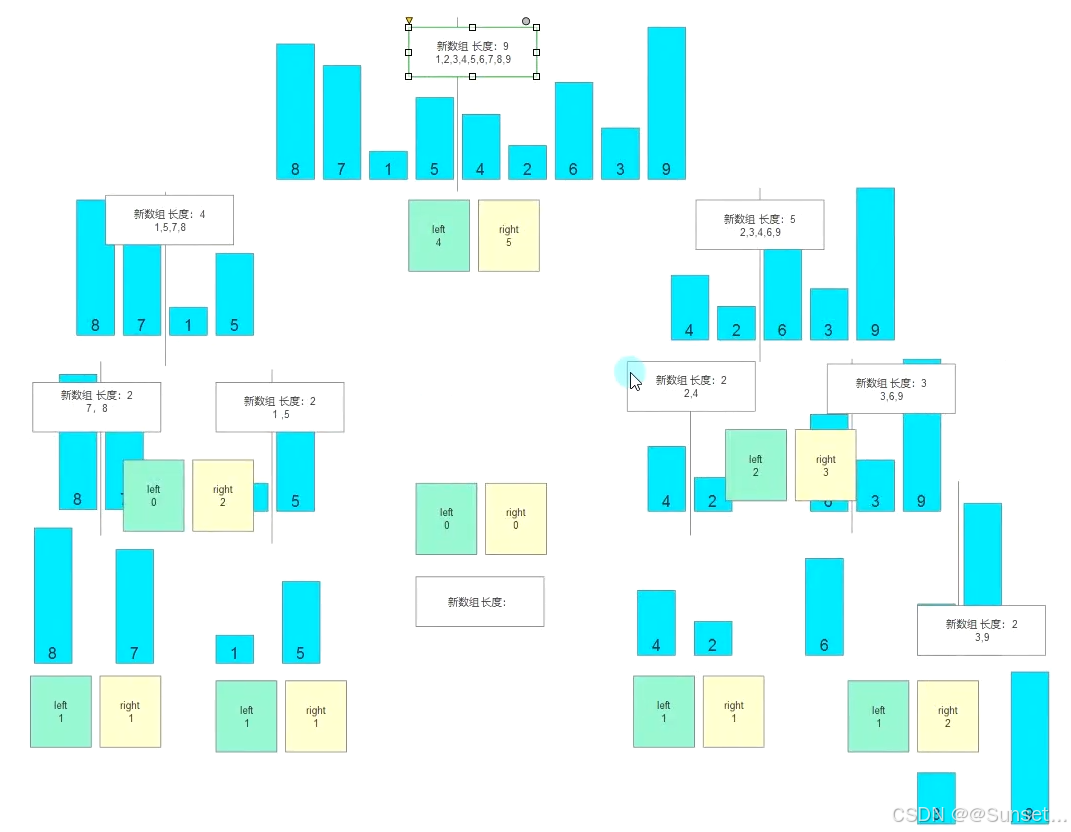
//归并 = 递归 + 合并
//数组分左右
//左右元素相比较
//满足条件放入新数组
//一侧用完放对面
//递归不停分
//分完再排序
//排序结束往上走
//边走边合并
//走到头顶出结果
//归并排序分成两部分
//1.基本排序规则
//2.递归平分数组
//递归平分数组:
//不停进行分割
//长度小于2停止
//开始比较
//一层一层向上比
//基本排序规则:
//左右元素进行比较
//依次放入新数组中
//一侧没有了另一侧直接放入新数组
#endregion
#region 知识点二 代码实现
//第一步:
//基本排序规则
//左右元素相比较
//满足条件放进去
//一侧用完直接放
public static int[] Sort(int[] left, int[] right)
{
//先准备一个新数组
int[] array = new int[left.Length + right.Length];
int leftIndex = 0; //左数组索引
int rightIndex = 0; //右数组索引
//最终目的是要填满这个新数组
//不会出现两侧都放完还在进循环的情况
//因为这个新数组的长度 是根据左右两个数组长度计算出来的
for(int i = 0; i < array.Length; i++)
{
//左侧放完 直接放对面右侧
if(leftIndex >= left.Length)
{
array[i] = right[rightIndex];
rightIndex++;
}
//右侧放完 直接放对面左侧
else if(rightIndex >= right.Length)
{
array[i] = left[leftIndex];
leftIndex++;
}
else if(left[leftIndex] < right[rightIndex])
{
array[i] = left[leftIndex];
//已经放入了一个左侧元素进入新数组
//所以 标识应该指向下一个
leftIndex++;
}
else
{
array[i] = right[rightIndex];
rightIndex++;
}
}
//得到了新数组 直接返回出去
return array;
}
//第二步:
//递归平分数组
//结束条件为长度小于2
public static int[] Merge(int[] array)
{
//递归结束条件(一般都写在开头)
if (array.Length < 2)
return array;
//1.数组分两段 得到一个中间索引
int mid = array.Length / 2;
//2.初始化左右数组
//左数组
int[] left = new int[mid];
//右数组
int[] right = new int[array.Length - mid];
//左右初始化内容
for(int i = 0; i < array.Length; i++)
{
if (i < mid)
left[i] = array[i];
else
right[i - mid] = array[i];
}
//3.递归再分再排序
return Sort(Merge(left), Merge(right));
}
#endregion
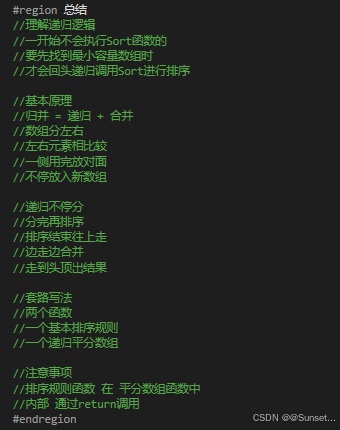
#region 总结
//理解递归逻辑
//一开始不会执行Sort函数的
//要先找到最小容量数组时
//才会回头递归调用Sort进行排序
//基本原理
//归并 = 递归 + 合并
//数组分左右
//左右元素相比较
//一侧用完放对面
//不停放入新数组
//递归不停分
//分完再排序
//排序结束往上走
//边走边合并
//走到头顶出结果
//套路写法
//两个函数
//一个基本排序规则
//一个递归平分数组
//注意事项
//排序规则函数 在 平分数组函数中
//内部 通过return调用
#endregion
}
}
Lesson28:快速排序
using System;
using System.Collections.Generic;
using System.Linq;
using System.Text;
using System.Threading.Tasks;
namespace Lesson28_快速排序
{
class Program
{
static void Main(string[] args)
{
Console.WriteLine("快速排序");
int[] arr = new int[] { 8, 7, 1, 5, 4, 2, 6, 3, 9 };
QuickSort(arr, 0, arr.Length - 1);
foreach(int num in arr)
{
Console.WriteLine(num);
}
}
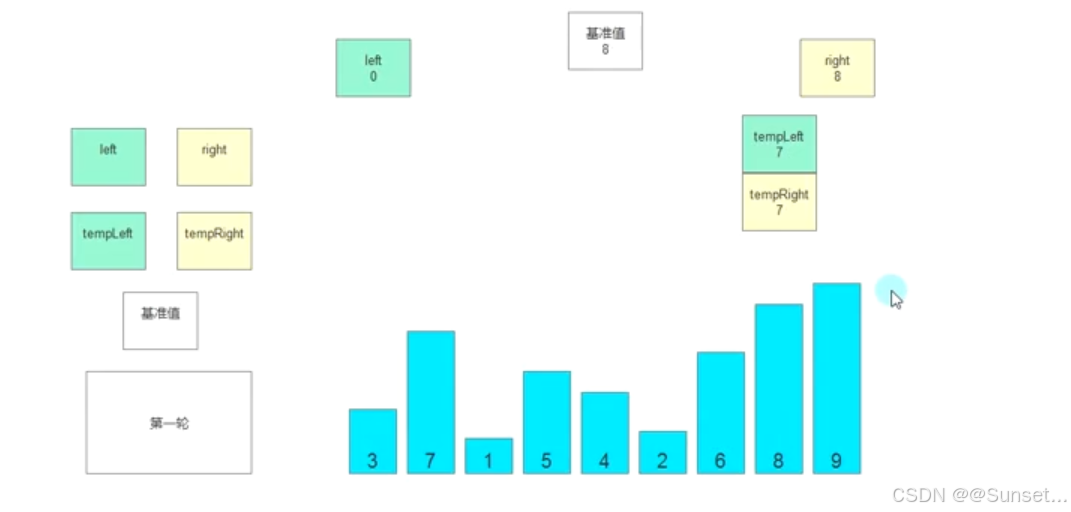
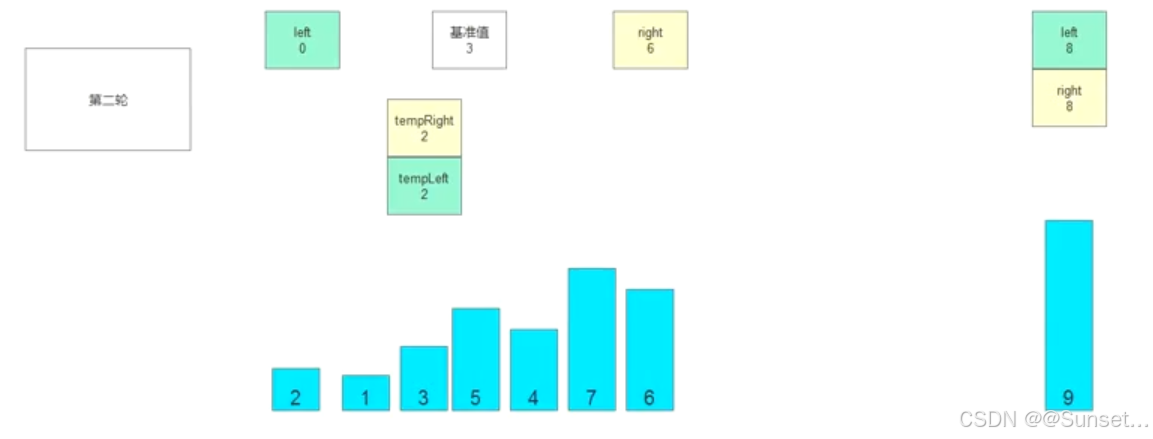
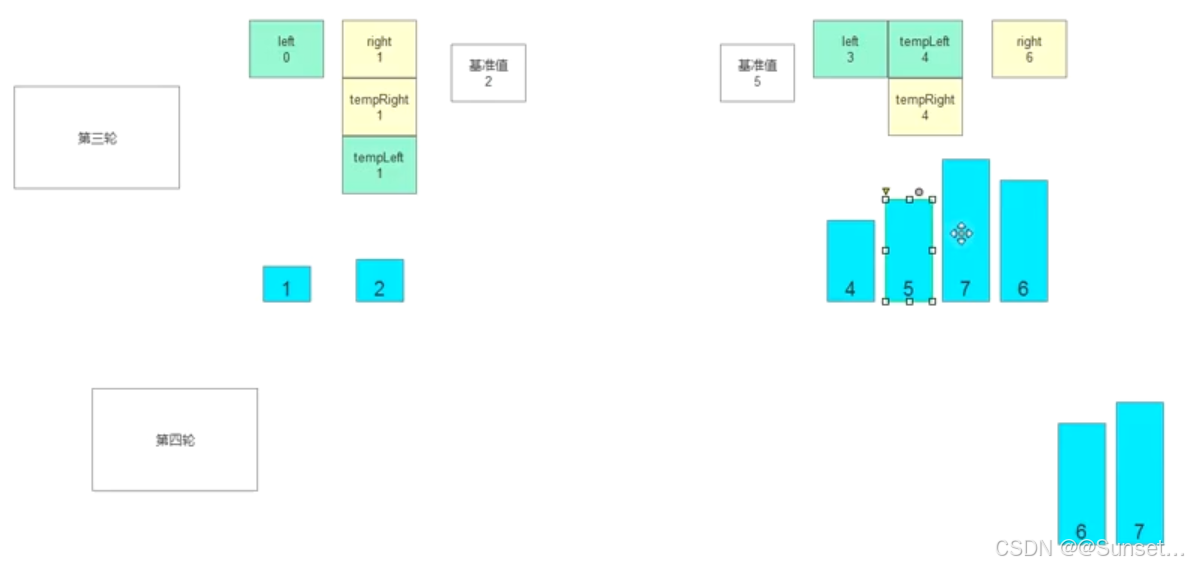
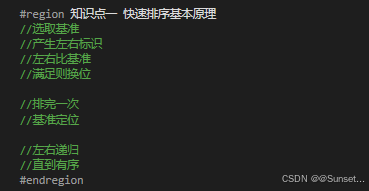
#region 知识点一 快速排序基本原理
//选取基准
//产生左右标识
//左右比基准
//满足则换位
//排完一次
//基准定位
//左右递归
//直到有序
#endregion
#region 知识点二 代码实现
//第一步:
//声明用于快速排序的函数
public static void QuickSort(int[] array, int left, int right)
{
//第七步:
//递归函数结束条件(重要)
if (left >= right)
return;
//第二步:
//记录基准值
//左游标
//右游标
int tempLeft, tempRight, temp;
temp = array[left];
tempLeft = left;
tempRight = right;
//第三步:
//核心交互逻辑
//左右游标会不同变化 要不相同 时才能继续变化
while (tempLeft != tempRight)
{
//第四步:比较位置交互
//首先从右边开始 比较 看值有没有资格放到标识的右侧
while (tempLeft < tempRight && array[tempRight] > temp)
{
tempRight--;
}
//跳出循环时说明需要交换位置了(就是有不满足右边比基准值大时)
array[tempLeft] = array[tempRight];
//上面是移动右侧游标
//接着移动完右侧游标 就要来移动左侧游标
while(tempLeft < tempRight && array[tempLeft] < temp)
{
tempLeft++;
}
//跳出循环就是要换位置了
array[tempRight] = array[tempLeft];
}
//第五步:放置基准值
//跳出循环后 说明是 就该把基准值放在中间位置
//此时tempLeft 和 tempRight 一定是相等的
array[tempLeft] = temp;
//第六步:
//递归继续
QuickSort(array, left, tempRight - 1);
QuickSort(array, tempLeft + 1, right);
}
#endregion
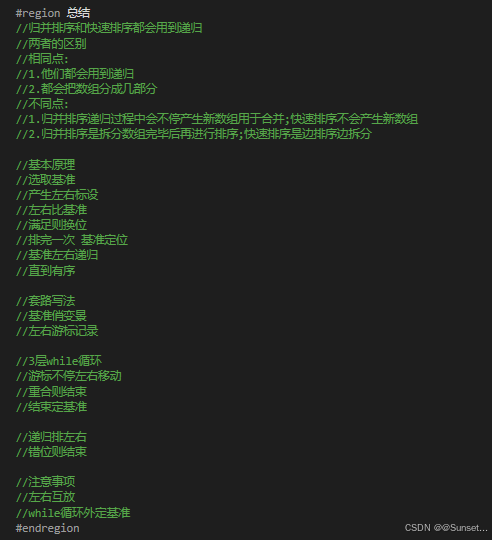
#region 总结
//归并排序和快速排序都会用到递归
//两者的区别
//相同点:
//1.他们都会用到递归
//2.都会把数组分成几部分
//不同点:
//1.归并排序递归过程中会不停产生新数组用于合并;快速排序不会产生新数组
//2.归并排序是拆分数组完毕后再进行排序;快速排序是边排序边拆分
//基本原理
//选取基准
//产生左右标设
//左右比基准
//满足则换位
//排完一次 基准定位
//基准左右递归
//直到有序
//套路写法
//基准俏变景
//左右游标记录
//3层while循环
//游标不停左右移动
//重合则结束
//结束定基准
//递归排左右
//错位则结束
//注意事项
//左右互放
//while循环外定基准
#endregion
}
}
Lesson29:堆排序
using System;
using System.Collections.Generic;
using System.Linq;
using System.Text;
using System.Threading.Tasks;
namespace Lesson29_堆排序
{
class Program
{
static void Main(string[] args)
{
Console.WriteLine("堆排序");
int[] arr = new int[] { 8, 7, 1, 5, 4, 2, 6, 3, 9 };
HeapSort(arr);
for(int i = 0; i < arr.Length; i++)
{
Console.WriteLine(arr[i]);
}
}
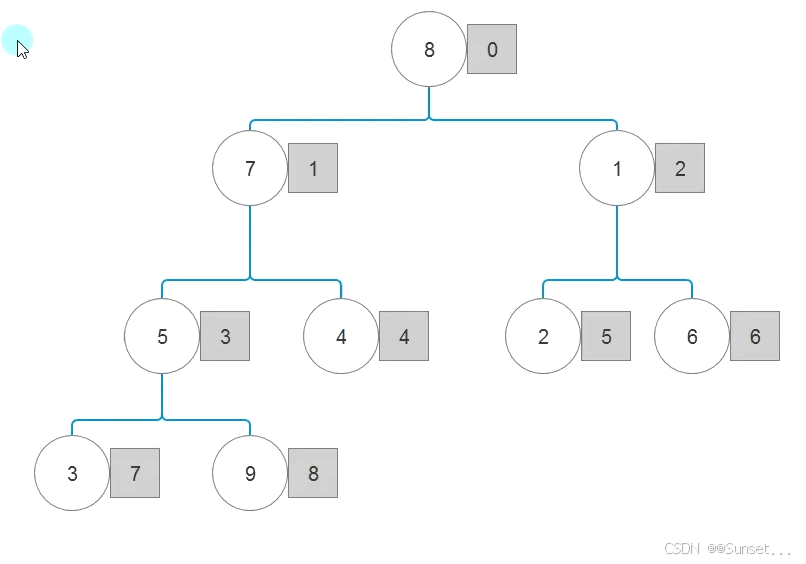
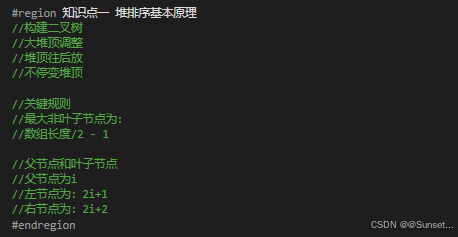
#region 知识点一 堆排序基本原理
//构建二叉树
//大堆顶调整
//堆顶往后放
//不停变堆顶
//关键规则
//最大非叶子节点为:
//数组长度/2 - 1
//父节点和叶子节点
//父节点为i
//左节点为:2i+1
//右节点为:2i+2
#endregion
#region 知识点二 代码实现
//第一步:实现父节点和左右节点比较(方法)
/// <summary>
/// 实现比较
/// </summary>
/// <param name="array">需要排序的数组</param>
/// <param name="nowIndex">当前作为根节点的索引</param>
/// <param name="arrayLength">哪些位置没有确定</param>
static void HeapCompare(int[] array, int nowIndex, int arrayLength)
{
//通过传入的索引 得到它对应的左右叶子节点的索引
//可能会溢出,但是后面会进行判断
int left = 2 * nowIndex + 1;
int right = 2 * nowIndex + 2;
//用于记录较大数的索引
int biggerIndex = nowIndex;
//先比左 再比右
//这里判断不能溢出
if(left < arrayLength && array[left] > array[biggerIndex])
{
//认为目前最大的是左节点 记录索引
biggerIndex = left;
}
//比较右节点
if(right < arrayLength && array[right] > array[biggerIndex])
{
biggerIndex = right;
}
//如果比较过后 发现最大索引发生变化了 那就要进行换位置了
if(biggerIndex != nowIndex)
{
int temp = array[nowIndex];
array[nowIndex] = array[biggerIndex];
array[biggerIndex] = temp;
//通过递归 看是否影响了叶子节点他们的三角关系
HeapCompare(array, biggerIndex, arrayLength);
}
}
//第二步:构建大堆顶(方法)
static void BuildBigHeap(int[] array)
{
//从最大的非叶子节点索引 开始 不停的往前 去构建大堆顶
for(int i = array.Length / 2 - 1; i >= 0; i--)
{
HeapCompare(array, i, array.Length);
}
}
//第三步:结合大堆顶和节点比较 实现堆排序 把堆顶不停往后移动(就是结合第一二步的方法)
static void HeapSort(int[] array)
{
//构建大堆顶
BuildBigHeap(array);
//执行过后
//最大的数肯定就在最上层
//往屁股后面放 得到 屁股后面最后一个索引
for(int i = array.Length - 1; i > 0; i--)
{
//直接把 堆顶端的数 放到最后一个位置上
int temp = array[0];
array[0] = array[i];
array[i] = temp;
//重新进行大堆顶调整
HeapCompare(array, 0, i);
}
}
#endregion
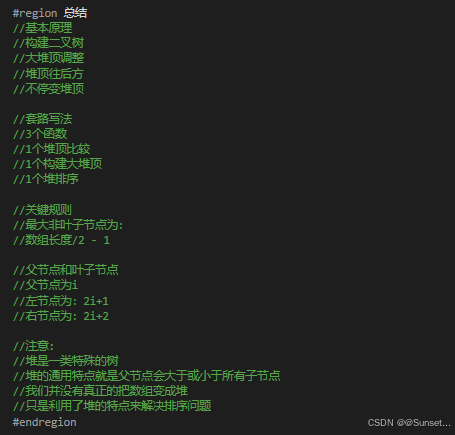
#region 总结
//基本原理
//构建二叉树
//大堆顶调整
//堆顶往后方
//不停变堆顶
//套路写法
//3个函数
//1个堆顶比较
//1个构建大堆顶
//1个堆排序
//关键规则
//最大非叶子节点为:
//数组长度/2 - 1
//父节点和叶子节点
//父节点为i
//左节点为:2i+1
//右节点为:2i+2
//注意:
//堆是一类特殊的树
//堆的通用特点就是父节点会大于或小于所有子节点
//我们并没有真正的把数组变成堆
//只是利用了堆的特点来解决排序问题
#endregion
}
}
总结
毋庸置疑C#进阶的知识点挺重要,要多回来复习学习!
接下来的任务是把C#进阶的实践小项目《俄罗斯方块》做完,然后进入Unity的学习!
抓紧时间!!!


 5268
5268

 被折叠的 条评论
为什么被折叠?
被折叠的 条评论
为什么被折叠?
 到【灌水乐园】发言


