


 该文章介绍了如何在Minecraft模组开发中创建一个具有飞行功能的鞘翅盔甲,包括模型制作、动画文件、盔甲类的编写、渲染类的注册以及资源包的制作过程。
本次我们在模组中实现一个可用于飞行的鞘翅。
1.首先参考3D动画盔甲的教程一、二步制作盔甲的模型、动画文件。
2.模型制作完成,接下来需要制作我们的盔甲类
在items包中新建armor包 -> armor包中新建我们的套装类DressArmorItem.java
DressArmorItem.java
package net.joy187.joyggd.item.armor;


import net.joy187.joyggd.Main;
import net.joy187.joyggd.init.ItemInit;
import net.joy187.joyggd.item.CustomArmorMaterial;
import net.minecraft.network.chat.Component;
import net.minecraft.world.InteractionHand;
import net.minecraft.world.InteractionResultHolder;
import net.minecraft.world.entity.Entity;
import net.minecraft.world.entity.EquipmentSlot;
import net.minecraft.world.entity.Mob;
import net.minecraft.world.entity.player.Player;
import net.minecraft.world.item.*;
import net.minecraft.world.level.Level;
import net.minecraftforge.client.extensions.common.IClientItemExtensions;
import software.bernie.geckolib3.core.IAnimatable;
import software.bernie.geckolib3.core.manager.AnimationData;
import software.bernie.geckolib3.core.manager.AnimationFactory;
import software.bernie.geckolib3.item.GeoArmorItem;

import javax.annotation.Nullable;
import java.util.List;

public class DressArmorItem extends GeoArmorItem implements IAnimatable {
    private AnimationFactory factory = new AnimationFactory(this);

    public DressArmorItem(Item.Properties props, CustomArmorMaterial mat) {
        super(mat, EquipmentSlot.CHEST, props);
    }


    public static boolean isUsable(ItemStack stack) {
        return stack.getDamageValue() < stack.getMaxDamage() - 1;
    }

    public InteractionResultHolder<ItemStack> use(Level worldIn, Player playerIn, InteractionHand handIn) {
        ItemStack itemstack = playerIn.getItemInHand(handIn);
        EquipmentSlot equipmentslottype = Mob.getEquipmentSlotForItem(itemstack);
        ItemStack itemstack1 = playerIn.getItemBySlot(equipmentslottype);
        if (itemstack1.isEmpty()) {
            playerIn.setItemSlot(equipmentslottype, itemstack.copy());
            itemstack.setCount(0);
            return InteractionResultHolder.sidedSuccess(itemstack, worldIn.isClientSide());
        } else {
            return InteractionResultHolder.fail(itemstack);
        }
    }
    //是否可以像鞘翅一样飞行
    @Override
    public boolean canElytraFly(ItemStack stack, net.minecraft.world.entity.LivingEntity entity) {
        return ElytraItem.isFlyEnabled(stack);
    }
    //飞行时的属性,每隔1s掉一个耐久度
    @Override
    public boolean elytraFlightTick(ItemStack stack, net.minecraft.world.entity.LivingEntity entity, int flightTicks) {
        if (!entity.level.isClientSide && (flightTicks + 1) % 20 == 0) {
            stack.hurtAndBreak(1, entity, e -> e.broadcastBreakEvent(net.minecraft.world.entity.EquipmentSlot.CHEST));
        }
        return true;
    }
    //用什么修该物品
    public boolean isValidRepairItem(ItemStack toRepair, ItemStack repair) {
        return repair.getItem() == ItemInit.ORE.get();
    }

    public EquipmentSlot getEquipmentSlot(ItemStack stack) {
        return EquipmentSlot.CHEST;
    }


    @Override
    public void registerControllers(AnimationData data) {

    }

    @Override
    public AnimationFactory getFactory() {
        return factory;
    }

    @Override
    public void appendHoverText(ItemStack stack, Level worldIn, List<Component> tooltip, TooltipFlag flagIn) {
        tooltip.add(Component.translatable("tooltip.dress"));
    }
}
之后我们需要在armor包中新建model包->model包中新建我们的盔甲的模型类ModelDress:
ModelDress.java
public class ModelDress extends AnimatedGeoModel<DressArmorItem> {
    @Override
    public ResourceLocation getModelResource(DressArmorItem object) {
        return new ResourceLocation(Main.MOD_ID, "geo/dress.geo.json");
    }

    @Override
    public ResourceLocation getTextureResource(DressArmorItem object) {
        return new ResourceLocation(Main.MOD_ID, "textures/models/armor/dress.png");
    }

    @Override
    public ResourceLocation getAnimationResource(DressArmorItem animatable) {
        return new ResourceLocation(Main.MOD_ID, "animations/chandlier.animation.json");
    }
}
之后我们需要在armor包中新建render包->render包中新建我们的盔甲的渲染类RenderDress:
RenderDress.java
package net.joy187.joyggd.item.armor.render;


import net.joy187.joyggd.item.armor.ChandlierArmorItem;
import net.joy187.joyggd.item.armor.model.ModelChandlier;
import software.bernie.geckolib3.renderers.geo.GeoArmorRenderer;


public class RenderDress extends GeoArmorRenderer<DressArmorItem> {
    //渲染盔甲穿在身上的每一个部位的效果
    public RenderDress() {
        super(new ModelDress());
        //这里要和第二步你blockbench中建模的名称一一对应
        this.headBone = "head";
        this.bodyBone = "dress";
        this.rightArmBone = "rightArm";
        this.leftArmBone = "leftArm";
        this.rightLegBone = "rightLeg";
        this.leftLegBone = "leftLeg";
        this.rightBootBone = "rightBoot";
        this.leftBootBone = "leftBoot";
    }

}
3.在ClientModEventSubscriber类中将我们的盔甲渲染类进行注册:
ClientModEventSubscriber.java
@Mod.EventBusSubscriber(modid = Main.MOD_ID, value = Dist.CLIENT, bus = Mod.EventBusSubscriber.Bus.MOD)
public class ClientModEventSubscriber extends ModEventSubscriber{

    @SubscribeEvent
    public static void registerRenderers(final EntityRenderersEvent.AddLayers event) {
        //渲染类进行注册
        GeoArmorRenderer.registerArmorRenderer(DressArmorItem.class, RenderDress::new);
    }
}
4.在ItemInit类中将我们的盔甲进行声明
ItemInit.java
    public static final RegistryObject<Item> DRESS = ITEMS.register("dress",
            () -> new DressArmorItem(new Item.Properties().tab(Main.ITEM_TAB).durability(800), CustomArmorMaterial.ARMOR_MATERIAL_DRESS));
5.代码部分结束,之后参考教程3D动画盔甲第六步进行资源包制作。
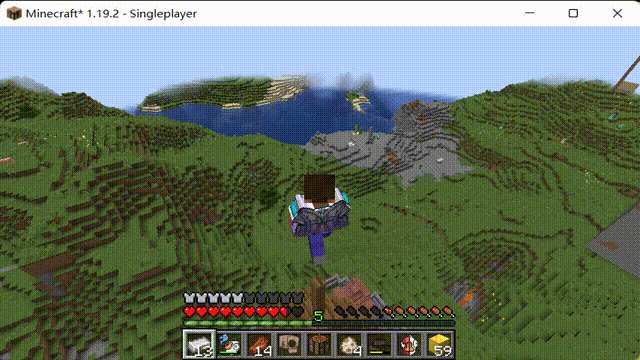
6.保存所有文件 -> 进行测试:


 2786
2786

 被折叠的 条评论
为什么被折叠?
被折叠的 条评论
为什么被折叠?
 到【灌水乐园】发言


