


本文以Qwen3-4B-AWQ为例,进行vLLM模型部署的介绍
参考文档
Qwen文档:
VLLM官方文档:
vLLM安装
参考上面的VLLM官方文档,官方推荐uv安装,但是为了偷懒,没有安装uv,直接选择了pip方式进行了安装,我的torch对应的cuda版本为12.8(torch==2.7.0+cu128),根据自己的cuda版本查看官方文档进行相应调整。
# Install vLLM with CUDA 12.8.
# If you are using pip.
pip install vllm --extra-index-url https://download.pytorch.org/whl/cu128
# If you are using uv.
uv pip install vllm --torch-backend=auto
We recommend leveraging uv to automatically select the appropriate PyTorch index at runtime by inspecting the installed CUDA driver version via --torch-backend=auto (or UV_TORCH_BACKEND=auto). To select a specific backend (e.g., cu126), set --torch-backend=cu126 (or UV_TORCH_BACKEND=cu126). If this doesn't work, try running uv self update to update uv first.
Install the latest code
LLM inference is a fast-evolving field, and the latest code may contain bug fixes, performance improvements, and new features that are not released yet. To allow users to try the latest code without waiting for the next release, vLLM provides wheels for Linux running on a x86 platform with CUDA 12 for every commit since v0.5.3.
Install the latest code using pip
pip install -U vllm \
    --pre \
    --extra-index-url https://wheels.vllm.ai/nightly
--pre is required for pip to consider pre-released versions.
pip list查看,已安装成功,版本为0.9.2
![]()
模型部署
API服务
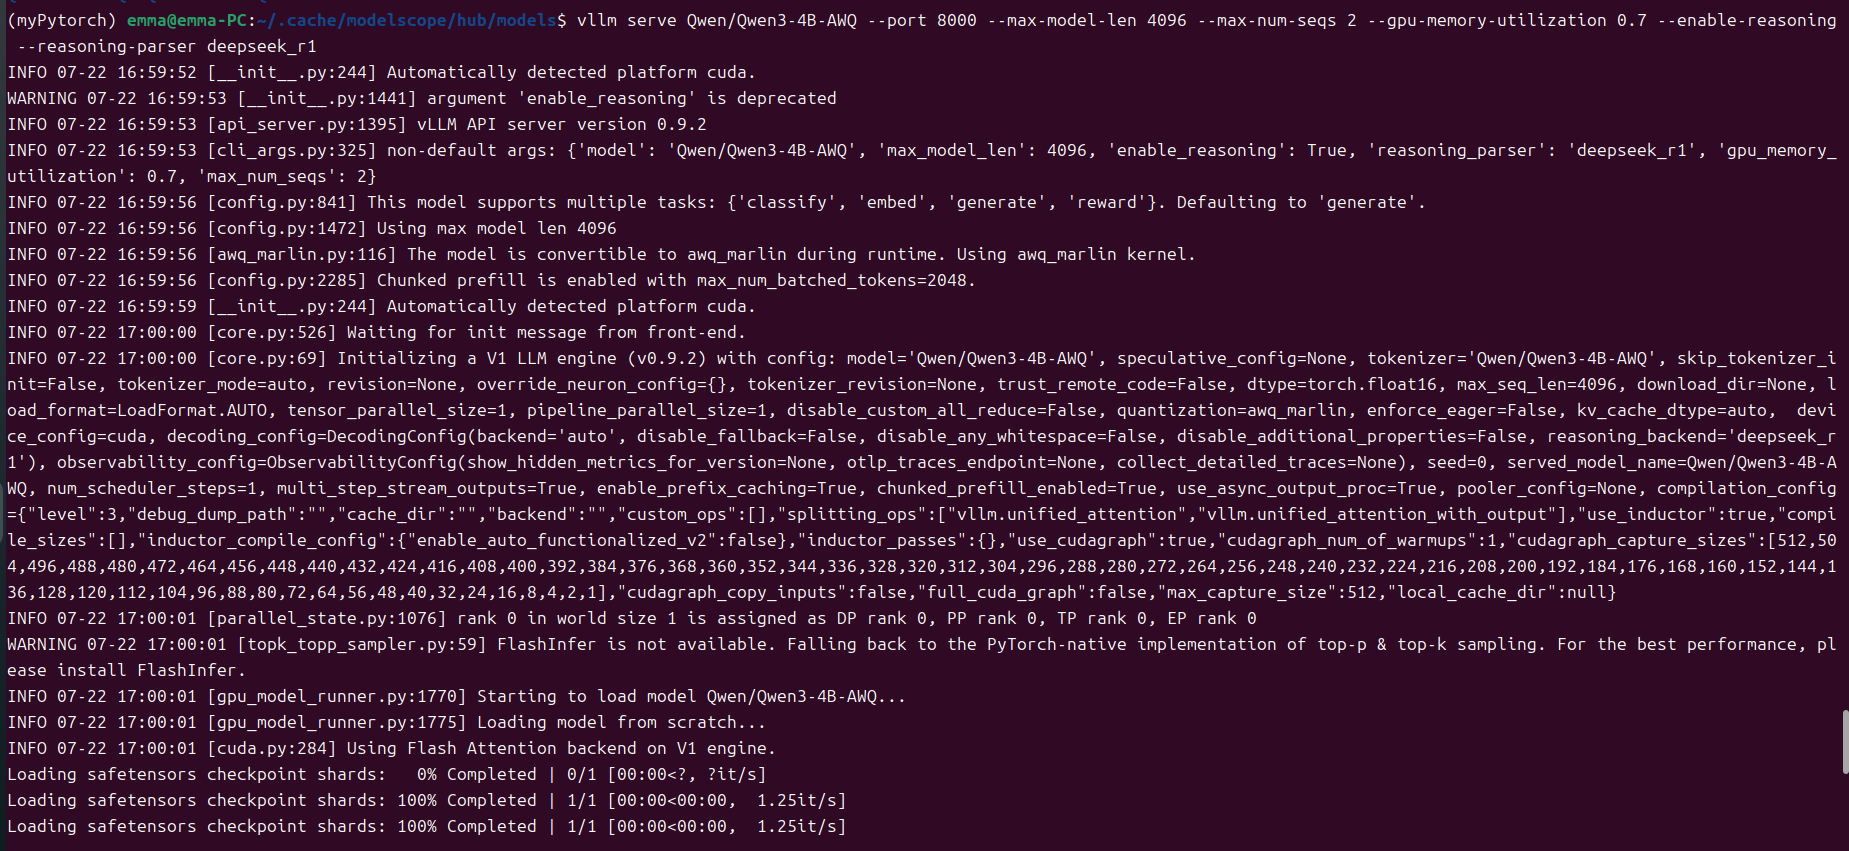
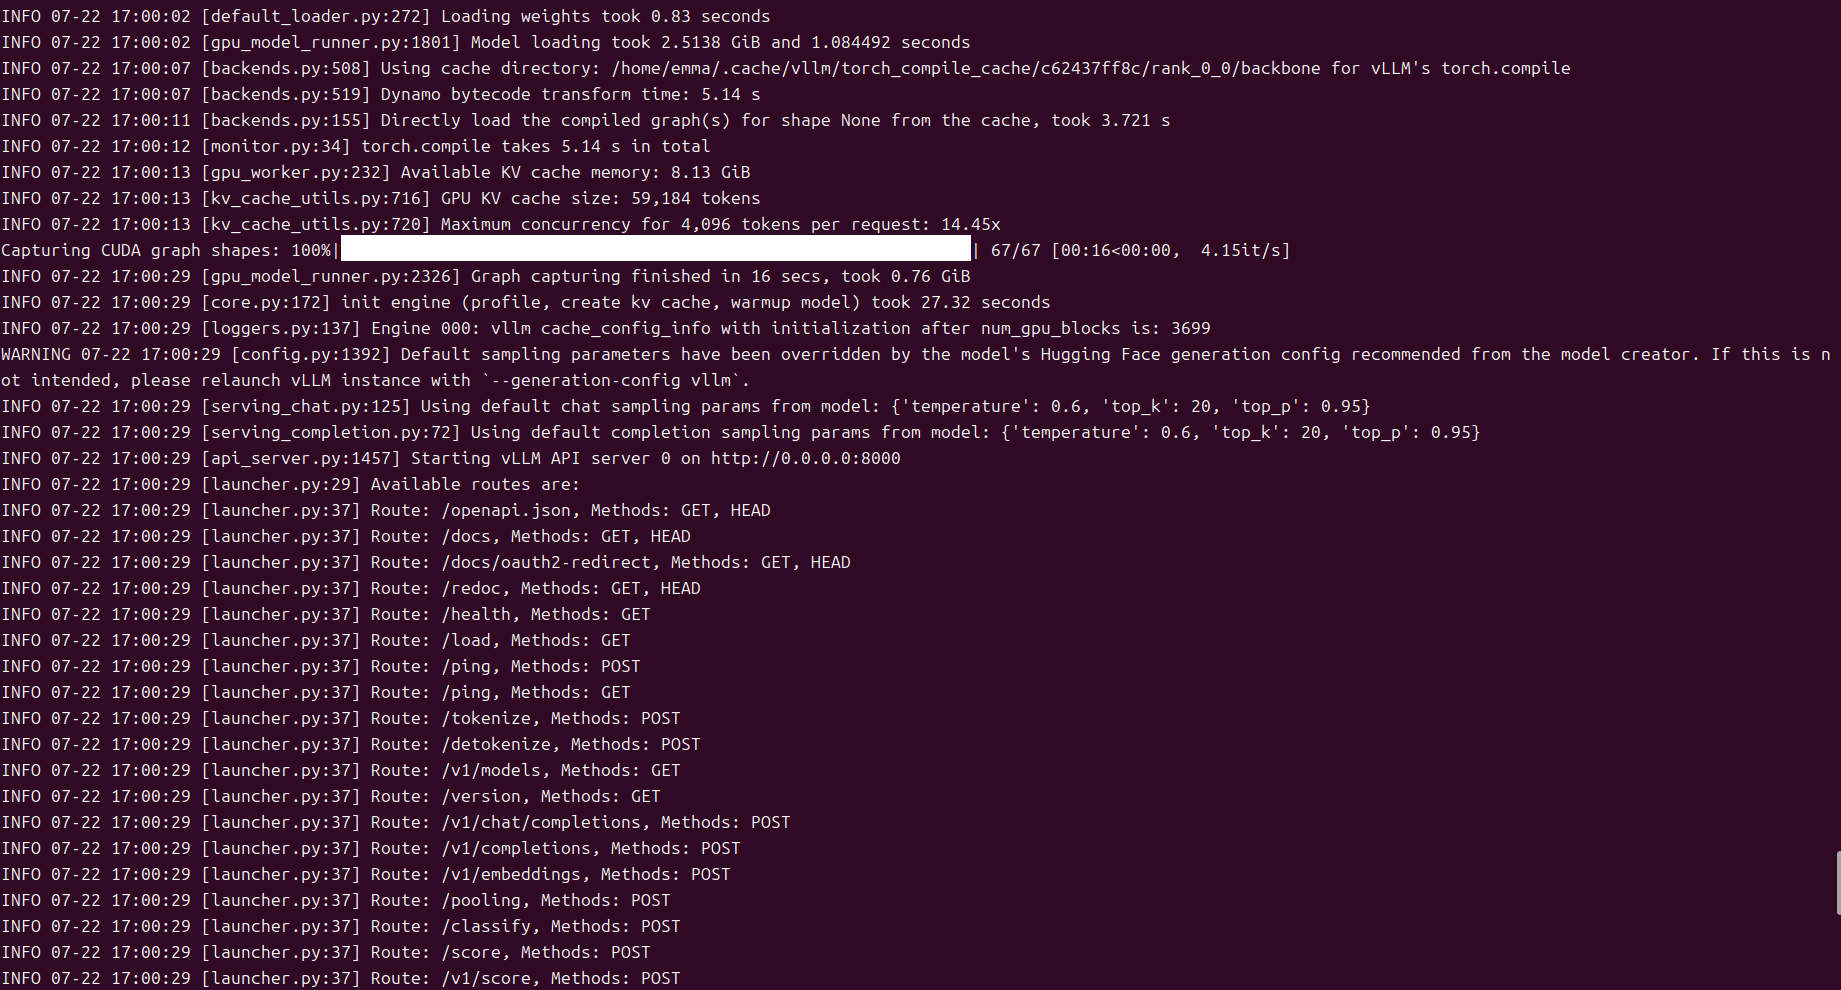
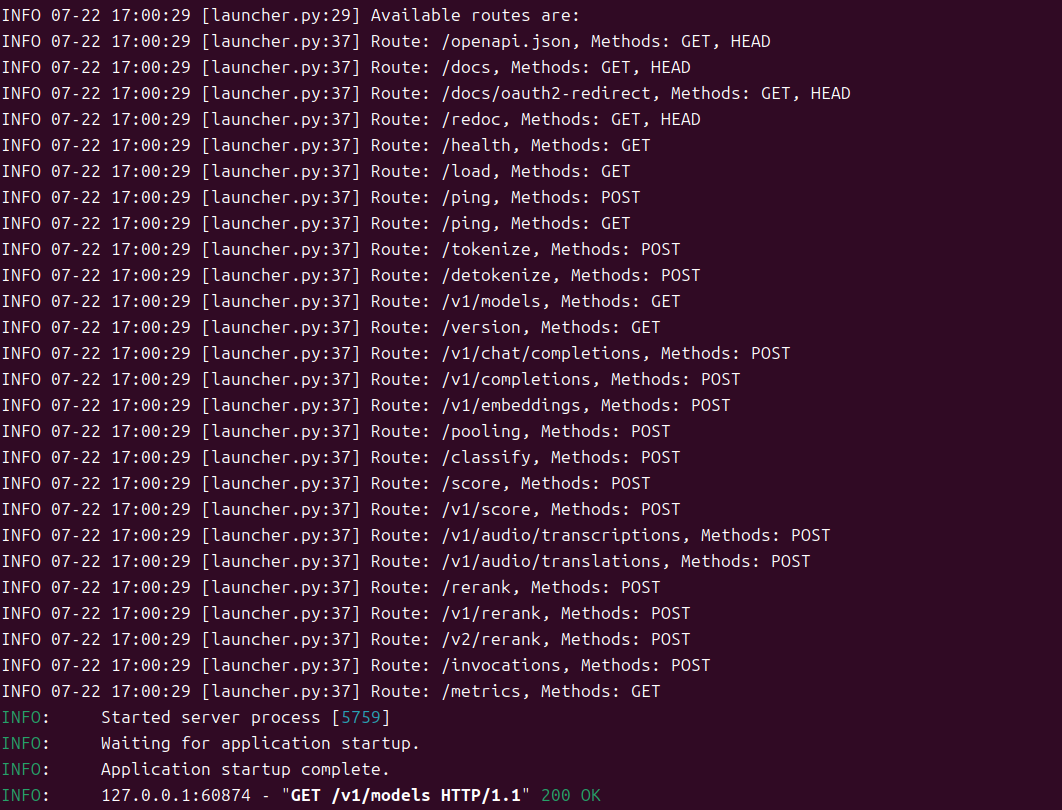
vLLM安装成功之后,借助vLLM,构建一个与OpenAI API兼容的API服务十分简便,该服务可以作为实现OpenAI API协议的服务器进行部署。默认情况下,它将在 http://localhost:8000 启动服务器。您可以通过 --host 和 --port 参数来自定义地址。请按照以下所示运行命令,相关参数自行调整:
vllm serve Qwen/Qwen3-4B-AWQ --port 8000 --max-model-len 4096 --max-num-seqs 2 --gpu-memory-utilization 0.7 --enable-reasoning --reasoning-parser deepseek_r1
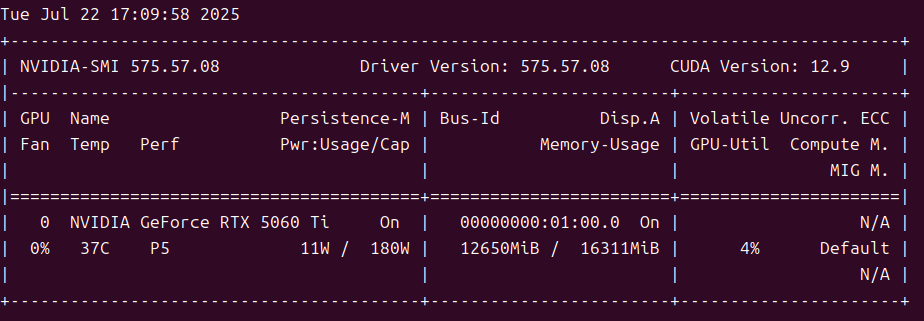
发布成功之后,查看GPU的占用情况:
API调用方法
命令行调用方式
终端输入以下内容:
curl http://localhost:8000/v1/chat/completions -H "Content-Type: application/json" -d '{
"model": "Qwen/Qwen3-4B-AWQ",
"messages": [
{"role": "user", "content": "你好,你是谁?"}
],
"temperature": 0.6,
"top_p": 0.95,
"top_k": 20,
"max_tokens": 4000
}'
官方参考:
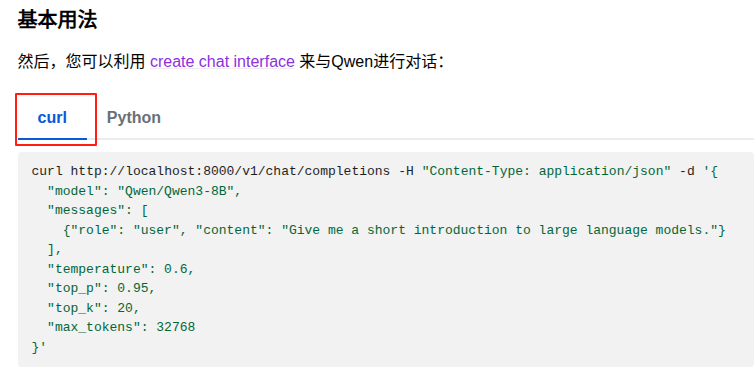
请求端:
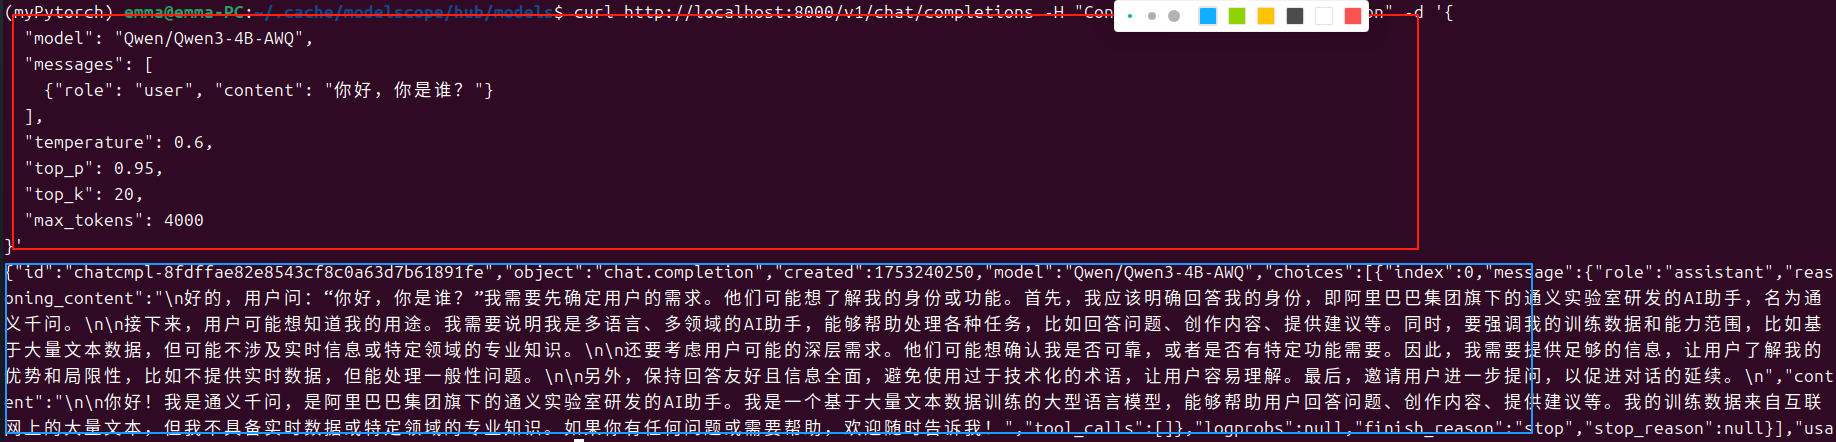
服务端:

编程调用方式
官方参考:
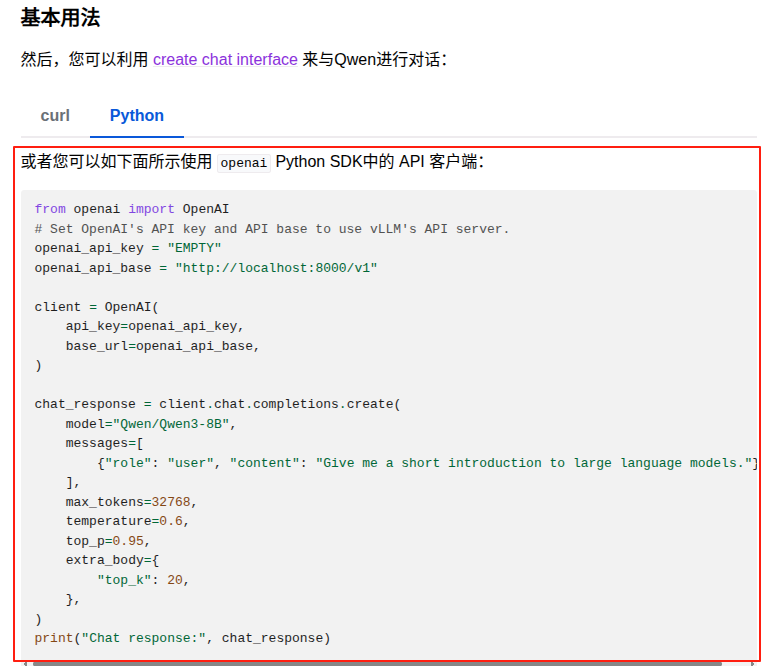
程序代码:
from openai import OpenAI
# Set OpenAI's API key and API base to use vLLM's API server.
openai_api_key = "EMPTY"
openai_api_base = "http://localhost:8000/v1"

content = ("🔺【客人自行进入游玩,向导和车辆在外等候】            🐼  熊猫谷不仅是大熊猫回归自然的桥梁,也是圈养大熊猫走向野外进行自我繁衍的可行性研究基地。       目前,熊猫谷拥有完善的大熊猫适应性生态兽舍、半野化过渡训练区和小熊猫生态放养区,常驻有10余只大熊猫和20余只小熊猫"
           "\n---\n请判断上面这段文本属于哪些标签,[现场音乐会,滑雪,爬山,美食之旅,水族馆游览,随上随下巴士,蹦极,博物馆体验,观赏熊猫,艺术课程,摩托艇,骑骆驼],并输出命中的标签列表,如果没有命中,则输出'无',不要输出解释信息/no_think")

client = OpenAI(
    api_key=openai_api_key,
    base_url=openai_api_base,
)

chat_response = client.chat.completions.create(
    model="Qwen/Qwen3-4B-AWQ",
    messages=[
        {"role": "user", "content": content},
    ],
    max_tokens=4096-len(content),
    temperature=0.6,
    top_p=0.95,
    extra_body={
        "top_k": 20,
    },
)
print("Chat response:", chat_response)
prompt中追加了/no_think,启用非思考模式进行了调用,运行结果如下:
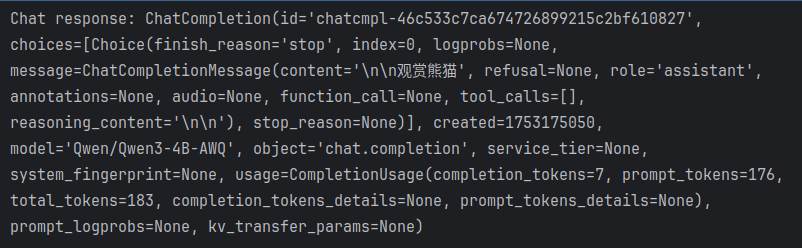
服务端:
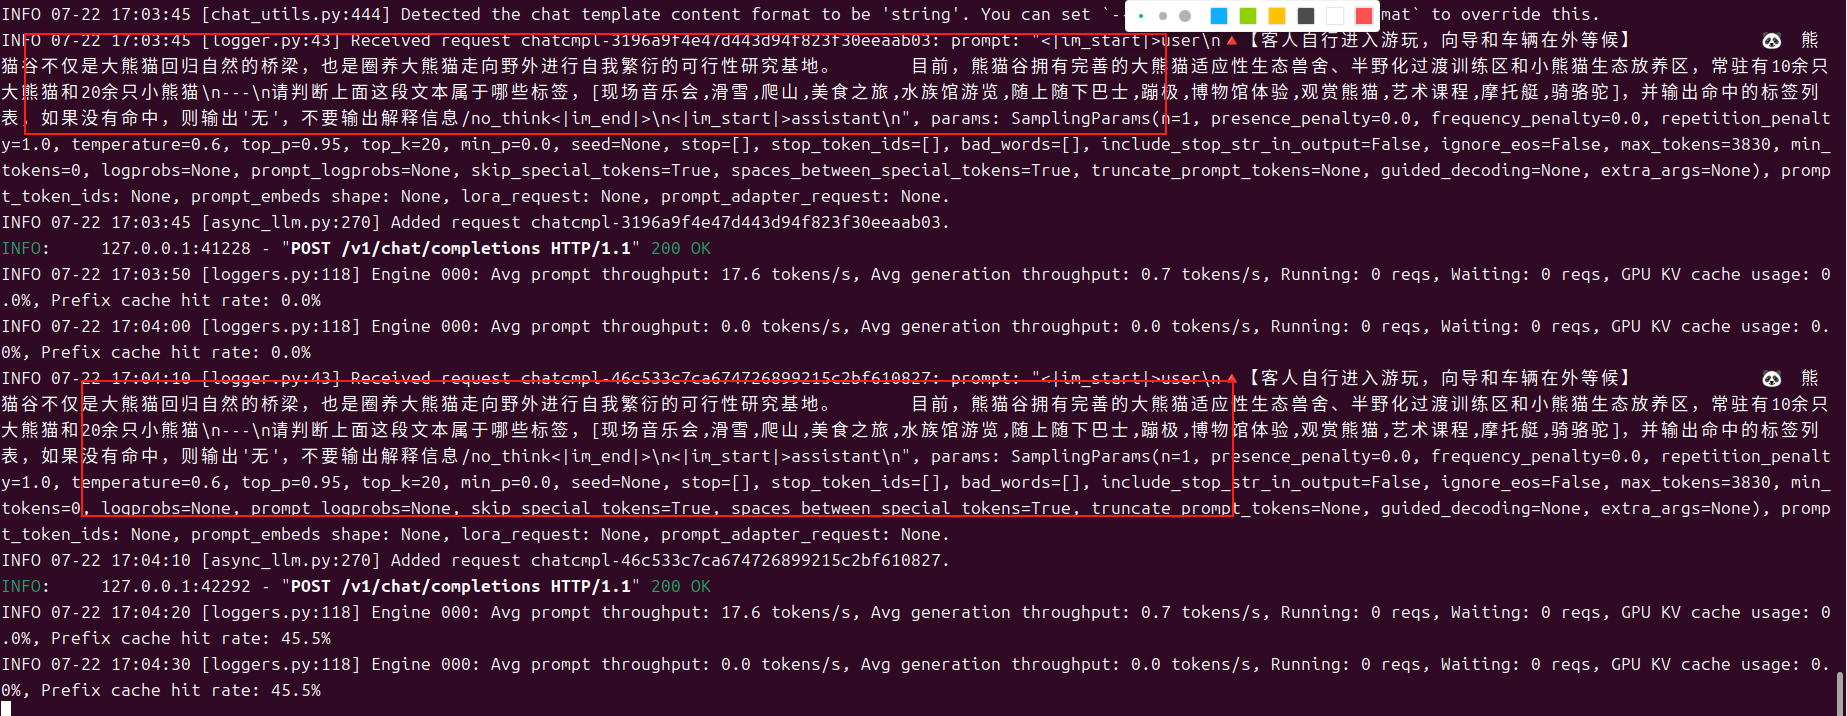
问题记录
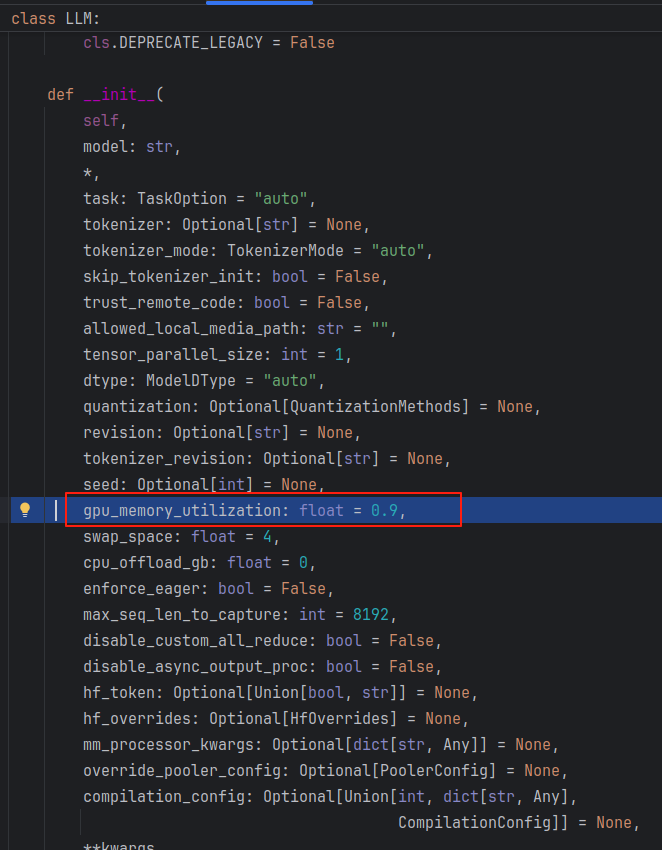
如果GPU比较小的话,在使用官方推荐的命令起服务时,会碰到out of memory的问题,提示进行
gpu_memory_utilization和max_num_seqs的调整,官方参考及报错如下图所示:
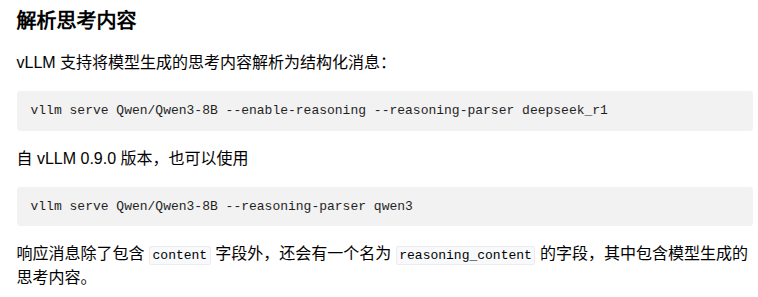
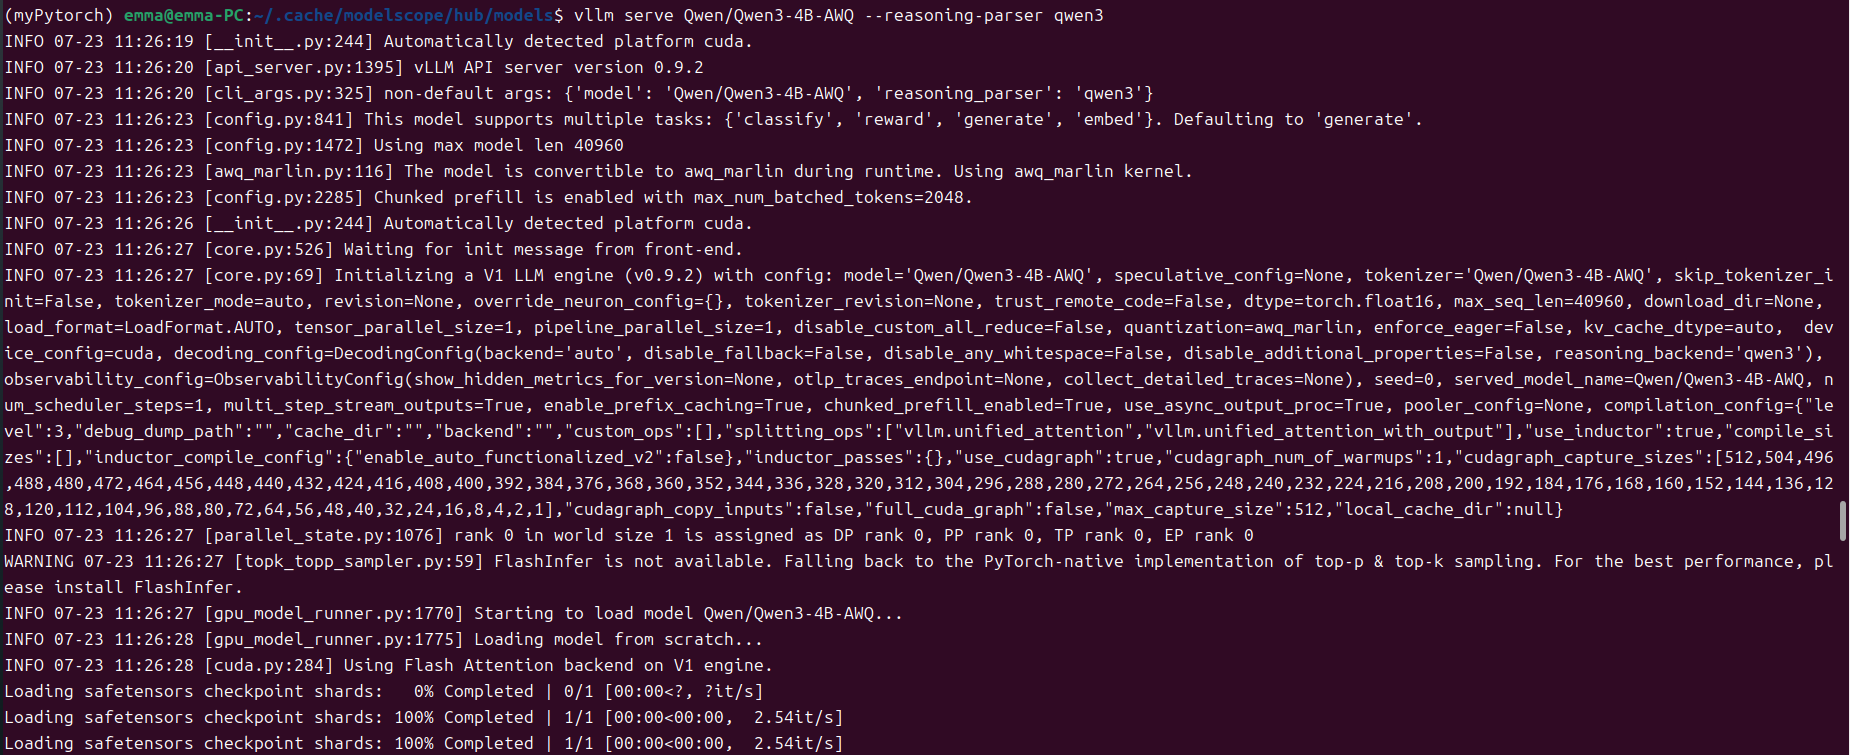
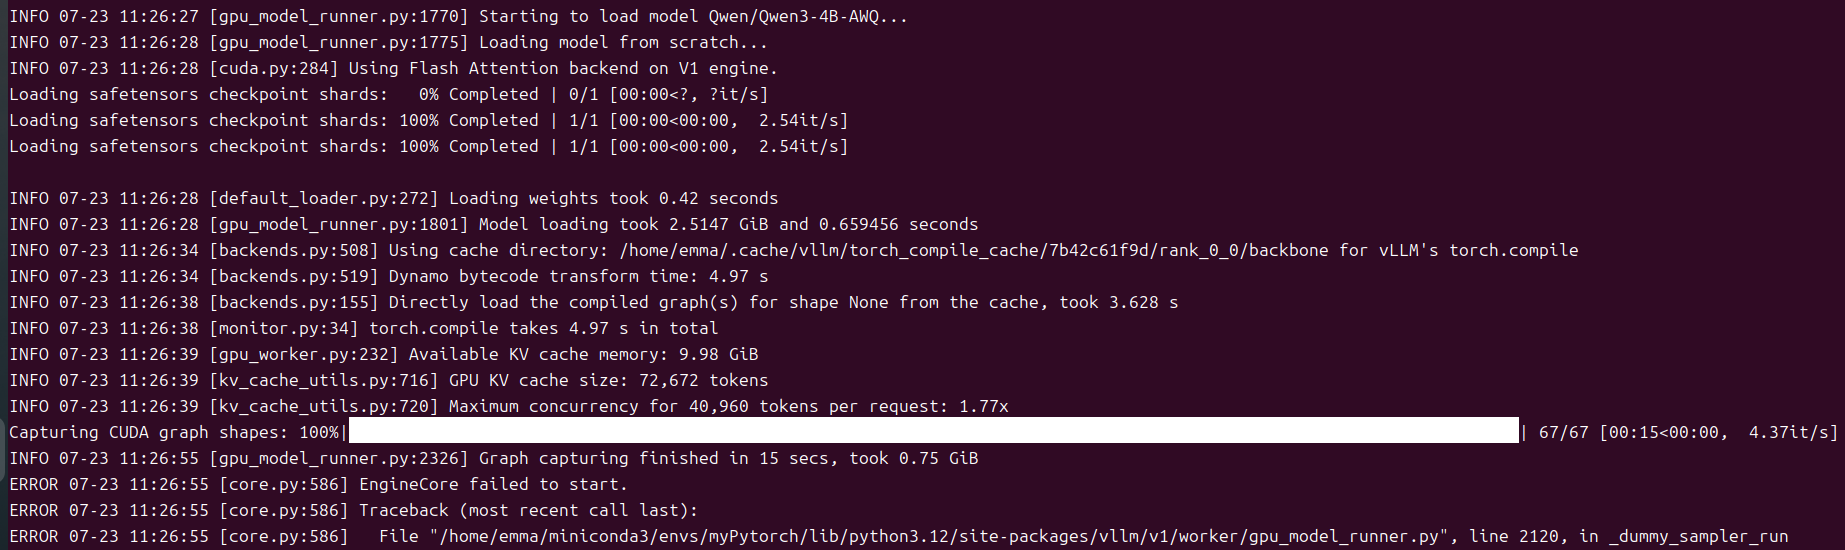


原因是gpu_memory_utilization的默认值为0.9,在GPU较小的情况下,分配给kv缓存的空间太大,导致out of memory的问题,因此需要根据自己的情况进行gpu_memory_utilization的调整,我的GPU大小为16G,该参数调整为0.6~0.85之间均可正常启动。
vllm serve Qwen/Qwen3-4B-AWQ --gpu-memory-utilization 0.8 --reasoning-parser qwen3


 1万+
1万+

 被折叠的 条评论
为什么被折叠?
被折叠的 条评论
为什么被折叠?
 到【灌水乐园】发言


