


目录
1)、访问 Ollama 官网 下载 Windows 预览版安装程序。
2、之后新建知识库的名字,把上面的文档加入即可,之后需要等待文件解析完成,切记命名要用英文。编辑
一、硬件配置
- CPU:i9 2.3Ghz;
- GPU:GTX4060 8G显存;
- 内存:16G;
- 硬盘:1T
二、软件资源
- Langchain-Chatchat:https://github.com/chatchat-space/Langchain-Chatchat
- ollama:ollama version is 0.5.12
- python:python3.11
- cuda: cuda11.8
- anaconda: Anaconda3-2022.10-Windows-x86_64.exe
三、环境搭建
1.基础环境安装:
(base) PS C:\Users\18710> conda env list
# conda environments:
#
base                  *  C:\Users\18710\anaconda3
langchain-chatchat-python3.11     C:\Users\18710\anaconda3\envs\langchain-chatchat-python3.11
torch_cpu                C:\Users\18710\anaconda3\envs\torch_cpu
torch_gpu                C:\Users\18710\anaconda3\envs\torch_gpu

(base) PS C:\Users\18710> conda activate langchain-chatchat-python3.11

(base) PS C:\Users\18710> pip install langchain-chatchat -U
2.执行初始化
建立一个自己的工程文件夹,如Langchain-Chatchat,进入这个文件夹下执行:
(langchain-chatchat-python3.11) PS D:\Code\Python\Langchain-Chatchat> chatchat init
2025-03-13 09:29:37.607 | WARNING  | chatchat.server.utils:detect_xf_models:107 - cannot connect to xinference host: http://127.0.0.1:9997, please check your configuration.
2025-03-13 09:29:37.608 | WARNING  | chatchat.server.utils:get_default_llm:205 - default llm model glm4-chat is not found in available llms, using qwen:7b instead
2025-03-13 09:29:37.625 | WARNING  | chatchat.server.utils:get_default_embedding:214 - default embedding model bge-m3 is not found in available embeddings, using quentinz/bge-large-zh-v1.5 instead
2025-03-13 09:29:37.626 | WARNING  | chatchat.server.utils:get_default_embedding:214 - default embedding model bge-m3 is not found in available embeddings, using quentinz/bge-large-zh-v1.5 instead
2025-03-13 09:29:37.627 | WARNING  | chatchat.server.utils:get_default_embedding:214 - default embedding model bge-m3 is not found in available embeddings, using quentinz/bge-large-zh-v1.5 instead
2025-03-13 09:29:37.629 | WARNING  | chatchat.server.utils:get_default_embedding:214 - default embedding model bge-m3 is not found in available embeddings, using quentinz/bge-large-zh-v1.5 instead
2025-03-13 09:29:37.632 | SUCCESS  | chatchat.cli:init:47 - 开始初始化项目数据目录:D:\Code\Python\Langchain-Chatchat
2025-03-13 09:29:37.635 | SUCCESS  | chatchat.cli:init:49 - 创建所有数据目录:成功。
2025-03-13 09:29:37.661 | SUCCESS  | chatchat.cli:init:52 - 复制 samples 知识库文件:成功。
2025-03-13 09:29:37.723 | SUCCESS  | chatchat.cli:init:54 - 初始化知识库数据库:成功。
2025-03-13 09:29:37.910 | SUCCESS  | chatchat.cli:init:66 - 生成默认配置文件:成功。
2025-03-13 09:29:37.910 | SUCCESS  | chatchat.cli:init:67 - 请先检查确认 model_settings.yaml 里模型平台、LLM模型和Embed模型信息已经正确
2025-03-13 09:29:37.910 | SUCCESS  | chatchat.cli:init:76 - 执行 chatchat kb -r 初始化知识库,然后 chatchat start -a 启动服务。
3.初始化知识库
进行知识库初始化前,请确保已经启动模型推理框架及对应 embedding 模型,且已按照上述步骤2完成模型接入配置。
chatchat kb -r
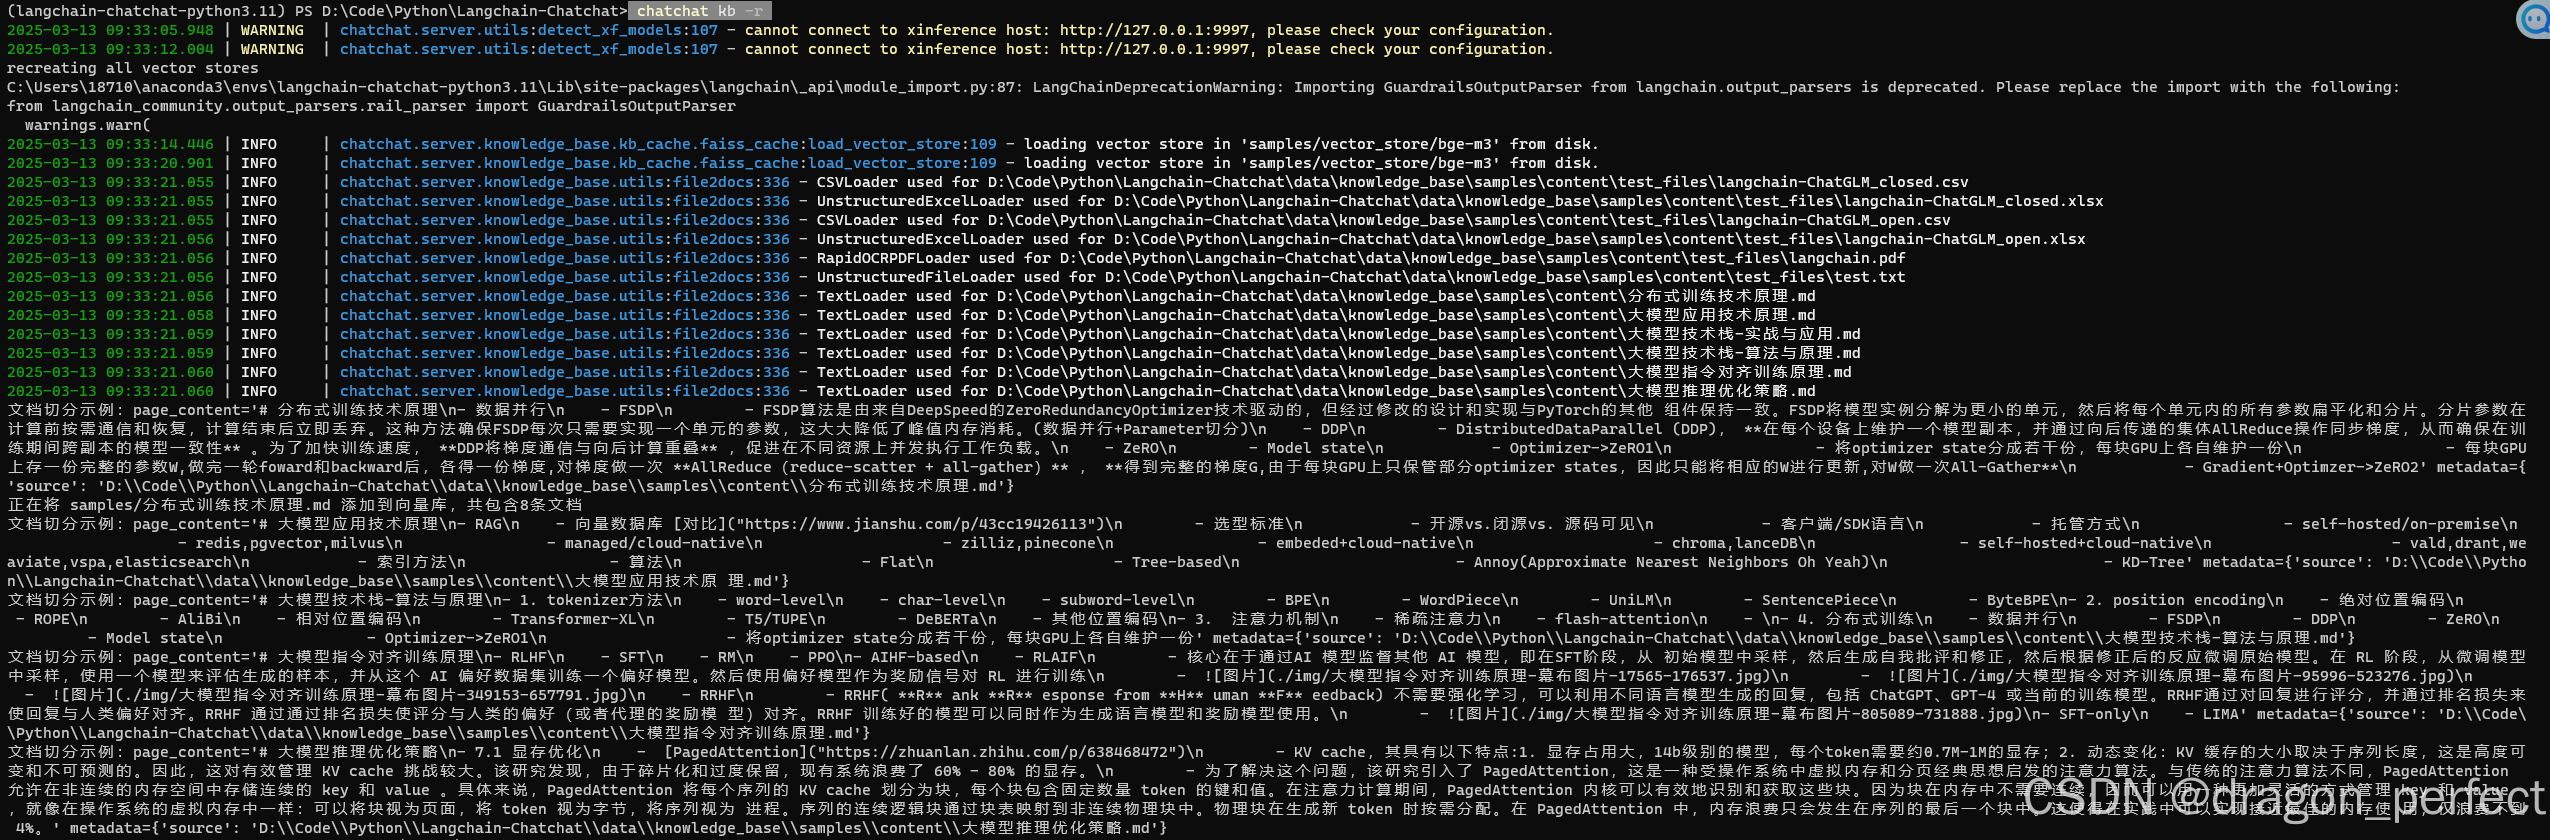
最后输出以下信息表示成功:

4.启动项目
项目启动部分,只要对model_settings.yaml进行修改,修改前需要先安装ollama,这些教程都比较简单:
1)、访问 Ollama 官网 下载 Windows 预览版安装程序。
之后输入以下内容,拉 embedding model和LLM模型。
ollama pull deepseek-r1:7b
ollama pull bge-m3
2)、model_settings.yaml进行修改如下:
# 模型配置项


# 默认选用的 LLM 名称 #修改
DEFAULT_LLM_MODEL: deepseek-r1:7b

# 默认选用的 Embedding 名称 #修改
DEFAULT_EMBEDDING_MODEL: bge-m3:latest

# AgentLM模型的名称 (可以不指定,指定之后就锁定进入Agent之后的Chain的模型,不指定就是 DEFAULT_LLM_MODEL)
Agent_MODEL: ''

# 默认历史对话轮数
HISTORY_LEN: 3

# 大模型最长支持的长度,如果不填写,则使用模型默认的最大长度,如果填写,则为用户设定的最大长度
MAX_TOKENS:

# LLM通用对话参数
TEMPERATURE: 0.7

# 支持的Agent模型
SUPPORT_AGENT_MODELS:
  - chatglm3-6b
  - glm-4
  - openai-api
  - Qwen-2
  - qwen2-instruct
  - gpt-3.5-turbo
  - gpt-4o

# LLM模型配置,包括了不同模态初始化参数。
# `model` 如果留空则自动使用 DEFAULT_LLM_MODEL
LLM_MODEL_CONFIG:
  preprocess_model:
    model: ''
    temperature: 0.05
    max_tokens: 4096
    history_len: 10
    prompt_name: default
    callbacks: false
  llm_model:
    model: ''
    temperature: 0.9
    max_tokens: 4096
    history_len: 10
    prompt_name: default
    callbacks: true
  action_model:
    model: ''
    temperature: 0.01
    max_tokens: 4096
    history_len: 10
    prompt_name: ChatGLM3
    callbacks: true
  postprocess_model:
    model: ''
    temperature: 0.01
    max_tokens: 4096
    history_len: 10
    prompt_name: default
    callbacks: true
  image_model:
    model: sd-turbo
    size: 256*256

# # 模型加载平台配置


# # 平台名称 #修改
platform_name: ollama

# # 平台类型 #修改
# # 可选值:['xinference', 'ollama', 'oneapi', 'fastchat', 'openai', 'custom openai']
platform_type: ollama

# # openai api url #修改
api_base_url: http://127.0.0.1:11434/v1

# # api key if available
# api_key: EMPTY

# # API 代理
# api_proxy: ''

# # 该平台单模型最大并发数
# api_concurrencies: 5

# # 是否自动获取平台可用模型列表。设为 True 时下方不同模型类型可自动检测
# auto_detect_model: false

# # 该平台支持的大语言模型列表,auto_detect_model 设为 True 时自动检测
# llm_models: []

# # 该平台支持的嵌入模型列表,auto_detect_model 设为 True 时自动检测
# embed_models: []

# # 该平台支持的图像生成模型列表,auto_detect_model 设为 True 时自动检测
# text2image_models: []

# # 该平台支持的多模态模型列表,auto_detect_model 设为 True 时自动检测
# image2text_models: []

# # 该平台支持的重排模型列表,auto_detect_model 设为 True 时自动检测
# rerank_models: []

# # 该平台支持的 STT 模型列表,auto_detect_model 设为 True 时自动检测
# speech2text_models: []

# # 该平台支持的 TTS 模型列表,auto_detect_model 设为 True 时自动检测
# text2speech_models: [] #修改
MODEL_PLATFORMS:
  - platform_name: xinference
    platform_type: xinference
    api_base_url: http://127.0.0.1:9997/v1
    api_key: EMPTY
    api_proxy: ''
    api_concurrencies: 5
    auto_detect_model: true
    llm_models: []
    embed_models: []
    text2image_models: []
    image2text_models: []
    rerank_models: []
    speech2text_models: []
    text2speech_models: []
  - platform_name: ollama
    platform_type: ollama
    api_base_url: http://127.0.0.1:11434/v1
    api_key: EMPTY
    api_proxy: ''
    api_concurrencies: 5
    auto_detect_model: false
    llm_models:
      - qwen:7b
      - qwen2:7b
      - deepseek-r1:7b
    embed_models:
      - quentinz/bge-large-zh-v1.5
      - bge-m3:latest
    text2image_models: []
    image2text_models: []
    rerank_models: []
    speech2text_models: []
    text2speech_models: []
  - platform_name: oneapi
    platform_type: oneapi
    api_base_url: http://127.0.0.1:3000/v1
    api_key: sk-
    api_proxy: ''
    api_concurrencies: 5
    auto_detect_model: false
    llm_models:
      - chatglm_pro
      - chatglm_turbo
      - chatglm_std
      - chatglm_lite
      - qwen-turbo
      - qwen-plus
      - qwen-max
      - qwen-max-longcontext
      - ERNIE-Bot
      - ERNIE-Bot-turbo
      - ERNIE-Bot-4
      - SparkDesk
    embed_models:
      - text-embedding-v1
      - Embedding-V1
    text2image_models: []
    image2text_models: []
    rerank_models: []
    speech2text_models: []
    text2speech_models: []
  - platform_name: openai
    platform_type: openai
    api_base_url: https://api.openai.com/v1
    api_key: sk-proj-
    api_proxy: ''
    api_concurrencies: 5
    auto_detect_model: false
    llm_models:
      - gpt-4o
      - gpt-3.5-turbo
    embed_models:
      - text-embedding-3-small
      - text-embedding-3-large
    text2image_models: []
    image2text_models: []
    rerank_models: []
    speech2text_models: []
    text2speech_models: []
3)、启动chat:
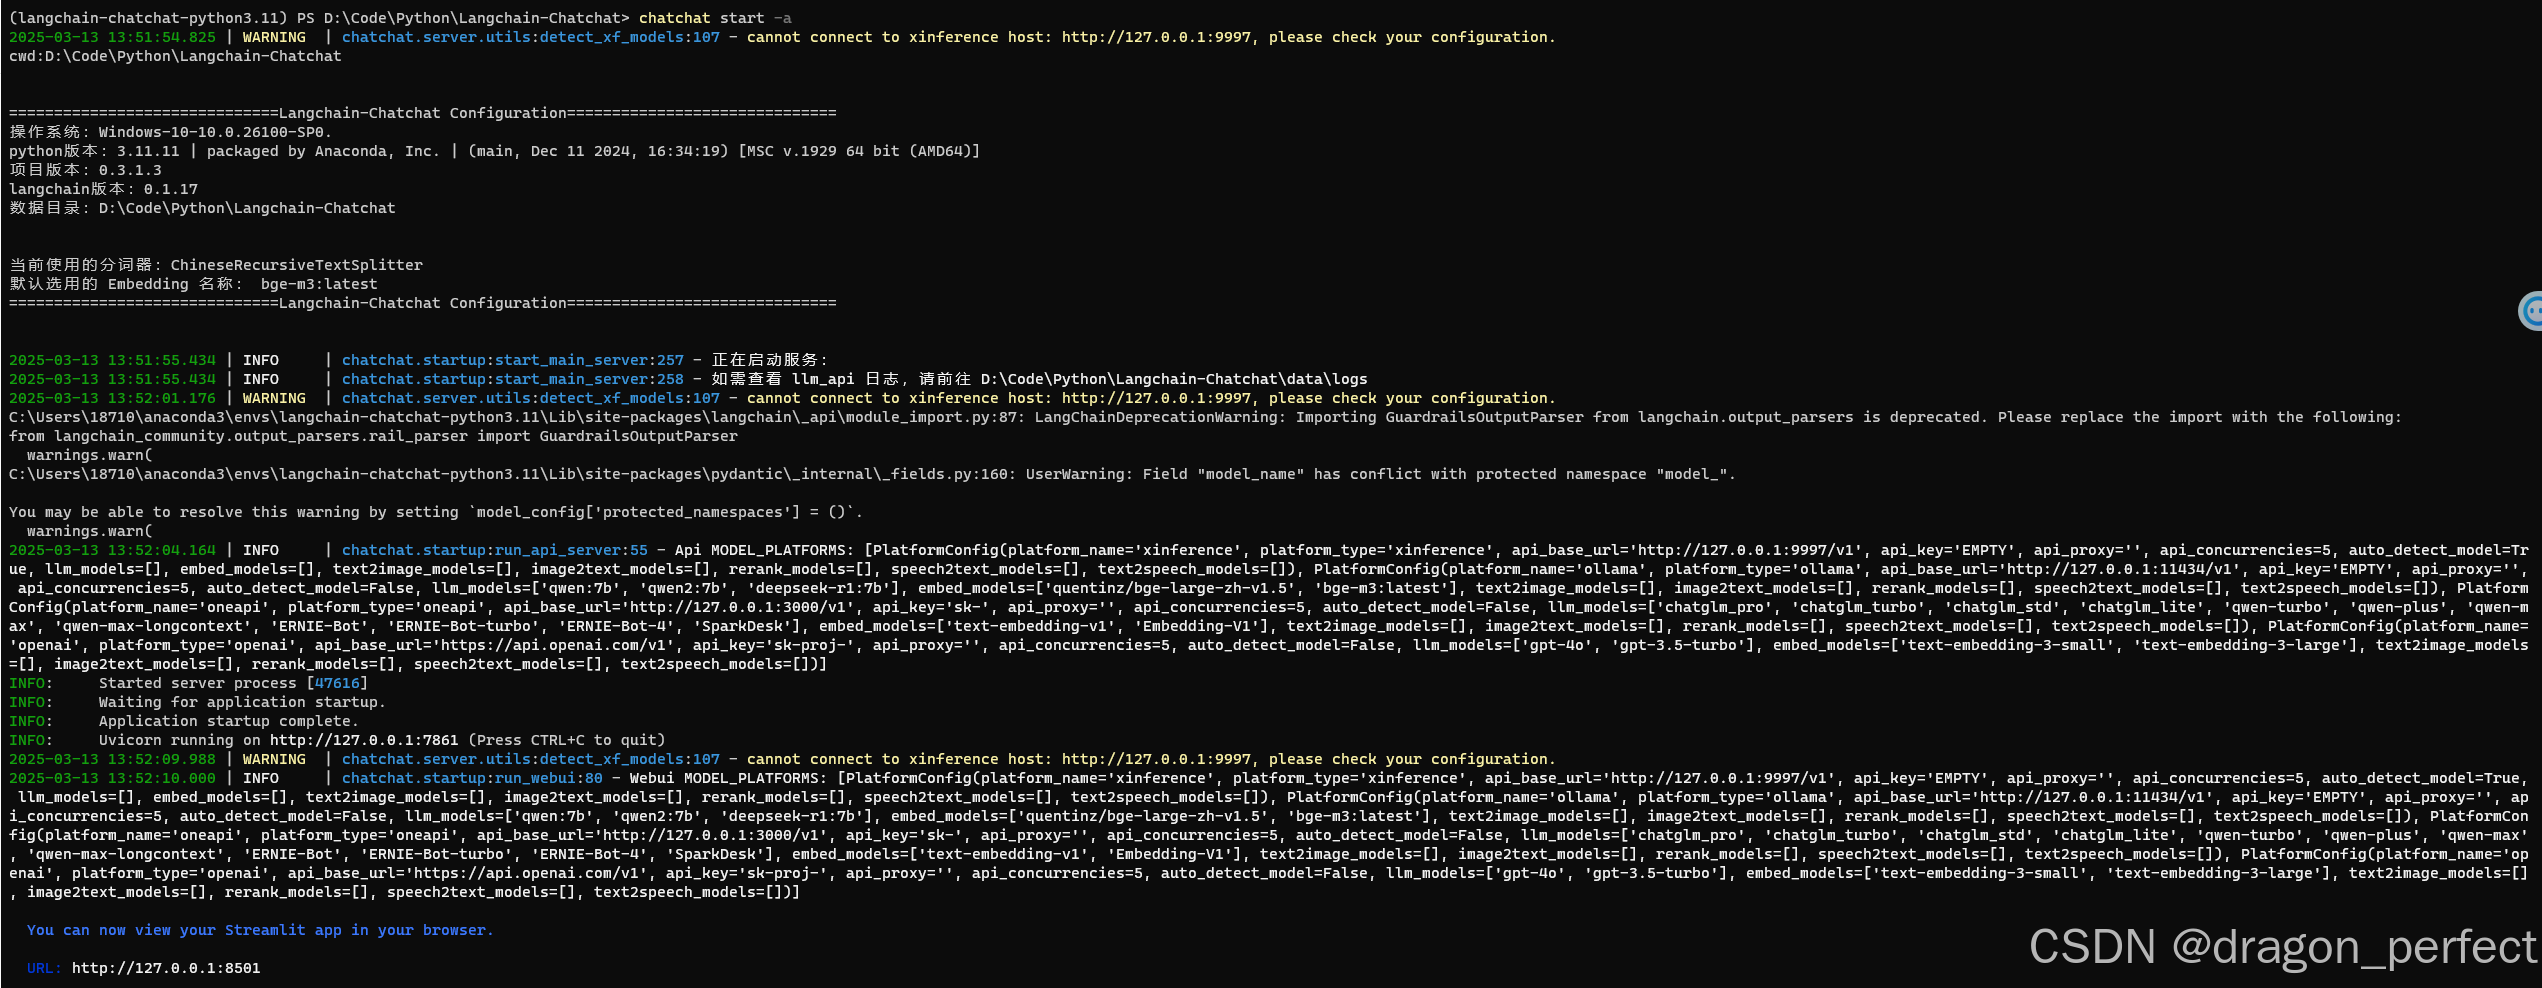
输入chatchat start -a
启动后界面如下:
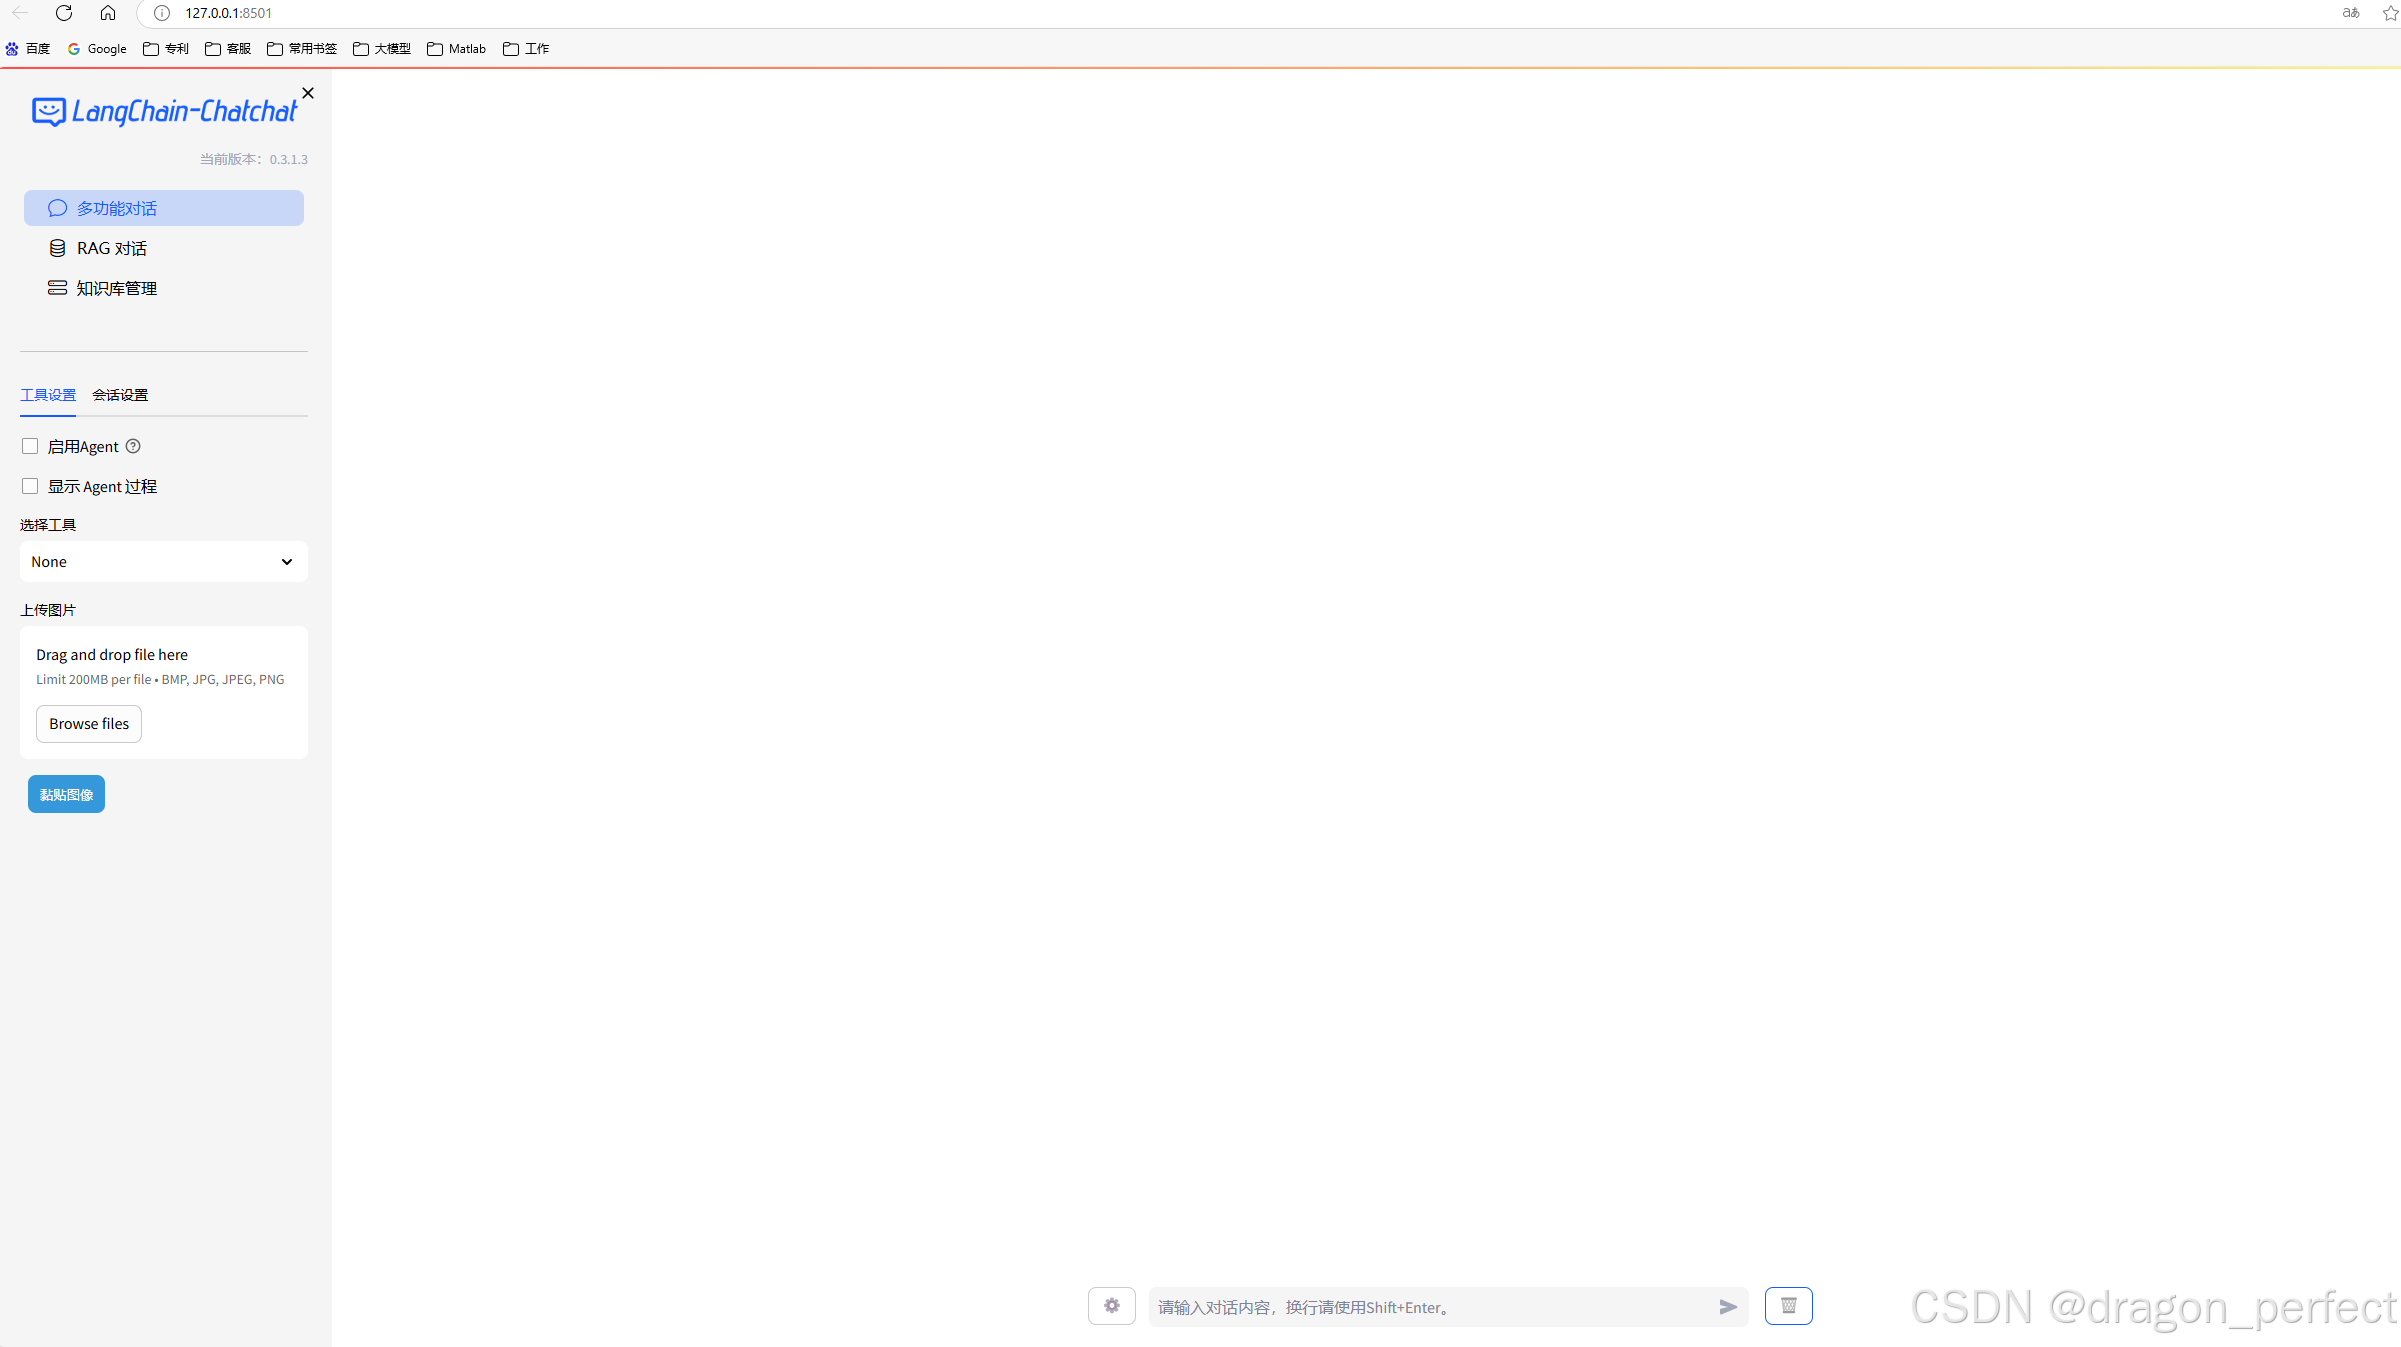
同时产生 Langchain-Chatchat WebUI界面:
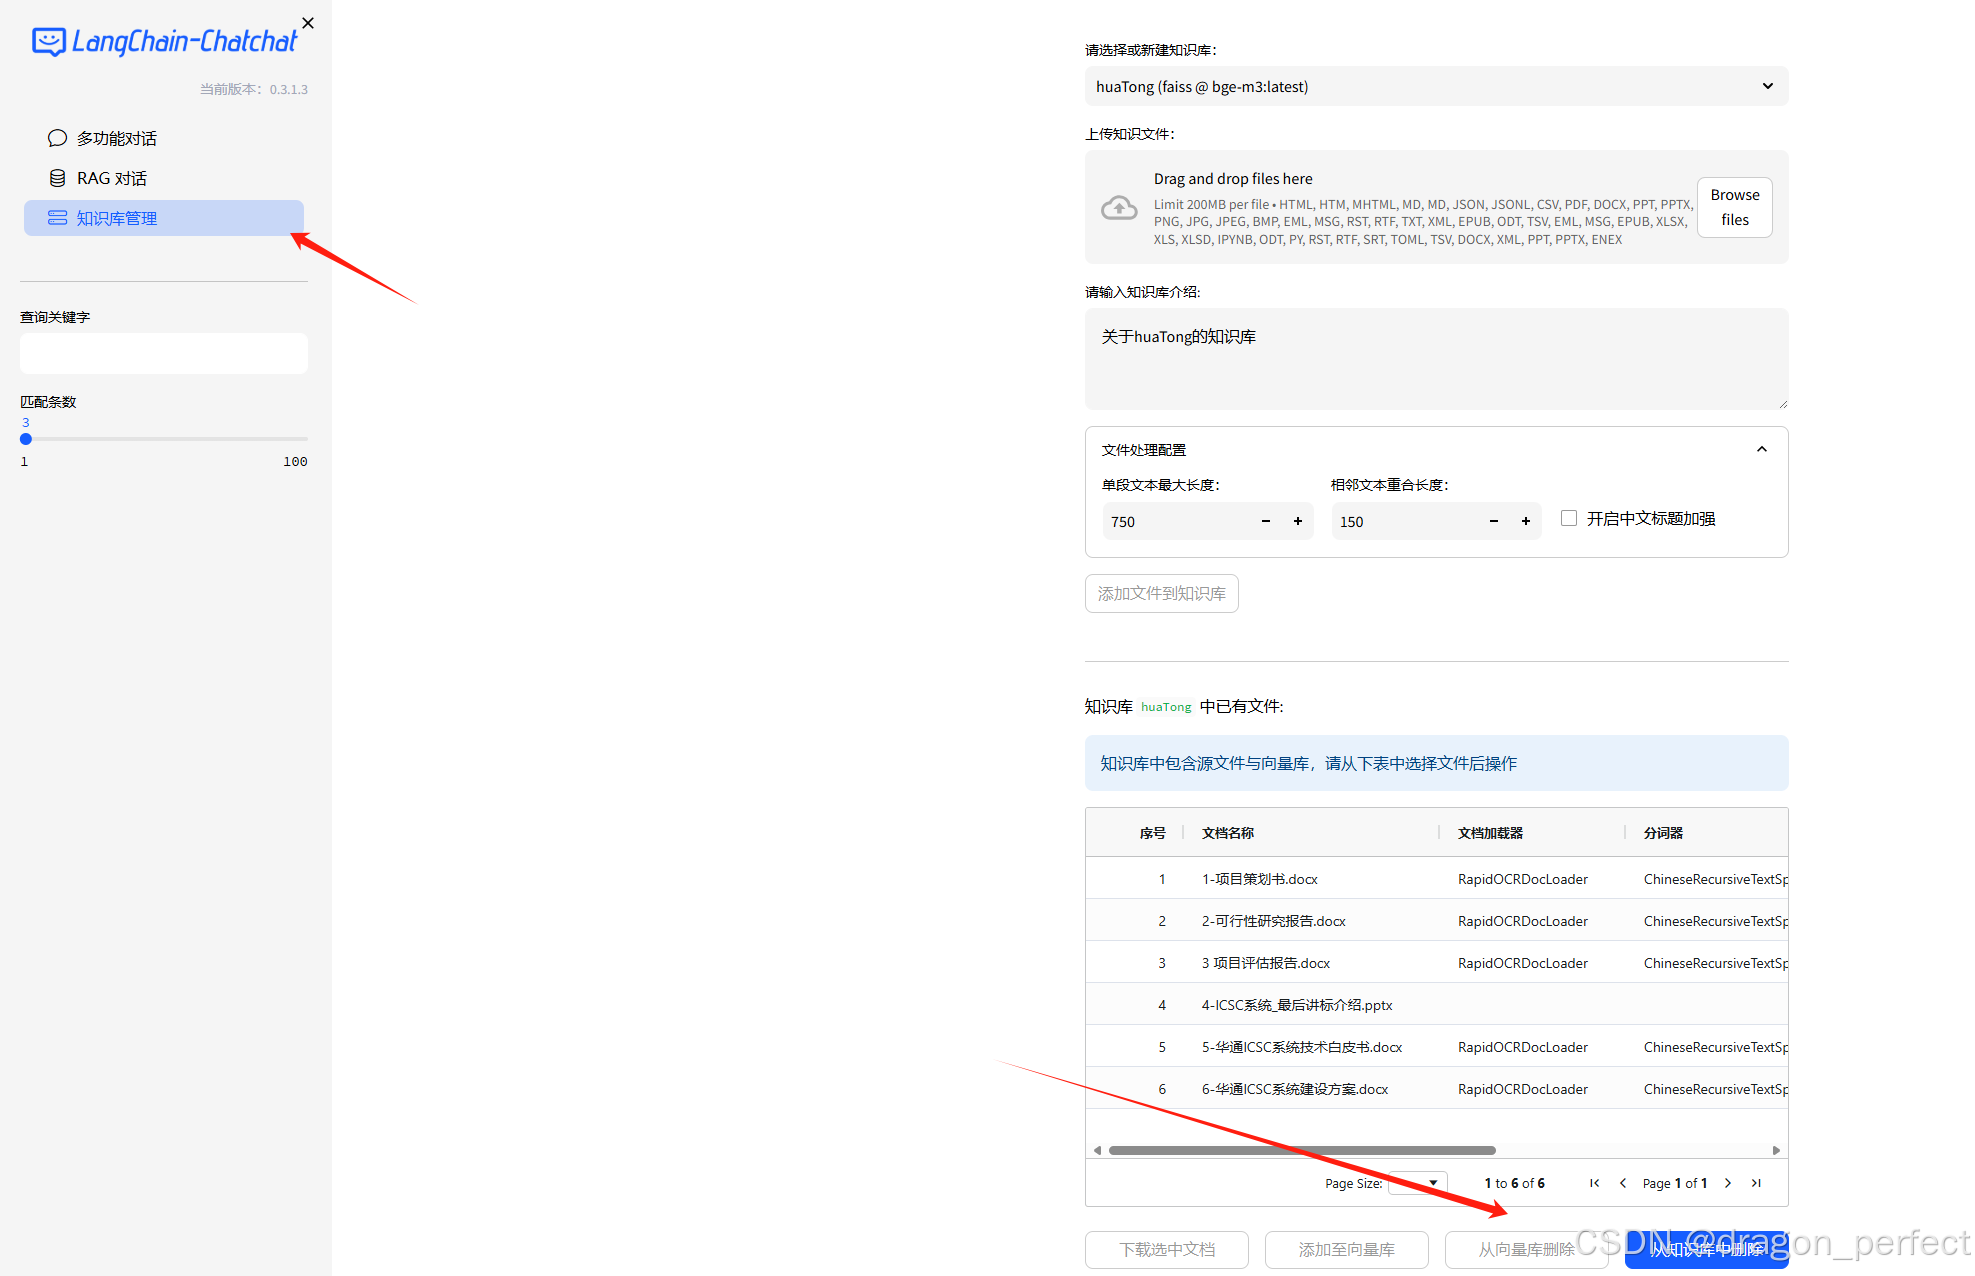
四、搭建自己的数据库
-
1、 准备数据库数据,自己可以按照文档整理如下:

-
2、之后新建知识库的名字,把上面的文档加入即可,之后需要等待文件解析完成,切记命名要用英文。
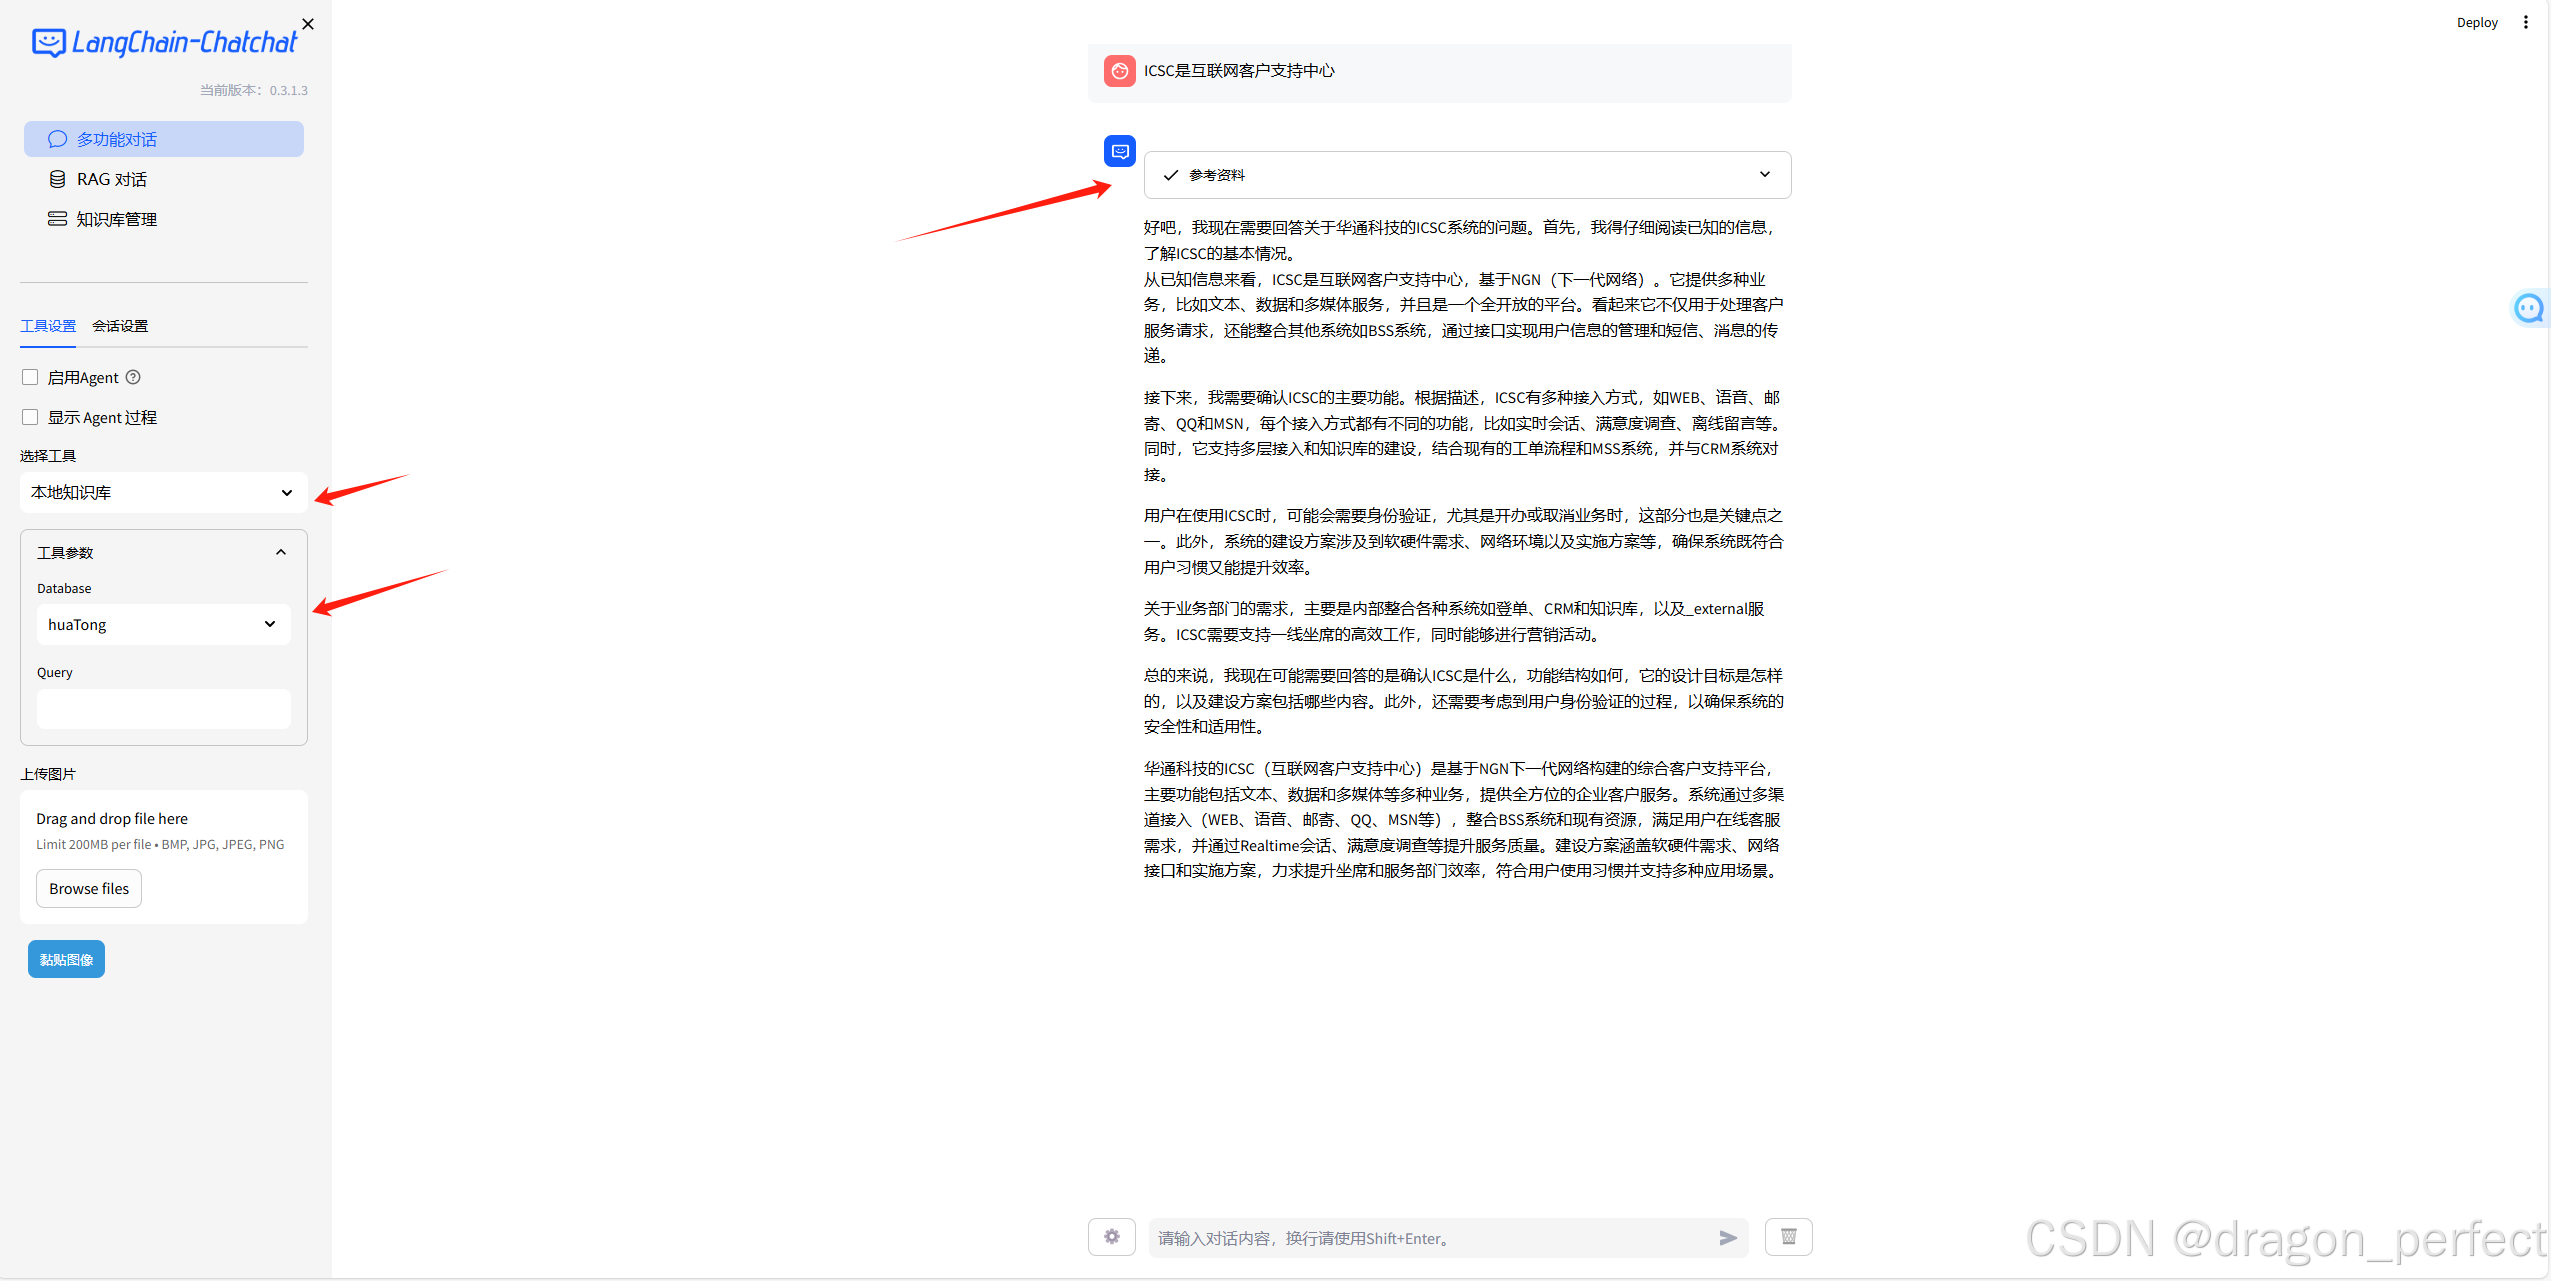
五、基于本地知识库问答
六、小结:
- model_settings.yaml 配置中模型要用全称;
- httpx 需要该成 httpx==0.27.2的版本,否则会报错;
- 知识库命名一定是要用英文。
- QQ:187100248,大模型交流。


 1216
1216

 被折叠的 条评论
为什么被折叠?
被折叠的 条评论
为什么被折叠?
 到【灌水乐园】发言


