


 本文详细介绍了如何在SpringBoot项目中整合Redis,包括下载安装Redis、配置依赖、配置信息、创建配置类、服务接口及其实现类、控制器类等步骤,并提供了具体的代码示例。
springboot对于redis的增删改查
1.下载redis,安装之后,打开redis服务器。不过有绿色版的,直接打开redis服务器可执行文件,启动redis服务器。
2.在pom.xml配置文件中添加redis依赖包
-
<dependency> -
<groupId>org.springframework.boot</groupId> -
<artifactId>spring-boot-starter-redis</artifactId> -
<version>1.3.8.RELEASE</version> -
</dependency>
3.在application.properties配置文件中添加redis配置信息
-
#spring redis -
spring.redis.host=localhost -
spring.redis.port=6379 -
spring.redis.database=0 -
spring.redis.password=root -
spring.redis.pool.max-active=8 -
spring.redis.pool.max-wait=-1 -
spring.redis.pool.max-idle=8 -
spring.redis.pool.min-idle=0 -
spring.redis.timeout=0
4.新建一个config包,创建RedisConfig配置类
-
package springboot.redis.config; -
import org.springframework.cache.CacheManager; -
import org.springframework.cache.annotation.CachingConfigurerSupport; -
import org.springframework.cache.annotation.EnableCaching; -
import org.springframework.context.annotation.Bean; -
import org.springframework.context.annotation.Configuration; -
import org.springframework.data.redis.cache.RedisCacheManager; -
import org.springframework.data.redis.connection.RedisConnectionFactory; -
import org.springframework.data.redis.core.RedisTemplate; -
@Configuration -
@EnableCaching//开启注解 -
public class RedisConfig extends CachingConfigurerSupport { -
@Bean -
public CacheManager cacheManager(RedisTemplate<?,?> redisTemplate) { -
CacheManager cacheManager = new RedisCacheManager(redisTemplate); -
return cacheManager; -
} -
@Bean -
public RedisTemplate<String, String> redisTemplate(RedisConnectionFactory factory) { -
RedisTemplate<String, String> redisTemplate = new RedisTemplate<String, String>(); -
redisTemplate.setConnectionFactory(factory); -
return redisTemplate; -
} -
}
5.新建一个services包,创建一个RedisService接口
-
package springboot.redis.services; -
public interface RedisService { -
//add -
public void set(String id, String name); -
//select -
public String get(String id); -
//update -
public void update(String id,String name); -
//delete -
public void delete(String id); -
}
6.在services包中,新建一个impl包,在impl包中新建一个RedisServiceImpl实现类
-
package springboot.redis.services.impl; -
import javax.annotation.Resource; -
import org.springframework.data.redis.core.RedisTemplate; -
import org.springframework.data.redis.core.ValueOperations; -
import org.springframework.stereotype.Service; -
import springboot.redis.services.RedisService; -
@Service -
public class RedisServiceImpl implements RedisService { -
@Resource -
private RedisTemplate<String, String> redisTemplate; -
@Override -
public void set(String id, String name) { -
ValueOperations<String,String> vo = redisTemplate.opsForValue(); -
vo.set(id, name); -
} -
@Override -
public String get(String id) { -
ValueOperations<String, String> vo=redisTemplate.opsForValue(); -
return vo.get(id); -
} -
@Override -
public void update(String id, String name) { -
ValueOperations<String,String> vo=redisTemplate.opsForValue(); -
vo.set(id, name); -
} -
@Override -
public void delete(String id) { -
ValueOperations<String, String> vo=redisTemplate.opsForValue(); -
vo.getOperations().delete(id); -
} -
}
7.新建一个control包,创建一个RedisControl类
-
package springboot.redis.control; -
import org.springframework.beans.factory.annotation.Autowired; -
import org.springframework.web.bind.annotation.RequestMapping; -
import org.springframework.web.bind.annotation.RestController; -
import springboot.redis.services.impl.RedisServiceImpl; -
@RestController -
@RequestMapping("/redis") -
public class RedisControl { -
@Autowired -
private RedisServiceImpl redisServiceImpl; -
//设置redis中的key和value -
@RequestMapping("/add") -
public String setRedis(String id,String name){ -
redisServiceImpl.set(id, name); -
return "redis设置成功"+"id="+id+" name="+name; -
} -
//获得redis中的value -
@RequestMapping("/select") -
public String getRedis(String id){ -
return "redis获得值成功"+"name="+redisServiceImpl.get(id); -
} -
//修改redis中的value -
@RequestMapping("/update") -
public String updateRedis(String id,String name){ -
redisServiceImpl.update(id, name); -
System.out.println("修改成"); -
return "redis修改成功"+"id="+id+" name="+redisServiceImpl.get(id); -
} -
//修改redis中的value -
@RequestMapping("/delete") -
public String deleteRedis(String id,String name){ -
redisServiceImpl.delete(id); -
return "redis删除成功"; -
} -
}
8.springboot启动类
-
package springboot; -
import org.springframework.boot.SpringApplication; -
import org.springframework.boot.autoconfigure.SpringBootApplication; -
import org.springframework.scheduling.annotation.EnableScheduling; -
//import org.springframework.session.data.redis.config.annotation.web.http.EnableRedisHttpSession; -
import org.springframework.session.data.redis.config.annotation.web.http.EnableRedisHttpSession; -
import redis.clients.jedis.Jedis; -
@SpringBootApplication -
@EnableRedisHttpSession -
public class SpringbootApplication { -
public static void main(String[] args) { -
SpringApplication app=new SpringApplication(SpringbootApplication.class); -
app.run(args); -
Jedis jedis = new Jedis("localhost"); -
jedis.auth("root"); -
jedis.save(); -
} -
}
9.启动之后
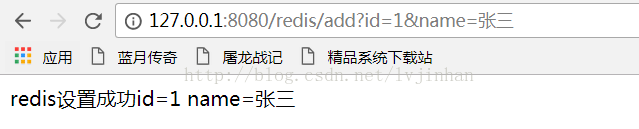
新增数据 http://127.0.0.1:8080/redis/add?id=1&name=张三
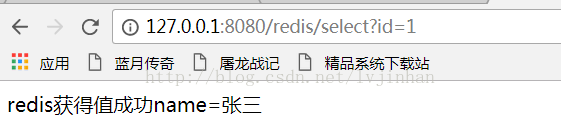
查询数据 http://127.0.0.1:8080/redis/select?id=1
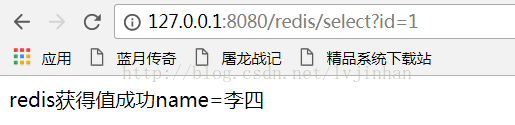
修改数据 http://127.0.0.1:8080/redis/update?id=1&name=李四

查询修改数据 http://127.0.0.1:8080/redis/select?id=1
删除数据 http://127.0.0.1:8080/redis/delete?id=1

查询删除数据 http://127.0.0.1:8080/redis/select?id=1


 946
946

 被折叠的 条评论
为什么被折叠?
被折叠的 条评论
为什么被折叠?
 到【灌水乐园】发言


