


引言:
在我们之前学习了单向链表的各种操作后,我们发现我们的逻辑思维需要十分严密,比如需要处理链表为空,非空,查找节点的上一个位置是否有节点等等,为了简化我们的代码,可以采取新的方法,也就是哨兵节点
PS:基础数据结构——单向链表(一篇文章带你拿捏所有常用操作)
没有了解过的可以看看上一篇,带你快速上手
ok回到正题
我们将原先设置为null的头结点赋予一个哨兵节点,这样就避免了空链表的情况,也避免了findlast为空以及种种逻辑判断。
public class SinglyLinkedList implements Iterable<Integer> {
    private Node head=new Node(666,null);//哨兵指针
我们接下来在涉及的各个方法中进行修改简化。
addLast尾插法
不添加哨兵节点的尾插法需要靠许找到的最后一个节点为空的情况,而添加了哨兵节点后,最后一个节点不可能为null,于是我们可以把if判断删除进行简化
public void addLast(int value){
        Node last=findLast();
        if(last==null){
            addFirst(value);
            return;
        }
        last.next=new Node(value,null);
    }
简化后(哨兵)
 public void addLast(int value){
        Node last=findLast();
        last.next=new Node(value,null);
    }
我们发现这个addLast方法里面涉及findLast,我们接着进行修改
findLast查找最后一个节点
我们先来看原来的代码
public Node findLast(){
        if(head==null){
            return null;
        }
        Node p;
        for(p=head;p.next!=null;p=p.next){

        }
        return p;
    }
因为head不为null了,所以也可以删除if逻辑,我们来看改进后的代码
public Node findLast(){
        Node p;
        for(p=head;p.next!=null;p=p.next){

        }
        return p;
    }
我们接下来对于代码进行测试
我们通过之前写过的迭代器进行遍历打印,结果如下
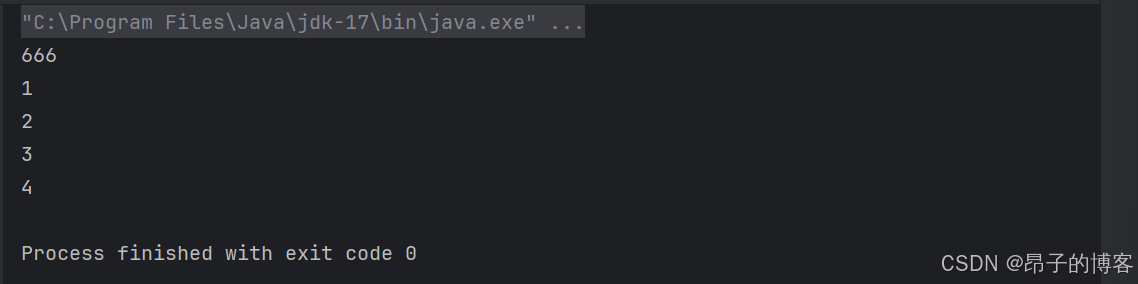
我们发现在遍历的时候我们将哨兵节点也进行了打印,所以我们要对遍历进行修改
遍历
思路就是将头指针指向它的下一个指向就ok,也就是
head=head.next
迭代器遍历
 public Iterator<Integer> iterator() {
        //匿名内部类
        return new NodeIterator();
    }
    private class NodeIterator implements Iterator<Integer> {
        Node p=head.next;

        @Override
        public boolean hasNext() {//是否有下一个元素
            return p!=null;
        }

        @Override
        public Integer next() {//返回当前值,并指向下一个元素
            int v=p.value;
            p=p.next;
            return v;
        }
    }
循环遍历
 public void loop1(Consumer<Integer> consumer){
        Node p=head.next;
        while(p!=null){
            consumer.accept(p.value);
            p=p.next;
        }
    }

    public void loop2(Consumer<Integer> consumer){
        for (Node p=head.next;p!=null;p=p.next){
            consumer.accept(p.value);
        }
    }
findNode按照索引的返回节点
也是只需要将初始指针指向哨兵节点的下一个节点就行
private Node findNode(int index){
        int i=0;
        for (Node p=head.next;p!=null;p=p.next,i++){
            if(i==index){
                return p;
            }
        }
        return null;
    }
get获取节点元素值方法
 public int get(int index){
        Node node=findNode(index);
        if(node==null){
            throw illegalIndex(index);
        }
        return node.value;
    }
在这个方法里面的异常处理
if(node==null)
并不代表链表为空链表,而是输入的索引值错误,该索引对应的节点为空。
其他无需做变动
insert插入方法
我们回顾一下上一个博客里面我们写的insert方法
public void insert(int index,int value){
        if(index==0){
            addFirst(value);
            return;
        }

        Node prev=findNode(index-1);//找到上一个节点
        if(prev==null){//找不到
            throw illegalIndex(index);
        }
        prev.next=new Node(value,prev.next);
    }
因为有哨兵节点的存在,我们不需要再考虑index=0的时候去加入头结点,因为已经存在了哨兵节点。
但是当插入index=0的时候,我们的findNode没有处理过参数为-1的情况
所以我们再回过去对findNoe进行改写
findNode2.0
我们将i的值设为-1,这样它第一个返回的节点就是头结点
private Node findNode(int index){
        int i=-1;
        for (Node p=head.next;p!=null;p=p.next,i++){
            if(i==index){
                return p;
            }
        }
        return null;
    }
addFirst新添头结点
我们先来回顾一下上一篇博客里面写的addFirst
public void addFirst(int value){

        head=new Node(value,head);
    }
如果不进行修改,那么添加的节点就会到哨兵节点之前,哨兵节点不再是第一个节点。
而我们之前写过的insert方法在索引为0的位置插入该索引可以很好的解决这个问题,我们直接在addFirst方法里面去调用insert方法。
 public void addFirst(int value){
        insert(0,value);
    }
remove删除
我们先看原来的代码
public void remove(int index)throws IllegalArgumentException{
        if(index==0){
            removeFirst();
            return;
        }
        Node prev=findNode(index-1);//上一个节点
        if(prev==null){
            throw illegalIndex(index);
        }
        Node removed=prev.next;//删除的节点
        if(removed==null){
            throw illegalIndex(index);
        }
        prev.next=removed.next;//将上一个节点指向删除的节点的指向即可

    }
和insert类似,无需再考虑index=0,而findNode的方法也在之前进行了优化,所以我们直接删除关于index的判断逻辑删除即可
 public void remove(int index)throws IllegalArgumentException{
        Node prev=findNode(index-1);//上一个节点
        if(prev==null){
            throw illegalIndex(index);
        }
        Node removed=prev.next;//删除的节点
        if(removed==null){
            throw illegalIndex(index);
        }
        prev.next=removed.next;//将上一个节点指向删除的节点的指向即可

    }
removeFirst删除头结点
这个和addFirst类似,直接调用remove方法即可
 public void removeFirst(){
        remove(0);
    }
以下是完整的代码
import java.util.Iterator;
import java.util.function.Consumer;

public class SinglyLinkedList implements Iterable<Integer> {
    private Node head=new Node(666,null);//头指针

    @Override
    public Iterator<Integer> iterator() {
        //匿名内部类
        return new NodeIterator();
    }
    private class NodeIterator implements Iterator<Integer> {
        Node p=head.next;

        @Override
        public boolean hasNext() {//是否有下一个元素
            return p!=null;
        }

        @Override
        public Integer next() {//返回当前值,并指向下一个元素
            int v=p.value;
            p=p.next;
            return v;
        }
    }

    private static class Node {
        int value;//值
        Node next;//下一个节点

        public Node(int value, Node next) {
            this.value = value;
            this.next = next;
        }
    }

    public void addFirst(int value){
        insert(0,value);
    }

    public Node findLast(){
        Node p;
        for(p=head;p.next!=null;p=p.next){

        }
        return p;
    }

    public void addLast(int value){
        Node last=findLast();
        last.next=new Node(value,null);
    }

    private Node findNode(int index){
        int i=-1;
        for (Node p=head.next;p!=null;p=p.next,i++){
            if(i==index){
                return p;
            }
        }
        return null;
    }

    public int get(int index){
        Node node=findNode(index);
        if(node==null){
            throw illegalIndex(index);
        }
        return node.value;
    }

    private IllegalArgumentException illegalIndex(int index) {
        return new IllegalArgumentException(
                String.format("index[%d] not found", index)
        );
    }

    public void insert(int index,int value){
        if(index==0){
            addFirst(value);
            return;
        }

        Node prev=findNode(index-1);//找到上一个节点
        if(prev==null){//找不到
            throw illegalIndex(index);
        }
        prev.next=new Node(value,prev.next);
    }

    public void removeFirst(){
        remove(0);
    }

    public void remove(int index)throws IllegalArgumentException{
        Node prev=findNode(index-1);//上一个节点
        if(prev==null){
            throw illegalIndex(index);
        }
        Node removed=prev.next;//删除的节点
        if(removed==null){
            throw illegalIndex(index);
        }
        prev.next=removed.next;//将上一个节点指向删除的节点的指向即可

    }

    public void loop(){
        Node p=head;
        while(p!=null){
            System.out.println(p.value);
            p=p.next;
        }

    }
    public void loop1(Consumer<Integer> consumer){
        Node p=head.next;
        while(p!=null){
            consumer.accept(p.value);
            p=p.next;
        }
    }

    public void loop2(Consumer<Integer> consumer){
        for (Node p=head.next;p!=null;p=p.next){
            consumer.accept(p.value);
        }
    }
}


 1395
1395

 被折叠的 条评论
为什么被折叠?
被折叠的 条评论
为什么被折叠?
 到【灌水乐园】发言


