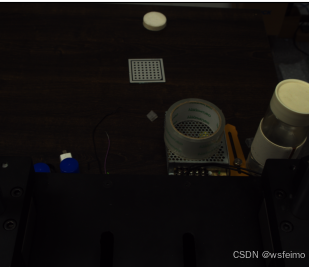
变换前:
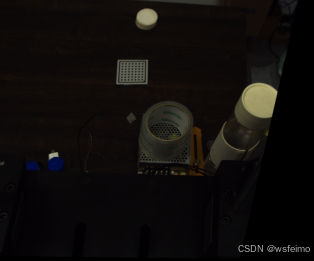
变换后:
import cv2
import matplotlib.pyplot as plt
import numpy as np
# 图像预处理
def detect_img(img):
# BGR 转 RGB
rgb_img = cv2.cvtColor(img, cv2.COLOR_BGR2RGB)
# 获取图像尺寸
H, W = rgb_img.shape[0:2]
# 裁剪目标区域
split_img = rgb_img[410:620, 1020:1330]
# 图像尺寸重制
new_img = cv2.resize(split_img, (W // 4, H // 4))
# RGB 转 Gray
gray = cv2.cvtColor(new_img, cv2.COLOR_RGB2GRAY)
# 图像阈值分割
ret, thresh = cv2.threshold(gray, 60, 255, cv2.THRESH_BINARY)
return H, W, rgb_img, split_img, gray, new_img, thresh
# 图像轮廓提取
def img_cnt(thresh):
# 图像开运算
kernel = np.ones((11, 11), np.uint8)
open_img = cv2.morphologyEx(thresh, cv2.MORPH_OPEN, kernel)
# 图像轮廓查找
cnt, _ = cv2.findContours(open_img, cv2.RETR_TREE, cv2.CHAIN_APPROX_SIMPLE)
# 画出轮廓
copy_img = new_img.copy()
draw_img = cv2.drawContours(copy_img, cnt, 0, (0, 255, 0), 2)
approx_img = new_img.copy()
return open_img, cnt, copy_img, draw_img, approx_img
# 图像多边形拟合
def draw_ploy_4rect(cnt, approx_img):
global R_up, R_down, L_down, L_up
# 外接四边形
count_cnt = len(cnt)
for i in range(0, count_cnt):
# 凸包检测
hull_cnt = cv2.convexHull(cnt[i])
Hull_img = cv2.drawContours(approx_img, [hull_cnt], -1, (255, 65, 65), 3)
# cv2.imshow("hull", Hull_img)
cnt_len = cv2.arcLength(hull_cnt, True)
# 轮廓多边形拟合
approx_cnt = cv2.approxPolyDP(hull_cnt, 0.01 * cnt_len, True)
# cv2.drawContours(approx_img, [approx_cnt], 0, (255, 0, 255), 2)
# 四边形轮廓筛选
if len(approx_cnt) == 4:
cv2.drawContours(approx_img, [], 0, (255, 0, 255), 2)
# x, y, w, h = cv2.boundingRect(approx_cnt)
# 获取轮廓坐标
R_up = [approx_cnt[0][0][0], approx_cnt[0][0][1]]
R_down = [approx_cnt[1][0][0], approx_cnt[1][0][1]]
L_down = [approx_cnt[2][0][0] + 2, approx_cnt[2][0][1] + 5]
L_up = [approx_cnt[3][0][0], approx_cnt[3][0][1]]
# cv2.drawMarker(approx_img, L_down, (255, 255, 0), 3, cv2.MARKER_TILTED_CROSS, 10)
# 获取轮廓质心
M = cv2.moments(hull_cnt)
# print(M)
cx = int(M["m10"] / M["m00"])
cy = int(M["m01"] / M["m00"])
# print("cx:", cx, "cy:", cy)
poly_img_4 = cv2.drawMarker(approx_img, (cx, cy), (255, 255, 0), 3, cv2.MARKER_TILTED_CROSS, 5)
return poly_img_4, R_up, R_down, L_down, L_up
# 透视变换
def Perspective_Transform(L_up, R_up, R_down, L_down, rgb_img):
# 设定坐标
New_L_up = L_up
New_L_down = [L_up[0], L_up[1] + 467]
New_R_up = [L_up[0] + 467, L_up[1]]
New_R_down = [L_up[0] + 467, L_up[1] + 467]
input_points = np.float32([L_up, R_up, R_down, L_down])
output_points = np.float32([New_L_up, New_R_up, New_R_down, New_L_down])
# 创建变换矩阵
mat = cv2.getPerspectiveTransform(input_points, output_points)
# 执行透视变换
out_img = cv2.warpPerspective(rgb_img.copy(), mat, (W, H))
New_out_img = cv2.resize(out_img, (W // 4, H // 4))
return New_out_img
if __name__ == "__main__":
img = cv2.imread(r"E:\DeskTop\ppt_img.bmp")
# 图像预处理
H, W, rgb_img, split_img, gray, new_img, thresh = detect_img(img)
# 图像轮廓提取
open_img, cnt, copy_img, draw_img, approx_img = img_cnt(thresh)
# 图像多边形拟合
poly_img_4, R_up, R_down, L_down, L_up = draw_ploy_4rect(cnt, approx_img)
# 图像透视变换
New_out_img = Perspective_Transform(L_up, R_up, R_down, L_down, rgb_img)
# 显示图像
plt.subplot(241), plt.imshow(rgb_img, cmap=None), plt.title('org')
plt.subplot(242), plt.imshow(split_img, cmap=None), plt.title('split_img')
plt.subplot(243), plt.imshow(gray, cmap='gray'), plt.title('gray')
plt.subplot(244), plt.imshow(open_img, cmap='gray'), plt.title('open_img')
plt.subplot(245), plt.imshow(draw_img, cmap=None), plt.title('draw_img')
plt.subplot(246), plt.imshow(poly_img_4, cmap=None), plt.title('poly_img_4')
plt.subplot(247), plt.imshow(New_out_img, cmap=None), plt.title('New_out_img')
plt.subplot(248), plt.imshow(rgb_img, cmap=None), plt.title('org')
plt.show()
# cv2.imshow("out_img", New_out_img)
# cv2.waitKey(0)
# cv2.destoryAllWindows()