


在开始搭建自然语言处理(NLP)模型之前,我们面对的往往是一团混乱的原始文本数据:格式不统一、符号混杂、错字连篇,甚至包含大量无意义的词。这些脏数据如果未经处理直接用于建模,只会让模型学到一堆噪声,最终一无所获。因此,文本的清洗和格式化是NLP中不可或缺的一步。
文章目录
1 文本的清洗和格式化
1.1 将文本转为小写(Lowercasing)
使用 Python 的内置 .lower() 方法即可把文本转为小写:
# 单条文本示例
x = 'Testing'
x2 = x.lower()
print(x2)  # 输出:'testing'
接下来处理一下DataFrame数据的大小写:
# 创建文本数据
text = [
    'This is introduction to NLP',
    'It is likely to be useful, to people ',
    'Machine learning is the new electrcity',
    'There would be less hype around AI and more action going forward',
    'python is the best tool!',
    'R is good langauage',
    'I like this book',
    'I want more books like this'
]
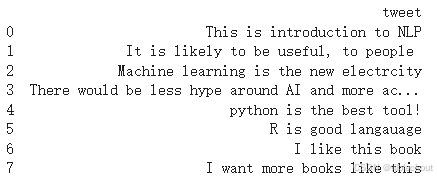
将上面的列表 text 转换为一个 Pandas DataFrame,并命名列为 'tweet',即每条文本是该列中的一行。
# 转为 DataFrame
import pandas as pd
df = pd.DataFrame({'tweet': text})
print(df)
输出如下:
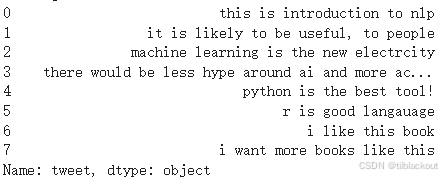
# 整列文本小写处理
df['tweet'] = df['tweet'].apply(lambda x: " ".join(x.lower() for x in x.split()))
print(df['tweet'])
这段是将整个 tweet 列里的文本全部转换为小写。
df['tweet']:取出 DataFrame 中的tweet列(即所有文本数据)。.apply(...):对这列中的每一条文本(每一行)应用括号中的函数。lambda x: ...:匿名函数,参数x是一行字符串。x.split():将字符串按空格分词,变成单词列表,例如:"I Like NLP"→['I', 'Like', 'NLP']x.lower() for x in x.split():对每个单词应用.lower()方法 → 转为小写。" ".join(...):再把这些小写单词用空格拼接回完整句子。
输出:
1.2 去除标点(Punctuation Removal)
我们可以使用 re.sub() 或 string.punctuation去除标点:
import re
s = "I. like. This book!"
s1 = re.sub(r'[^\w\s]', '', s)
print(s1)  # 输出:'I like This book'

# 或者处理整个 DataFrame:
df['tweet'] = df['tweet'].str.replace('[^\w\s]', '', regex=True)
\w匹配字母、数字和下划线,而\s匹配空白字符(包括空格、换行符、制表符),所以[^\w\s]匹配所有标点符号、特殊字符等。
也可以使用 string 模块:
import string
s = "I. like. This book!"
for c in string.punctuation:
    s = s.replace(c, "")
print(s)  # 输出:'I like This book'
1.3 去除停用词(Stop Words Removal)
在自然语言处理中,像 “the”、“is”、“in”、“to”、“and” 这类词被称为 停用词(Stop Words)。它们在一段文本中出现得非常频繁,但通常不携带关键语义信息。换句话说,无论文本主题是什么,这些词基本都会出现,它们对理解句子主题或核心含义的帮助非常有限。
如果我们在文本建模(如词频分析、TF-IDF、向量化、分类任务)时保留这些词,会带来一些问题:
- 噪声大:它们会淹没真正有意义的关键词,影响模型聚焦重点信息。
- 维度膨胀:如果不清理,向量空间中的维度会增多,增加计算资源消耗。
- 降低模型性能:模型可能会“学习”到一些没意义的关联,反而影响准确性。
我们可以使用 NLTK 的 stopwords 模块来去除停用词:
!pip install nltk
import nltk
# 下载它内置的停用词词表资源
nltk.download('stopwords')
# 从NLTK的corpus模块中导入stopwords列表
from nltk.corpus import stopwords
# 获取一组英文的停用词,返回值是一个字符串列表
stop = stopwords.words('english')
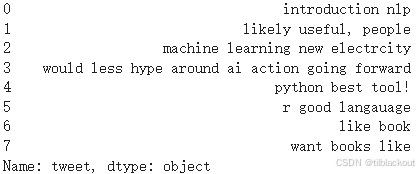
df['tweet'] = df['tweet'].apply(lambda x: " ".join(x for x in x.split() if x not in stop))
print(df['tweet'])
输出如下:
相比 NLTK,spaCy 是一个工业级更现代化的 NLP 库,内置强大的分词、词性标注、命名实体识别等功能,也包含停用词。
!pip install spacy
import spacy

# 加载英文模型(首次使用需运行:python -m spacy download en_core_web_sm)
nlp = spacy.load("en_core_web_sm")

# 示例文本
text = "This is an example of removing stopwords using spaCy."

# 使用 spaCy 分词
doc = nlp(text)

# 去除停用词
filtered = [token.text for token in doc if not token.is_stop]
print(" ".join(filtered))
输出:
example removing stopwords spaCy .
1.4 标准化文本(Text Standardization)
我们可以自定义一个词典,通过替换将缩写、俚语等标准化为完整词。
lookup_dict = {'nlp': 'natural language processing', 'ur': 'your', 'wbu': 'what about you'}
import re

def text_std(input_text):
    words = input_text.split()
    new_words = []
    for word in words:
        word = re.sub(r'[^\w\s]', '', word)
        if word.lower() in lookup_dict:
            word = lookup_dict[word.lower()]
        new_words.append(word)
    return " ".join(new_words)

print(text_std("I like nlp it's ur choice"))
# 输出:'I like natural language processing it s your choice'
1.5 拼写纠错(Spelling Correction)
我们可以使用 TextBlob 或 autocorrect 库来纠正文本中的拼写错误
!pip install textblob
from textblob import TextBlob

# 示例 1:带有拼写错误的英文句子
text = "I lik this boook on machne learnin"

# 创建 TextBlob 对象,并调用 correct() 方法
corrected = TextBlob(text).correct()

print("原句:", text)
print("纠正后:", corrected)
使用 autocorrect:
!pip install autocorrect
from autocorrect import Speller

spell = Speller()
print(spell("langauage"))  # 输出:language
print(spell("sirvice"))    # 输出:service
1.6 分词(Tokenization)
分词(Tokenization)是将一整段文本按照语言结构拆分为最小有意义单位(通常是单词或子词)的过程,是自然语言处理中的基础步骤。因为文本是非结构化的,模型无法直接理解整段语言,必须先将其切分为结构化的词。分词不仅是关键词提取、词频统计(如 TF-IDF、词云)的前提,也是向量化建模(如词袋模型、Word2Vec、BERT)的起点。同时,后续的文本清洗操作,如去除停用词、拼写纠错、词干提取与词形还原等,也都依赖于已完成的分词结果。
我们可以使用 NLTK、Spacy或内置 .split()将句子分割成单词。
# 定义示例文本
text = "My favorite animal is cat"

# 使用 NLTK 分词
import nltk
nltk.download('punkt')    # 基础分词器
nltk.download('punkt_tab')  # 有些版本环境需要这个“表”文件
from nltk.tokenize import word_tokenize
tokens = word_tokenize(text)
print("NLTK 分词结果:", tokens)


# 使用 Python 的 split() 分词
basic_tokens = text.split()
print("Python split() 分词结果:", basic_tokens)

# 使用 spaCy 分词
!pip install spacy
import spacy
nlp = spacy.load("en_core_web_sm")
doc = nlp(text)
spacy_tokens = [token.text for token in doc]
print("spaCy 分词结果:", spacy_tokens)
输出如下:

1.7 词干提取(Stemming)
词干提取是将单词还原成它的“词根”或“词干”形式的过程。
例如:
fishing→fishfished→fishfisher→fisher(不变)
它不关注语法规则,它有如下好处:
1.统一词形:把同一个含义但不同形式的词(如:fishing、fished)合并为一个词根,有助于模型更准确地“理解”它们的语义一致性。
2.减少词汇量: 减少重复词形导致的特征维度膨胀,提高效率。
3.常用于搜索引擎、关键词匹配、聚类等场景:能够增强召回率,让“不同写法的同义词”都能被识别为相同。
我们可以使用 NLTK 的 PorterStemmer实现词干提取:
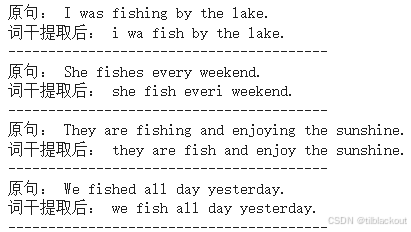
# 示例文本
text_list = [
    "I was fishing by the lake.",
    "She fishes every weekend.",
    "They are fishing and enjoying the sunshine.",
    "We fished all day yesterday."
]

# 使用 NLTK 的 PorterStemmer
from nltk.stem import PorterStemmer
stemmer = PorterStemmer()

# 逐句进行 stemming
for sentence in text_list:
    stemmed_words = [stemmer.stem(word) for word in sentence.split()]
    print("原句:", sentence)
    print("词干提取后:", " ".join(stemmed_words))
    print("-" * 40)
输出如下:
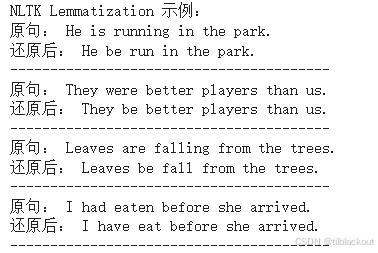
1.8 词形还原(Lemmatization)
Lemmatization不仅仅是通过裁剪词尾来简化词形,而是结合词性和词典信息,将单词还原为真实存在的词根。所以它比Stemming更先进。例如,Stemming 可能将 “leaves” 错误地变成 “leav”,而 Lemmatization 能准确还原为 “leaf”。此外,它还能识别语义上的还原关系,比如 “better” 还原为 “good”。因此,在需要语义理解或高质量文本处理的场景中,Lemmatization 更加可靠和准确。
我们可以使用NLTK或Spacy实现词形还原。首先定义一个文本:
text_list = [
    "He is running in the park.",
    "They were better players than us.",
    "Leaves are falling from the trees.",
    "I had eaten before she arrived.",
]
NLTK 的 Lemmatization 使用的是 WordNetLemmatizer,效果比 stemming 更自然一些,但需要指定词性才准确。
# 安装和导入
import nltk
nltk.download('wordnet')
nltk.download('omw-1.4')
from nltk.stem import WordNetLemmatizer
from nltk.corpus import wordnet

lemmatizer = WordNetLemmatizer()

# 定义辅助函数(默认词性为动词)
def lemmatize_nltk(text):
    return " ".join([lemmatizer.lemmatize(word, pos='v') for word in text.split()])

# 应用到文本列表
print("NLTK Lemmatization 示例:")
for sentence in text_list:
    print("原句:", sentence)
    print("还原后:", lemmatize_nltk(sentence))
    print("-" * 40)
输出:
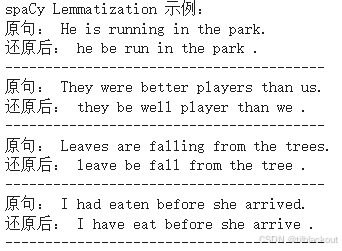
spaCy 更强大,能自动识别词性并准确还原原型。
# 安装 spaCy 和模型(如未安装)
!pip install -q spacy
import spacy
nlp = spacy.load("en_core_web_sm")

print("spaCy Lemmatization 示例:")
for sentence in text_list:
    doc = nlp(sentence)
    lemmatized = " ".join([token.lemma_ for token in doc])
    print("原句:", sentence)
    print("还原后:", lemmatized)
    print("-" * 40)
输出:
1.9 探索性文本分析(EDA)
我们已经熟悉了数据收集和文本预处理,现在来进行一些基本的文本探索分析。下面我们用 NLTK 对一段自定义文本进行探索性文本分析,包含:分词词频统计、停用词过滤、词频图表和词云绘制。
# 导入必要的库
import nltk
from nltk.tokenize import word_tokenize, sent_tokenize
from nltk.probability import FreqDist
from nltk.corpus import stopwords
import string
import matplotlib.pyplot as plt
from wordcloud import WordCloud

# 下载需要的资源
nltk.download('punkt')
nltk.download('stopwords')

# 自定义一段文本(模拟用户产品评论)
text_data = """
I recently bought this wireless headset and it has exceeded my expectations.
The sound quality is amazing, battery life lasts more than 12 hours, and the noise cancellation works really well.
However, the build quality feels a bit cheap and the headband could be more comfortable.
Overall, it's a great product for the price.
"""

# 分句与分词
sentences = sent_tokenize(text_data)
words = word_tokenize(text_data)

print(f"句子数: {len(sentences)}")
print(f"总词数(含标点): {len(words)}")

# 词频统计(不去除停用词)
frequency_dist = FreqDist(words)
print("\n【前10高频词 - 未过滤】")
print(frequency_dist.most_common(10))

# 去除停用词、标点、小于等于3字符的词
stop_words = set(stopwords.words('english'))
words_clean = [w.lower() for w in words if w.isalpha() and w.lower() not in stop_words and len(w) > 3]

# 重新统计词频
filtered_freq = FreqDist(words_clean)
print("\n【前10高频词 - 去除停用词后】")
print(filtered_freq.most_common(10))
输出:
句子数: 4
总词数(含标点): 63

【前10高频词 - 未过滤】
[('.', 4), (',', 4), ('the', 4), ('and', 3), ('it', 2), ('quality', 2), ('more', 2), ('a', 2), ('I', 1), ('recently', 1)]

【前10高频词 - 去除停用词后】
[('quality', 2), ('recently', 1), ('bought', 1), ('wireless', 1), ('headset', 1), ('exceeded', 1), ('expectations', 1), ('sound', 1), ('amazing', 1), ('battery', 1)]
接下来我们绘制词频图和词云:
# 绘制前20高频词的频率柱状图
print("\n正在绘制词频图...")
filtered_freq.plot(20, cumulative=False)

# 创建词云
print("正在生成词云...")
wcloud = WordCloud(width=800, height=400, background_color='white').generate_from_frequencies(filtered_freq)

plt.figure(figsize=(12, 6))
plt.imshow(wcloud, interpolation='bilinear')
plt.axis("off")
plt.show()
输出:
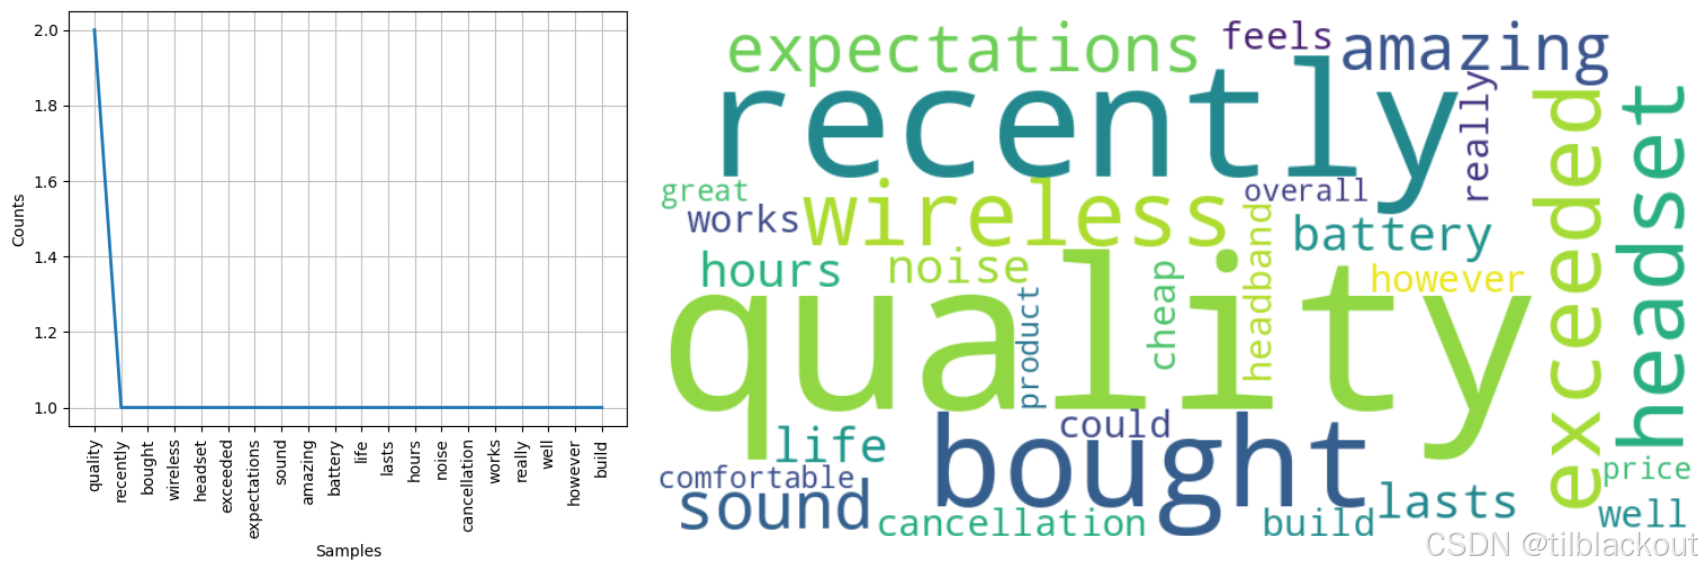
需要注意的是,去除停用词后再构建词云效果会更佳,可尝试加入 stopwords 过滤再生成词云图。
2 文本预处理pipeline
现在我们将之前学到的文本预处理技术(如小写化、去除链接、去除特殊字符、去除停用词、词干提取、词形还原等)组合成一个函数,使其可以直接用于 NLP 模型、分类器或其他任务中。
预处理函数:
def preprocess_text(text):
    import re
    import nltk
    from nltk.corpus import stopwords
    from nltk.stem import PorterStemmer
    from textblob import Word
    nltk.download('stopwords')
    nltk.download('punkt')

    # 1. 小写化
    text = text.lower()

    # 2. 去除URL
    text = re.sub(r'http\S+|www\S+|https\S+', 'URL', text)

    # 3. 替换用户名为 AT_USER
    text = re.sub(r'@\w+', 'AT_USER', text)

    # 4. 去除表情符号(简单示例)
    text = re.sub(r'[^\x00-\x7F]+', ' ', text)

    # 5. 去除标点符号和特殊字符(保留单词和数字)
    text = re.sub(r'[^a-zA-Z0-9\s]', '', text)

    # 6. 去除数字
    text = re.sub(r'\d+', '', text)

    # 7. 去除多余的空格
    text = re.sub(r'\s+', ' ', text).strip()

    # 8. 分词
    words = nltk.word_tokenize(text)

    # 9. 去除停用词
    stop_words = set(stopwords.words('english'))
    words = [w for w in words if w not in stop_words]

    # 10. 词形还原(lemmatization)
    words = [Word(w).lemmatize() for w in words]

    # 11. 可选:词干提取(Stemming)
    # stemmer = PorterStemmer()
    # words = [stemmer.stem(w) for w in words]

    # 12. 重组文本
    cleaned_text = " ".join(words)

    return cleaned_text

# 调用预处理函数
cleaned = preprocess_text("🔥Check out our *NEW* deals at https://best-deals.com!! Save $$$ NOW!!! 😊 #Shopping #Deals @User123")
print("预处理后文本:\n", cleaned)
输出:
预处理后文本:
 check new deal URL save shopping deal ATUSER
3 总结
在自然语言处理任务中,模型的效果不仅取决于算法本身,更依赖于输入数据的质量。通过对文本进行清洗、规范化、去除噪声和无用词,我们才能为后续建模打下扎实基础。


 599
599

 被折叠的 条评论
为什么被折叠?
被折叠的 条评论
为什么被折叠?
 到【灌水乐园】发言


