


 本文详细介绍了在Ubuntu16.04系统下安装和配置Caffe深度学习框架的全过程,包括依赖包安装、编译配置、测试运行及常见错误解决方法。
默认 CUDA 、CUDNN 都已经安装完成,还没有安装参考:Ubuntu 16.04下cuda和cudnn的安装
配置系统:
Ubuntu 16.04
CUDA 9.0
cuDNN 7.5.1
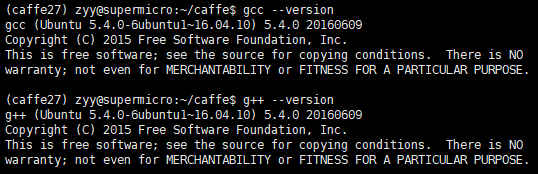
gcc 5.4.0 gcc --version
g++ 5.4.0 g++ --version
1. 安装依赖包
sudo apt-get install libprotobuf-dev libleveldb-dev libsnappy-dev libopencv-dev libhdf5-serial-dev protobuf-compiler
sudo apt-get install --no-install-recommends libboost-all-dev
sudo apt-get install libopenblas-dev liblapack-dev libatlas-base-dev
sudo apt-get install libgflags-dev libgoogle-glog-dev liblmdb-dev
sudo apt-get install git cmake build-essential
需要确保以上依赖包都安装成功,验证方法就是再次执行安装命令,以第二条命令为例,如果输出:

说明已经安装成功了。
2. 下载caffe
下载 Caffe 的源码:https://github.com/BVLC/caffe.git
或者直接进入想要安装 caffe 的路径下,然后执行 git:
git clone https://github.com/BVLC/caffe.git
进入 caffe 文件夹下,将 Makefile.config.example 文件复制一份并更名为 Makefile.config:
cd caffe/
cp Makefile.config.example Makefile.config
复制一份的原因是编译 caffe 时需要的是 Makefile.config 文件,而Makefile.config.example 只是caffe 给出的配置文件例子,不能用来编译 caffe。
3. 修改各种文件
需要修改文件 Makefile.config,Makefile,修改文件命令为:
vi filename
i 对文件进行编辑,Esc+:+wq保存并退出
3.1 Makefile.config
修改上一步复制的 Makefile.config 文件,这里按照配置文件的顺序进行说明,不一定全部都需要修改,根据自己情况决定吧。
1.需要使用 cuDNN,取消注释 USE_CUDNN := 1:

2.如果只有 CPU,将 CPU_ONLY := 1 取消注释:
这里就不取消了,因为一般我们都会用 GPU

3.如果要使用 OpenCV,取消注释并改为 1:
这里仍然是 0,因为我没有用 OpenCV,其实仍然等同于注释掉了,所以要使用的话必须改为 1。
但是推荐设置为 1,后面很多都会用到,到时候还得回来改!

4.使用 OpenCV3:
这里说了,如果你使用的是 OpenCV3,就把第二行取消注释。

4.根据个人情况 cuda 路径可能需要做出修改:
看你要使用的 cuda 路径是什么,然后对这里进行替换。
CUDA_DIR := /usr/local/cuda
修改为:
CUDA_DIR := path/to/your/cuda

5. 根据 CUDA 版本修改 CUDA_ARCH:
我用的是 cuda-9.0,所以根据提示可以直接删掉前两行,确保兼容性,其实不删好像也没太大关系,就是可能会报 warning。
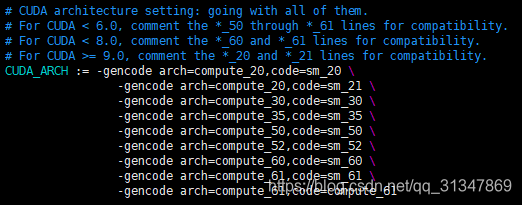
由于使用的是 cuda9.0,根据提示应该将 *_20 和 *_21 注释掉,以确保兼容性。其他版本的 cuda 也可以根据提示进行修改。
将
CUDA_ARCH := -gencode arch=compute_20,code=sm_20 \
                -gencode arch=compute_20,code=sm_21 \
                -gencode arch=compute_30,code=sm_30 \
                -gencode arch=compute_35,code=sm_35 \
                -gencode arch=compute_50,code=sm_50 \
                -gencode arch=compute_52,code=sm_52 \
                -gencode arch=compute_60,code=sm_60 \
                -gencode arch=compute_61,code=sm_61 \
                -gencode arch=compute_61,code=compute_61

修改为:
CUDA_ARCH := -gencode arch=compute_30,code=sm_30 \
                -gencode arch=compute_35,code=sm_35 \
                -gencode arch=compute_50,code=sm_50 \
                -gencode arch=compute_52,code=sm_52 \
                -gencode arch=compute_60,code=sm_60 \
                -gencode arch=compute_61,code=sm_61 \
                -gencode arch=compute_61,code=compute_61
6. 修改 PYTHON 路径:
这里是大环境下默认安装的 python 路径,如果自己用的不在这个路径下,需要根据情况进行修改。

如果不知道自己当前的 python 路径,可以尝试输入:
python
import numpy as np
np.get_include()

返回的路径就是你需要修改的第二条路径,第一条路径就根据这个路径的上级目录进行修改。
/data/zyy/usr/local/anaconda/envs/caffe27/include/python2.7
/data/zyy/usr/local/anaconda/envs/caffe27/lib/python2.7/site-packages/numpy/core/include
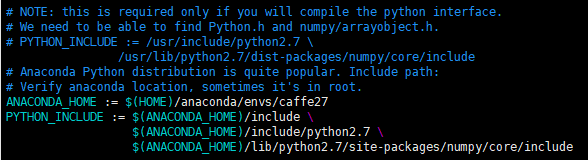
另外,如果像我一样使用 Anaconda,就要把前面的 PYTHON_INCLUDE 注释掉,在下面的 Anaconda 路径下进行配置:
根据自己的 Anaconda 路径进行修改,只需要修改 ANACONDA_HOME 就可以了:

ANACONDA_HOME := $(HOME)anaconda/envs/caffe27
PYTHON_INCLUDE := $(ANACONDA_HOME)/include \
                  $(ANACONDA_HOME)/include/python2.7 \
                  $(ANACONDA_HOME)/lib/python2.7/site-packages/numpy/core/include
修改之后如下:
7. 如果使用的是 python3:
Caffe 默认使用的 python 版本是 2,所以如果要使用 python3,需要对下面的语句取消注释并修改为自己的路径。

8. 修改 PYTHON_ILB [可选] :
根据自己的情况对 PYTHON_ILB 进行修改,如果使用的是 Anaconda,需要注释掉第二条,取消注释第三条。

9. 使用 python 接口:
将
#WITH_PYTHON_LAYER := 1
修改为
WITH_PYTHON_LAYER := 1

10. 修改 INCLUDE_DIRS 和 LIBRARY_DIRS:
没有修改前是这样的:

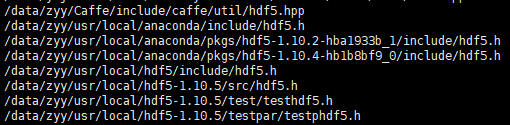
查看 hdf5 文件位置:
whereis hdf5

进去看看发现里面还有一个文件 serial,所以要将路径修改一下:

INCLUDE_DIRS := $(PYTHON_INCLUDE) /data/zyy/usr/local/anaconda/envs/caffe27/include /usr/local/include /usr/include/hdf5/serial/ $(ANACONDA_HOME)/include
LIBRARY_DIRS := $(PYTHON_LIB) /data/zyy/usr/local/anaconda/envs/caffe27/lib /usr/local/lib /usr/lib /usr/lib/x86_64-linux-gnu/hdf5/serial

这里的路径其实重复了,我忘记改。只要第一行的 /usr/include/hdf5/serial/ 和第二行的 /usr/lib/x86_64-linux-gnu/hdf5/serial 有就行,如果和我一样使用了 Anaconda,记得添上对应的 include 路径。
重要重要重要!!!!
在文件最后自己再添上两句话:
CXXFLAGS+=-std=c++11
CUSTOM_CXX := g++ -std=c++11
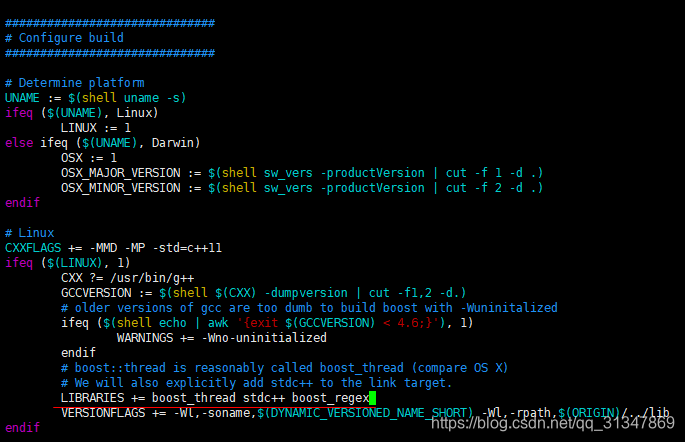
3.2 Makefile
将:
NVCCFLAGS +=-ccbin=$(CXX) -Xcompiler-fPIC $(COMMON_FLAGS)
替换为:
NVCCFLAGS += -D_FORCE_INLINES -ccbin=$(CXX) -Xcompiler -fPIC $(COMMON_FLAGS)

将:
LIBRARIES += glog gflags protobuf boost_system boost_filesystem m hdf5_hl hdf5
改为:
LIBRARIES += glog gflags protobuf boost_system boost_filesystem m hdf5_serial_hl hdf5_serial
4. 编译
进入 /caffe 工程根目录下,执行:
make all -j8
make test -j8
make runtest -j8
更推荐这样编译:
makedir build
cd build
cmake ..
make -j8
cmake … 输出如下说明没问题,可以接着进行make

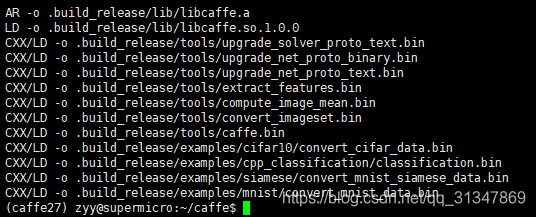
执行 make all -j8 时,如果没有报 error 且最后输出如下应该就没有什么问题。
看到如下内容说明安装成功:
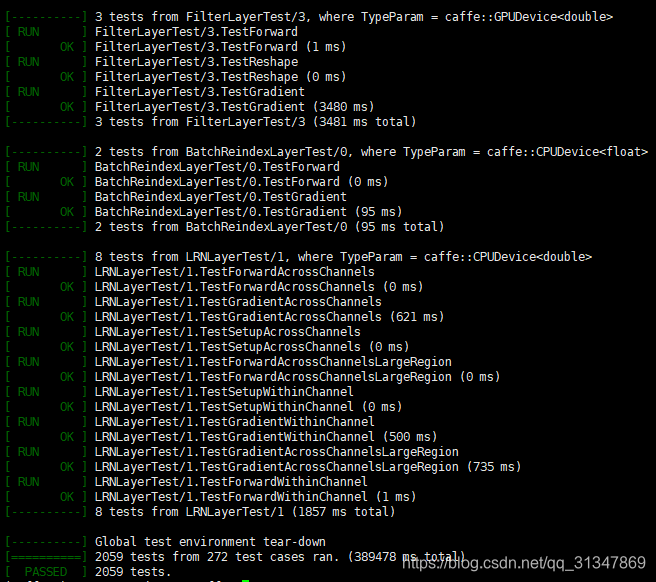
然后执行完 make runtest -j8 后,如果显示如下说明编译成功。
编译完成后,再编译 python 用到的 caffe 文件
make pycaffe -j8
5. 测试 caffe(Le-Net)
参考:
https://zhuanlan.zhihu.com/p/24683142
https://www.cnblogs.com/yushuo1990/p/5909680.html
5.1 下载mnist数据
在 caffe 目录下:
cd data/mnist/
sudo sh ./get_mist.sh
这样就下载了 4 个数据包:

5.2 重建数据文件
重建数据文件,将 mnist 重建为能被 caffe 使用的数据格式:
重新进入 caffe 根目录下,执行:
cd ~/caffe
sudo sh ./examples/mnist/create_mnist.sh
************************** 报错 **************************

解决: 看报错信息说要用到 USE_LEVELDB 和 USE_LMDB,但是我在 Makefile.config 文件里虽然取消了注释但是仍旧设为 0,这其实和注释掉的效果是一样的,那么尝试将这两个设置为 1,修改后如下:

然后重新编译 caffe 问题解决。
make clean
make all -j8
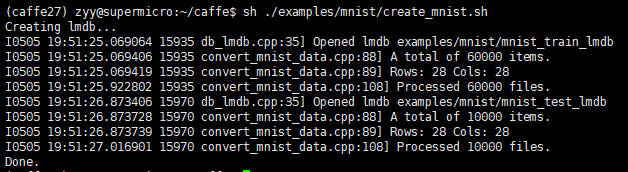
成功后在 /examples/mnist/ 目录下生成了两个文件夹:mnist_test_lmdb 和 mnist_train_lmdb
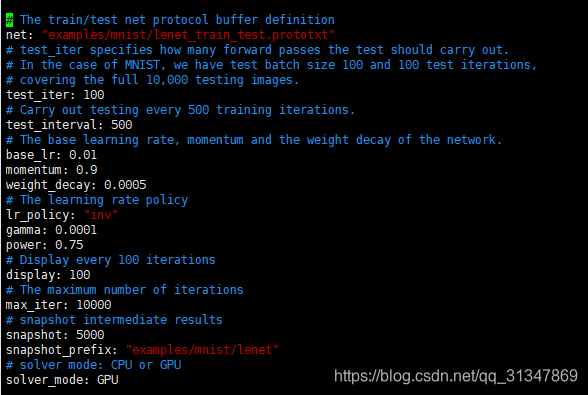
5.3 修改配置文件 [可选]
如果需要用 CPU 进行测试,可以修改 /examples/mnist/ 文件夹下的 lenet_solver.prototxt,在最后一行将 solver_mode:GPU 中的 GPU 改为 CPU。
5.4 执行测试
sh ./examples/mnist/train_lenet.sh
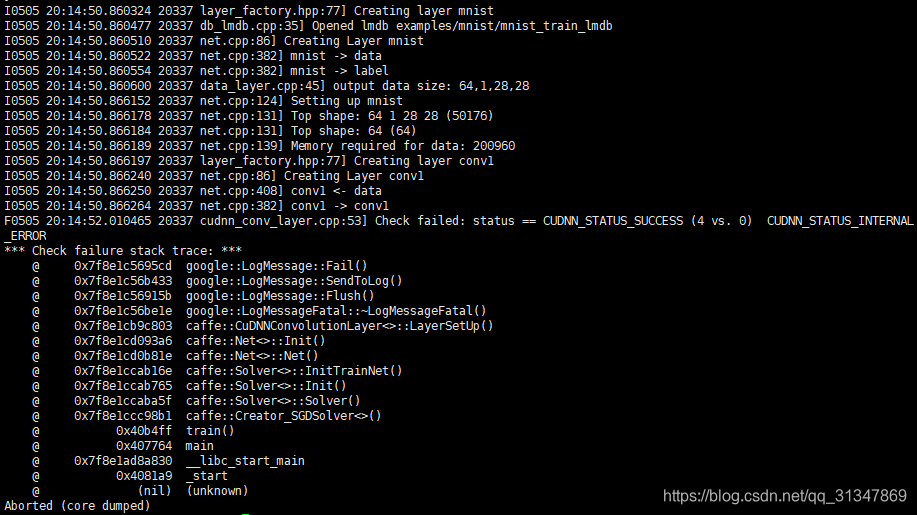
********************* 报错 *********************
参考:
https://blog.youkuaiyun.com/stone_linclon/article/details/51645198
https://github.com/shicai/MobileNet-Caffe/issues/3
http://www.justlive.vip/blog/article/details/8129
解决: 只是 GPU 跑满了,那先换成 CPU 测试一下好了。
5.5 运行结果
迭代 10000 次后的结果:accuracy = 0.9908,loss = 0.026556

6. 配置 pycaffe notebook 接口
在成功安装 caffe 之后,就可以通过 caffe 去做训练数据集或者预测各种相关的事了,只不过需要在命令行下通过 caffe 命令进行操作,而 pycaffe 的安装以及 notebook 环境配置只是为了更方便的去使用 caffe。
配置过程:
cd caffe
sudo make pycaffe -j8
成功后通过 python 导入 caffe 验证一下:
python
import caffe
错误 1:No module named caffe
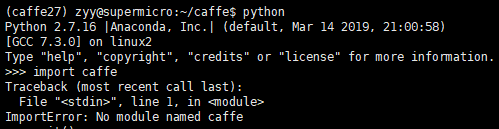
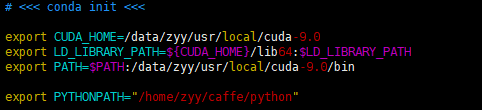
解决: 应该是没有设置环境变量,添加环境变量再刷新一下就好了。
vi ~/.bashrc
export PYTHONPATH="~/caffe/python"
source ~/.bashrc
错误 2:__init()__got an unexpected keyword argument ‘syntax’
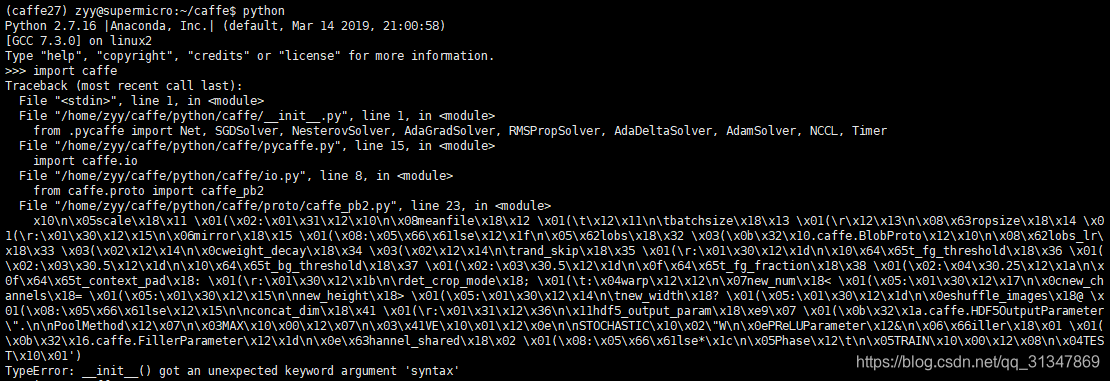
参考: https://github.com/BVLC/caffe/issues/2092
解决: conda install -c conda-forge protobuf
当 import 后无报错,就可以继续配置 notebook 环境了。

配置 notebook 环境首先要安装python接口依赖库,在 caffe 根目录的 python 文件夹下,有一个 requirements.txt 的清单文件,上面列出了需要的依赖库,按照这个清单安装就可以了。
cd python/
conda install --yes --file requirements.txt
其中有一个包 python-dateutil>=1.4,<2 由于版本过旧,无法下载,我们可以先 pip 下载之后,将 requirements.txt 里的 dateutil 删除就好。

全部安装成功后,安装 jupyter notebook:
conda install jupyter
安装完成后运行 notebook:
jupyter notebook
7. 遇到的错误
********************** 第一次报错 ***********************

参考:
https://github.com/BVLC/caffe/issues/6359
https://blog.youkuaiyun.com/pkwcxy/article/details/82351669
https://blog.youkuaiyun.com/bleedingfight/article/details/80238348
解决:
这是因为编译支持的原因,具体我也不知道。但是在 Makefile.config 文件的最后加上这两句代码就解决了,其他的方法我试了都没用。
CXXFLAGS+=-std=c++11
CUSTOM_CXX := g++ -std=c++11
********************** 第二次报错 ***********************

参考: https://github.com/BVLC/caffe/issues/5078
解决: 是依赖库 libopencv-dev 没有装好,或者版本不对。这里要求 protobuf 的版本是 2,6,1,如果其他版本会出错。
查看 protobuf 的版本:protoc --version

看到版本是 3.5.1,由于我用的是 Anaconda 的环境,所以只需要将 Anaconda 下面的 protobuf 删掉,重新安装 2.6.1 版本的即可。
conda uninstall protobuf
conda install protobuf=2.6.1
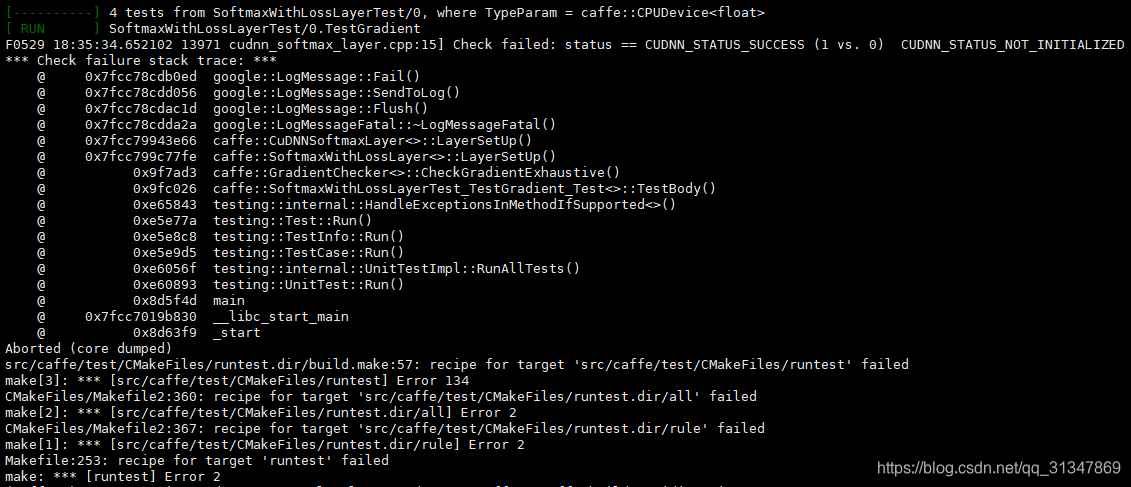
********************** 第三次报错 ***********************

参考:
https://www.cnblogs.com/zwjhq/p/9258432.html
https://github.com/BVLC/caffe/issues/489
https://github.com/BVLC/caffe/issues/410
https://github.com/BVLC/caffe/issues/2475
解决: 这好像是 cuda 和 cudnn 没有配置的原因,终端输入 locate libcudnn_static.a
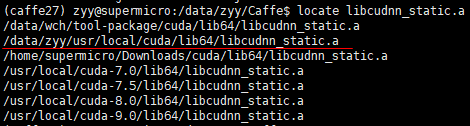
现在使用的是第二个路径下的 cuda,复制 cuDNN 文件到 CUDA 的对应目录下:
cd <your cuDNN path>
sudo cp cudnn.h /data/zyy/usr/local/cuda-9.0/include
sudo cp libcudnn* /data/zyy/usr/local/cuda-9.0/lib64
然后将 /cuda/lib64 添加到环境变量后刷新一下环境变量

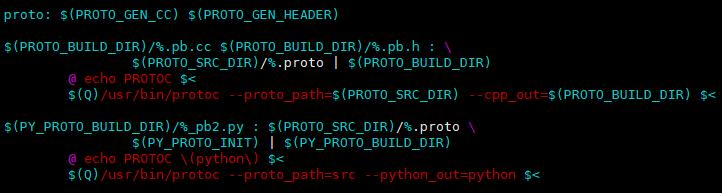
********************** 第四次报错 ***********************

参考: https://blog.youkuaiyun.com/qq_38451119/article/details/81383709
解决:
$ protoc src/caffe/proto/caffe.proto --cpp_out=.
$ mkdir include/caffe/proto
$ mv src/caffe/proto/caffe.pb.h include/caffe/proto
********************** 第五次报错 ***********************

参考:
https://github.com/BVLC/caffe/issues/6550
https://www.cnblogs.com/happyamyhope/p/9205038.html
https://blog.youkuaiyun.com/goofysong/article/details/52116265
解决: 报错找不到 hdf5 文件,先查看一下 hdf5 文件的安装位置:locate hdf5.h
********************** 第六次报错 ***********************

参考:
https://github.com/BVLC/caffe/issues/5959
https://www.jianshu.com/p/8cc149ad0545
https://jmydurant.github.io/blog/tech/2017/01/18/some_tips_about_caffe.html
********************** 第七次报错 ***********************
在执行 sh ./examples/mnist/create_mnist.sh 时报错:

参考:
https://github.com/BVLC/caffe/issues/3223
https://www.cnblogs.com/yushuo1990/p/5909680.html
https://blog.youkuaiyun.com/lanyuxuan100/article/details/69633785
解决: 看报错信息说要用到 USE_LEVELDB 和 USE_LMDB,但是我在 Makefile.config 文件里虽然取消了注释但是仍旧设为 0,这其实和注释掉的效果是一样的,那么尝试将这两个设置为 1,修改后如下:
然后重新编译 caffe 问题解决。
make clean
make all -j8
********************** 第八次报错 ***********************
在执行 make runtest -j8 时报错找不到文件:
.build_release/tools/caffe
.build_release/tools/caffe: error while loading shared libraries: libboost_system.so.1.66.0: cannot open shared object file: No such file or directory
Makefile:532: recipe for target 'runtest' failed
make: *** [runtest] Error 127
参考:
https://stackoverflow.com/questions/48675384/caffe-cant-find-libboost-system-so-166-0
解决: 主要是因为没有向 cache 文件中添加路径,按照下面的三步添加即可。
sudo vi /etc/ld.so.conf
在 ld.so.conf 文件中添加 libboost_system.so.1.67.0 所在的目录路径
sudo ldconfig
********************** 第九次报错 ***********************
在执行 make runtest -j8 时报错:
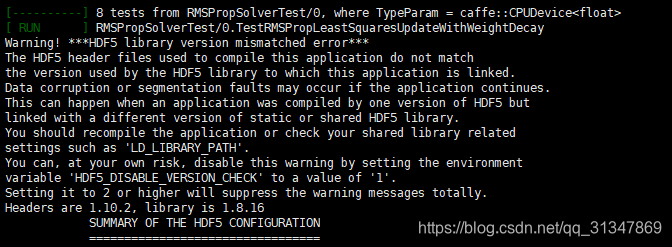
解决: conda install -c anaconda hdf5=1.8.17
********************** 第十次报错 ***********************
之前本来都编译没问题了,时隔一个月再次编译时出现了 protobuf 的问题,查了一下总之是 protobuf 的版本问题。

查看一下 protobuf 都在哪些地方:
whereis protoc
再看一下自己当前使用的 protobuf 是哪一个:
which protoc
看一下使用的 protobuf 的版本:
protoc --version
或者
path/to/protoc --version
参考:
https://www.zhihu.com/question/58592005/answer/270998973
https://blog.youkuaiyun.com/uniqueyyc/article/details/85006994
https://github.com/BVLC/caffe/issues/5645
解决:
确认用的 protobuf 版本是 2.6.1
cmake -D CMAKE_BUILD_TYPE=Release -D BLAS=Open -D BUILD_SHARED_LIBS=Off ..
********************** 第十一次报错 ***********************
编译 caffe 的时候报错,conda自动安装了一个cudnn,版本不对,卸掉就好了。
参考文章
Caffe 安装
caffe 编译bug汇总
Ubuntu16.04 安装 Caffe
Caffe 安装错误记录及解决办法
Caffe 环境搭建中应注意的问题
Caffe中的Makefile.config的一些说明
Ubuntu16.04 Caffe 安装步骤记录(超详尽)
Ubuntu16.04安装配置Caffe教程(GPU版)
[机器学习] 深度学习之caffe1——软件配置与测试
Ubuntu16.04安装caffe非常细致教程(历经两周的血泪史)
caffe环境搭建、使用教程及检验相应依赖库是否安装成功
linux下非root用户安装软件入门


 1107
1107

 被折叠的 条评论
为什么被折叠?
被折叠的 条评论
为什么被折叠?
 到【灌水乐园】发言


