


 本文对比了ORB-SLAM2与OpenCV在图像特征提取上的表现,发现ORB-SLAM2提取的特征点更多且分布更均匀,对系统定位的鲁棒性有显著提升。
比较opencv默认的方式和ORB-SLAM2中对opencv进行重写的方式,两个方法对图像特征提取结果的对比。
为方便比较,写在同一个文件中。主函数如下:
#include <iostream>
#include <opencv2/opencv.hpp>
#include "ORBextractor.h"
#include <vector>

using namespace std;
using namespace cv;
using namespace ORB_SLAM2;

int main()
{
    Mat img1 = imread("000000.png",0);
    ORBextractor* mpORBextractorLeft;

    //orb
    int nFeatures = 2000;
    float fScaleFactor = 1.2;
    int nLevels = 8;
    int fIniThFAST = 20;
    int fMinThFast = 7;

    std::vector<KeyPoint> keypoints1;
    mpORBextractorLeft = new ORBextractor(nFeatures,fScaleFactor,nLevels,fIniThFAST,fMinThFast);
    cv::Mat mDescriptors;
    cv::Mat outimg;
    (*mpORBextractorLeft)(img1,cv::Mat(),keypoints1,mDescriptors);
	drawKeypoints(img1,keypoints1,outimg,Scalar::all(-1));
    cout<<"ORBSLAM2: "<<keypoints1.size()<<endl;
    imshow("ORB_SLAM2", outimg);

    //opencv
    std::vector<KeyPoint> keypoints2;
    cv::Mat mDescriptors2;
    Ptr<ORB> orb = ORB::create(2000, 1.2f, 8,31, 0, 2,ORB::HARRIS_SCORE, 31, 20);
    orb->detectAndCompute(img1, Mat(),keypoints2, mDescriptors2);
    Mat outimg2;
    drawKeypoints(img1,keypoints2,outimg2,Scalar::all(-1));
    cout<<"OpenCV: "<<keypoints2.size()<<endl;
    imshow("OpenCV", outimg2);

    waitKey(0);


    return 0;
}
效果如下
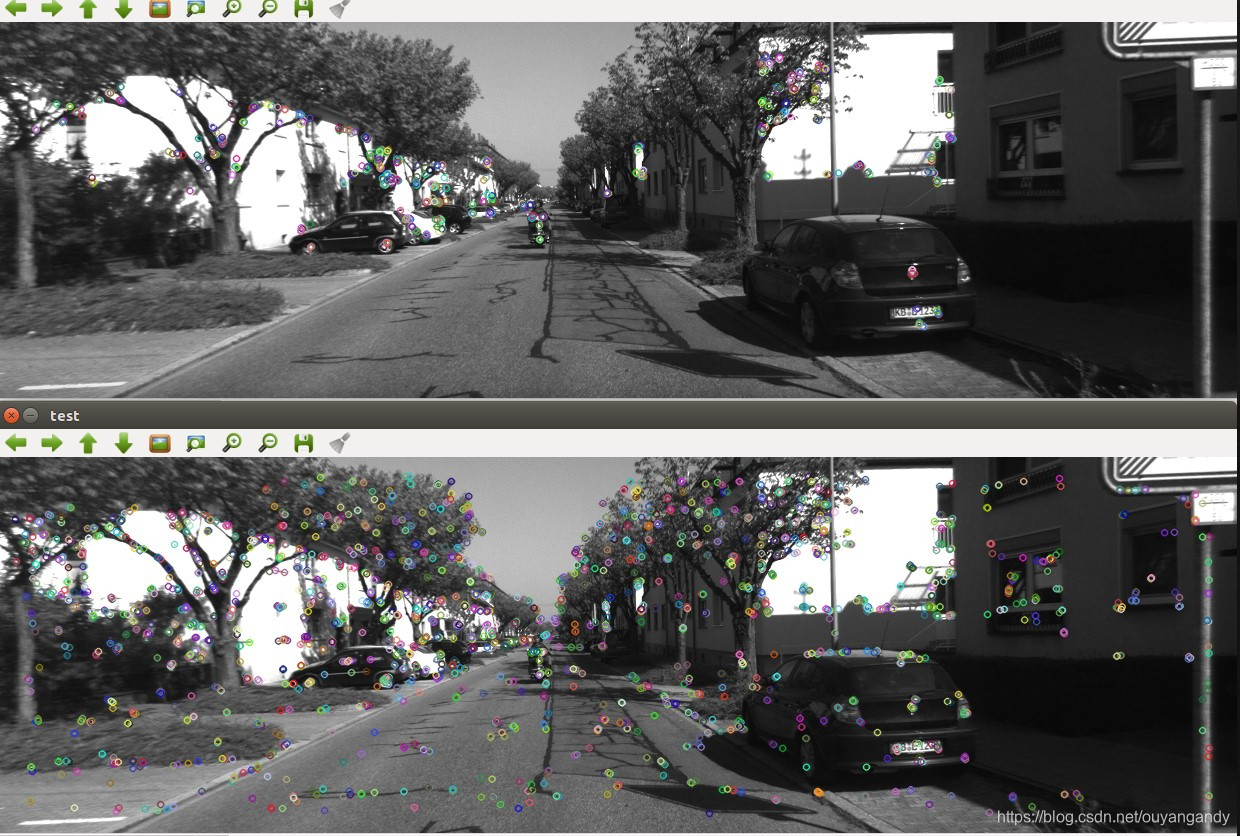
结论
使用树形结构的ORB-SLAM2的特征提取方式,在提取数量上更多,分布也更均匀。而OpenCV默认的特征提取,特征点的分布较为集中,数量也较少,当把OpenCV方式参数中特征数量设置为2000时,分布无明显变化,还是很集中。因此ORB-SLAM2的作者在这方面下了功夫,对系统定位的鲁棒性有很大的作用。


 3919
3919

 被折叠的 条评论
为什么被折叠?
被折叠的 条评论
为什么被折叠?
 到【灌水乐园】发言


