


简单使用OCRmyPDF
1 简单介绍
OCRmyPDF是基于Tesseract OCR实现的,用于将PDF扫描件或图片转化为可编辑和查询的PDF文件。
# Github地址
https://github.com/ocrmypdf/OCRmyPDF

# 官网地址
https://ocrmypdf.readthedocs.io/
olmOCR是由Ai2开发的一款将PDF及其他图像类文档格式转换为清晰易读的纯文本格式的工具集。安装方式和版本更新较多,便于维护。
https://github.com/allenai/olmocr
MonkeyOCR是一款速度、精度较高的图片和PDF内容识别工具,MonkeyOCR采用结构识别-关系(SRR,Structure-Recognition-Relation )三元组范式,该范式简化了模块化方法的多工具流水线,同时避免了使用大型多模态模型进行全页文档处理的低效问题。
https://github.com/Yuliang-Liu/MonkeyOCR
OCRFlux是一款基于多模态大型语言模型的工具包,能够将PDF和图像转换为清晰易读的纯Markdown文本。其目标是将现有技术水平显著提升至更高层次。
# github地址
https://github.com/chatdoc-com/OCRFlux

# 官网地址
https://ocrflux.pdfparser.io/
2 使用OCRmyPDF
⚠️ OCRmyPDF不能使用pip安装,本文在docker的Ubuntu容器中安装。
(1)安装容器
# 下载镜像
docker pull ubuntu:24.04

# 创建容器
docker run -itd \
--name my-ubuntu \
-v /home/data:/home/data \
ubuntu:24.04
(2)安装依赖
# 进入容器
docker exec -it my-ubuntu /bin/bash
# 更新依赖包
apt update
# 安装依赖
apt install ocrmypdf
# 查看支持的语言(语言包较多)
apt-cache search tesseract-ocr
# 安装语言包(简体中文),可根据实际情况选择
apt-get install tesseract-ocr-chi-sim
# 转化OCR
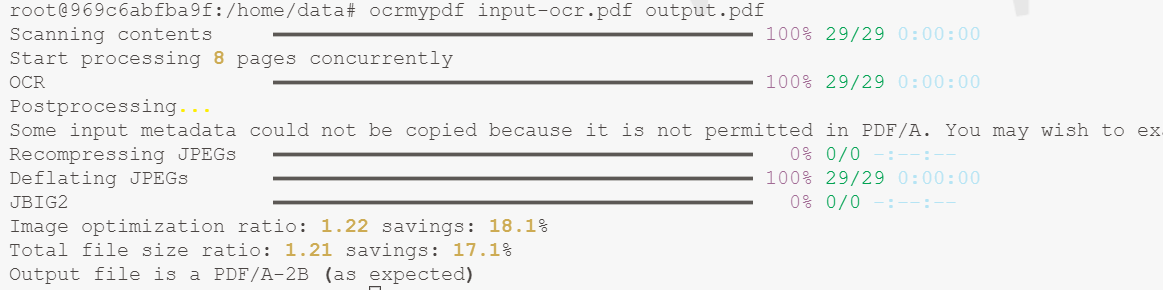
ocrmypdf input-ocr.pdf output.pdf
(3)安装ocrmypdf的过程
After this operation, 550 MB of additional disk space will be used.
Do you want to continue? [Y/n] y
……
Please select the geographic area in which you live. Subsequent configuration questions will narrow this down by presenting a list of cities,
representing the time zones in which they are located.

  1. Africa  2. America  3. Antarctica  4. Arctic  5. Asia  6. Atlantic  7. Australia  8. Europe  9. Indian  10. Pacific  11. Etc  12. Legacy
Geographic area: 5
……
Please select the city or region corresponding to your time zone.

  1. Aden      11. Baku        21. Damascus     31. Hong_Kong  41. Kashgar       51. Makassar      61. Pyongyang  71. Srednekolymsk  81. Urumqi
  2. Almaty    12. Bangkok     22. Dhaka        32. Hovd       42. Kathmandu     52. Manila        62. Qatar      72. Taipei         82. Ust-Nera
  3. Amman     13. Barnaul     23. Dili         33. Irkutsk    43. Khandyga      53. Muscat        63. Qostanay   73. Tashkent       83. Vientiane
  4. Anadyr    14. Beirut      24. Dubai        34. Istanbul   44. Kolkata       54. Nicosia       64. Qyzylorda  74. Tbilisi        84. Vladivostok
  5. Aqtau     15. Bishkek     25. Dushanbe     35. Jakarta    45. Krasnoyarsk   55. Novokuznetsk  65. Riyadh     75. Tehran         85. Yakutsk
  6. Aqtobe    16. Brunei      26. Famagusta    36. Jayapura   46. Kuala_Lumpur  56. Novosibirsk   66. Sakhalin   76. Tel_Aviv       86. Yangon
  7. Ashgabat  17. Chita       27. Gaza         37. Jerusalem  47. Kuching       57. Omsk          67. Samarkand  77. Thimphu        87. Yekaterinburg
  8. Atyrau    18. Choibalsan  28. Harbin       38. Kabul      48. Kuwait        58. Oral          68. Seoul      78. Tokyo          88. Yerevan
  9. Baghdad   19. Chongqing   29. Hebron       39. Kamchatka  49. Macau         59. Phnom_Penh    69. Shanghai   79. Tomsk
  10. Bahrain  20. Colombo     30. Ho_Chi_Minh  40. Karachi    50. Magadan       60. Pontianak     70. Singapore  80. Ulaanbaatar
Time zone: 69
输出结果
3 简单使用olmOCR
使用python安装
conda create -n olmocr python=3.11
conda activate olmocr

# For CPU-only operations, ex running the benchmark
pip install olmocr[bench]

# For actually converting the files with your own GPU
pip install olmocr[gpu]  --extra-index-url https://download.pytorch.org/whl/cu128

# Recommended: Install flash infer for faster inference on GPU
pip install https://download.pytorch.org/whl/cu128/flashinfer/flashinfer_python-0.2.5%2Bcu128torch2.7-cp38-abi3-linux_x86_64.whl
使用docker安装
python -m olmocr.pipeline ./localworkspace \
  --server https://api.deepinfra.com/v1/openai \
  --api_key $DEEPINFRA_API_KEY \
  --pages_per_group 100 \
  --model allenai/olmOCR-7B-0825 \
  --markdown \
  --pdfs path/to/your/*.pdf
使用vllm安装
vllm serve allenai/olmOCR-7B-0825-FP8 --served-model-name olmocr --max-model-len 16384


 1059
1059

 被折叠的 条评论
为什么被折叠?
被折叠的 条评论
为什么被折叠?
 到【灌水乐园】发言


