


 本文介绍了解决程序因内存不足导致崩溃的问题,并详细记录了如何在Ubuntu系统上手动配置SWAP空间以避免内存溢出错误。此外,还提供了一个ROS程序示例,用于读取并发布点云数据。
程序调试
程序运行终止:
terminate called after throwing an instance of 'std::bad_alloc'
  what():  std::bad_alloc

Process finished with exit code 134 (interrupted by signal 6: SIGABRT)
分析原因:
这个错误是程序运行时数据量太大。代码中频繁的使用 new 生成数组。
程序中频繁的调malloc(),导致可用内存不断减小,最终内存不够,无法分配新的空间,程序终止;
指令
free -m  #查看运行内存

relaybot@ubuntu:~/swap$ free -m
             total       used       free     shared    buffers     cached
Mem:          7916       7459        456         95         20       1404
-/+ buffers/cache:       6034       1881
Swap:            0          0          0
ubuntu的swap是与物理内存一致,可以通过增加一些虚拟内存swap,采用文件的方式
来使运行的程序不至于因为内存不够而终止
https://blog.youkuaiyun.com/mouse_ts/article/details/51649091
上面的链接讲述了SWAP文件指令创建
1、创建SWAP文件,可以在Home文件夹下直接创建
mkdir swap
cd swap
relaybot@ubuntu:~/swap$ sudo dd if=/dev/zero of=swapfile bs=1024 count=21000000
[sudo] password for relaybot:
21000000+0 records in
21000000+0 records out
21504000000 bytes (22 GB) copied, 62.8795 s, 342 MB/s
备注:count为swap文件的大小
2、把生成的文件转换为SAWP文件
sudo mkswap swapfile

relaybot@ubuntu:~/swap$ sudo mkswap swapfile
[sudo] password for relaybot:
Setting up swapspace version 1, size = 20999996 KiB
no label, UUID=3f7c1c0f-7e7b-4ee4-a91e-fd7e6a7529ad

#mkswap是在那个空白文件的基础上,建立swap的文件系统
3、激活swap文件(可以用 free -M 先查看现有swap的大下,完成后再查看激活新的大小):
sudo swapon swapfile4、修改/etc/fstab,实现自动挂载:
sudo gedit /etc/fstab在文件中后面加入:
/home/username/swap/swapfile   swap     swap   defaults  0  0
#下面的UUID从上面得到

# <file system> <mount point>   <type>  <options>       <dump>  <pass>
# / was on /dev/sda5 during installation
UUID=76e4f775-07f6-42c6-b0f4-1617776b6925 /               ext4    errors=remount-ro 0       1
# /boot was on /dev/sda1 during installation
UUID=c99236d2-0320-4b55-8bf4-87454ed50c9f /boot           ext4    defaults        0       2
# /home was on /dev/sda6 during installation
UUID=0e9e5902-adcb-4231-92e8-20d04992b4f4 /home           ext4    defaults        0       2
/home/relaybot/swap/swapfile              swap            swap    defaults        0       0
最前面是实际创建的swapfile文件路径
6、如果不需要自动挂载,可以省掉第四步,如果想临时用完后卸载此swap文件,可以在swap目录下用如下命令:
sudo swapoff swapfile重新查看
relaybot@ubuntu:~/swap$ free -m
             total       used       free     shared    buffers     cached
Mem:          7916       7734        182         81         41       1632
-/+ buffers/cache:       6059       1856
Swap:        20507          0      20507
扩展
据网上的一些错误描述也可能是内存爆炸的原因
错误现象描述一:
Install: out/host/linux-x86/framework/dx.jar
Copy: dx (out/host/linux-x86/obj/EXECUTABLES/dx_intermediates/dx)
Install: out/host/linux-x86/bin/dx
target Dex: core
make: *** [out/target/common/obj/JAVA_LIBRARIES/core_intermediates/noproguard.classes-with-local.dex] 已杀死
错误现象描述二:
collect2: ld terminated with signal 9 [Killed]
make: *** [out/host/linux-x86/obj/EXECUTABLES/clang_intermediates/clang] Error 1
make: *** Waiting for unfinished jobs....
ROS-rviz-pcl 显示点云数据
~/catkin_ws$ roscd chapter6_tutorials
~/catkin_ws/src/Learning_ROS_for_Robotics_Programming_2nd_edition-indigo-devel/chapter6_tutorials$
如果没有开启roscore
则会报错:
cd data
#注意此处的pcd_read 读取的pcd文件放在data文件夹下面
~/catkin_ws/src/Learning_ROS_for_Robotics_Programming_2nd_edition-indigo-devel/chapter6_tutorials/data$ rosrun chapter6_tutorials pcl_read
[ERROR] [1525351554.566872022]: [registerPublisher] Failed to contact master at [localhost:11311].  Retrying...
##先开启一个新的终端
roscore
##回到原来的终端文件夹下面
relaybot@ubuntu:~/catkin_ws/src/Learning_ROS_for_Robotics_Programming_2nd_edition-indigo-devel/chapter6_tutorials/data
$ rosrun chapter6_tutorials pcl_read

##没有反应--正确读取了pcd文件

##重新开启一个新的终端
rosrun rviz rviz
#在rviz的界面点击左下角的Add选项
By Topic
#选中/pcl_output
PointCloud2

#添加了点云的Topic
点云数据的Style选择Points

#Global Options
Fixed Frame选项修改为odom
#现在可以查看到点云的数据了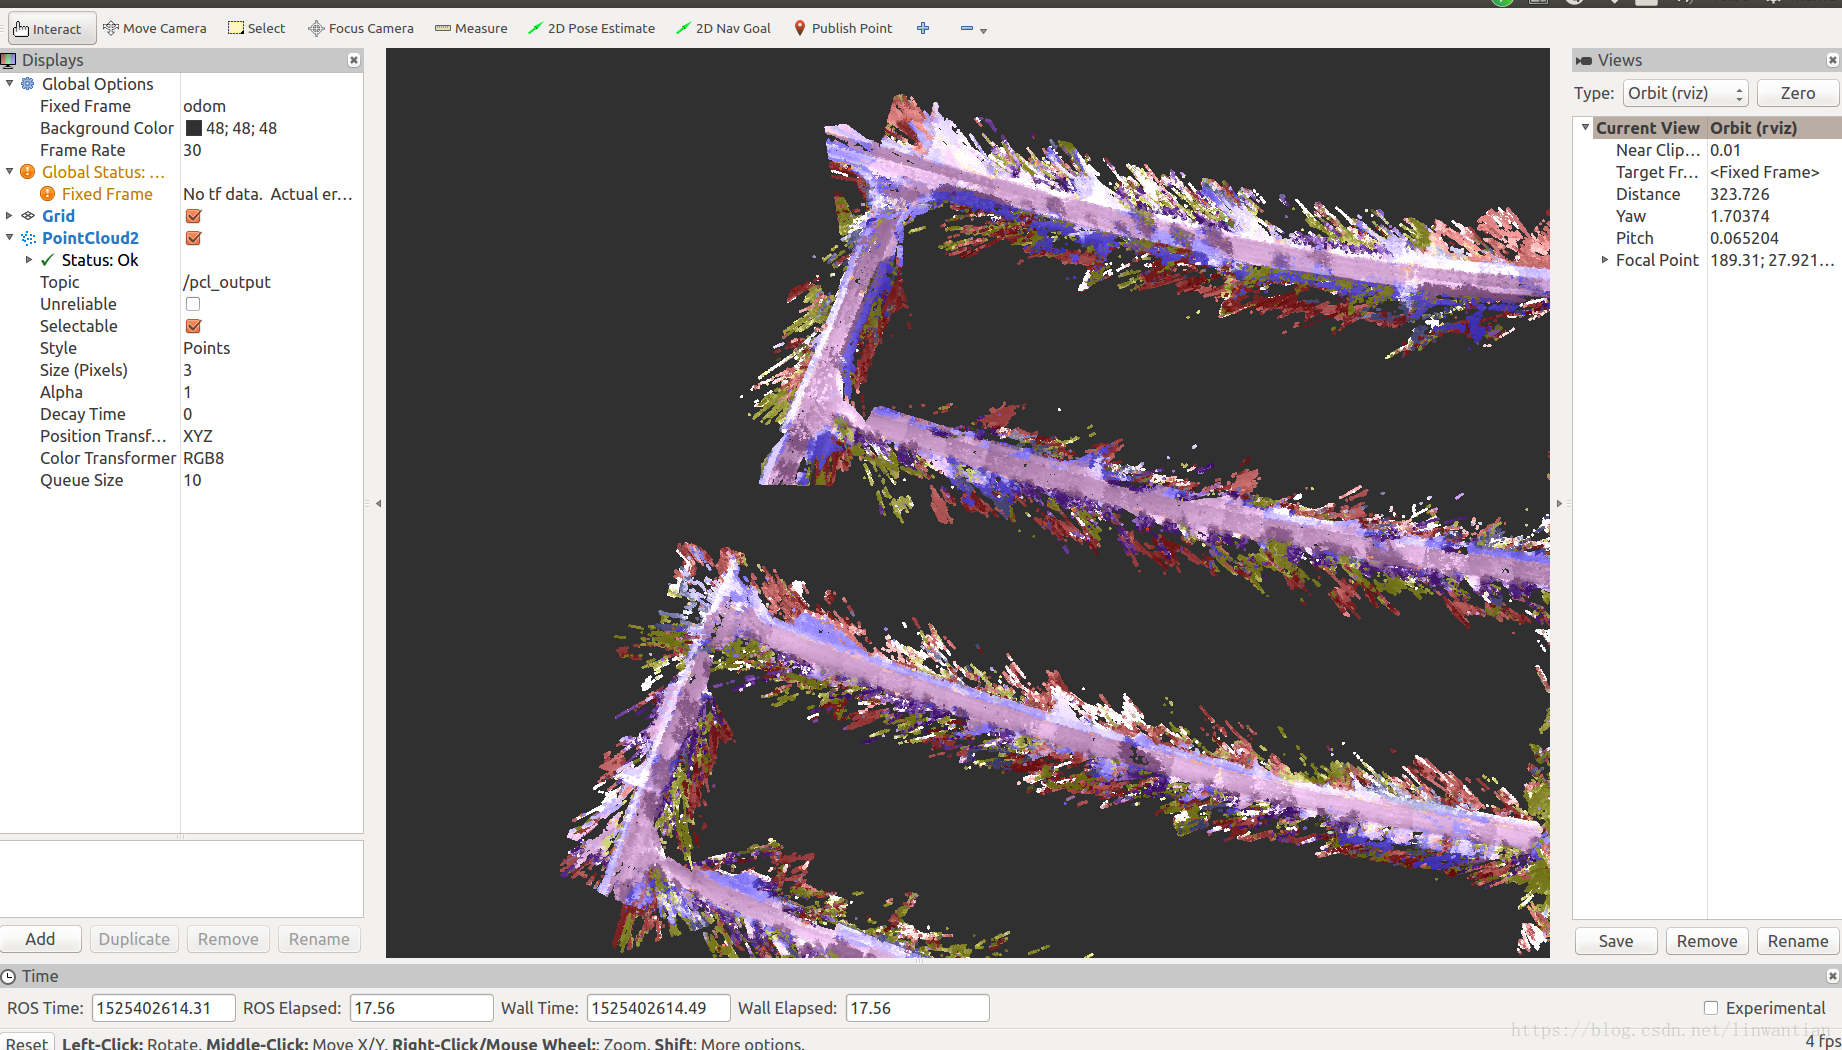
下面贴出chapter6_tutorials的pcl_read.cpp
#include <ros/ros.h>
#include <pcl/point_cloud.h>
#include <pcl_conversions/pcl_conversions.h>
#include <sensor_msgs/PointCloud2.h>
#include <pcl/io/pcd_io.h>

main(int argc, char **argv)
{
    ros::init (argc, argv, "pcl_read");

    ros::NodeHandle nh;
    ros::Publisher pcl_pub = nh.advertise<sensor_msgs::PointCloud2> ("pcl_output", 1);

    sensor_msgs::PointCloud2 output;
    pcl::PointCloud<pcl::PointXYZRGB> cloud;

    pcl::io::loadPCDFile ("test_pcd.pcd", cloud);

    pcl::toROSMsg(cloud, output);
    output.header.frame_id = "odom";

    ros::Rate loop_rate(1);
    while (ros::ok())
    {
        pcl_pub.publish(output);
        ros::spinOnce();
        loop_rate.sleep();
    }

    return 0;
}


 4088
4088

 被折叠的 条评论
为什么被折叠?
被折叠的 条评论
为什么被折叠?
 到【灌水乐园】发言


