


前期环境踩过的坑
首先给大家介绍,我是仿照这篇博客进行LaneATT环境配置的。博客链接:
操作很简单,就是远程登录服务器,进入到自己的用户环境下,在terminal端输入如下指令:
#代码下载
git clone https://github.com/lucastabelini/LaneATT
# 新建虚拟环境
conda create -n laneatt python=3.8 -y
#激活虚拟环境
conda activate laneatt
# 安装torch和torchvision
conda install pytorch==1.6 torchvision -c pytorch
# 再安装必要的python包
pip install -r requirements.txt
# 安装nms
cd lib/nms
python setup.py install
cd -
下面说说我遇到的问题:
1、在mac上进行git clone操作,出现超时连接。报错代码443如下所示:
Failed to connect to github.com port 443: Operation timed out解决博客Mac git clone报错443解决方法
具体操作:
1. 打开https://github.com.ipaddress.com/ 如下图:
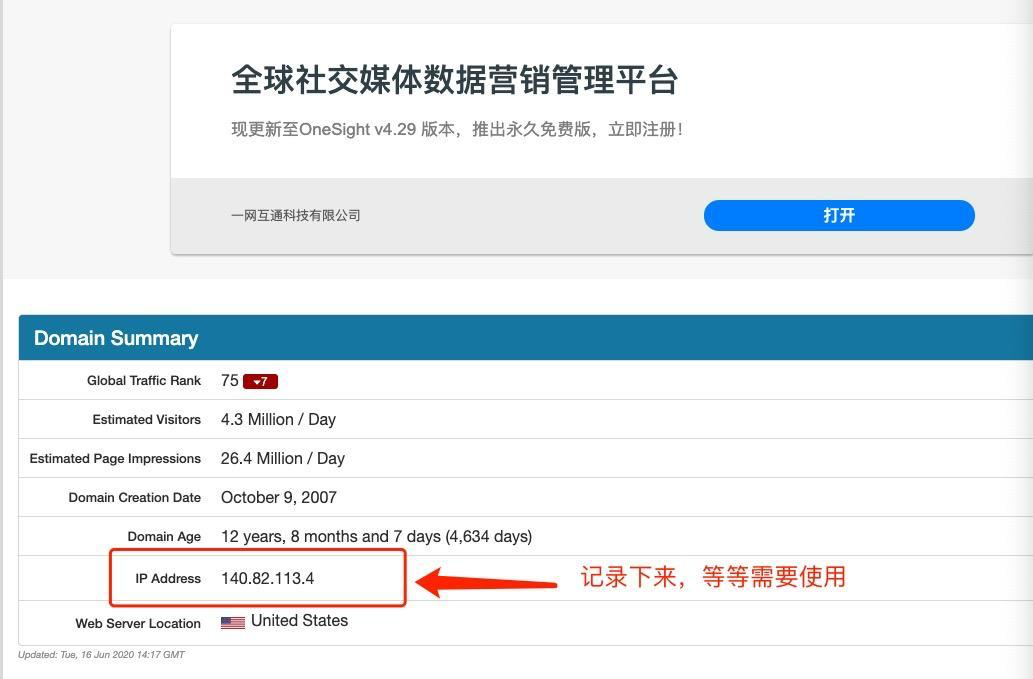
把IP Address 记录下来!
2.打开https://fastly.net.ipaddress.com/github.global.ssl.fastly.net#ipinfo 如下图:
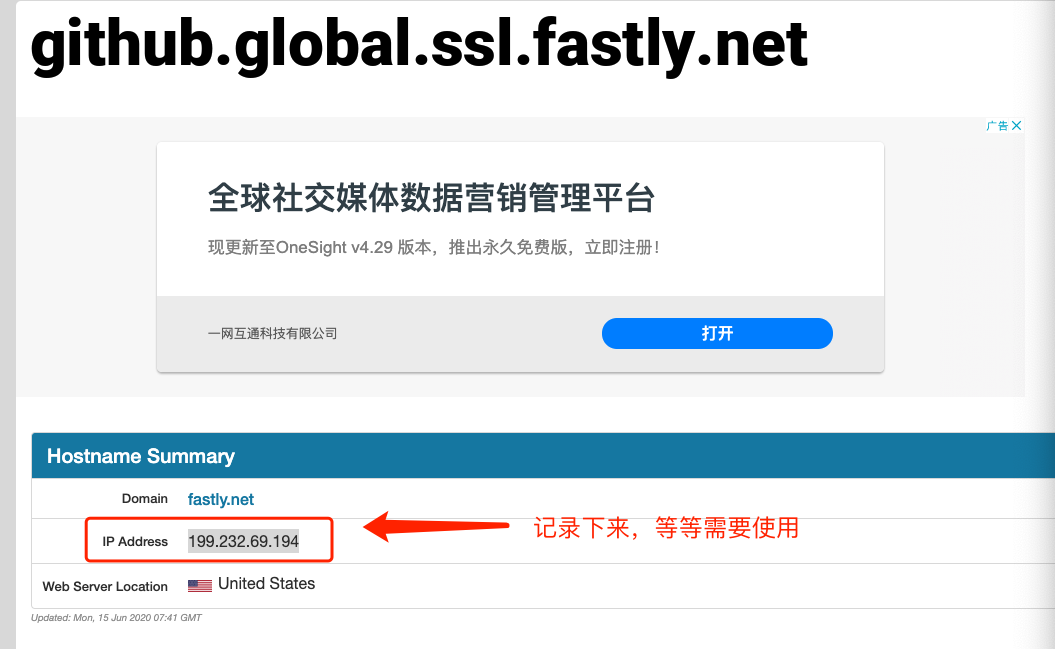
把IP Address 记录下来!
3.打开https://github.com.ipaddress.com/assets-cdn.github.com 如下图:
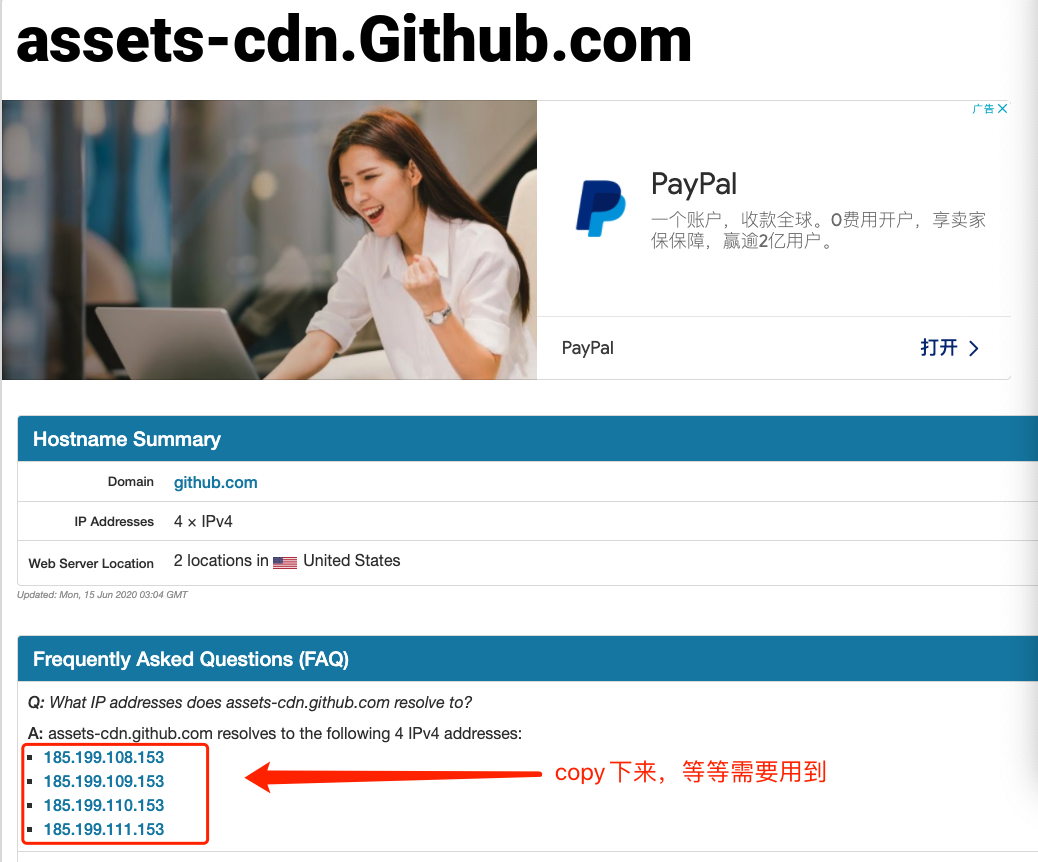
把IP Address 记录下来!
4.打开电脑的hosts文件,把下列的东西写在最后,然后保存即可
终端输入,需要权限,要输入密码:
sudo vim /etc/hosts将刚才复制的 IP Address 写入hosts文件中:
140.82.113.4(图1的IP Address) github.com
199.232.69.194(图2的IP Address) github.global.ssl.fastly.net
185.199.108.153(图3的IP Address)  assets-cdn.github.com
185.199.109.153(图3的IP Address)  assets-cdn.github.com
185.199.110.153(图3的IP Address)  assets-cdn.github.com
185.199.111.153(图3的IP Address)  assets-cdn.github.com
效果图如下:
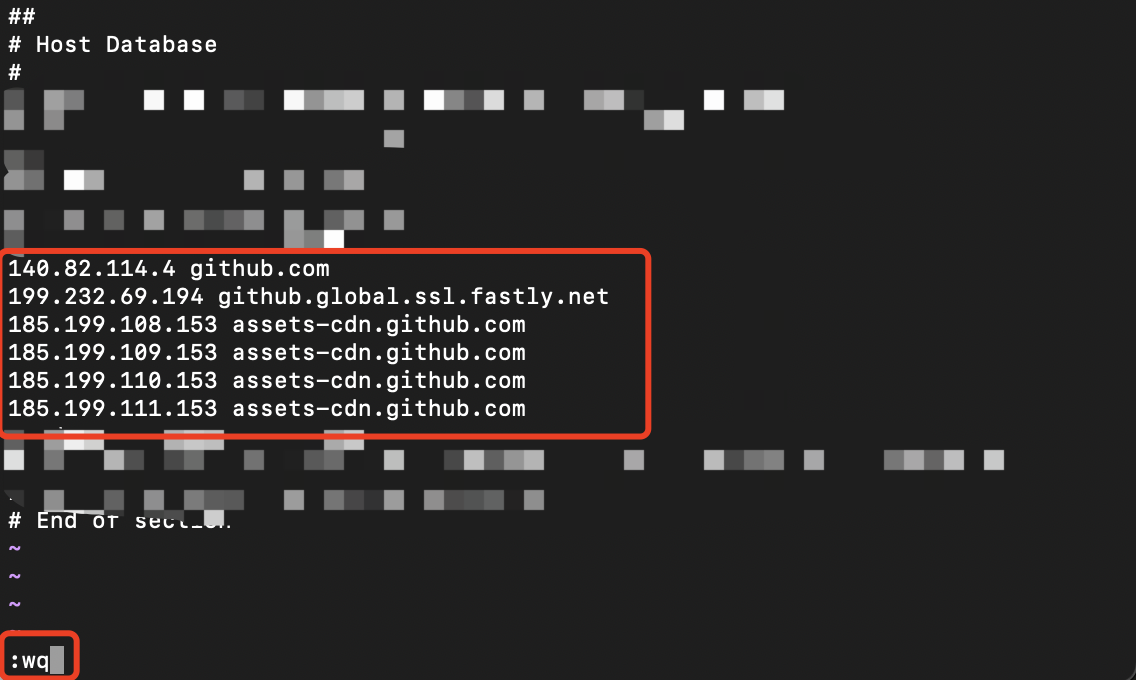
输入完成后,按Esc,输入:wq,按Enter,保存并退出。
5.再次执行git clone操作,此时你会发现BUG修复了!
2、torchvision提示未安装 : no module named torchvision
这个比较好解决,直接在远程终端输入:
pip install torchvision
我执行这条命令后,安装的torchvision是自动跟我的python3.8配套的。
3、NMS 安装,关于Pytoch中CUDA扩展的本地安装
这个问题困了我2个小时,后来我发现,我自己已经习惯了只把最后一行错误代码,复制粘贴到搜索框,不会自己terminal窗口中报的错误,其实已经有很多提示信息了,这是一个我后续要改正的缺点。
至于为什么会出现这个BUG,以及如何解决,参考如下博客:
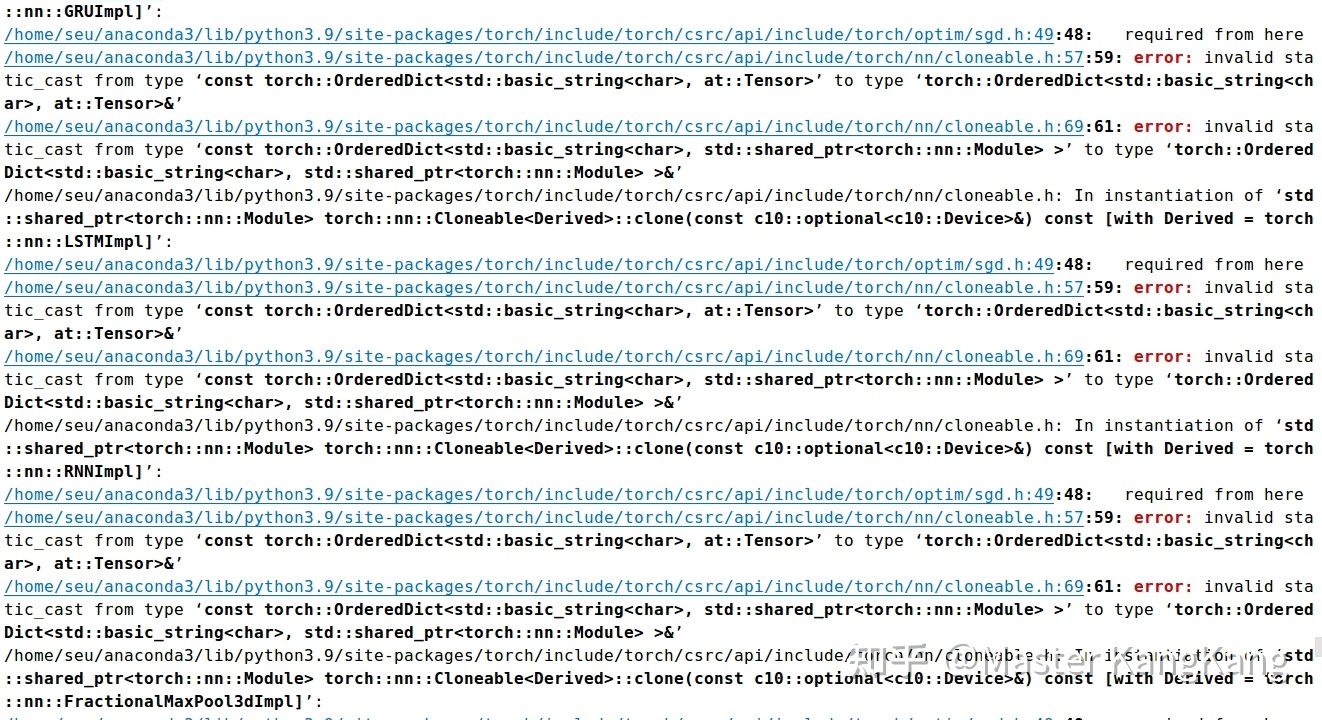
报错关键信息:
error: invalid static_cast from type ‘const torch::OrderedDict<std::bas
ic_string<char>, std::shared_ptr<torch::nn::Module> >’ to type ‘tor
ch::OrderedDict<std::basic_string<char>, std::shared_ptr<torch::nn::M
odule> >&’
error: command '/usr/local/cuda-11.6/bin/nvcc' failed with exit status 1
主要问题是:
要在当前Pytorch项目中安装自定义的层,前向传播和反向传播的细节由Cuda C的底层代码实现。写好了init.py,setup.py和jit.py配置文件,然后在终端中运行:
python setup.py install主要报错如下所示:
(图源网络)
解决办法:
切换到报错路径下,修改cloneable.h文件。 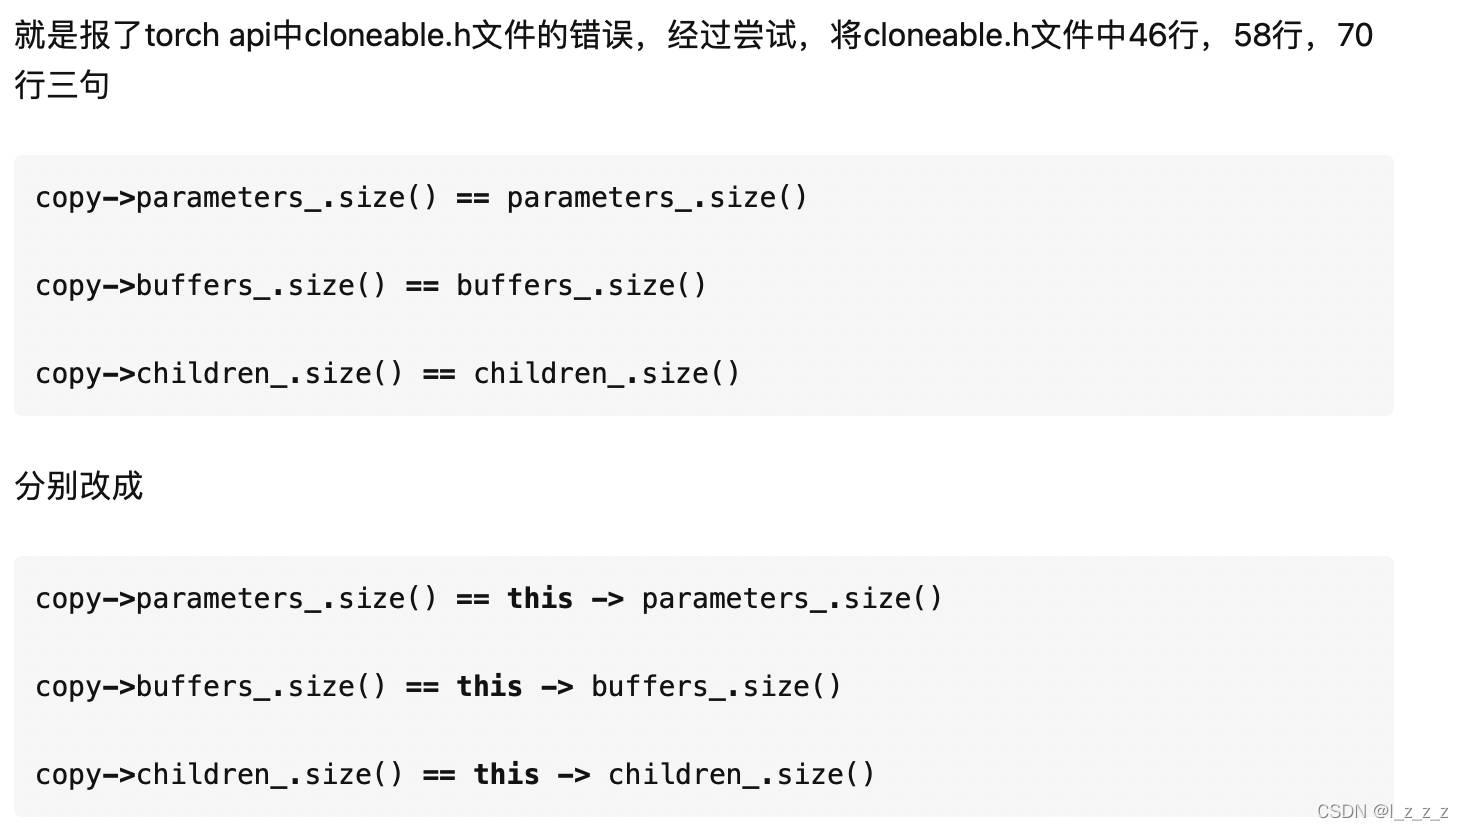
解决后,重新运行成功结果展示:


 3783
3783

 被折叠的 条评论
为什么被折叠?
被折叠的 条评论
为什么被折叠?
 到【灌水乐园】发言


