


 本文详细介绍了如何将libjpeg库移植到TI的TMS320C6678处理器上,并提供了一个读取JPEG图片的示例程序。从准备libjpeg源码开始,一步步指导如何在CCS环境中配置和编译,最终生成静态库文件。同时,文章还分享了如何在项目中使用该库进行JPEG图片的解码。
憋了这么久终于要爆发了。
上次解决了BMP图片读取的问题,这一次想解决读取JPEG图片的问题,本来打算自己新造一个轮子的,
但是既然已经有了libjpeg为何不尝试移植呢?话说这次真的移植成功了!
废话不多说,就列出具体步骤吧。
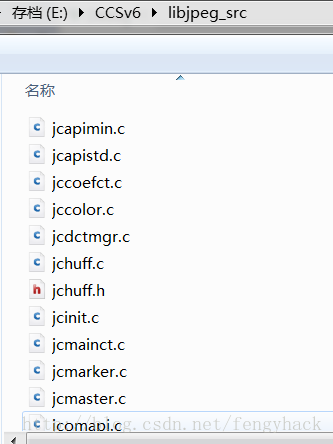
首先是准备libjpeg的源码(删除所有不必要的文件),我这里有一份整理好的源码压缩包,下载链接
http://download.youkuaiyun.com/detail/von_ryan_hack/8317245
然后打开CCS新建项目
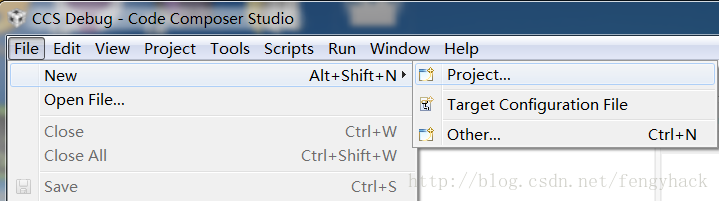
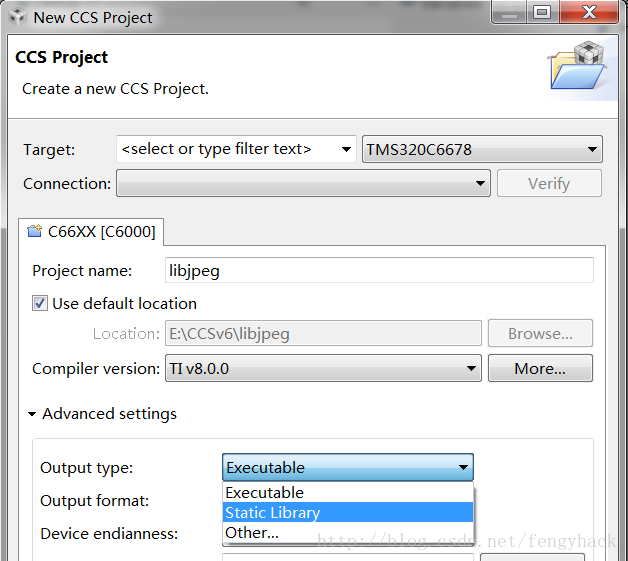
设置目标平台为TMS320C6678
项目名称libjpeg
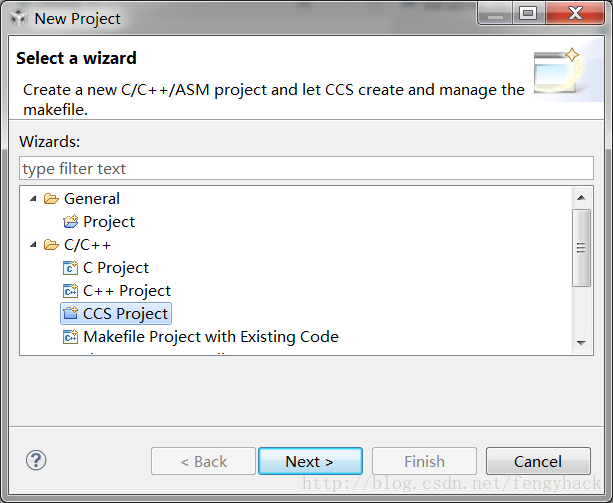
点击[ Next > ] 弹出对话框,展开[ Advanced Settings ]
选择Output type为Static Library
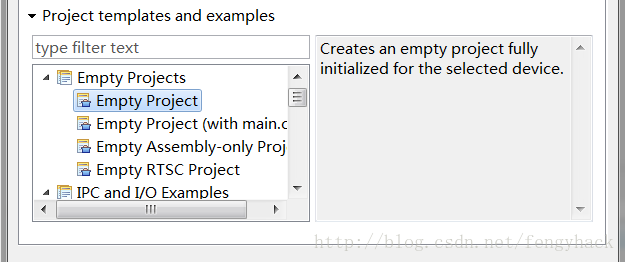
项目模板为Empty Project
在项目上右键菜单选择添加文件
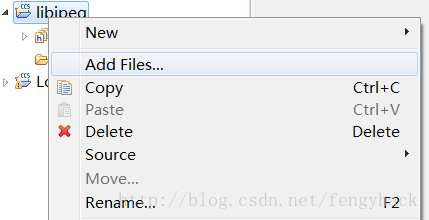
浏览libjpeg源码文件夹,[Add Files...]添加文件(全选)
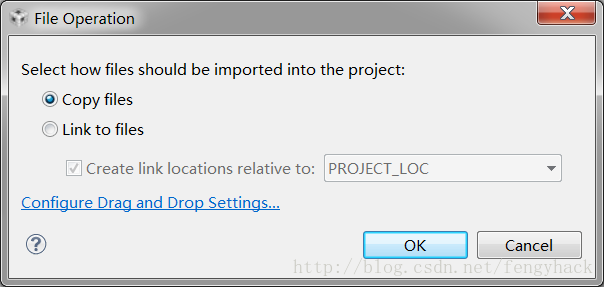
提示,选择【复制文件】即可
编译类型默认为Debug,如需调整,可在项目右键设置
或者打开设置对话框,选择 [Manage Configurations...]
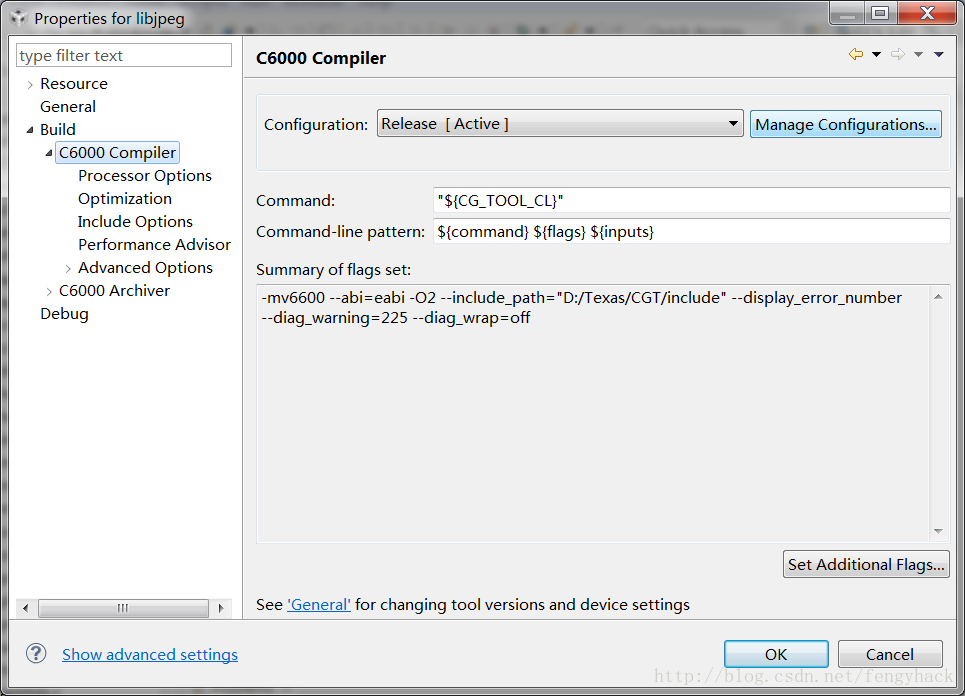
选择Release并【Set Active】
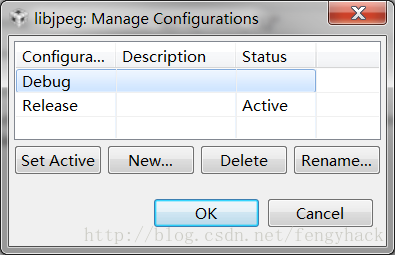
接下来执行[Project]-->[Build All]即可
编译完成后请将输出文件夹(Debug或Release文件夹)下的libjpeg.lib
和jconfig.h jmorecfg.h jpeglib.h这写文件拷贝出来以供其他项目使用。
下面给出一个应用示例
新建项目(可参考这篇文章http://blog.youkuaiyun.com/fengyhack/article/details/41945029)
设置的时候注意添加libjpeg.lib以及jconfig.h; jmorecfg.h; jpeglib.h这几个文件
添加文件后,打开项目属性设置对话框
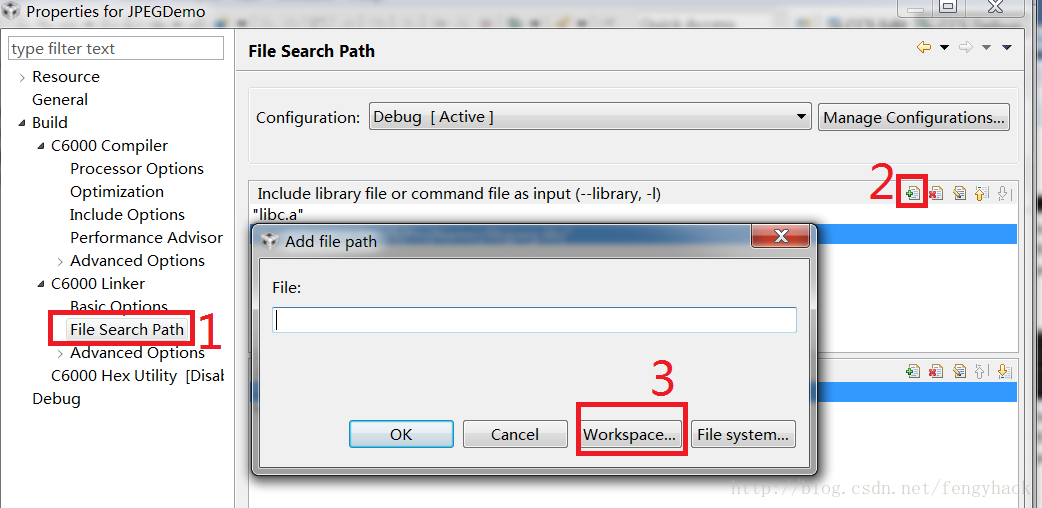
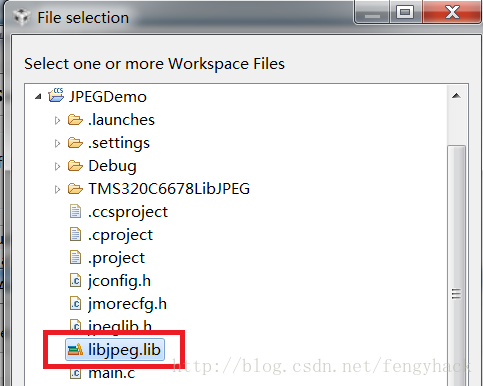
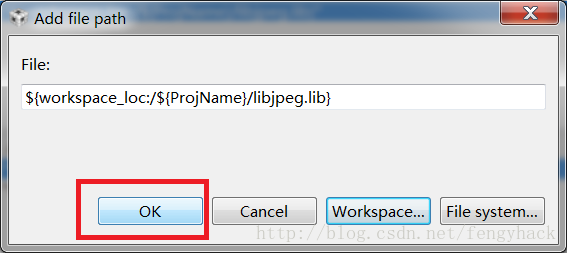
浏览Workspace选择刚才添加的libjpeg.lib文件
然后确定
接下来贴上示例的源代码main.c
(参考http://blog.youkuaiyun.com/fengyhack/article/details/42239807)
- #include <stdio.h>
- #include <stdlib.h>
- #include "jpeglib.h"
-
- typedef unsigned char BYTE;
-
- int main(void)
- {
- char* szFileName = "F:\\Images\\Snapshot\\000.jpg";
-
- struct jpeg_decompress_struct cinfo;
- struct jpeg_error_mgr jerr;
-
- // STEP 1: StdError
- printf("\n-----------------------------------\n");
- cinfo.err = jpeg_std_error(&jerr);
-
- // STEP 2: Create
- printf("Create decompress information.\n");
- jpeg_create_decompress(&cinfo);
-
- FILE* pf = fopen(szFileName, "rb");
- if (pf != NULL)
- {
- // STEP 3: IO
- printf("Attach input file.\n");
- jpeg_stdio_src(&cinfo, pf);
-
- // STEP 4: Header
- printf("Read header information.\n");
- jpeg_read_header(&cinfo, TRUE);
-
- long width=cinfo.image_width;
- long height=cinfo.image_height;
- long channels=cinfo.num_components;
- printf("Image size information:\n%d*%d*%d(width*height*channel)\n",width,height,channels);
-
- long bytes = width*height*channels;
- printf("Allocate %d bytes memory:",bytes);
- BYTE* data = (BYTE*)malloc(bytes);
- int line=0;
- if (data != NULL)
- {
- printf("OK.\nPrepare to decompress the image...\n");
-
- // STEP 5: Start
- jpeg_start_decompress(&cinfo);
- JSAMPROW row_pointer[1];
-
- // STEP 6: ReadScan
- printf("Scan lines...\n");
- while (cinfo.output_scanline < cinfo.output_height)
- {
- row_pointer[0] = &data[(cinfo.output_height - cinfo.output_scanline - 1)*cinfo.image_width*cinfo.num_components];
- jpeg_read_scanlines(&cinfo, row_pointer, 1);
- ++line;
- if(line%100==0)
- {
- printf("Current line: %03d\n",line);
- }
- }
-
- // STEP 7: Finish
- jpeg_finish_decompress(&cinfo);
- printf("Decompression finished.\n");
- // Do something with
- // BYTE data[] here
- // and then release it
- free(data);
- }
- else
- {
- printf("FAILED.\n");
- }
-
- // STEP 8: Destroy
- jpeg_destroy_decompress(&cinfo);
- fclose(pf);
- }
- else
- {
- printf("Failed to open \'%s\'\n", szFileName);
- }
-
- printf("Test PASSED.\n");
- return 0;
- }
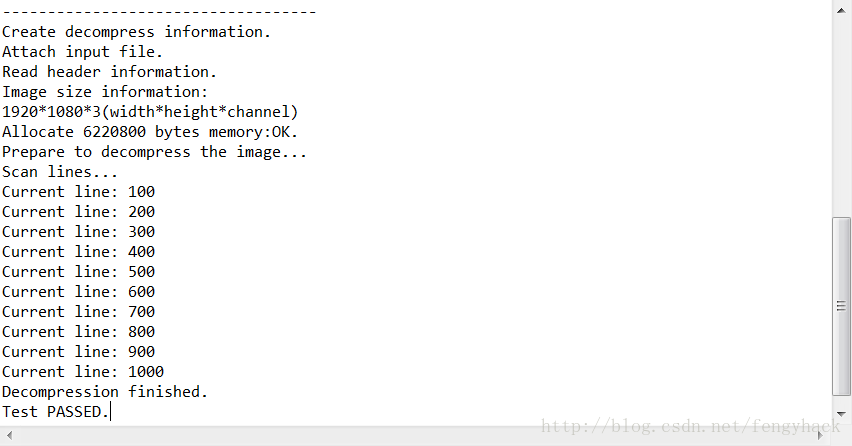
运行时输出截图如下
最后附上适用于C6678的libjpeg库及相应头文件的下载链接
http://download.youkuaiyun.com/detail/von_ryan_hack/8317241


 3211
3211

 被折叠的 条评论
为什么被折叠?
被折叠的 条评论
为什么被折叠?
 到【灌水乐园】发言


