


二、利用TensorFlow Object Detection API训练自己的数据集
第一部分讲了如何搭建训练环境,这部分讲解如何从头开始训练自己的数据集!
1. 首先,标注数据集,推荐labelImag这个标注用的小工具,大家可以在https://github.com/tzutalin/labelImg 上下载,然后直接运行它的labelImag.py文件即可进入标注界面。为了方便,以VOC 2012数据集为例,介绍如何使用Object Detection API训练新的模型。VOC 2012是一共有11530张图片,每张图片都有标注,标注的物体包括人、动物(如猫、狗、鸟等)、交通工具(如车、船飞机等)、家具(如椅子、桌子、沙发等)在内的20个类别。
数据集获取及训练
首先下载数据集,并将其转换为tfrecord格式。下载地址为:http://host.robots.ox.ac.uk/pascal/VOC/voc2012/VOCtrainval_11-May-2012.tar。(如果不采用voc2102数据集,可以按照voc2012数据集的模式来制作自己的数据集)
为了不影响代码的结构,不妨在 object_detection 文件夹中 , 再新建一个voc文件夹,并将下载的数据集压缩包复制至 voc/中 。 解压后,就得到一个VOCdevkit 文件夹,最终的文件夹结构应该为:

JPEGImages文件中文件夹里存放了全部的训练图片和验证图片。
Annotations文件夹中存放有对应图像的xml文件。保存着物体框的标注,包括图片文件名,图片大小,图片边界框等信息。
ImageSets文件夹包括Action Layout Main Segmentation四部分,(Action存放的是人的动作,Layout存放人体部位数据, Segmentation是用于分割的,这三部分我们用不到,可以不用关注他们),Main存放的是图像物体识别数据(里面的train.txt,val.txt,trainval.txt需要自己根据数据集生成)。
SegmentationClass(标注出每一个像素的类别)和SegmentationObject(标注出每个像素属于哪一个物体)是分割相关的,不用关心。
从object_detection\dataset_tools下把create_pascal_tf_record.py文件复制到object_detection文件夹下,这个代码是为VOC2012数据集提前编写好的。
#################################
注意!!!!这里我们需要注意一个细节,如果我们要想训练自己的数据集就把:create_pascal_tf_record.py中的
examples_path = os.path.join(data_dir, year, 'ImageSets', 'Main', 'aeroplane_' + FLAGS.set + '.txt')
去掉'aeroplane_'。
##################################
在 object_detection 文件夹中,执行以下命令可以将 voc2012 数据集转换为 tfrecord 恪式,转换好的 tfrecord 保存在新建的 voc 文件夹下,分别为pascal_train.record 和 pascal_ val.record :
python create_pascal_tf_record.py --data_dir=voc/VOCdevkit --year=VOC2012 --set=train --output_path=voc/pascal_train.record

python create_pascal_tf_record.py --data_dir=voc/VOCdevkit --year=VOC2012 --set=val --output_path=voc/pascal_val.record如果读者希望使用自己的数据集,有两种方法:
- 第一种是修改自己的数据集的标注格式,使和VOC2012一模一样(主要是Annotations文件夹,ImageSets\Main文件夹,JPEGImages文件夹),然后即可以直接使用create_pascal_tf_record.py脚本转换了。
- 另外一种方法就是修改create_pascal_tf_record.py,对读取标签的代码进行修改。
此外,将 data/pascal_label_map .pbtxt 数据复制到 voc 文件夹下(如果要用自己的数据集,需要修改里面的类型),如:
item {
id: 1
name: '你自己的类别'
}
item {
id: 2
name: '你自己的类别'
}
item {
id: 3
name: '你自己的类别'
}......
回到 voc 2012 数据集的训练 。 下载数据集后 ,需要选择合适的模型 ,官方提供了不少预训练模型。我是地址。这里以 Faster R-CNN + Inception_ResNet_ v2 模型为例进行介绍 。 首先下载在coco 上预训练的 Faster R-CNN + Inception_ ResN et_ v2 模型(http://download.tensorflow.org/models/object_detection/faster_rcnn_inception_resnet_v2_atrous_coco_11_06_2017.tar.gz)。 解压后得到frozen _inference _graph.pb、graph.pbtxt (通过我是地址下载的预训练模型没有这个文件,不过没关系,可以不要这个文件也没有影响!亲测没问题!!!)、model.ckpt. data-00000 -of-00001 、model.ckpt. index 、 model.ckpt.meta 5 个文件。在 voc文件夹中新建一个pretrained 文件夹,并将这 5 个文件复制进去。
在object_detection/samples/configs/文件夹下,将 faster_rcnn_inception_resnet_v2_atrous_pets.config 复制一份到 voc文件夹下,并重命名为voc.config(其他的模型也采用这样的方法)。!!!!!!!!!!!!
voc.config文件有8处需要修改:
- 第一处为num_classes,需要将它修改为VOC2012 中物体类别数,即20,(如果要用自己的数据集,就把这个数字改为自己的类别种类)
- 第二处为eval_config中的num_examples,它表示在验证阶段需要执行的图片数量,修改为VOC 2012验证集的图片数5823(可以在create_pascal_tf_record.py中,输出对应的examples_list长度,就可以知道这个大小),自己的数据集要根据实际情况修改!(不改也没有问题!)。
- 还有6处为所有含PATH_TO_BE_CONFIGURED的地方。这些地方需要修改为自己的目录,他们应该分别被修改为(在input_path:处):
gradient_clipping_by_norm: 10.0
  fine_tune_checkpoint:” voc/pretrained/model.ckpt ”    (初始化模型参数)
  from_detection_checkpoint: true
  # Note: The below line limits the training process to 200K steps, which we
  # empirically found to be sufficient enough to train the pets dataset. This
  # effectively bypasses the learning rate schedule (the learning rate will
  # never decay). Remove the below line to train indefinitely.
  num_steps: 200000    (训练步数,自己可根据自己数据集的大小调整)
  data_augmentation_options {
    random_horizontal_flip {
    }
  }
}

train_input_reader: {
  tf_record_input_reader {
    input_path: "voc/pascal_train.record"
  }
  label_map_path: "voc/pascal_label_map.pbtxt"
}

eval_config: {
  num_examples: 5823
  # Note: The below line limits the evaluation process to 10 evaluations.
  # Remove the below line to evaluate indefinitely.
  max_evals: 10
}

eval_input_reader: {
  tf_record_input_reader {
    input_path: "voc/pascal_val.record"
  }
  label_map_path: "voc/pascal_label_map.pbtxt"
  shuffle: false
  num_readers: 1
}最后,在voc文件夹中新建一个train_dir作为保存模型和日志的目录,在使用object_detection/legacy目录下的train.py文件训练的时候会使用到slim下库,因此我们需要先配置临时环境变量,在research目录下执行一下命令:
export PYTHONPATH=$PYTHONPATH:${PWD}:${PWD}/slim在object_detection目录下,使用下面的命令就可以开始训练了:(要在GPU下运行,在CPU运行会抛出module 'tensorflow' has no attribute 'data'的错误)
python legacy/train.py --train_dir voc/train_dir/ --pipeline_config_path voc/voc.config训练如下:
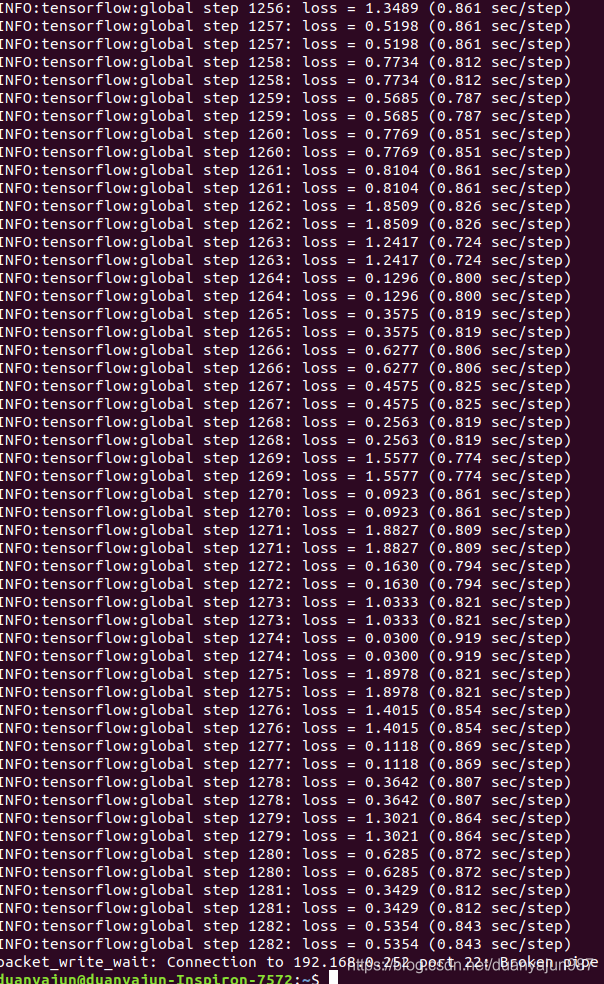
由于我们在设置文件中设置的训练步数为200k,因此整个训练可能会消耗大量时间,这里训练到4万多次就强行终止训练了.
num_steps: 200000训练的日志和最终的模型(默认保存了5个不同步数时的模型)都会保存在train_dir中,因此,同样可以使用TensorBoard来监控训练情况。在日志文件的上级路径下,输入如下命令:
tensorboard --logdir ./train_dir 把得到的网址输入浏览器,就可以看到实时的运行状态了!需要注意的是,如果发生内存和显存不足报锚的情况,除了换用较小的模型进行训练外,还可以修改配置文件中的以下部分:
image_resizer {
      keep_aspect_ratio_resizer {
        min_dimension: 600
        max_dimension: 1024
      }
    }
这个部分表示将输入图像进行等比例缩放再进行训练,缩放后的最大边长为1024,最小边长为600.可以将整两个数值改小(我训练的时候就分别改成512和300),使用的显存就会变小。不过这样做也可能导致模型的精度下降,因此我们需要根据自己的情况选择适合的处理方法。
导出模型并预测单张图片
如何将train_dir中的checkpoint文件导出并用于单张图片的目标检测?TensorFlow Object Detection API提供了一个export_inference_graph.py脚本用于导出训练好的模型。具体方法是在object_detect目录下执行:
python export_inference_graph.py --input_type image_tensor --pipeline_config_path voc/voc.config --trained_checkpoint_prefix voc/train_dir/model.ckpt-47837 --output_directory voc/export其中model.ckpt-47837表示使用第47837步保存的模型。我们需要根据voc/train_dir时间保存的checkpoint,将47837改为合适的数值。导出的模型是voc/export/frozen_inference_graph.pb文件。
运行以下程序,以test_images下的图片作为测试,得到如下结果:
# -*- coding: utf-8 -*-
"""
Created on Tue Jun  5 20:34:06 2018
@author: zy
"""

'''
调用Object Detection API进行实物检测   需要GPU运行环境,CPU下会报错
TensorFlow  生成的  .ckpt 和  .pb 都有什么用?
https://www.cnblogs.com/nowornever-L/p/6991295.html
如何用Tensorflow训练模型成pb文件(一)——基于原始图片的读取
https://blog.youkuaiyun.com/u011463646/article/details/77918980?fps=1&locationNum=7
'''

#运行前需要把object_detection添加到环境变量
#ubuntu 在research目录下,打开终端,执行export PYTHONPATH=$PYTHONPATH:${PWD}:${PWD}/slim 然后执行spyder,运行程序
#windows 在research目录下,打开cmd,执行set PYTHONPATH=%PYTHONPATH%;%CD%;%CD%/slim 然后执行spyder,运行程序

import matplotlib.pyplot as plt
import numpy as np
import os
import tensorflow as tf
from object_detection.utils import label_map_util
from object_detection.utils import visualization_utils as vis_util
from PIL import Image


def test():
    #重置图
    tf.reset_default_graph()
    '''
    载入模型以及数据集样本标签,加载待测试的图片文件
    '''
    #指定要使用的模型的路径  包含图结构,以及参数
    PATH_TO_CKPT = './voc/export/frozen_inference_graph.pb'

    #测试图片所在的路径
    PATH_TO_TEST_IMAGES_DIR = './test_images'

    TEST_IMAGE_PATHS = [os.path.join(PATH_TO_TEST_IMAGES_DIR,'image{}.jpg'.format(i)) for i in range(1,3) ]

    #数据集对应的label pascal_label_map.pbtxt文件保存了index和类别名之间的映射
    PATH_TO_LABELS = './voc/pascal_label_map.pbtxt'

    NUM_CLASSES = 20

    #重新定义一个图
    output_graph_def = tf.GraphDef()

    with tf.gfile.GFile(PATH_TO_CKPT,'rb') as fid:
        #将*.pb文件读入serialized_graph
        serialized_graph = fid.read()
        #将serialized_graph的内容恢复到图中
        output_graph_def.ParseFromString(serialized_graph)
        #print(output_graph_def)
        #将output_graph_def导入当前默认图中(加载模型)
        tf.import_graph_def(output_graph_def,name='')

    print('模型加载完成')

    #载入coco数据集标签文件
    label_map = label_map_util.load_labelmap(PATH_TO_LABELS)
    categories = label_map_util.convert_label_map_to_categories(label_map,max_num_classes = NUM_CLASSES,use_display_name = True)
    category_index = label_map_util.create_category_index(categories)


    '''
    定义session
    '''
    def load_image_into_numpy_array(image):
        '''
        将图片转换为ndarray数组的形式
        '''
        im_width,im_height = image.size
        return np.array(image.getdata()).reshape((im_height,im_width,3)).astype(np.uint0)

    #设置输出图片的大小
    IMAGE_SIZE = (12,8)

    #使用默认图,此时已经加载了模型
    detection_graph = tf.get_default_graph()

    with tf.Session(graph=detection_graph) as sess:
        for image_path in TEST_IMAGE_PATHS:
            image = Image.open(image_path)
            #将图片转换为numpy格式
            image_np = load_image_into_numpy_array(image)

            '''
            定义节点,运行并可视化
            '''
            #将图片扩展一维,最后进入神经网络的图片格式应该是[1,?,?,3]
            image_np_expanded = np.expand_dims(image_np,axis = 0)

            '''
            获取模型中的tensor
            '''
            image_tensor = detection_graph.get_tensor_by_name('image_tensor:0')

            #boxes用来显示识别结果
            boxes = detection_graph.get_tensor_by_name('detection_boxes:0')

            #Echo score代表识别出的物体与标签匹配的相似程度,在类型标签后面
            scores = detection_graph.get_tensor_by_name('detection_scores:0')
            classes = detection_graph.get_tensor_by_name('detection_classes:0')
            num_detections = detection_graph.get_tensor_by_name('num_detections:0')

            #开始检查
            boxes,scores,classes,num_detections = sess.run([boxes,scores,classes,num_detections],
                                                           feed_dict={image_tensor:image_np_expanded})

            #可视化结果
            vis_util.visualize_boxes_and_labels_on_image_array(
                    image_np,
                    np.squeeze(boxes),
                    np.squeeze(classes).astype(np.int32),
                    np.squeeze(scores),
                    category_index,
                    use_normalized_coordinates=True,
                    line_thickness=8)
            plt.figure(figsize=IMAGE_SIZE)
            print(type(image_np))
            print(image_np.shape)
            image_np = np.array(image_np,dtype=np.uint8)
            plt.imshow(image_np)


if __name__ == '__main__':
    test()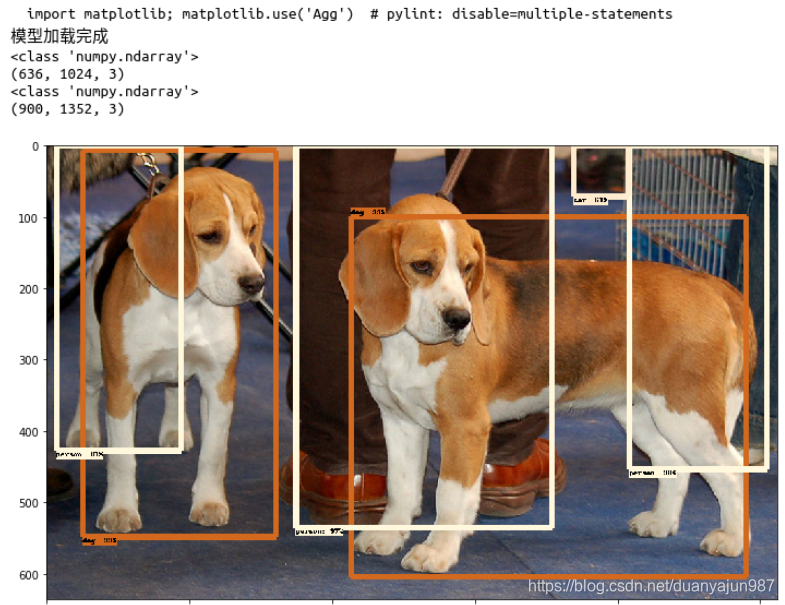


 393
393

 被折叠的 条评论
为什么被折叠?
被折叠的 条评论
为什么被折叠?
 到【灌水乐园】发言


