


本文来源公众号“OpenCV与AI深度学习”,仅用于学术分享,侵权删,干货满满。
原文链接:使用 MoveNet Lightning 和 OpenCV 实现实时姿势检测
在本文中,我们将探讨如何使用 TensorFlow Lite 的 MoveNet Lightning 模型和 OpenCV 构建实时姿势检测系统。这个项目使我们能够使用网络摄像头检测身体关节并动态地可视化运动。
MoveNet Lightning 概述
MoveNet 是由 TensorFlow 开发的最先进的姿态估计模型,专为实时应用程序而设计。MoveNet 的 Lightning 变体针对速度和准确性进行了优化,使其适用于健身跟踪、运动分析等任务。
第 1 步:安装所需的库
在开始之前,请确保您已安装以下 Python 库:
pip install tensorflow numpy opencv-python matplotlib这些库对于加载 MoveNet 模型、处理视频帧和可视化结果至关重要。
第 2 步:加载 MoveNet 模型
首先,我们将加载 TensorFlow Lite MoveNet Lightning 模型并分配张量进行推理。
import tensorflow as tfimport numpy as npimport cv2# Load the TensorFlow Lite modelinterpreter = tf.lite.Interpreter(model_path='3.tflite')interpreter.allocate_tensors()
第 3 步:定义辅助函数
为了可视化检测到的姿势,我们需要在每一帧上绘制关键点 (关节) 和连接 (骨骼)。
绘制关键点
def draw_keypoints(frame, keypoints, confidence_threshold):"""Draws keypoints on the frame if their confidence exceeds the threshold."""y, x, c = frame.shapeshaped = np.squeeze(np.multiply(keypoints, [y, x, 1]))for kp in shaped:ky, kx, kp_conf = kpif kp_conf > confidence_threshold:cv2.circle(frame, (int(kx), int(ky)), 4, (0, 255, 0), -1)
绘制连接
EDGES = {(0, 1): 'm', (0, 2): 'c', (1, 3): 'm', (2, 4): 'c',(0, 5): 'm', (0, 6): 'c', (5, 7): 'm', (7, 9): 'm',(6, 8): 'c', (8, 10): 'c', (5, 6): 'y', (5, 11): 'm',(6, 12): 'c', (11, 12): 'y', (11, 13): 'm', (13, 15): 'm',(12, 14): 'c', (14, 16): 'c'}def draw_connections(frame, keypoints, edges, confidence_threshold):"""Draws connections (edges) between keypoints if both exceed the threshold."""y, x, c = frame.shapeshaped = np.squeeze(np.multiply(keypoints, [y, x, 1]))for edge, color in edges.items():p1, p2 = edgey1, x1, c1 = shaped[p1]y2, x2, c2 = shaped[p2]if (c1 > confidence_threshold) & (c2 > confidence_threshold):cv2.line(frame, (int(x1), int(y1)), (int(x2), int(y2)), (0, 0, 255), 2)
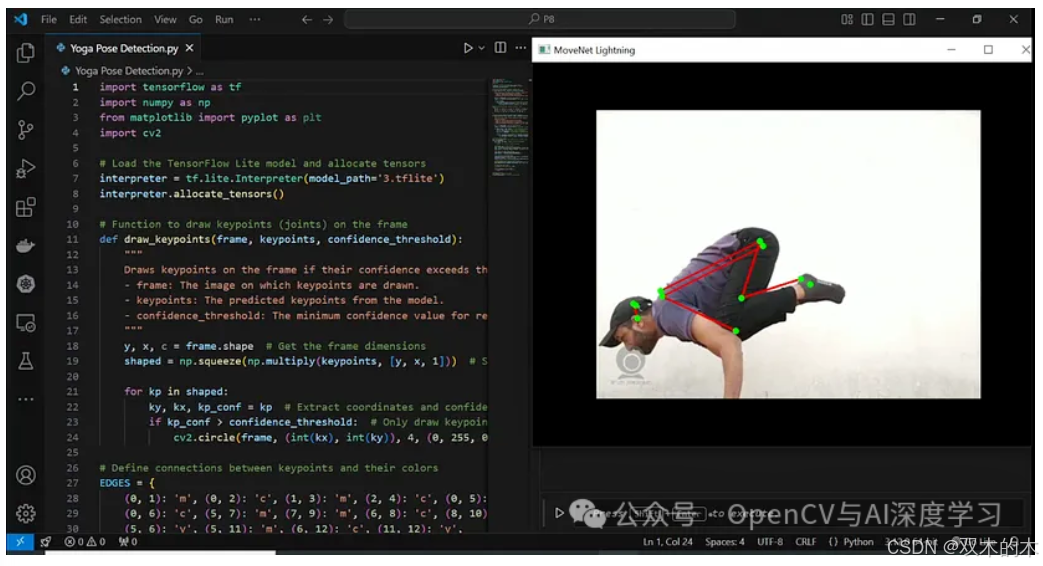
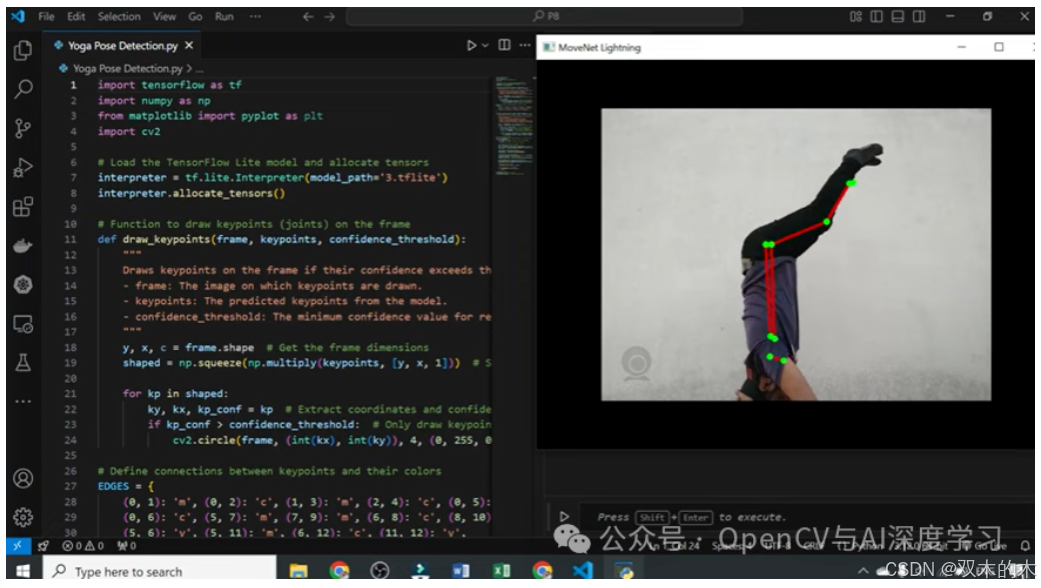
第 4 步:实时姿势检测
使用 OpenCV,我们将从网络摄像头捕获帧,并通过 MoveNet 处理它们以进行姿势检测。
# Initialize webcam capturecap = cv2.VideoCapture(1) # Use '0' for the default camerawhile cap.isOpened():ret, frame = cap.read()if not ret:break# Preprocess the frame for MoveNetimg = frame.copy()img = tf.image.resize_with_pad(np.expand_dims(img, axis=0), 192, 192)input_image = tf.cast(img, dtype=tf.float32)# Get input and output tensor detailsinput_details = interpreter.get_input_details()output_details = interpreter.get_output_details()# Run inferenceinterpreter.set_tensor(input_details[0]['index'], np.array(input_image))interpreter.invoke()keypoints_with_scores = interpreter.get_tensor(output_details[0]['index'])# Draw connections and keypoints on the framedraw_connections(frame, keypoints_with_scores, EDGES, 0.4)draw_keypoints(frame, keypoints_with_scores, 0.4)# Display the framecv2.imshow('MoveNet Lightning', frame)if cv2.waitKey(10) & 0xFF == ord('q'):breakcap.release()cv2.destroyAllWindows()
如何运行
-
-
模型加载:TensorFlow Lite MoveNet 模型已加载并准备好进行推理。
-
帧预处理:每个网络摄像头帧的大小都会调整并填充,以匹配模型的预期输入尺寸。
-
姿势检测:该模型预测每帧的关键点及其置信度分数。
-
可视化:关键点和连接叠加在框架上,实时动态更新。
-
应用
该项目具有多种应用:
-
-
健身追踪和体型校正。
-
交互式系统的手势识别。
-
运动中的实时运动分析。
-
通过利用 TensorFlow Lite 的 MoveNet 和 OpenCV,我们创建了一个功能强大且高效的姿势检测系统。这种设置是轻量级的,非常适合边缘设备上的实时应用程序。通过将该系统集成到健身或游戏应用程序中来进一步探索!
源码下载:
https://github.com/iamramzan/Real-Time-Pose-Detection-Using-MoveNet-Lightning-and-OpenCVTHE END !
文章结束,感谢阅读。您的点赞,收藏,评论是我继续更新的动力。大家有推荐的公众号可以评论区留言,共同学习,一起进步。


 501
501

 被折叠的 条评论
为什么被折叠?
被折叠的 条评论
为什么被折叠?
 到【灌水乐园】发言


