


这是一个延续了很久的工作,老头和我说的时候是去年年底,然后学习了一通ecc的内容,接着小论文回复评审意见然后放寒假就一直没有再动手。到了今年年初给他准备国自然的一些东西,然后断断续续又看了两天,接着学校给了毕业安排,就又开始写毕业论文,做ppt,然后修改修改修改,准备预答辩...中途也确实没有什么时间来处理ecc的问题。这几天正好师弟来北京准备中期答辩,我对于他项目的代码并不了解,然后两个人碰了一下,今天把这个事情完成了。也算研究生阶段做的最后一件和科研相关的事情了。
一、回顾TI提供的FLASH_API例程中代码的含义
1. 首先是引用使用FLASH_API需要的头文件
#include "driverlib.h"
#include "device.h"

// Include Flash API include file
#include "F021_F28004x_C28x.h"


// Include Flash API example header file
#include "flash_programming_f28004x.h"
2.定义一些后续会用到的常量、变量以及函数
// Length (in 16-bit words) of data buffer used for program
#define  WORDS_IN_FLASH_BUFFER    0xFF

//Data Buffers used for program operation using the flash API program function
#pragma  DATA_SECTION(Buffer,"DataBufferSection");
uint16   Buffer[WORDS_IN_FLASH_BUFFER + 1];
uint32   *Buffer32 = (uint32 *)Buffer;

// Prototype of the functions used in this example
void Example_Error(Fapi_StatusType status);
void Example_Done(void);
void Example_CallFlashAPI(void);
void FMSTAT_Fail(void);
3. 介绍main函数中完成flash的一系列操作:
3.1进行一系列的初始化操作,包括时钟、GPIO管脚、中断等等:
    // Initialize device clock and peripherals
	// Copy the Flash initialization code from Flash to RAM
    // Copy the Flash API from Flash to RAM
    // Configure Flash wait-states, fall back power mode, performance features and ECC
    Device_init();

    // Initialize GPIO
    Device_initGPIO();

    // Initialize PIE and clear PIE registers. Disables CPU interrupts.
    Interrupt_initModule();


    // Initialize the PIE vector table with pointers to the shell Interrupt
    // Service Routines (ISR).
    Interrupt_initVectorTable();

    // Enable Global Interrupt (INTM) and realtime interrupt (DBGM)
    EINT;
    ERTM;
3.2 进入Example_CallFlashAPI函数:
3.2.1 完成Flash的初始化:
使用Example_Error()函数的定义如下:
extern Fapi_StatusType Fapi_initializeAPI(
Fapi_FmcRegistersType *poFlashControlRegister, uint32 u32HclkFrequency);
可以参考例程中给出的方法使用它完成初始化工作,下面的if函数是用来判断是否正确完成了对FLASH进行的操作。这部分内容在加入到程序中后可以作为调试程序的参考节点。
    // Initialize the Flash API by providing the Flash register base address
    // and operating frequency.
    // This function is required to initialize the Flash API based on System frequency
    // before any other Flash API operation can be performed.
    // This function must also be called whenever System frequency or RWAIT is changed.
    oReturnCheck = Fapi_initializeAPI(F021_CPU0_BASE_ADDRESS, 100);

    if(oReturnCheck != Fapi_Status_Success)
    {
        // Check Flash API documentation for possible errors
        Example_Error(oReturnCheck);
    }
3.2.2 选择FLASH的扇区
使用的驱动板为F280049C,它的Flash被分为了bank0和bank1两部分,这两部分在使用时只能二选一,因此在对flash进行操作前需要明确所使用的bank是哪一个。在TI提供的例程中使用 Fapi_setActiveFlashBank来完成操作。
对于F280049C这个函数可以写入bank0和bank1两个参数,它的定义如下:extern Fapi_StatusType Fapi_setActiveFlashBank(Fapi_FlashBankType oFlashBank);
 // Initialize the Flash banks and FMC for erase and program operations.
    // Fapi_setActiveFlashBank() function sets the Flash banks and FMC for further
    // Flash operations to be performed on the banks.

    oReturnCheck = Fapi_setActiveFlashBank(Fapi_FlashBank0);

    if(oReturnCheck != Fapi_Status_Success)
    {
        // Check Flash API documentation for possible errors
        Example_Error(oReturnCheck);
    }
同样在完成操作后,通过oReturnCheck返回的数值来判断该操作是否正常进行。
3.2.3 对FLASH特定扇区进行操作。
对一块FLASH扇区操作需要完成:擦除——写入——验证三个阶段。这三个步骤缺一不可,尤其是擦除的操作,即便flash中没有写入数据,也需要先进行擦除再写入数据,要不然会报错!
首先是对flash特定扇区中的数据进行擦除:
 // Erase Flash Bank0 sector6
    oReturnCheck = Fapi_issueAsyncCommandWithAddress(Fapi_EraseSector,
                                        (uint32 *)Bzero_Sector6_start);

    // Wait until FSM is done with erase sector operation
    while (Fapi_checkFsmForReady() != Fapi_Status_FsmReady){}

	if(oReturnCheck != Fapi_Status_Success)
	{
		// Check Flash API documentation for possible errors
		Example_Error(oReturnCheck);
	}
其中的while循环是在等待这个操作完成,才进行检验。
接下来是写入数据+验证,这段代码比较长,把它分成了几个部分来详细的解释一下,这个地方确实也是后面移植代码最需要理解的部分。因为example没有特定的意义,我们只是在这里定义了一个长度为0xff的数组,在里面写入数据,按照这个for循环的内容,Buffer数组中应该写入了0-255总共256个数据。
 for(i=0; i <= WORDS_IN_FLASH_BUFFER; i++)
    {
        Buffer[i] = i;
    }
然后使用FLASH_API中提供的Fapi_issueProgrammingCommand函数来完成写入数据的工作,首先看下对函数的定义能够帮助我们更好的理解这个函数的使用:
extern Fapi_StatusType Fapi_issueProgrammingCommand(
                                            uint32 *pu32StartAddress,
                                            uint16 *pu16DataBuffer,
                                            uint16  u16DataBufferSizeInWords,
                                            uint16 *pu16EccBuffer,
                                            uint16  u16EccBufferSizeInBytes,
                                            Fapi_FlashProgrammingCommandsType oMode
                                            );
使用这个函数需要写入6个变量,其中第六项mode的设定有4中选项:
typedef enum
{
   Fapi_AutoEccGeneration, /* This is the default mode for the command and will auto generate the ecc for the provided data buffer */
   Fapi_DataOnly,       /* Command will only process the data buffer */
   Fapi_EccOnly,        /* Command will only process the ecc buffer */
   Fapi_DataAndEcc         /* Command will process data and ecc buffers */
}  ATTRIBUTE_PACKED Fapi_FlashProgrammingCommandsType;
一般使用Fapi_AutoEccGeneration自动生成ecc的数据,这是最常见的方式,手册和例程中也都使用了这种方式。在这种方式下不需要手动定义EccBuffer的相关内容,也就是说uint16 *pu16EccBuffer, uint16 u16EccBufferSizeInBytes,这两项参数直接写0即可。
例程中给出了一段对ECC操作的简单描述:
A data buffer of max 8 16-bit words can be supplied to the program function.
Each word is programmed until the whole buffer is programmed or a problem is found. However to program a buffer that has more than 8 words, program function can be called in a loop to program 8 words for each loop iteration until the whole buffer is programmed.
Remember that the main array flash programming must be aligned to 64-bit address boundaries and each 64 bit word may only be programmed once per write/erase cycle. Meaning the length of the data buffer (3rd parameter for Fapi_issueProgrammingCommand() function) passed to the program function can only be either 4 or 8.
标红的位置大概意思是说: 1. 这个函数每次只能写入8个字,超过八个字要使用循环,每次循环写入八个字来实现更多内容的存储。2. 主阵列闪存编程必须与 64 位地址边界对齐,并且每个 64 位字在每个写入/擦除周期只能编程一次,这也就意味着第三个参数只能是4或者8。
例程中给的就是一次写入八个字,然后使用循环来完成256个字的写入:
    for(i=0, u32Index = Bzero_Sector6_start;
       (u32Index < (Bzero_Sector6_start + WORDS_IN_FLASH_BUFFER)) &&
       (oReturnCheck == Fapi_Status_Success); i+= 8, u32Index+= 8)
    {
		oReturnCheck = Fapi_issueProgrammingCommand((uint32 *)u32Index, Buffer+i, 8,
																				 0, 0, Fapi_AutoEccGeneration);

		// Wait until the Flash program operation is over
		while(Fapi_checkFsmForReady() == Fapi_Status_FsmBusy);

		if(oReturnCheck != Fapi_Status_Success)
		{
			// Check Flash API documentation for possible errors
			Example_Error(oReturnCheck);
		}

		// Read FMSTAT register contents to know the status of FSM after
		// program command to see if there are any program operation related errors
		oFlashStatus = Fapi_getFsmStatus();
		if(oFlashStatus != 0)
		{
			//Check FMSTAT and debug accordingly
			FMSTAT_Fail();
		}

		// Verify the programmed values.  Check for any ECC errors.
		// The program command itself does a verify as it goes.
		// Hence program verify by CPU reads (Fapi_doVerify()) is optional.
        oReturnCheck = Fapi_doVerify((uint32 *)u32Index,
                                     4, Buffer32+(i/2),
                                     &oFlashStatusWord);

		if(oReturnCheck != Fapi_Status_Success)
		{
			// Check Flash API documentation for possible errors
			Example_Error(oReturnCheck);
		}
    }
最后使用Fapi_doVerify函数来验证写入的数据是否正确,然后再根据关键字返回值来判断操作。
二、根据程序进行移植
大体介绍完例程的流程后,我们首先需要找到程序里面要写入flash的内容是什么,也就是哪部分内容需要进行ecc效验。对于我们的项目,需要保证数据在某些环境下的准确性,因此需要找到程序中的data部分,对这部分内容进行效验。
1. 怎么在代码中确定各个部分的存储位置?
主要有两个方法:
View——Memory Allocation里面直接找.data的存储位置:
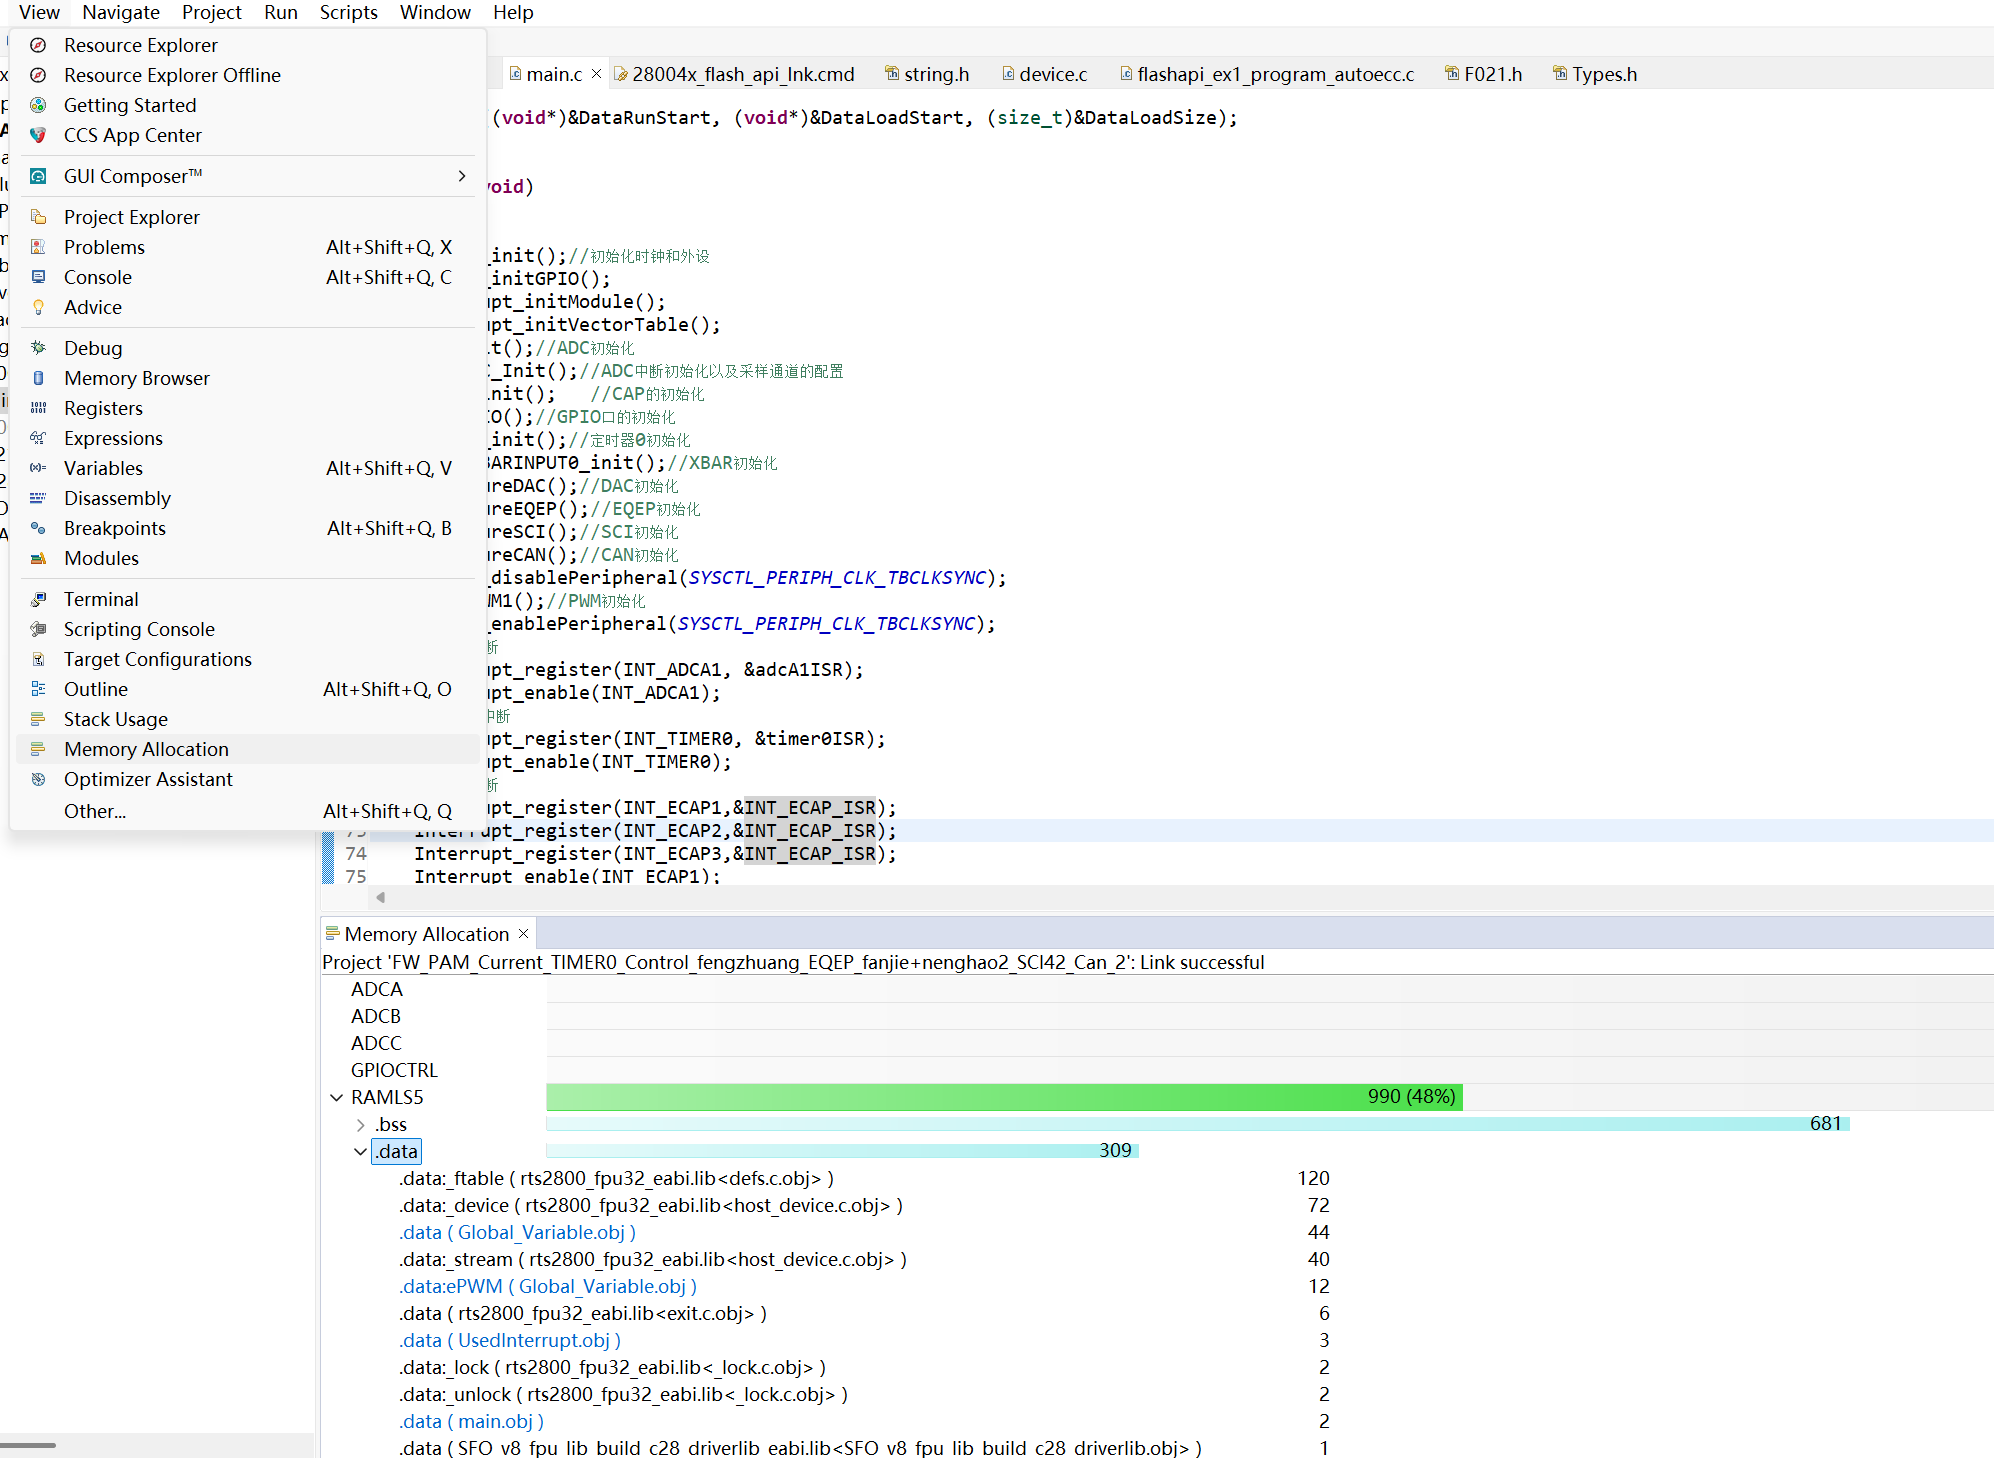
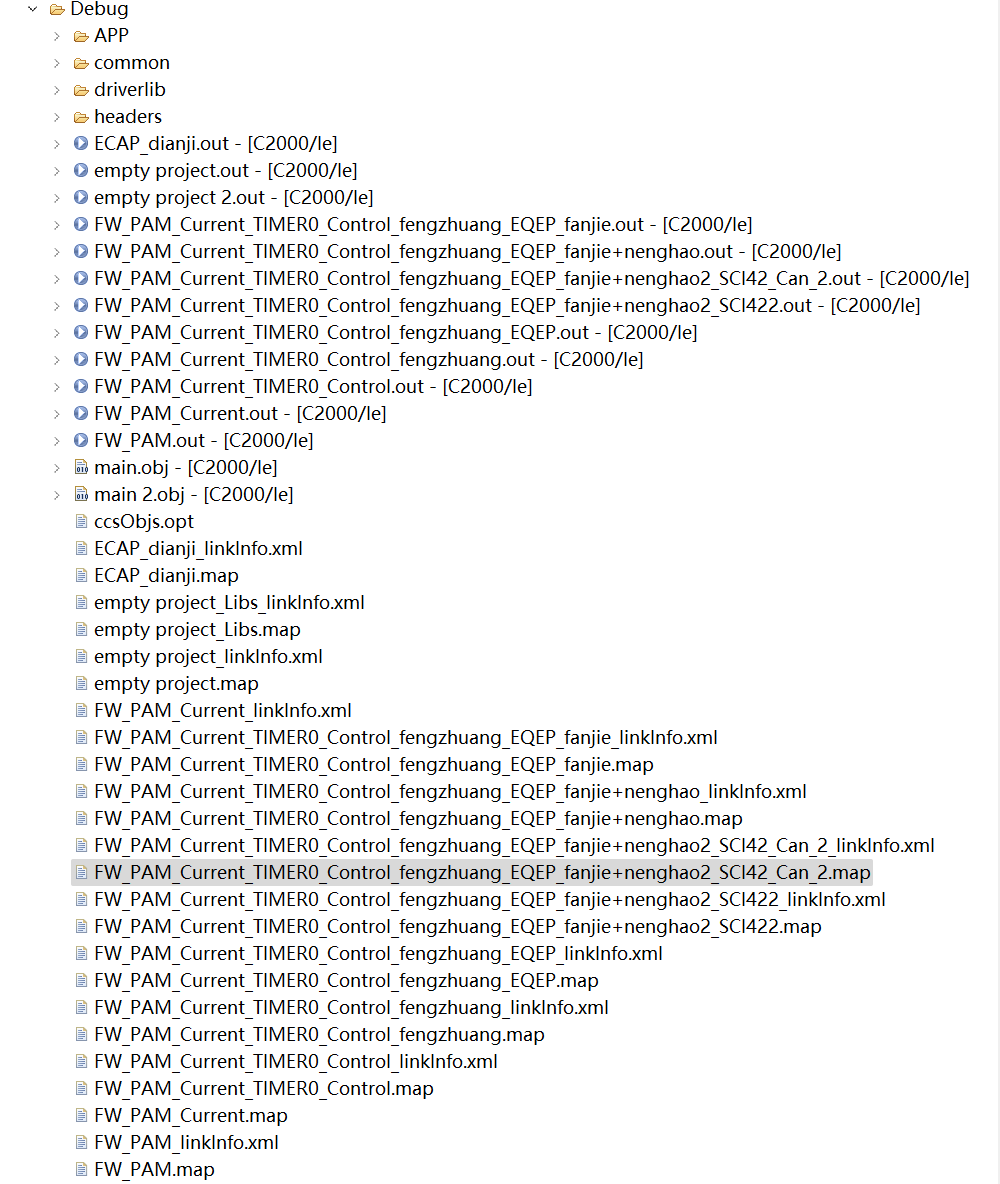
找到project中debug文件夹下的.map文件(更推荐这种),有时候这个文件夹里面可能存在不止一个.map文件,这里一定要找到和我们程序名字对应的.map文件:
 找到.map后在代码中可以找到具体的地址:
.data      1    0000aaaa    00000135     UNINITIALIZED
                  0000aaaa    00000078     rts2800_fpu32_eabi.lib : defs.c.obj (.data:_ftable)
                  0000ab22    00000048                            : host_device.c.obj (.data:_device)
                  0000ab6a    0000000c     Global_Variable.obj (.data:ePWM)
                  0000ab76    00000006     rts2800_fpu32_eabi.lib : exit.c.obj (.data)
                  0000ab7c    00000003     UsedInterrupt.obj (.data)
                  0000ab7f    00000001     SFO_v8_fpu_lib_build_c28_driverlib_eabi.lib : SFO_v8_fpu_lib_build_c28_driverlib.obj (.data)
                  0000ab80    0000002c     Global_Variable.obj (.data)
                  0000abac    00000028     rts2800_fpu32_eabi.lib : host_device.c.obj (.data:_stream)
                  0000abd4    00000002                            : _lock.c.obj (.data:_lock)
                  0000abd6    00000002                            : _lock.c.obj (.data:_unlock)
                  0000abd8    00000002     main.obj (.data)
                  0000abda    00000001     rts2800_fpu32_eabi.lib : defs.c.obj (.data)
                  0000abdb    00000001                            : errno.c.obj (.data)
                  0000abdc    00000001                            : fopen.c.obj (.data)
                  0000abdd    00000001                            : memory.c.obj (.data)
                  0000abde    00000001                            : open.c.obj (.data)
这也就确定了我们要将0x0000AAAA到0x0000ABDE处的数据写入到FLASH的某个扇区中。
2.选择一个合适的扇区,flash的bank0中提供了sector0-sector15这16个扇区,根据Memory Allocation的内存分配结果,我们要优先选择没有被占用的内存。
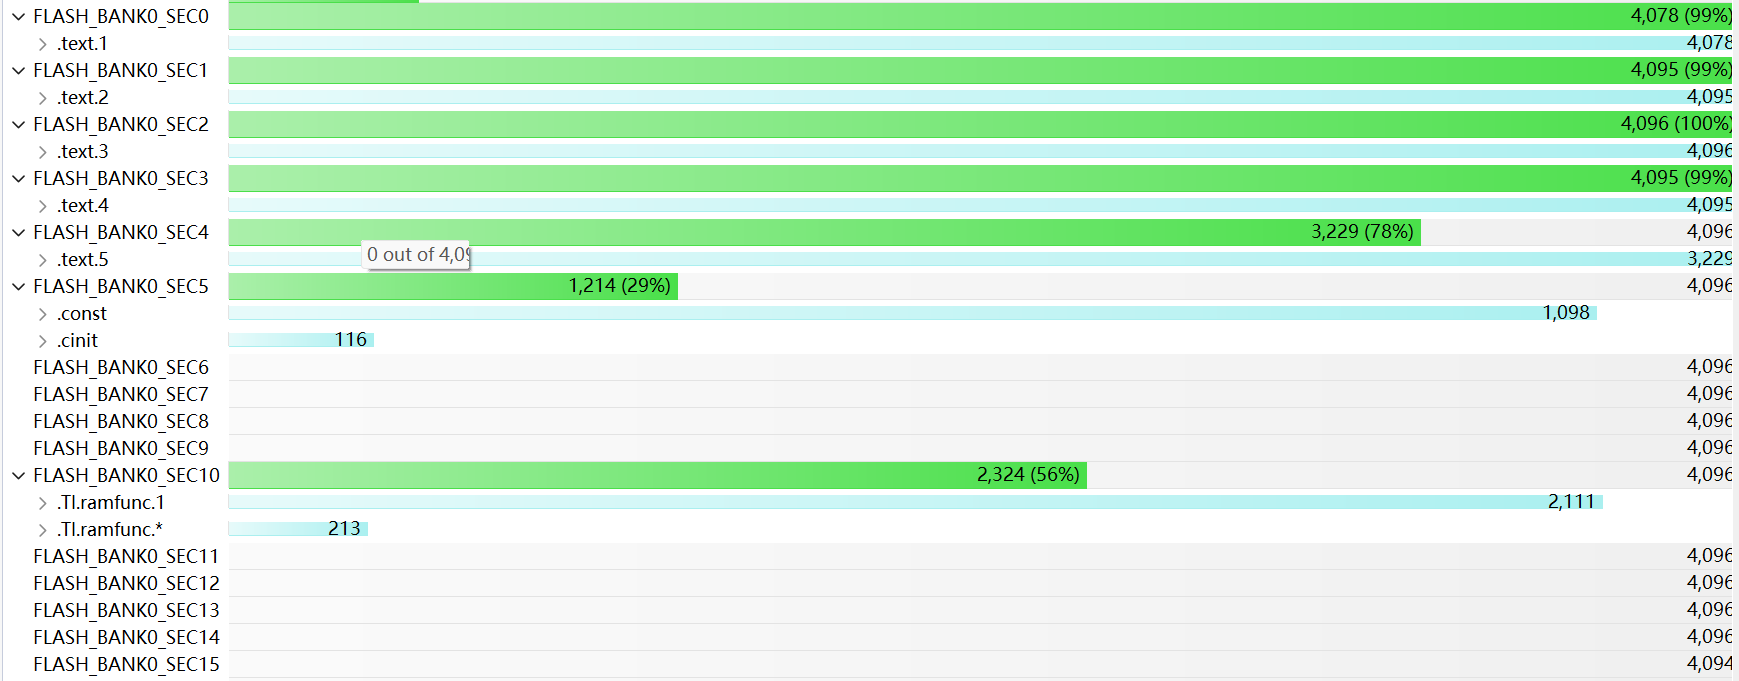
根据内存分配的结果,我最终选择了SEC6用于操作。
3. 按照例程的操作顺序来移植代码
初始化、定义操作区域的代码没有区别可以直接照搬,为了方便后面的调试,我添加了printf语句来显示代码进行到了哪个步骤:
Fapi_StatusType  oReturnCheck;
    Fapi_FlashStatusType  oFlashStatus;
    Fapi_FlashStatusWordType  oFlashStatusWord;
    uint16 i=0;
    uint32 u32Index = 0;

    oReturnCheck = Fapi_initializeAPI(F021_CPU0_BASE_ADDRESS, 100);

    if(oReturnCheck != Fapi_Status_Success)
    {
        // Check Flash API documentation for possible errors
        Example_Error(oReturnCheck);
    }
    else
    {
        printf("初始化成功\n");
    }


    oReturnCheck = Fapi_setActiveFlashBank(Fapi_FlashBank0);
    if(oReturnCheck != Fapi_Status_Success)
    {
        // Check Flash API documentation for possible errors
        Example_Error(oReturnCheck);
    }
    else
    {
            printf("Bank0成功激活\n");
    }

    // Erase Flash Bank0 sector6
    oReturnCheck = Fapi_issueAsyncCommandWithAddress(Fapi_EraseSector,
                                        (uint32 *)Bzero_Sector6_start);

    // Wait until FSM is done with erase sector operation
    while (Fapi_checkFsmForReady() != Fapi_Status_FsmReady){}

    if(oReturnCheck != Fapi_Status_Success)
    {
        // Check Flash API documentation for possible errors
        Example_Error(oReturnCheck);
    }
    else
    {
            printf("擦除扇区数据...\n");
    }

    oFlashStatus = Fapi_getFsmStatus();
    if(oFlashStatus != 0)
    {
        FMSTAT_Fail();
    }

    oReturnCheck = Fapi_doBlankCheck((uint32 *)Bzero_Sector6_start,
                   Sector8KB_u32length,
                   &oFlashStatusWord);

    if(oReturnCheck != Fapi_Status_Success)
    {
        // Check Flash API documentation for error info
        Example_Error(oReturnCheck);
    }
    else
    {
            printf("数据成功擦除\n");
    }
下面是写入数据的内容,我们要将0x0000AAAA处的数据写入到FLASH中来进行ecc效验,首先需要将这些数据送入缓冲区Buffer内,根据例程的操作,需要定义一些参数:
#define  WORDS_IN_FLASH_BUFFER    0xFF
uint16_t Buffer[WORDS_IN_FLASH_BUFFER + 1];
volatile uint16_t *data_ptr = (volatile uint16_t *)0x0000AAAA;
#define  DATA_SIZE_BYTES          0x0133
#define  DATA_SIZE_WORDS          (DATA_SIZE_BYTES+1)/2
将data的数据放入缓冲区内,这里也是使用了一个printf函数来方便查看程序的运行情况:
   for (i = 0; i < DATA_SIZE_WORDS && i <= WORDS_IN_FLASH_BUFFER; i++) {
        Buffer[i] = data_ptr[i];
        printf("data_ptr addr = 0x%p, value addr = 0x%04X, value buff = 0x%04X\n", data_ptr + i, data_ptr[i], Buffer[i]);
    }
    printf("写入完成\n");
然后仿照例程将buffer的内容写入sector6:
    for (i=0, u32Index = Bzero_Sector6_start;
        (u32Index < (Bzero_Sector6_start + WORDS_IN_FLASH_BUFFER)) &&
        (oReturnCheck == Fapi_Status_Success); i+= 8, u32Index+= 8)
    {
        //只能分块写入
            oReturnCheck = Fapi_issueProgrammingCommand((uint32 *)u32Index, Buffer+i, 8,
                                                        0, 0, Fapi_AutoEccGeneration);
            while(Fapi_checkFsmForReady() == Fapi_Status_FsmBusy);
    }

    if(oReturnCheck != Fapi_Status_Success)
    {
        // Check Flash API documentation for possible errors
        printf("Flash 写入失败,返回状态码 = %d\n", oReturnCheck);
        Example_Error(oReturnCheck);
    }
    else
    {
        printf("data字段成功写入\n");
    }
最后整体的函数如下:
void Example_CallFlashAPI(void)
{
    Fapi_StatusType  oReturnCheck;
    Fapi_FlashStatusType  oFlashStatus;
    Fapi_FlashStatusWordType  oFlashStatusWord;
    uint16 i=0;
    uint32 u32Index = 0;

    oReturnCheck = Fapi_initializeAPI(F021_CPU0_BASE_ADDRESS, 100);

    if(oReturnCheck != Fapi_Status_Success)
    {
        // Check Flash API documentation for possible errors
        Example_Error(oReturnCheck);
    }
    else
    {
        printf("初始化成功\n");
    }


    oReturnCheck = Fapi_setActiveFlashBank(Fapi_FlashBank0);
    if(oReturnCheck != Fapi_Status_Success)
    {
        // Check Flash API documentation for possible errors
        Example_Error(oReturnCheck);
    }
    else
    {
            printf("Bank0成功激活\n");
    }

    // Erase Flash Bank0 sector6
    oReturnCheck = Fapi_issueAsyncCommandWithAddress(Fapi_EraseSector,
                                        (uint32 *)Bzero_Sector6_start);

    // Wait until FSM is done with erase sector operation
    while (Fapi_checkFsmForReady() != Fapi_Status_FsmReady){}

    if(oReturnCheck != Fapi_Status_Success)
    {
        // Check Flash API documentation for possible errors
        Example_Error(oReturnCheck);
    }
    else
    {
            printf("擦除扇区数据...\n");
    }

    oFlashStatus = Fapi_getFsmStatus();
    if(oFlashStatus != 0)
    {
        FMSTAT_Fail();
    }

    oReturnCheck = Fapi_doBlankCheck((uint32 *)Bzero_Sector6_start,
                   Sector8KB_u32length,
                   &oFlashStatusWord);

    if(oReturnCheck != Fapi_Status_Success)
    {
        // Check Flash API documentation for error info
        Example_Error(oReturnCheck);
    }
    else
    {
            printf("数据成功擦除\n");
    }

    for (i = 0; i < DATA_SIZE_WORDS && i <= WORDS_IN_FLASH_BUFFER; i++) {
        Buffer[i] = data_ptr[i];
        printf("data_ptr addr = 0x%p, value addr = 0x%04X, value buff = 0x%04X\n", data_ptr + i, data_ptr[i], Buffer[i]);
    }
    printf("写入完成\n");

    for (i=0, u32Index = Bzero_Sector6_start;
        (u32Index < (Bzero_Sector6_start + WORDS_IN_FLASH_BUFFER)) &&
        (oReturnCheck == Fapi_Status_Success); i+= 8, u32Index+= 8)
    {
        //只能分块写入
            oReturnCheck = Fapi_issueProgrammingCommand((uint32 *)u32Index, Buffer+i, 8,
                                                        0, 0, Fapi_AutoEccGeneration);
            while(Fapi_checkFsmForReady() == Fapi_Status_FsmBusy);
    }

    if(oReturnCheck != Fapi_Status_Success)
    {
        // Check Flash API documentation for possible errors
        printf("Flash 写入失败,返回状态码 = %d\n", oReturnCheck);
        Example_Error(oReturnCheck);
    }
    else
    {
        printf("data字段成功写入\n");
    }
  // 可选:进一步 FSM 状态确认
    oFlashStatus = Fapi_getFsmStatus();
    if (oFlashStatus != 0)
    {
        FMSTAT_Fail();
    }

    Example_Done();
}

void Example_Error(Fapi_StatusType status)
{
    // 记录错误、重启、报警等
        printf("Flash Error! Status = %d\n", status);
        while(1);  // 或触发软复位、CAN上报等
}

void Example_Done(void)
{
    printf("Flash ECC效验完成\n");
}

void FMSTAT_Fail(void)
{
        printf("FMSTAT Flash 状态异常!\n");
        while(1);
}
三、移植过程中遇到的问题
1. 在例程中使用的flash_programming_f28004x.h是之前程序里面没有的,在将它复制到include文件夹后,一定要记得在project中将include重新添加进路径,要不然程序无法识别flash函数中使用的一些参数。
添加路径的方法是右键项目选择Propertise——C2000 Compiler——Include Options,选择右上角处绿色的带有加号的图标,然后再工作区选择include文件夹,把他重新添加一下: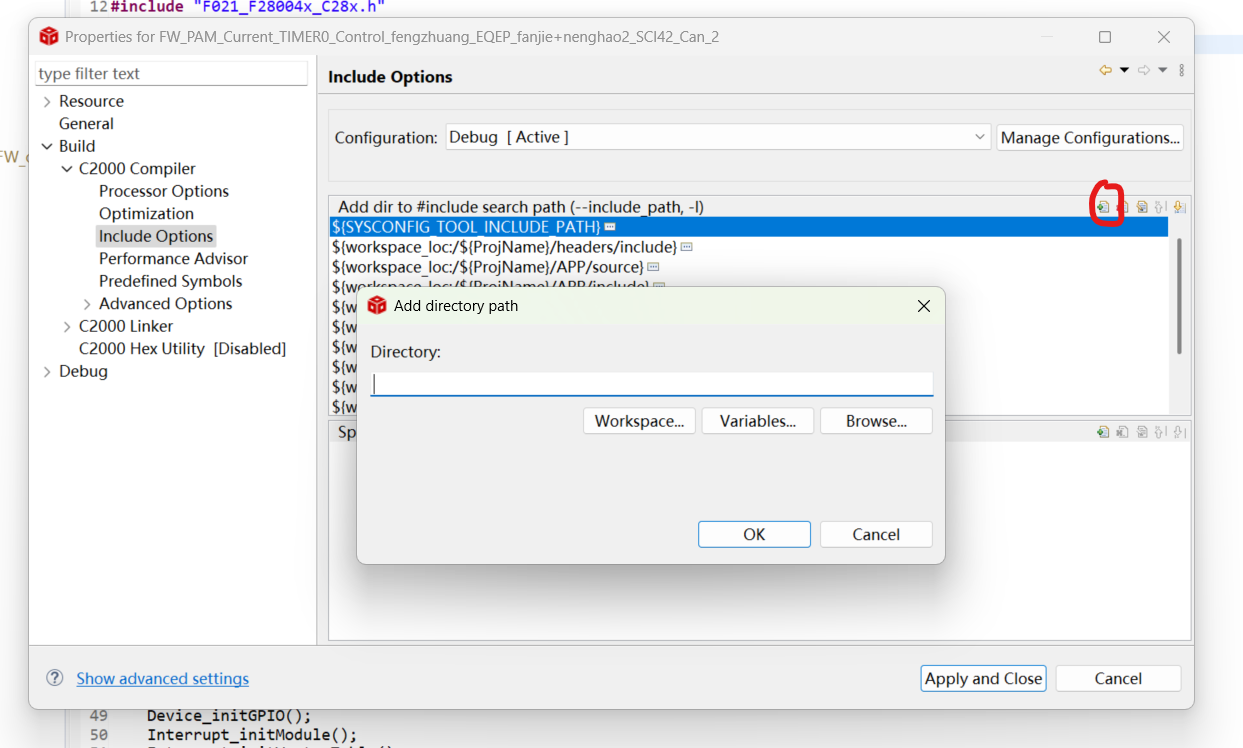
2. 编译没有问题后,进行烧写,但是一到数据写入就出现报错,由于函数的引用没有问题,分析后认为这是因为内存的分配发生了冲突所导致的。再和例程对比后发现我没有定义:#pragma DATA_SECTION(Buffer, "DataBufferSection")
这行代码是帮助我们将Buffer定义到特定的位置,而不是随意去安排它的位置。flash要求数据必须从RAM中读取,如果随机取安排buffer的位置有可能会被写入放有.bss或.data的区域内,程序会出现错误。此时也需要再cmd文件中添加下面的代码:DataBufferSection : > RAMM0, PAGE = 0, ALIGN(4),来讲buffer定义在一个‘与世无争’RAM中。
3. 烧录后我又发现了问题,写入buffer的数据会突然全部变成32.这个问题困惑了我很久,知道我发现删除掉printf函数就可以正确的把data中的数值写入到buffer中,我认为这是由于printf函数再分配内存时影响到了buffer。我求助gpt后它给我的答案是:
printf() 在 F28004x 等 C2000 芯片中使用了内部 stdio 缓冲区,该缓冲区可能被默认放到了你程序中紧邻 Buffer[] 的区域,尤其当你用了 RAMM0这样小的 RAM 区。它覆盖了 Buffer[] 的内容,导致你看到了全部 0x32 的数据。
根据它的建议,我将RAMM0修改为了RAMLS4,相应的cmd修改为:DataBufferSection : > RAMM0, PAGE = 0, ALIGN(4)。修改后再添加printf函数也不会对buffer的数据造成影响。
以上就是今天的全部内容,后续的一些细节还需要自己再进行梳理。


 1万+
1万+

 被折叠的 条评论
为什么被折叠?
被折叠的 条评论
为什么被折叠?
 到【灌水乐园】发言


