


 本文详细介绍了如何在Spring Boot项目中集成Spring Security,实现基于URL的权限控制。通过在pom.xml中引入依赖,修改HelloController,创建配置类WebSecurityConfig,并在templates中放置html文件,实现了用户登录验证和特定页面访问权限的限制。
接着第一篇的例子
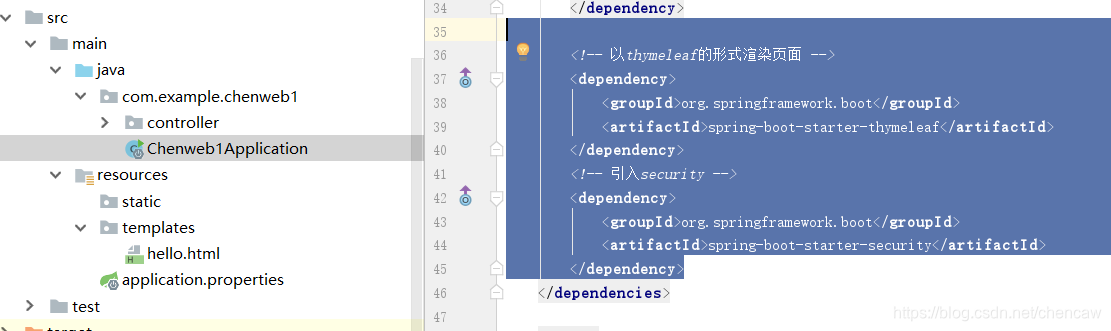
1、在pom.xml中加入
<!-- 引入security -->
<dependency>
    <groupId>org.springframework.boot</groupId>
    <artifactId>spring-boot-starter-security</artifactId>
</dependency>
2 、HelloController修改为
package com.example.chenweb1.controller;

import org.springframework.stereotype.Controller;
import org.springframework.web.bind.annotation.RequestMapping;
//import org.springframework.web.bind.annotation.RequestMethod;

@Controller
public class HelloController {
    //@RequestMapping(value = "/hello",method = RequestMethod.GET)
    @RequestMapping(value = "/hello")
    //  @ResponseBody
    public String home() {
        // return "Hello ,spring boot!";
        return "/hello";
    }
    @RequestMapping(value = "/index")
    public String index() {
        System.out.println("chenout--");
        return "/index";
    }
    @RequestMapping(value = "/login")
    public String login() {
        return "/login";
    }
}
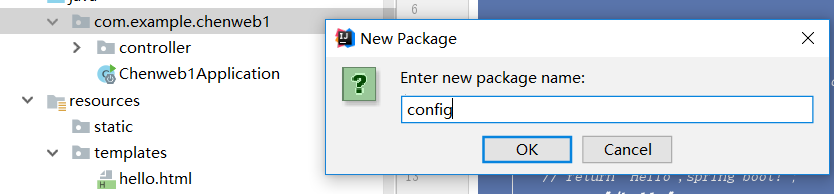
3、创建config包
4、在congfig创建配置类WebSecurityConfig
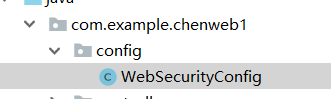
package com.example.chenweb1.config;

import org.springframework.beans.factory.annotation.Autowired;
import org.springframework.context.annotation.Bean;
import org.springframework.context.annotation.Configuration;
import org.springframework.security.config.annotation.authentication.builders.AuthenticationManagerBuilder;
import org.springframework.security.config.annotation.web.builders.HttpSecurity;
import org.springframework.security.config.annotation.web.configuration.EnableWebSecurity;
import org.springframework.security.config.annotation.web.configuration.WebSecurityConfigurerAdapter;
import org.springframework.security.crypto.password.NoOpPasswordEncoder;

@Configuration
@EnableWebSecurity // 注解开启Spring Security的功能
//WebSecurityConfigurerAdapter:重写它的方法来设置一些web的安全西街
public class WebSecurityConfig extends WebSecurityConfigurerAdapter {

    @Bean
    public static NoOpPasswordEncoder passwordEncoder() {
        return (NoOpPasswordEncoder) NoOpPasswordEncoder.getInstance();
    }
        @Override
    protected void configure(HttpSecurity http) throws Exception {
        http
                .authorizeRequests()  //定义哪些url需要保护,哪些url不需要保护
                .antMatchers("/chen", "/message/").permitAll()    //定义不需要认证就可以访问
                .anyRequest().authenticated()
                .and()
                .formLogin()
                .loginPage("/login")  //定义当需要用户登录时候,转到的登录页面
                .permitAll()
                .and()
                .logout()
                .permitAll();
        http.csrf().disable();
        http.formLogin().defaultSuccessUrl("/index");
    }
    @Autowired
    public void configureGlobal(AuthenticationManagerBuilder auth) throws Exception {
        auth
                .inMemoryAuthentication()
                .withUser("user").password("111").roles("USER");
        //在内存中创建了一个用户,该用户的名称为user,密码为password,用户角色为USER
    }
}
5、在templates中放入三个文件

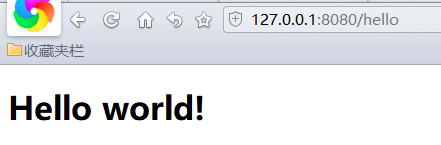
(1)hello.html
<!DOCTYPE html>
<html  xmlns:th="http://www.thymeleaf.org">
<head>
    <meta charset="UTF-8"/>
    <title>Hello World!</title>
</head>
<body>
<h1>Hello world!</h1>
</body>
</html>
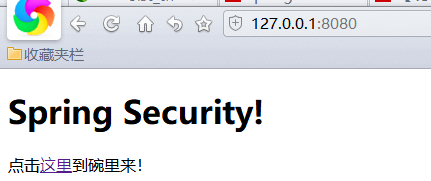
(2)index.html
<!DOCTYPE html>
<html  xmlns:th="http://www.thymeleaf.org">
<head>
    <meta charset="UTF-8"/>
    <title>Security</title>
</head>
<body>
<h1>Spring Security!</h1>
<p>点击<a th:href="@{/hello}">这里</a>到碗里来!</p>
</body>
</html>
(3)login.html
<!DOCTYPE html>
<html  xmlns:th="http://www.thymeleaf.org">
<head>
    <title>Spring Security Example </title>
</head>
<body>
<div th:if="${param.error}">
    用户名或密码错
</div>
<div th:if="${param.logout}">
    您已注销成功
</div>
<form th:action="@{/login}" method="post">
    <div><label> 用户名 : <input type="text" name="username"/> </label></div>
    <div><label> 密  码 : <input type="password" name="password"/> </label></div>
    <div><input type="submit" value="登录"/></div>
</form>
</body>
</html>
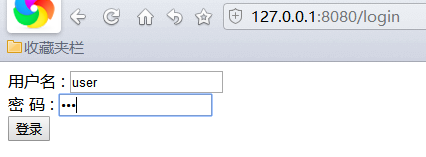
6、启动后在网页中输入,输入用户名user,密码111


 5万+
5万+

 被折叠的 条评论
为什么被折叠?
被折叠的 条评论
为什么被折叠?
 到【灌水乐园】发言


