


But you might not know much about the technology that UIView is built upon: CALayers! At least I didn’t, for quite a while.
It’s good to know a bit about CALayers, because you can use them to create some neat visual effects really easily. They’re also important to understand to work with Core Animation, which we’ll be discussing in a future tutorial.
In this tutorial, you’re going to learn the basics of using CALayers by making a simple app to create a layer and experiment with how it looks. In the process, you’ll learn what layers are, some neat properties you can set, and how to put images and custom-drawn content inside.
This tutorial assumes a basic familiarity with iPhone programming. If you are completely new, you might want to begin with the How To Create A Simple iPhone App Tutorial Series first.
So let’s get layering!
What Are CALayers?
CALayers are simply classes representing a rectangle on the screen with visual content.
“But wait a darn minute,” you may say, “that’s what UIViews are for!” That’s true, but there’s a trick to that: every UIView contains a root layer that it draws to! You can access this layer (created for you by default) with following bit of code:
| CALayer *myLayer = myView.layer; |
The neat thing about the CALayer class is that it contains a lot of properties that you can set on it to affect the visual appearance, such as:
- The size and position of the layer
- The layer’s background color
- The contents of the layer (an image, or something drawn with Core Graphics)
- Whether the corners of the layers should be rounded
- Settings for applying a drop shadow to the layer
- Applying a stroke around the edges of the layer
- And much more!
You can use these properties to create some neat effects. For example, maybe you want to take an image, and put it in a white frame, and apply a shadow to it to make it look neat. Rather than whipping out Photoshop or creating a bunch of Core Graphics code, you can do this in a couple lines of code using CALayers!
The other neat thing about the properties on CALayer is that most of them are animatable. For example, you could start your image out with rounded corners, tap a button, and have it animate the corners back out to straight. This can make for some really neat effects!
You can use a CALayer on its own, or you can use one of the handy subclasses that are available, such as CAGradientLayer, CATextLayer, CAShapeLayer, and others. The default layer class for a UIView is the plain-old CALayer class, and that’s what you’ll be focusing on in this tutorial.
Getting Started
There’s no better way to understand using CALayers than to try them out yourself! So load up XCode, go to File\New Project, choose iOS\Application\View-based Application, and click “Choose…”. Name the project LayerFun, and click Save.
The View-based Application template starts with a single view controller, and as you know, each view controller has a root view. And as you learned above, every view has a root layer.
So now you’ll try this out for yourself by changing some properties on the view’s layer.
But first things first. To use CALayers and Core Animation, you need to use a framework that isn’t included by default in the View-based template: QuartzCore. So add it to your project by control-clicking the Frameworks group, selecting Add\Existing Framework…, and choosing QuartzCore.framework from the dropdown list.
Now that you’ve included QuartzCore, make the following changes to LayerFunViewController.m:
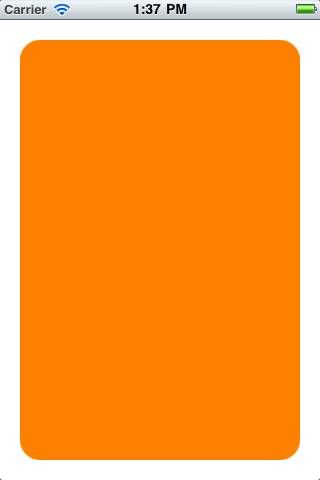
| // Import QuartzCore.h at the top of the file#import <QuartzCore/QuartzCore.h> // Uncomment viewDidLoad and add the following linesself.view.layer.backgroundColor = [UIColor orangeColor].CGColor;self.view.layer.cornerRadius = 20.0;self.view.layer.frame =CGRectInset(self.view.layer.frame, 20, 20); |
Let’s go over this bit by bit since this is new stuff:
- To get a pointer to the layer for the view, you just use self.view.layer. Remember, you can the root view for a View Controller by calling self.view. Once you have the view, you can get its default layer (created automatically) by using view.layer. By default, the layer is a CALayer (not a subclass).
- Next you set the layer’s background color to orange. Note that the backgroundColor property actually takes a CGColor, but it’s easy to convert a UIColor to a CGColor by using the CGColor property.
- Next you round the corners a bit by setting the corner radius. The value you pass in is the radius of the circle which makes up the corner, and it chooses 20 here for a nice rounded edge.
- Finally, you shrink the frame a bit so it’s easier to see, by using the handy CGRectInset function. The CGRectInset function takes a frame and an amount to shrink it by (for both the X and Y), and returns a new frame.
Compile and run your code, and you should see a rounded orange rectangle in the middle of your screen:
CALayers and Sublayers
Just like UIViews can have subviews, CALayers can have sublayers as well. You can create a new CALayer very easily with the following line of code:
| CALayer *sublayer = [CALayer layer]; |
Once you have a CALayer, you can set any properties on it you’d like. But remember there’s one property you definitely have to set: it’s frame (or bounds/position). After all, the layer needs to know how big it is (and where it’s located) in order to draw itself! When you’re done, you can add your new layer as a sublayer of another layer by the following line of code:
| [myLayer addSublayer:sublayer]; |
Ok, now try this out for yourself by adding a simple sublayer to the view’s layer. Add the following lines of code inside viewDidLoad, right after where you left off last time:
| CALayer *sublayer = [CALayer layer];sublayer.backgroundColor = [UIColor blueColor].CGColor;sublayer.shadowOffset = CGSizeMake(0, 3);sublayer.shadowRadius = 5.0;sublayer.shadowColor = [UIColor blackColor].CGColor;sublayer.shadowOpacity = 0.8;sublayer.frame = CGRectMake(30, 30, 128, 192);[self.view.layer addSublayer:sublayer]; |
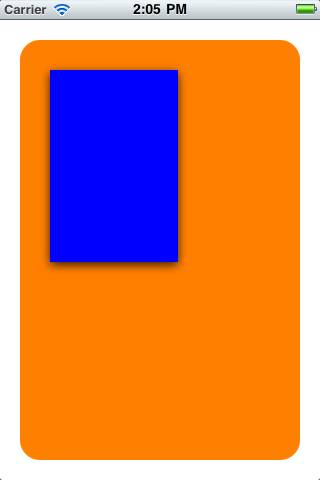
This creates a new layer, and sets a few properties on it – including a few you haven’t seen before to set shadows. You can see here how easy it is to set shadows on a layer – which can give some amazing effects with very little effort!
After setting the properties, it sets the frame of the layer and adds it as a sublayer to the view’s layer. Remember that these coordinates are relative to the parent layer’s frame, and since the parent layer begins at (20,20), the sublayer will be offset an additional (30,30) from that, so on the screen it will be at (50,50).
Compile and run your code, and you should now see a blue sublayer on the screen!
Setting CALayer Image Content
One of the coolest things about CALayers is that they can contain more than just plain colors. It’s extremely easy to have them contain images instead, for example.
So let’s replace the blue sublayer with an image instead. You can take a Default.jpg from one of your iPhone apps to use as a test, or you can download a splash screen from one of my apps.
Add the splash screen to your project, and inside viewDidLoad right before the last line you added that adds the sublayer to self.view.layer, add the following lines of code:
| sublayer.contents = (id) [UIImage imageNamed:@"BattleMapSplashScreen.jpg"].CGImage;sublayer.borderColor = [UIColor blackColor].CGColor;sublayer.borderWidth = 2.0; |
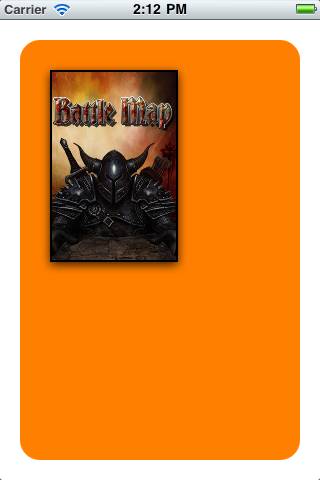
This sets the contents of the layer to an image (that’s literally all it takes!) and also sets the borderColor and borderWidth to set up a black stroke around the edges, to demonstrate how that works.
Compile and run your code, and you should now see the blue layer’s contents replaced with your splash screen image!
A Note about Corner Radius and Image Content
Now that you have this working, you might think it would be cool to round the corners of the splash screen as well, by setting the cornerRadius.
Well the problem is that as far as I can tell, if you set that on a CALayer with image contents, the image will still be drawn outside the corner radius boundary. You can solve this by setting sublayer.masksToBounds to YES, but if you do that the shadows won’t show up because they’ll be masked out!
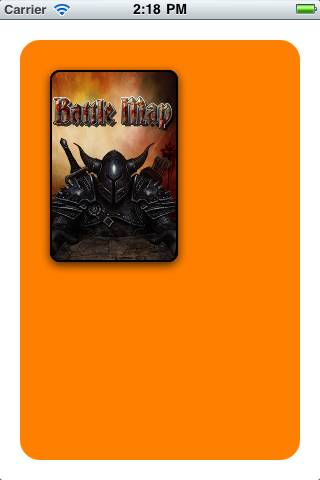
I found a workaround by creating two layers. The outer layer is just a colored CALayer with a border and a shadow. The inner layer contains the image, and is also rounded but set up to mask. That way, the outer layer can draw the shadow, and the inner layer can contain the image.
Try this out by modifying the code to create the sublayer as follows:
| CALayer *sublayer = [CALayer layer];sublayer.backgroundColor = [UIColor blueColor].CGColor;sublayer.shadowOffset = CGSizeMake(0, 3);sublayer.shadowRadius = 5.0;sublayer.shadowColor = [UIColor blackColor].CGColor;sublayer.shadowOpacity = 0.8;sublayer.frame =CGRectMake(30, 30, 128, 192);sublayer.borderColor = [UIColor blackColor].CGColor;sublayer.borderWidth = 2.0;sublayer.cornerRadius = 10.0;[self.view.layer addSublayer:sublayer]; CALayer *imageLayer = [CALayer layer];imageLayer.frame = sublayer.bounds;imageLayer.cornerRadius =10.0;imageLayer.contents = (id) [UIImage imageNamed:@"BattleMapSplashScreen.jpg"].CGImage;imageLayer.masksToBounds = YES;[sublayer addSublayer:imageLayer]; |
Compile and run your code, and now your image will have rounded corners!
CALayer and Custom Drawn Content
If you want to custom-draw the contents of a layer with Core Graphics instead of putting an image inside, that is quite easy too.
The idea is you set a class as the delegate of the layer, and that class needs to implement a method named drawLayer:inContext. This can contain Core Graphics drawing code to draw anything you want in that space.
Let’s try this out by adding a new layer, and drawing a pattern inside it. You’ll set the view controller as the delegate of the layer, and implement the drawLayer:inContext method to draw the pattern. As for the pattern drawing code, you’ll be using the same code as in the Core Graphics 101: Patternstutorial posted earlier on this site.
Add the following code at the bottom of your viewDidLoad to add a new layer that will be custom drawn:
| CALayer *customDrawn = [CALayer layer];customDrawn.delegate = self;customDrawn.backgroundColor = [UIColor greenColor].CGColor;customDrawn.frame = CGRectMake(30, 250, 128, 40);customDrawn.shadowOffset = CGSizeMake(0, 3);customDrawn.shadowRadius = 5.0;customDrawn.shadowColor = [UIColor blackColor].CGColor;customDrawn.shadowOpacity =0.8;customDrawn.cornerRadius = 10.0;customDrawn.borderColor = [UIColor blackColor].CGColor;customDrawn.borderWidth =2.0;customDrawn.masksToBounds = YES;[self.view.layer addSublayer:customDrawn];[customDrawn setNeedsDisplay]; |
Most of the code here you’ve seen before (creating a layer, setting properties such as shadow/cornerRadius/border/masksToBounds), however there are two new pieces:
- First, it sets the delegate of the layer to self. This means that this object (self) will need to implement the drawLayer:inContext method to draw the contents of the layer.
- Second, after it adds the layer, it needs to tell the layer to refresh itself (and call drawLayer:inContext) by calling setNeedsDisplay. If you forget to call this, drawLayer:inContext will never be called, so the pattern won’t show up!
Next add the code to implement drawLayer:inContext, as shown below:
| void MyDrawColoredPattern (void *info, CGContextRef context) { CGColorRef dotColor = [UIColor colorWithHue:0 saturation:0 brightness:0.07alpha:1.0].CGColor; CGColorRef shadowColor = [UIColor colorWithRed:1 green:1 blue:1 alpha:0.1].CGColor; CGContextSetFillColorWithColor(context, dotColor); CGContextSetShadowWithColor(context, CGSizeMake(0, 1), 1, shadowColor); CGContextAddArc(context, 3, 3, 4, 0, radians(360), 0); CGContextFillPath(context); CGContextAddArc(context, 16, 16, 4, 0, radians(360), 0); CGContextFillPath(context); } - (void)drawLayer:(CALayer *)layer inContext:(CGContextRef)context { CGColorRef bgColor = [UIColor colorWithHue:0.6 saturation:1.0 brightness:1.0 alpha:1.0].CGColor; CGContextSetFillColorWithColor(context, bgColor); CGContextFillRect(context, layer.bounds); static const CGPatternCallbacks callbacks = { 0, &MyDrawColoredPattern, NULL }; CGContextSaveGState(context); CGColorSpaceRef patternSpace = CGColorSpaceCreatePattern(NULL); CGContextSetFillColorSpace(context, patternSpace); CGColorSpaceRelease(patternSpace); CGPatternRef pattern = CGPatternCreate(NULL, layer.bounds, CGAffineTransformIdentity, 24, 24, kCGPatternTilingConstantSpacing, true, &callbacks); CGFloat alpha = 1.0; CGContextSetFillPattern(context, pattern, &alpha); CGPatternRelease(pattern); CGContextFillRect(context, layer.bounds); CGContextRestoreGState(context);} |
This code is literally copied and pasted from the Core Graphics 101: Patterns tutorial (just with a different color, and using the passed in context and layer bounds), so we aren’t going to cover it again here. If you want to know what it does, refer to the above tutorial.
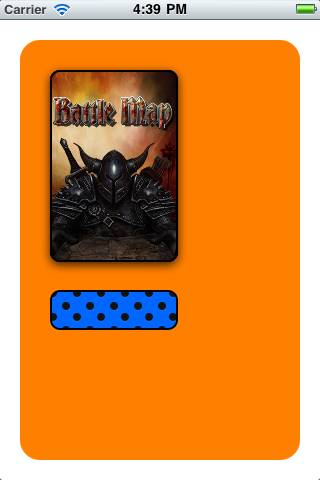
That’s it! Compile and run the code, and you should now see a blue grip pattern below the image.
Where To Go From Here?
Here is a sample project with all of the code we’ve developed in the above tutorial.
At this point, you should be familiar with the concepts of CALayers and how to create some neat effects with them really easily. In future tutorials, I’ll show you how you can animate CALayers using Core Animation, and use some really handy subclasses of CALayer such as CAGradientLayer, CATextLayer, and CAShapeLayer.
In the meantime, check out the Core Animation Programming Guide, which does a great job talking about Core Animation, and more details about CALayers.
If you’ve found some good ways to use CALayers in your projects, please share below! :]
 320


 扫一扫


 被折叠的 条评论
为什么被折叠?
 到【灌水乐园】发言


