


 本文详细介绍了TableLayout中行与列的布局管理,包括如何隐藏、拉伸和收缩列,以及使用GridLayout实现网格布局,设置了列数和行数,并讲解了子布局的控制方法。
TableLayout
行
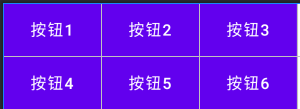
<TableRow></TableRow>标签代表一行 内部的布局都会在这一行内分布
    <TableRow>
        <Button
            android:layout_width="wrap_content"
            android:layout_height="wrap_content"
            android:text="按钮1"
            android:background="#FFF000"
            />
        <Button
            android:layout_width="wrap_content"
            android:layout_height="wrap_content"
            android:text="按钮2"
            android:background="#FFF000"
            />
        <Button
            android:layout_width="wrap_content"
            android:layout_height="wrap_content"
            android:text="按钮3"
            android:background="#FFF000"
            />
    </TableRow>
    <TableRow>
        <Button
            android:layout_width="wrap_content"
            android:layout_height="wrap_content"
            android:text="按钮4"
            android:background="#FFF000"
            />
        <Button
            android:layout_width="wrap_content"
            android:layout_height="wrap_content"
            android:text="按钮5"
            android:background="#FFF000"
            />
        <Button
            android:layout_width="wrap_content"
            android:layout_height="wrap_content"
            android:text="按钮6"
            android:background="#FFF000"
            />
    </TableRow>
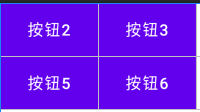
隐藏某一列
在TableLayout标签内有属性 android:collapseColumns=""可以设置隐藏哪一列
比如android:collapseColumns="0"隐藏第一列
效果如下
如果隐藏多列 使用android:collapseColumns="0,2"
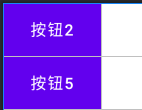
拉伸某一列
仍然是标签内属性 android:stretchColumns="1"代表第二列拉伸填充剩余位置
拉伸多列时同样采用“,”隔开 比如android:stretchColumns="0,2"
收缩某一列
当某一行排版不下时 可以使用 标签内的android:shrinkColumns=""属性对某一列进行收缩 使该行能完整排列下 使用方法同上。
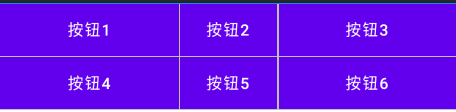
网格布局管理器
GridLayout
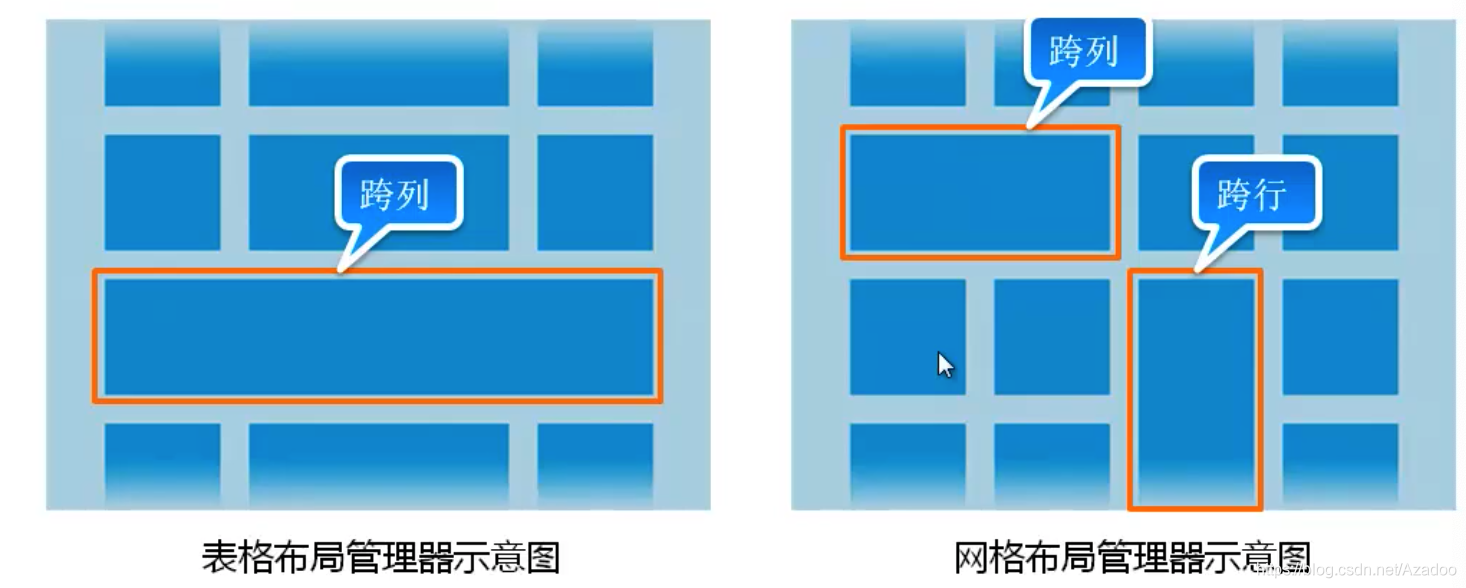
网格布局管理器可以打通不同行之间
设置列
GridLayout标签内部属性 android:columnCount="2"设置有两列
设置行
GridLayout标签内部属性 android:rowCount="2"设置有两列
注意:这种情况需要先设置布局是垂直排列才生效 android:orientation="vertical"
控制子布局
子布局内部
android:layout_column="0"设置在第1行
android:layout_row="0"设置在第1列

android:layout_rowSpan="2"设置跨行
android:layout_gravity="fill"需要设置填充
 android:layout_rowWeight="" 设置权重


 1575
1575

 被折叠的 条评论
为什么被折叠?
被折叠的 条评论
为什么被折叠?
 到【灌水乐园】发言


