


目录
引言
张量(Tensors):PyTorch的核心是张量。张量在PyTorch中是多维数组,类似于NumPy数组,但它们具有在GPU上运行的附加优势。它们是PyTorch的基础构件,用于各种操作。
1.Tensor张量
张量是一个统称,其中包含很多类型:
1.0阶张量:标量、常数,0-D Tensor
2.1阶张量:向量,1-D Tensor
3.2阶张量:矩阵,2-D Tensor
4.3阶张量
5.…
6.n阶张量
2.Tensor的创建
1)从数据直接创建
import torch
test1=torch.tensor([1,2,3])#一维时为向量
test2=torch.tensor([[1,2,3],[4,5,6]])#二维时为矩阵
test3=torch.tensor([[1,2,3],[4,5,6],[7,8,9]])#三维及以上统称为tensor
print(test1)
print(test2)
print(test3)
2)从其他数据结构创建
可以从NumPy数组、列表等创建张量。
# 从NumPy数组创建
import torch
import numpy as np
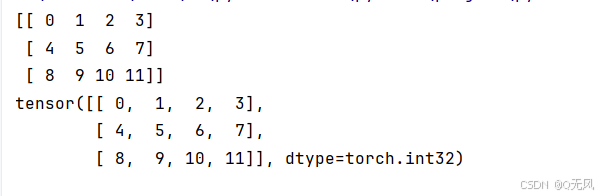
array1=np.arange(12).reshape(3,4)#生成一个从0到11(包含0,不包含12)的一维数组,并将其重新塑形成一个3行4列的二维数组。
print(array1)
test4=torch.tensor(array1)
print(test4)
# 从列表创建
list_data = [1, 2, 3, 4]
tensor_from_list = torch.tensor(list_data)
3)使用特定函数创建
import torch

#创建一个空的张量(会自动填充无用数据)
empty_tensor=torch.empty([3,4])   #3行4列

# 创建一个全零张量
zeros_tensor = torch.zeros((2, 3))  # 2行3列

# 创建一个全一张量
ones_tensor = torch.ones((2, 3))    # 2行3列

# 创建一个具有特定值的张量(例如,全为2.5)
filled_tensor = torch.full((2, 3), 2.5)

# 创建一个具有均匀分布的随机值的张量
rand_tensor = torch.rand((2, 3))

# 创建一个具有正态分布的随机值的张量
randn_tensor = torch.randn((2, 3))

#创建一个随机区间为[low,high]随机整数的张量
randint_tensor=torch.randint(low=0,high=3,size=[3,4])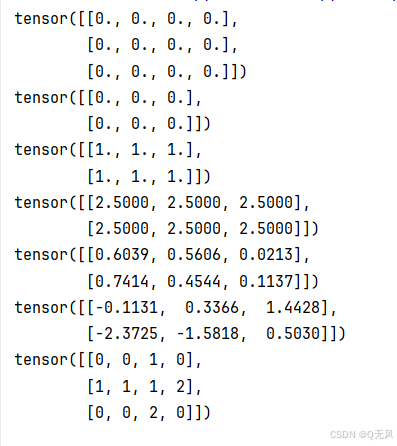
4)指定数据类型
在创建张量时,可以指定数据类型(dtype)。
float_tensor = torch.tensor([1.0, 2.0, 3.0], dtype=torch.float32)
int_tensor = torch.tensor([1, 2, 3], dtype=torch.int32)
3.Tensor的属性
1)形状(shape)
张量的形状表示张量在每个维度上的大小。形状是一个描述张量结构的重要属性。
查看张量的形状
可以通过 .shape 属性查看或.size(),后者比前者更加灵活,可以查看某一维度的形状。
import torch

# 创建一个2x2的张量
x = torch.tensor([[1.0, 2.0], [3.0, 4.0]])
print("张量 x 的形状:", x.shape)  # 输出: torch.Size([2, 2])
![]()
修改张量的形状
可以使用 .view() 或 .reshape() 方法来改变张量的形状。
# 使用 .view() 修改形状
reshaped_x = x.view(4)
print("使用 .view() 修改形状后的张量:", reshaped_x)  # 输出: tensor([1., 2., 3., 4.])

# 使用 .reshape() 修改形状
reshaped_x = x.reshape(4)
print("使用 .reshape() 修改形状后的张量:", reshaped_x)  # 输出: tensor([1., 2., 3., 4.])

# 修改为三维张量
reshaped_x = x.view(2, 2, 1)
print("修改为三维张量后的形状:", reshaped_x.shape)  # 输出: torch.Size([2, 2, 1])
2)数据类型(dtype)
张量的数据类型(dtype)决定了张量中元素的数据类型。PyTorch支持多种数据类型,如浮点型(float)、整型(int)等。
查看张量的数据类型
# 创建一个浮点型张量
x = torch.tensor([1.0, 2.0, 3.0], dtype=torch.float32)
print("张量 x 的数据类型:", x.dtype)  # 输出: torch.float32
转换张量的数据类型
可以使用 .to() 方法或直接指定 dtype 属性来转换张量的数据类型。
# 将浮点型张量转换为整型张量
x = x.to(torch.int64)
print("转换后的数据类型:", x.dtype)  # 输出: torch.int64
print("转换后的张量:", x)  # 输出: tensor([1, 2, 3])

# 另一种转换方法
x = torch.tensor([1.0, 2.0, 3.0], dtype=torch.float32)
x = x.type(torch.int64)
print("使用 type() 转换后的数据类型:", x.dtype)  # 输出: torch.int64
print("使用 type() 转换后的张量:&#
最低0.47元/天 解锁文章


 1920
1920

 被折叠的 条评论
为什么被折叠?
被折叠的 条评论
为什么被折叠?
 到【灌水乐园】发言


