


参考:https://github.com/tanluren/yolov3-channel-and-layer-pruning
1.测试集的单独制作:
首先从航线获取的视频中截取,放入data\photos_test_or目录下
cmd命令行运行下面命令将图片重命名:
python rename_photo.py# -*- coding:utf-8 -*-
import os
def test():
# 源地址和输出地址
cwd = os.getcwd()
photo_test_or_Path = cwd + '\\photos_test_or\\'
photo_test_Path = cwd + '\\photos_test\\'
if not os.path.exists(photo_test_Path):
os.mkdir(photo_test_Path)
filelist = os.listdir(photo_test_or_Path)
label_i = 1
for item in filelist:
if item.endswith('.jpg'):
src = os.path.join(os.path.abspath(photo_test_or_Path), item) #原图的地址
dst = os.path.join(os.path.abspath(photo_test_Path), str(label_i) + '.jpg') #新图的地址
try:
os.rename(src, dst)
print('converting %s to %s ...' % (src, dst))
label_i += 1
except:
continue
if __name__ == '__main__':
test()创建labels_test文件夹(用于存放标签),用labelImg(我的软件在E:\software\win10\exe\labelImg-master\)进行标注,注意将该文件夹下的data\predefined_classes.txt改成你要检测的类别
测试集标注好后cmd命令行运行下面命令将图片和标签放入images和labels文件夹:
python rename_test_photo_label.py# -*- coding:utf-8 -*-
import os
def test():
# 源地址和输出地址
cwd = os.getcwd()
photo_test_Path = cwd + '\\photos_test\\'
print(photo_test_Path)
photos_Path = cwd + '\\images\\'
print(photos_Path)
filelist = os.listdir(photo_test_Path)
photo_i = 1
for item in filelist:
if item.endswith('.jpg'):
src = os.path.join(os.path.abspath(photo_test_Path), item) #原图的地址
dst = os.path.join(os.path.abspath(photos_Path), '0' + str(photo_i) + '.jpg') #新图的地址
try:
os.rename(src, dst)
print('converting %s to %s ...' % (src, dst))
photo_i += 1
except:
continue
label_test_Path = cwd + '\\labels_test\\'
print(label_test_Path)
labels_Path = cwd + '\\labels\\'
print(labels_Path)
filelist = os.listdir(label_test_Path)
label_i = 1
for item in filelist:
if item.endswith('.txt'):
src = os.path.join(os.path.abspath(label_test_Path), item) #原图的地址
dst = os.path.join(os.path.abspath(labels_Path), '0' + str(label_i) + '.txt') #新图的地址
try:
os.rename(src, dst)
print('converting %s to %s ...' % (src, dst))
label_i += 1
except:
continue
if __name__ == '__main__':
test()
2.训练集和测试集生成脚本的修改
python get_train_test_data.py#-*- coding:utf-8 -*-
import os
import random
train_list = range(1,235) #训练集(234张图片)
#print(train_list)
test_list = range(1,61) #测试集(60张图片)
#print(test_list)
train = random.sample(train_list, 234)
#print(train)
test = random.sample(test_list, 60)
#print(test)
ftrain = open('ImageSets\\train.txt', 'w')
ftest = open('ImageSets\\test.txt', 'w') #只生成了训练集和测试集
for train_i in train:
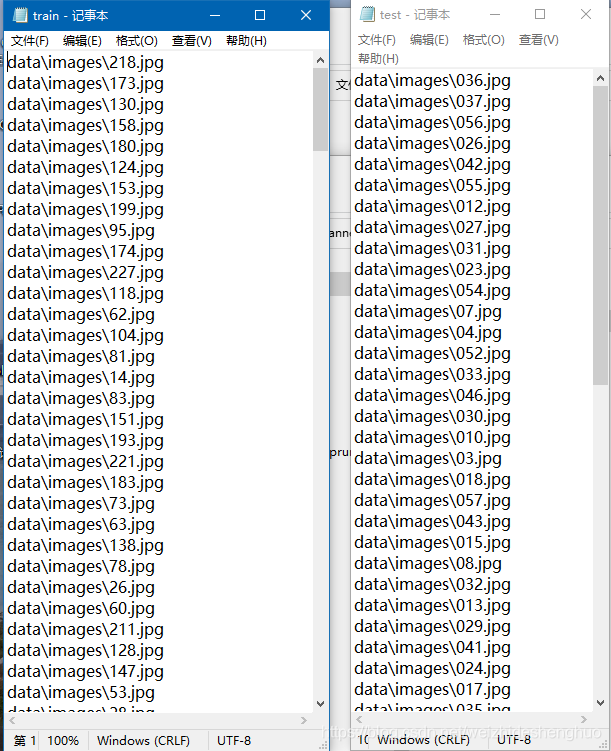
train_name = 'data\\images\\' + str(train_i) + '.jpg' + '\n'
print(train_name)
ftrain.write(train_name)
for test_i in test:
test_name = 'data\\images\\' + '0' + str(test_i) + '.jpg' + '\n'
print(test_name)
ftest.write(test_name)
ftrain.close()
ftest.close()
生成后的train.txt和test.txt文件如下:
3.用yolov3-tiny进行训练
python train.py --cfg cfg/yolov3-tiny_landmark.cfg --data data/landmark.data --weights weights/yolov3-tiny.weights --epochs 400 --batch-size 32Namespace(accumulate=2, adam=False, arc='defaultpw', batch_size=32, bucket='', cache_images=False, cfg='cfg/yolov3-tiny_landmark.cfg', data='data/landmark.data', device='', epochs=400, evolve=False, img_size=416, img_weights=False, multi_scale=False, name='', nosave=False, notest=False, prebias=False, prune=1, rect=False, resume=False, s=0.001, sr=False, t_cfg='', t_weights='', transfer=False, var=None, weights='weights/yolov3-tiny.weights')4.训练完后做视频检测(检测的结果会保存到output,目录下)
python detect.py --cfg cfg/yolov3-tiny_landmark.cfg --data data/landmark.data --weights weights/best.pt --source data/samples/test_mode1.mp4 --conf-thres 0.5Namespace(cfg='cfg/yolov3-tiny_landmark', conf_thres=0.5, data='data/landmark.data', device='', fourcc='mp4v', half=False, img_size=416, nms_thres=0.5, output='output', source='data/samples/test_mode1.mp4', view_img=False, weights='weights/best.pt')5.对测试集进行测试
python test.py --cfg cfg/yolov3-tiny_landmark.cfg --data data/landmark.data --weights weights/best.pt --conf-thres 0.5 –-save-jsonNamespace(batch_size=16, cfg='cfg/yolov3-tiny_landmark.cfg', conf_thres=0.5, data='data/landmark.data', device='', img_size=416, iou_thres=0.5, nms_thres=0.5, save_json=True, weights='weights/best.pt')
tensorboard的使用
tensorboard --logdir runs\Jun03_10-01-06_DESKTOP-3TM1PEM浏览器打开http://localhost:6006/即可查看训练信息
yolov3-tiny 模型剪枝
1.训练保存的pt权重包含epoch信息,可通过python -c "from models import *; convert('cfg/yolov3-tiny_landmark.cfg', 'weights/last.pt')"转换为darknet weights去除掉epoch信息,使用darknet weights从epoch 0开始稀疏训练。转换后的文件在重命名为con_last_yolov3_tiny.weights放到weights文件夹中
2.cmd命令行输入,开始稀疏训练
python train.py --cfg cfg/yolov3-tiny_landmark.cfg --data data/landmark.data --weights weights/con_last_yolov3_tiny.weights --epochs 300 --batch-size 32 -sr --s 0.005 --prune 13.通道剪枝
python slim_prune.py --cfg cfg/yolov3-tiny_landmark.cfg --data data/landmark.data --weights weights/last.pt --global_percent 0.8 --layer_keep 0.01输出结果:
+------------+----------+----------+
| Metric | Before | After |
+------------+----------+----------+
| mAP | 0.725248 | 0.724506 |
| Parameters | 8688356 | 7491720 |
| Inference | 0.0075 | 0.0079 |
+------------+----------+----------+
Config file has been saved: cfg/prune_0.2_keep_0.8_yolov3-tiny_landmark.cfg
Compact model has been saved: weights/prune_0.2_keep_0.8_backup200.weights
4.微调
python train.py --cfg cfg/prune_0.2_keep_0.8_yolov3-tiny_landmark.cfg --data data/landmark.data --weights weights/prune_0.2_keep_0.8_backup200.weights --batch-size 32 --epochs 50将极大值抑制改为最大值抑制
1.由于自己的数据集中每幅图像同一类landmark只会出现一次,故将极大值抑制改为最大值抑制
2.修改的文件为utils\utils.py,原文件如下:
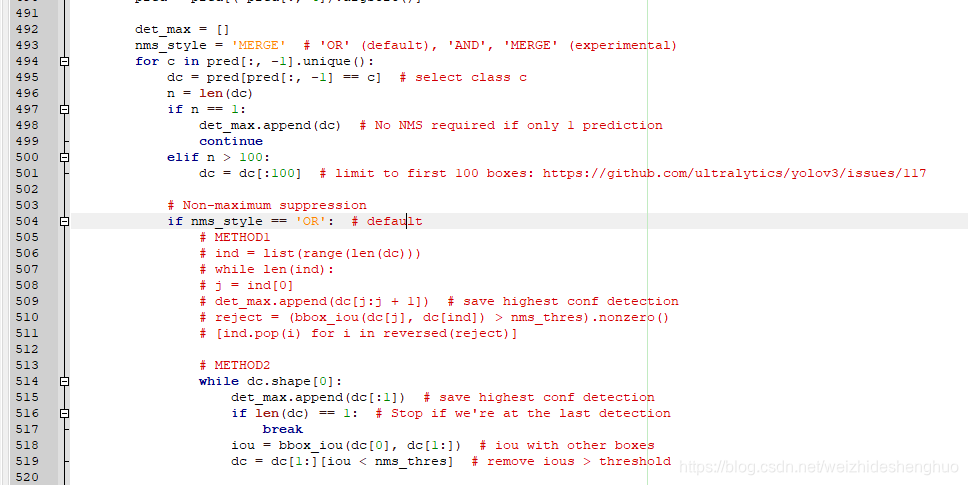
修改为:
        det_max = []
        nms_style = 'OR'  # 此处做了修改
        for c in pred[:, -1].unique():
            dc = pred[pred[:, -1] == c]  # select class c
            n = len(dc)
            if n == 1:
                det_max.append(dc)  # No NMS required if only 1 prediction
                continue
            elif n > 100:
                dc = dc[:100]  # limit to first 100 boxes: https://github.com/ultralytics/yolov3/issues/117

            # Non-maximum suppression
            if nms_style == 'OR':  # default
                # METHOD1
                # ind = list(range(len(dc)))
                # while len(ind):
                # j = ind[0]
                # det_max.append(dc[j:j + 1])  # save highest conf detection
                # reject = (bbox_iou(dc[j], dc[ind]) > nms_thres).nonzero()
                # [ind.pop(i) for i in reversed(reject)]

                # METHOD2
                det_max.append(dc[:1])  # save highest conf detection
                '''
                while dc.shape[0]:
                    det_max.append(dc[:1])  # save highest conf detection
                    if len(dc) == 1:  # Stop if we're at the last detection
                        break
                    iou = bbox_iou(dc[0], dc[1:])  # iou with other boxes
                    dc = dc[1:][iou < nms_thres]  # remove ious > threshold
                '''
自己数据集的k-means聚类
1.根据网络模型选择聚类个数yolov3-tiny为6,yolov3和yolov3-spp为9,labels_train文件夹存放训练数据集的标签
2.命令行输入python k_means.py(以前的版本,暂不采用)
# -*- coding: utf-8 -*-
# k-means ++ for YOLOv3 anchors
# 通过k-means ++ 算法获取YOLOv3需要的anchors的尺寸
import numpy as np
import os
import sys

# 定义Box类,描述bounding box的坐标
class Box():
    def __init__(self, x, y, w, h):
        self.x = x
        self.y = y
        self.w = w
        self.h = h


# 计算两个box在某个轴上的重叠部分
# x1是box1的中心在该轴上的坐标
# len1是box1在该轴上的长度
# x2是box2的中心在该轴上的坐标
# len2是box2在该轴上的长度
# 返回值是该轴上重叠的长度
def overlap(x1, len1, x2, len2):
    len1_half = len1 / 2
    len2_half = len2 / 2

    left = max(x1 - len1_half, x2 - len2_half)
    right = min(x1 + len1_half, x2 + len2_half)

    return right - left


# 计算box a 和box b 的交集面积
# a和b都是Box类型实例
# 返回值area是box a 和box b 的交集面积
def box_intersection(a, b):
    w = overlap(a.x, a.w, b.x, b.w)
    h = overlap(a.y, a.h, b.y, b.h)
    if w < 0 or h < 0:
        return 0

    area = w * h
    return area


# 计算 box a 和 box b 的并集面积
# a和b都是Box类型实例
# 返回值u是box a 和box b 的并集面积
def box_union(a, b):
    i = box_intersection(a, b)
    u = a.w * a.h + b.w * b.h - i
    return u


# 计算 box a 和 box b 的 iou
# a和b都是Box类型实例
# 返回值是box a 和box b 的iou
def box_iou(a, b):
    return box_intersection(a, b) / box_union(a, b)


# 使用k-means ++ 初始化 centroids,减少随机初始化的centroids对最终结果的影响
# boxes是所有bounding boxes的Box对象列表
# n_anchors是k-means的k值
# 返回值centroids 是初始化的n_anchors个centroid
def init_centroids(boxes,n_anchors):
    centroids = []
    boxes_num = len(boxes)

    centroid_index = np.random.choice(boxes_num, 1)
    centroids.append(boxes[centroid_index[0]])

    print(centroids[0].w,centroids[0].h)

    for centroid_index in range(0,n_anchors-1):

        sum_distance = 0
        distance_thresh = 0
        distance_list = []
        cur_sum = 0

        for box in boxes:
            min_distance = 1
            for centroid_i, centroid in enumerate(centroids):
                distance = (1 - box_iou(box, centroid))
                if distance < min_distance:
                    min_distance = distance
            sum_distance += min_distance
            distance_list.append(min_distance)

        distance_thresh = sum_distance*np.random.random()

        for i in range(0,boxes_num):
            cur_sum += distance_list[i]
            if cur_sum > distance_thresh:
                centroids.append(boxes[i])
                print(boxes[i].w, boxes[i].h)
                break

    return centroids


# 进行 k-means 计算新的centroids
# boxes是所有bounding boxes的Box对象列表
# n_anchors是k-means的k值
# centroids是所有簇的中心
# 返回值new_centroids 是计算出的新簇中心
# 返回值groups是n_anchors个簇包含的boxes的列表
# 返回值loss是所有box距离所属的最近的centroid的距离的和
def do_kmeans(n_anchors, boxes, centroids):
    loss = 0
    groups = []
    new_centroids = []
    for i in range(n_anchors):
        groups.append([])
        new_centroids.append(Box(0, 0, 0, 0))

    for box in boxes:
        min_distance = 1
        group_index = 0
        for centroid_index, centroid in enumerate(centroids):
            distance = (1 - box_iou(box, centroid))
            if distance < min_distance:
                min_distance = distance
                group_index = centroid_index
        groups[group_index].append(box)
        loss += min_distance
        new_centroids[group_index].w += box.w
        new_centroids[group_index].h += box.h

    for i in range(n_anchors):
        new_centroids[i].w /= len(groups[i])
        new_centroids[i].h /= len(groups[i])

    return new_centroids, groups, loss


# 计算给定bounding boxes的n_anchors数量的centroids
# label_path是训练集列表文件地址
# n_anchors 是anchors的数量
# loss_convergence是允许的loss的最小变化值
# grid_size * grid_size 是栅格数量
# iterations_num是最大迭代次数
# plus = 1时启用k means ++ 初始化centroids
def compute_centroids(label_path,n_anchors,loss_convergence,grid_size,iterations_num,plus):

    boxes = []
    label_files = []
    filelist = os.listdir(label_path)
    for files in filelist:
        #print(files)
        f = open(label_path + files)
        for line in f:
            temp = line.strip().split(" ")
            #print(temp)
            if len(temp) > 1:
                boxes.append(Box(0, 0, float(temp[3]), float(temp[4])))
        f.close()

    if plus:
        centroids = init_centroids(boxes, n_anchors)
    else:
        centroid_indices = np.random.choice(len(boxes), n_anchors)
        centroids = []
        for centroid_index in centroid_indices:
            centroids.append(boxes[centroid_index])

    # iterate k-means
    centroids, groups, old_loss = do_kmeans(n_anchors, boxes, centroids)
    iterations = 1
    while (True):
        centroids, groups, loss = do_kmeans(n_anchors, boxes, centroids)
        iterations = iterations + 1
        print("loss = %f" % loss)
        if abs(old_loss - loss) < loss_convergence or iterations > iterations_num:
        #if iterations > iterations_num:
            break
        old_loss = loss

        for centroid in centroids:
            print(centroid.w * grid_size * 32, centroid.h * grid_size * 32)

    # print result
    for centroid in centroids:
        print("k-means result:")
        print(centroid.w * grid_size * 32, centroid.h * grid_size * 32)

cwd = os.getcwd()
label_path = cwd + "\\labels_train\\"
n_anchors = 9
loss_convergence = 1e-6
grid_size = 13
iterations_num = 1000
plus = 1
compute_centroids(label_path,n_anchors,loss_convergence,grid_size,iterations_num,plus)
参考https://www.cnblogs.com/sdu20112013/p/10937717.html和官方https://github.com/AlexeyAB/darknet/blob/master/scripts/gen_anchors.py,采用的如下版本:
命令行输入python get_anchors.py --num_clusters 9
# -*- coding: utf-8 -*-
from os import listdir
from os.path import isfile, join
import argparse
#import cv2
import numpy as np
import sys
import os
import shutil
import random
import math

width_in_cfg_file = 416.
height_in_cfg_file = 416.

max_avg_IOU = 0

def IOU(x,centroids):
    similarities = []
    k = len(centroids)
    for centroid in centroids: #每一个样本分别与聚类中心点计算IOU
        c_w,c_h = centroid
        w,h = x
        if c_w>=w and c_h>=h: #具有相同的中心点
            similarity = w*h/(c_w*c_h)
        elif c_w>=w and c_h<=h:
            similarity = w*c_h/(w*h + (c_w-w)*c_h)
        elif c_w<=w and c_h>=h:
            similarity = c_w*h/(w*h + c_w*(c_h-h))
        else: #means both w,h are bigger than c_w and c_h respectively
            similarity = (c_w*c_h)/(w*h)
        similarities.append(similarity) # will become (k,) shape
    return np.array(similarities)

def avg_IOU(X,centroids):
    n,d = X.shape
    sum = 0.
    for i in range(X.shape[0]):
        #note IOU() will return array which contains IoU for each centroid and X[i] // slightly ineffective, but I am too lazy
        sum+= max(IOU(X[i],centroids)) #计算重合度最高的
    return sum/n

def write_anchors_to_file(centroids,X,anchor_file):
    global max_avg_IOU
    return_avg_IOU = avg_IOU(X,centroids) #随机运行1000次,取最大的IOU
    print('\n')
    print(return_avg_IOU)
    print('\n')
    if return_avg_IOU > max_avg_IOU:
        max_avg_IOU = return_avg_IOU
        f = open(anchor_file,'w')

        anchors = centroids.copy()
        print(anchors.shape)

        for i in range(anchors.shape[0]):
            anchors[i][0]*=width_in_cfg_file
            anchors[i][1]*=height_in_cfg_file

        widths = anchors[:,0]
        sorted_indices = np.argsort(widths)

        print('Anchors = ', anchors[sorted_indices])

        for i in sorted_indices[:-1]:
            f.write('%0.2f,%0.2f, '%(anchors[i,0],anchors[i,1]))

        #there should not be comma after last anchor, that's why
        f.write('%0.2f,%0.2f\n'%(anchors[sorted_indices[-1:],0],anchors[sorted_indices[-1:],1])) #换行

        f.write('%f\n'%(avg_IOU(X,centroids)))

def kmeans(X,centroids,eps,anchor_file):

    N = X.shape[0] #N代表全部样本数量
    iterations = 0
    k,dim = centroids.shape #k代表聚类的cluster数,dim代表聚类中心点的维度(w,h)
    prev_assignments = np.ones(N)*(-1) #N个样本归属于哪个cluster
    iter = 0
    old_D = np.zeros((N,k))

    while True:
        D = []
        iter+=1 #迭代次数
        for i in range(N):
            d = 1 - IOU(X[i],centroids)
            D.append(d)
        D = np.array(D) # D.shape = (N,k) N个样本分别与k个聚类中心点的IOU

        print("iter {}: dists = {}".format(iter,np.sum(np.abs(old_D-D))))

        #assign samples to centroids
        assignments = np.argmin(D,axis=1) #每个样本取最小的IOU,返回的是下标,即该样本所属的cluster

        if (assignments == prev_assignments).all() : #每个样本归属的cluster都不再变化了,就退出
            print("Centroids = ",centroids)
            write_anchors_to_file(centroids,X,anchor_file)
            return

        #calculate new centroids 重新计算样本中心点
        centroid_sums=np.zeros((k,dim),np.float)
        for i in range(N):
            centroid_sums[assignments[i]]+=X[i] #assignments[i]为每一个样本所属的cluster,将同一cluster的样本相加
        for j in range(k):
            if np.sum(assignments==j):
                centroids[j] = centroid_sums[j]/(np.sum(assignments==j)) #np.sum(assignments==j)为cluster j中的样本总量,重新计算中心点
            else:
                return

        prev_assignments = assignments.copy()
        old_D = D.copy()

def main(argv):
    cwd = os.getcwd()
    parser = argparse.ArgumentParser()
    parser.add_argument('--path_labels', default = cwd + '\\labels_train\\',  #标签的文件夹地址
                        help='path to filelist\n' )
    parser.add_argument('--output_dir', default = cwd + '\\anchors\\', type = str,
                        help='Output anchor directory\n' )
    parser.add_argument('--num_clusters', default = 0, type = int,
                        help='number of clusters\n' )


    args = parser.parse_args()

    if not os.path.exists(args.output_dir):
        os.mkdir(args.output_dir)

    annotation_dims = []
    filelist = os.listdir(args.path_labels)
    for files in filelist:
        #print(files)
        f = open(args.path_labels + files)
        for line in f.readlines():
            line = line.rstrip('\n')
            w,h = line.split(' ')[3:]
            #print(w,h)
            annotation_dims.append(tuple(map(float,(w,h))))
        f.close()
    #print(annotation_dims)
    annotation_dims = np.array(annotation_dims)
    #print(annotation_dims)

    eps = 0.005

    if args.num_clusters == 0:
        for num_clusters in range(1,11): #we make 1 through 10 clusters
            anchor_file = join( args.output_dir,'anchors%d.txt'%(num_clusters))
            indices = [random.randrange(annotation_dims.shape[0]) for i in range(num_clusters)]
            centroids = annotation_dims[indices]
            kmeans(annotation_dims,centroids,eps,anchor_file)
            print('centroids.shape', centroids.shape)
    else:
        anchor_file = join( args.output_dir,'anchors%d.txt'%(args.num_clusters))
        for best_i in range(1000):
            indices = [random.randrange(annotation_dims.shape[0]) for i in range(args.num_clusters)] #随机选取args.num_clusters个聚类中心
            centroids = annotation_dims[indices]
            kmeans(annotation_dims,centroids,eps,anchor_file)

        print('centroids.shape', centroids.shape)

if __name__=="__main__":
    main(sys.argv)
得到27.34,59.93, 30.50,38.86, 46.77,93.98, 51.48,147.72, 51.71,51.65, 53.01,74.68, 64.15,109.78, 66.99,82.44, 94.52,100.05

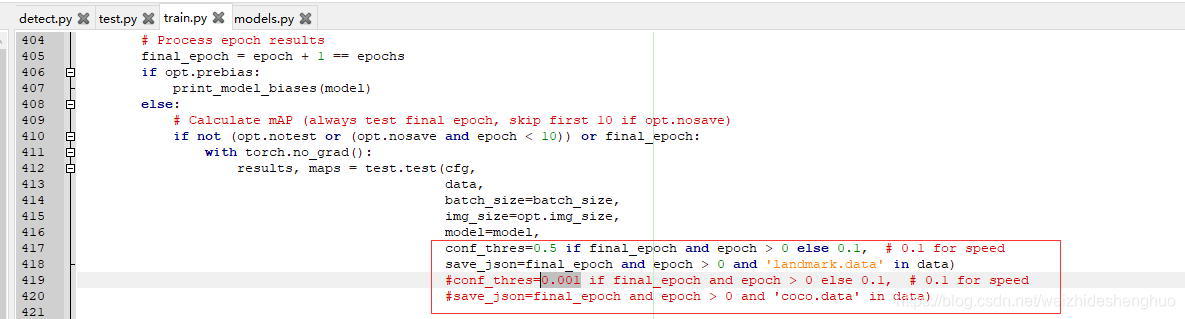
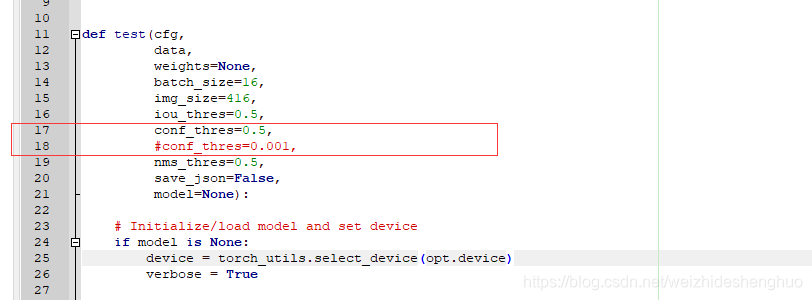
代码修改说明
计算mAP等参数时,将conf_thres由0.001改为了0.5


 1409
1409

 被折叠的 条评论
为什么被折叠?
被折叠的 条评论
为什么被折叠?
 到【灌水乐园】发言


